SpriteKit Tutorial: Create an Interactive Children’s Book with SpriteKit and Swift 3
Learn how to create an interactive book app with very little code by using SpriteKit with Swift 3 to build a children’s book. By Caroline Begbie.
Reference Nodes
Each page is going to have a footer with navigation buttons. As this footer will be the same across all pages, you’ll use a separate scene for it, and then add a reference to this footer in all the page scenes.
I’ve already created an empty scene named Footer.sks, and added a reference to this scene in all the page scenes except TitlePage.sks.
Before starting, take a look at Scene01.sks. You’ll see a reference node for the footer in the scene navigator, but no footer images are showing up.

You’ll now add sprite nodes to Footer.sks, and see the real advantage of creating a reference node. All the page scenes with a reference to this Footer will automatically update with the new nodes.
Open Footer.sks and drag the footer image from the Media library onto the scene.
In the Attributes Inspector, change the following:
- Name: footerBackground
- Position: X: 0, Y: 0, Z: -5
Drag button_previous, button_next and button_sound_on onto the footer background and position them on the right of the bar like so:

When the user taps the left hand side of the footer background, she’ll return to the title page. There’s no special button image for this, so from the Object library, drag a Color Sprite to the left hand side and size and position it to cover the text on the background:

Change the following:
- Position: Z: -20
This will position the red sprite behind everything so that it won’t show.
In the Attributes Inspector, name each sprite appropriately. From left to right:
- buttonHome
- buttonSound
- buttonPrevious
- buttonNext
Open Scene01.sks again. Like magic, the footer now appears as you designed it in Footer.sks.

That’s the power of reference nodes. If you change a scene, those changes will propagate to all other scenes that have a reference to the changed scene.
You can now add the footer to your Title Page. Open TitlePage.sks, and drag a Reference node from the Object Library to the scene.
With this reference node selected, change:
- Name: footer
- Reference: Footer
- Position: X: 0, Y: -345, Z: 100
Build and run, and you’ll see the footer at the bottom of the title page.
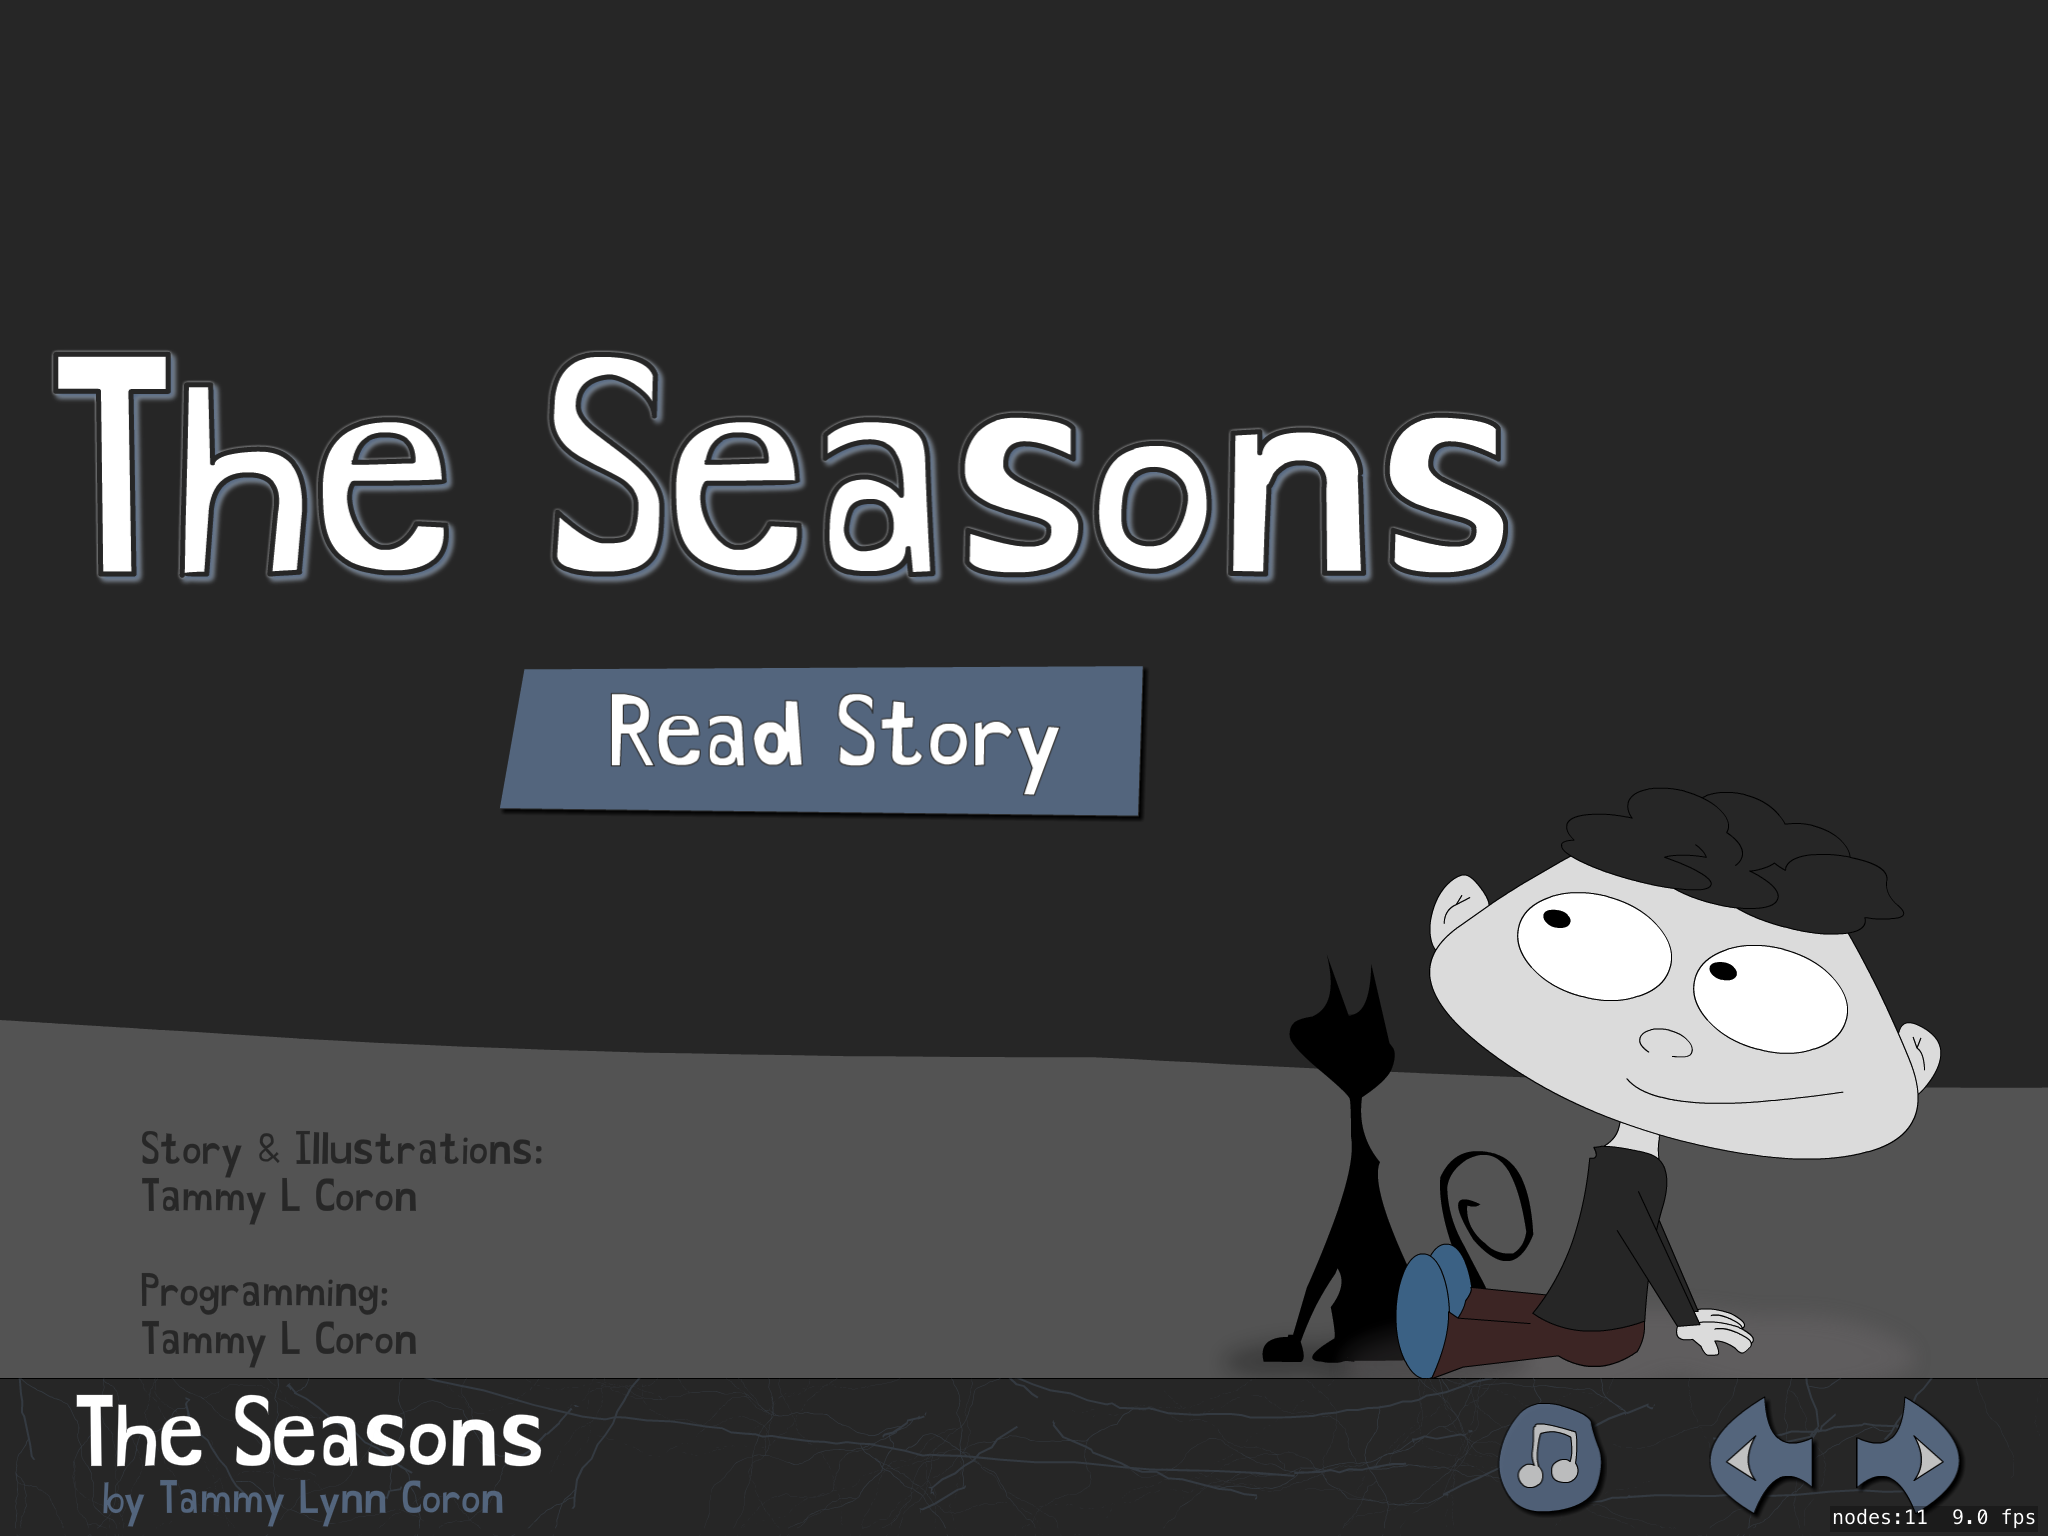
Currently the buttons on the footer don’t actually do anything. This is because the sprites don’t have any touch event handlers. In the next section, you’ll dive into code and connect the properties in your scene that you created in the editor.
Detecting Touch Events
When SpriteKit loads TitlePage.sks, it expands into a scene hierarchy that looks like this:
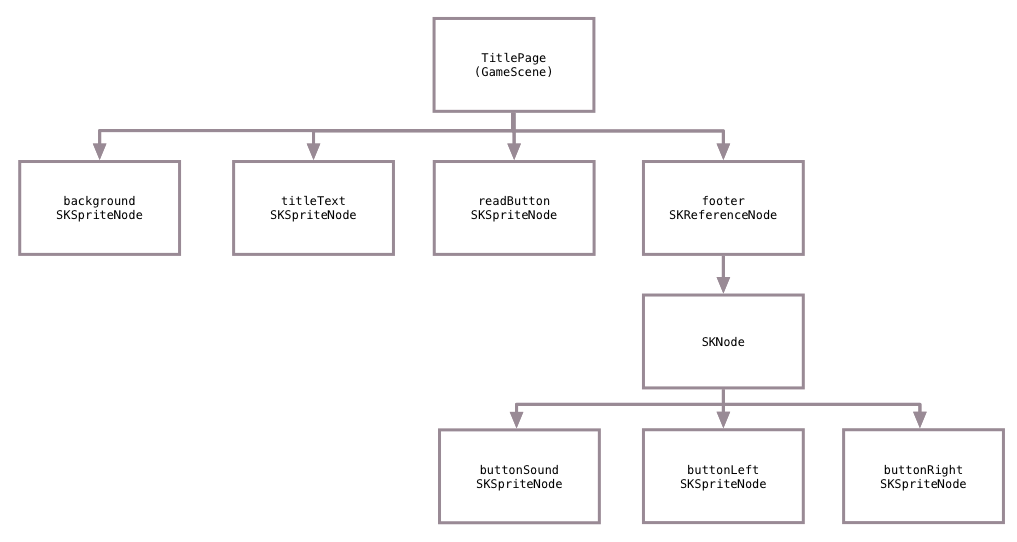
You’ll hook into this hierarchy and connect the nodes to properties in code using the name you assigned in the editor.
Because the footer buttons will do the same thing across all scenes, you’ll first change the code in the base class GameScene. This class has a few methods in it already. These methods are just simple touch event handlers and stub methods for the page scenes to override.
In GameScene.swift, add these properties to GameScene:
var footer:SKNode!
var btnNext: SKSpriteNode!
var btnPrevious: SKSpriteNode!
var btnSound: SKSpriteNode!
var btnHome: SKSpriteNode!
Each of these properties will match a sprite in Footer.sks. To connect them, add this method at the bottom:
override func sceneDidLoad() {
  super.sceneDidLoad()
  footer = childNode(withName: "footer")
}
SpriteKit calls sceneDidLoad() after the scene has loaded in memory, and you can very easily locate the child node using the name you gave it in the scene editor.
However childNode(withName:) only locates nodes that are directly descended from the parent. To retrieve nodes further down the hierarchy, you add two forward slashes // to the start of the search string. This will perform a recursive search across the whole node tree.
Add this to the end of sceneDidLoad():
btnNext = childNode(withName: "//buttonNext") as! SKSpriteNode
btnPrevious = childNode(withName: "//buttonPrevious") as! SKSpriteNode
btnSound = childNode(withName: "//buttonSound") as! SKSpriteNode
btnHome = childNode(withName: "//buttonHome") as! SKSpriteNode
Now you have references in code to all the navigator buttons in the footer.
Create a new method to transition to a different scene:
func goToScene(scene: SKScene) {
  let sceneTransition = SKTransition.fade(with: UIColor.darkGray, duration: 1)
  scene.scaleMode = .aspectFill
  self.view?.presentScene(scene, transition: sceneTransition)
}
This method creates a fade transition, and then the view presents the specified scene with that transition.
There are two stub methods in GameScene: getNextScene() and getPreviousScene(). These methods will be overridden by each page to return the correct next and previous scenes for that page.
In TitlePage.swift, override the method to return the next scene:
override func getNextScene() -> SKScene? {
  return SKScene(fileNamed: "Scene01") as! Scene01
}
In Scene01.swift add:
override func getPreviousScene() -> SKScene? {
  return SKScene(fileNamed: "TitlePage") as! TitlePage
}
With all that in place, you can now override the touch handler in GameScene.swift by adding this method:
override func touchesBegan(_ touches: Set<UITouch>, with event: UIEvent?) {
  guard let touch = touches.first else { return }

  // 1
  let touchLocation = touch.location(in: self)

  // 2
  if footer.contains(touchLocation) {
    let location = touch.location(in: footer)

    // 3
    if btnNext.contains(location) {
      goToScene(scene: getNextScene()!)
    } else if btnPrevious.contains(location) {
      goToScene(scene: getPreviousScene()!)
    } else if btnHome.contains(location) {
      goToScene(scene: SKScene(fileNamed: "TitlePage") as! TitlePage)
    }

  } else {

    // 4
    touchDown(at: touchLocation)
  }
}
Going through this code in sequence:
- You retrieve the location of the first touch within the whole screen.
- If the touch is in the area of the footer, get the location of the touch within the footer.
- You’re then able to check whether each button contains that location and take the appropriate action.
- If the touch is not within the footer, call
touchDown(at:). Each page will have different interactive features, so you’ll override this method in each page subclass.
Run the app and check out all the buttons. The next button should take you to the next scene, and the previous button should take you to the previous scene.
You can now read the book all the way through!
However, what happens if you click the next button on the last page, or the previous button on the title page? Since there is no next or previous page provided for these, the app crashes.
The title page actually has a read button to start the book, so it doesn’t need the next and previous buttons. Also, the last page shouldn’t display the next button.
In TitlePage.swift, add a property to TitlePage for the read button:
var readButton: SKSpriteNode!
Override sceneDidLoad() as follows:
override func sceneDidLoad() {
  super.sceneDidLoad()
  readButton = childNode(withName: "readButton") as! SKSpriteNode

  btnNext.isHidden = true
  btnPrevious.isHidden = true
}
Here you get a reference to the read button node and hide the next and previous buttons.
Add an action to the read button by overriding touchDown(at:):
override func touchDown(at point: CGPoint) {
  if readButton.contains(point) {
    goToScene(scene: getNextScene()!)
  }
}
When the read button is tapped, the next scene will be loaded.
In summary, when a touch action happens, GameScene’s touchesBegan(_:with:) is performed. This does the test to see if the touch was within the footer. If it wasn’t, then it calls touchDown(at:). Each scene subclass can override this method to perform actions suitable for that page.
Build and run the app, and your title page now has the navigation buttons hidden. Tap the read button and the first page in the book will load up.
Tap the left hand area of the footer, and the title page will show. That’s where you hid the home button behind the footer.

Your book is really starting to take shape.
Sounds are an integral part of any interactive children’s book and SpriteKit makes this tremendously easy as well!