SpriteKit Tutorial: Create an Interactive Children’s Book with SpriteKit and Swift 3
Learn how to create an interactive book app with very little code by using SpriteKit with Swift 3 to build a children’s book. By Caroline Begbie.
Sprite Rendering Order
Your scene consists of a tree of nodes. Each node may have one or more children. If the node has children, it is considered the parent of the child nodes.

At the top of this tree is the scene itself. Your scene currently has three child nodes all held in an array named children, which is a property on SKNode. SKScene and SKSpriteNode are subclasses of SKNode.

Each of the sprite nodes that you’ve dragged into the scene are held in children. An array has an implicit order, but the scene rendering currently ignores this.
There are two ways of dealing with this.
First, in GameViewController, the template created this line:
view.ignoresSiblingOrder = true
ignoresSiblingOrder, when set to true, means that the rendering order of sibling nodes is arbitrary. It may appear that nodes are missing from your app, but they are actually rendering behind the background sprite.
In GameViewController, set this value to false:
view.ignoresSiblingOrder = false
Build and run the app, and all your sprites should appear appropriately in your scene.
The second way of dealing with this is to set the Z position of each sprite. The Z position is a depth position and determines how far forward your nodes are. A node with a lower Z position will always appear behind nodes with a higher Z position.
This gives you total control over the depth order that the sprites appear in, so this is the method you will be using.
Change the code back to:
view.ignoresSiblingOrder = true
Open TitlePage.sks and select background in the scene navigator. Change the position as follows:
- Position: Z: -10
The other sprites will keep their default Z positions of 0.
Build and run the app, and your background page will appear behind the other two sprites.
Adding Animation to Objects
SpriteKit makes it really easy to add animation to the objects in your scene. Instead of simply having the title appear on the screen, you can make it slide onto the screen and bounce a little before it comes to rest.
With TitlePage.sks open, select titleText. At the bottom of the scene, ensure the Action Editor is displaying. If it’s not, at the bottom left of the scene, click the right hand icon to show it.
![]()
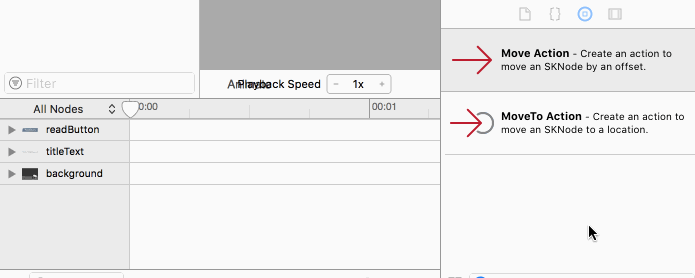
In the Object library, find Move Action and drag it onto titleText in the Action Editor.
You’ve now created an animation block on the timeline.
With the new animation block selected, in the Attributes Inspector, change the following:
- Start Time: 0
- Duration: 3
- Timing Function: Linear
- Offset: X: 0, Y: -300
Click on the word Animate above the Action Editor. The editor will switch to Animate mode. As soon as you click on Animate, the animation of the title text takes place. The title will move down by three hundred points over three seconds. Watch as the playhead moves along the timeline. You can drag the playhead to see the action happen more slowly.

Notice how the title ends up below the read button. The title should start off the top of the page and animate down the page to just above the read button. Click on the word Layout above the Action Editor to exit Animate mode.
Select titleText in the scene navigator. Change the following:
- Position: X: -120, Y: 450
This will move “The Seasons” to the top outside the page.
Build and run the app and watch “The Seasons” gently scroll down the page into position.
This is a simple animation, but you should be able to see the potential. You’ll now add a little bounce to the animation you just created and also fade in the read button after the title animation has finished.
Select the move animation in the timeline. In the Attributes Inspector, change the timing function from linear to the following:
- Timing Function: Ease In
Linear means that the animation will happen at the same rate for the whole animation. Ease In means that the animation will be slower towards the start and then speed up.
Drag a second and third Move action onto the titleText Action timeline, one after another.

Select the second Move action and in the Attributes Inspector, change the following:
- Start Time: 3
- Duration: 0.25
- Offset: X: 0, Y: 5
Select the third Move action and in the Attributes Inspector, change the following:
- Start Time: 3.25
- Duration: 0.25
- Offset: X: 0, Y: -5
Build and run the app, and watch the title text animate in, slow at first, but then gaining speed. Watch for the little bump at the end of the animation.
Now for the fade-in on the Read button.
Select readButton in the scene navigator. In the Attributes Inspector, change the following:
- Alpha: 0
With its alpha property set to 0, readButton should disappear.
Drag a FadeIn action from the Objects library onto the readButton’s timeline in the Action editor.
With the FadeIn action selected, change the following in the Attributes Inspector:
- Start Time: 3.25
- Duration: 0.75
Drag in a PlaySoundFileNamed action to readButton’s timeline after the FadeIn action.
In the Attributes Inspector, change the following:
- Start Time: 4.0
- Filename: thompsonman_pop
Build and run the app, and watch the completed title page animation with a popping sound at the end. Tapping the read button doesn’t do anything — yet.
Architecture of the App
Each page of your book will have similar elements:
- Background audio
- Text audio (most pages)
- A footer with touch enabled for page navigation
- Transition between pages
Currently when TitlePage.sks loads, it creates a generic SKScene instance, but you’ll deal with these common elements in the SKScene subclass GameScene. Each page will be a subclass of GameScene.
Create a new file. Choose File/New/File…, choose iOS/Source/Cocoa Touch Class and click Next. Name the class TitlePage and make it a subclass of GameScene. Click Next and then Create.
In TitlePage.swift, replace:
import UIKit
with:
import SpriteKit
When you import the SpriteKit framework, all supporting frameworks such as UIKit and Foundation are automatically added.
In TitlePage.sks, select Scene in the scene navigator and in the Custom Class Inspector, change the following:
- Custom Class: TitlePage
This ties the SpriteKit scene to the custom class that you’ve just created.