SwiftUI: Getting Started
In this SwiftUI tutorial, you’ll learn how to layout the UI by declaring and modifying views, and how to use state variables to update your UI. You’ll use Xcode’s new preview and live preview, and experience the joy of code and WYSIWYG layout that stay in sync. By Audrey Tam.
Filling in Your Outline
Now, practice your new SwiftUI-fu skills to start filling in the color blocks HStack: Use your preferred combination of Command-Click menu and drag-from-Library actions to replace each color block placeholder with a VStack containing a Rectangle and the relevant Text:
HStack {
  // Target color block
  VStack {
    Rectangle()
    Text("Match this color")
  }
  // Guess color block
  VStack {
    Rectangle()
    HStack {
      Text("R: xxx")
      Text("G: xxx")
      Text("B: xxx")
    }
  }
}
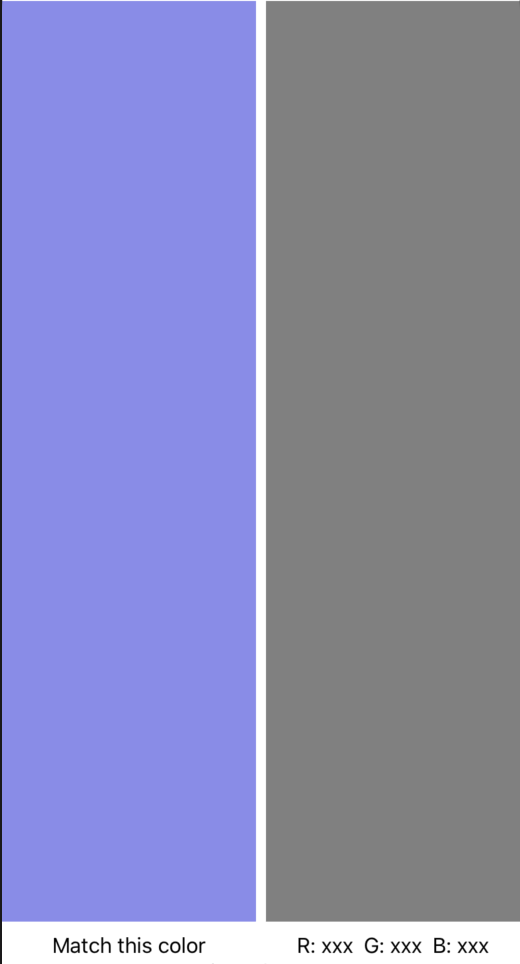
Each color block has a Rectangle. The target color block has one Text view below its rectangle, while the guess color block has three Text views — later in this article, you’ll replace each xxx to display the current slider values.
Don’t worry about the black rectangles taking over the scene — they will make room for the sliders and you’ll set their foreground colors now.
Using @State Variables
You can use “normal” constants and variables in SwiftUI, but you designate a variable as a @State variable if the UI should update whenever its value changes. This game is all about colors, so all variables that affect the color of the guess rectangle are @State variables.
Add these lines at the top of struct ContentView, above the body closure:
let rTarget = Double.random(in: 0..<1)
let gTarget = Double.random(in: 0..<1)
let bTarget = Double.random(in: 0..<1)
@State var rGuess: Double
@State var gGuess: Double
@State var bGuess: Double
R, G and B values are between 0 and 1. You initialize the target values to random values. You could also initialize the guess values to 0.5, but I've left them uninitialized to show you what you must do, if you don't initialize some variables.
Scroll down to the ContentView_Previews struct, which instantiates a ContentView to display in the preview. The initializer now needs parameter values for the guess values. Change ContentView() to this:
ContentView(rGuess: 0.5, gGuess: 0.5, bGuess: 0.5)
When you create the sliders, they'll appear in the preview with their thumbs centered.
You must also modify the initializer in SceneDelegate, in scene(_:willConnectTo:options:) — replace ContentView() in this line:
window.rootViewController = UIHostingController(rootView:
  ContentView(rGuess: 0.5, gGuess: 0.5, bGuess: 0.5))
When the app loads its root scene, the slider thumbs will be centered.
Now add a foreground color modifier to the target Rectangle:
Rectangle()
  .foregroundColor(Color(red: rTarget, green: gTarget, blue: bTarget, opacity: 1.0))
The modifier .foregroundColor creates a new Rectangle view, now with the foreground color specified by the randomly-generated RGB values.
Similarly, modify the guess Rectangle:
Rectangle()
  .foregroundColor(Color(red: rGuess, green: gGuess, blue: bGuess, opacity: 1.0))
When the R, G and B values are all 0.5, you get gray.
Click Resume, and wait a while for the preview to update.
Making Reusable Views
I've shown this game to a few people, and they found it very addictive — especially graphic designers. And then they would ask me to implement one of the other color spaces, like YUV. But RGB is a good choice for this article, because the sliders are basically identical, so you'll define one slider view, then reuse it for the other two sliders.
First, pretend you're not thinking about reuse, and just create the red slider. In the sliders VStack, replace the Text("Red slider") placeholder with this HStack:
HStack {
  Text("0")
    .foregroundColor(.red)
  Slider(value: $rGuess)
  Text("255")
    .foregroundColor(.red)
}
You modify the Text views to change the text color to red. And you initialize the Slider with a value — the position of its thumb. The default range is 0 to 1, which is just fine, so you don't need to specify anything more here.
But what's with the $? You've just gotten comfortable with ? and ! for optionals, and now $?
It's actually pretty cool and ultra powerful for such a little symbol. rGuess by itself is just the value — read-only. $rGuess is a read-write binding — you need it here, to update the guess rectangle's foreground color while the user is changing the slider's value.
To see the difference, set the values in the three Text views below the guess rectangle:
HStack {
  Text("R: \(Int(rGuess * 255.0))")
  Text("G: \(Int(gGuess * 255.0))")
  Text("B: \(Int(bGuess * 255.0))")
}
Here, you're only using the values, not changing them, so you don't need the $ prefix.
Wait for the preview to refresh, to see your first slider:

The color blocks have shrunk a little, to make room, but the slider still looks a little cramped — the end labels are too close to the window edges — so add some padding (another modifier) to the HStack:
HStack {
  Text("0")
    .foregroundColor(.red)
  Slider(value: $rGuess)
  Text("255")
    .foregroundColor(.red)
}
  .padding()
That's better!

Now, if you were to copy-paste-edit this HStack to create the green slider, you'd change .red to .green, and $rGuess to $gGuess. So that's where the parameters will go.
Command-Click the red slider HStack, and select Extract Subview:

This works the same as Refactor ▸ Extract to Function, but for SwiftUI views.
Don't worry about all the error messages that appear — they'll go away when you've finished editing your new subview.
Now, name the ExtractedView ColorSlider, then add these lines at the top of your new ColorSlider view, before its body closure:
@Binding var value: Double
var textColor: Color
You're adding parameters to its initializer, to synchronize its value with ContentView, and to specify the color of its slider label.
Next, replace $rGuess with $value, and .red with textColor:
Text("0")
  .foregroundColor(textColor)
Slider(value: $value)
Text("255")
  .foregroundColor(textColor)
You're replacing the fixed values from the red slider with your new parameters, so you'll be able to reuse ColorSlider for the green and blue sliders.
Now, go back up to the call to ColorSlider() in the VStack, and add your parameters:
ColorSlider(value: $rGuess, textColor: .red)
Check that the preview shows the red slider, then copy-paste-edit this line to replace the Text placeholders with the other two sliders:
ColorSlider(value: $gGuess, textColor: .green)
ColorSlider(value: $bGuess, textColor: .blue)
Click Resume to update the preview:

And that's nearly the entire app done! Think back to when you created BullsEye, and marvel at how much more quickly you've created RGBullsEye. When I used to teach BullsEye to my students, it would take them hours to set up the UI, even with Auto Layout and stack views. And then they still had so much code to write! When I start teaching SwiftUI, I might run out of apps to fill up their time ;].
Now for something fun: Down by the lower right corner of the preview device, click the live preview button:

Live preview lets you interact with the preview the same as if your app is running in the simulator — brilliant!
Wait for the Preview spinner to stop; if necessary, click Try Again.
Now move those sliders to match the color!

Wonderful! Do you feel like those programmers in the Goodnight Developers video from the WWDC Keynote? So satisfying! Go ahead and do a victory lap to the kitchen, get your favorite drink and snacks, then come back for the final step! You want to know your score, don't you?