What’s New In SpriteKit on iOS 10: A Look At Tile Maps
Learn how to use Tile Maps in SpriteKit on iOS 10. By Caroline Begbie.
New SpriteKit Tile Classes
In addition to creating tile maps with the scene editor, you can also create them in code. I know what you’re thinking, “Why do that when you can use the scene editor?”
Suppose you need to recognize specific tiles in your code, such as the water tiles? In this tutorial, water tiles slow the car’s speed. You can do this in code!
Another reason is randomness. In this tutorial, the player collects duckies and gas cans. If you painted these with the editor, they would remain in the same spot for every game. If you add them in code, you can randomize their placement.
Reviewing what you’ve done so far, each item you created has a corresponding new SpriteKit class.

In GameScene.sks, they are:
-
SKTileMapNode: the node you placed in the scene editor. -
SKTileSet: the tile set you assigned in the Attributes Inspector for the tile map node.
Open Tiles.sks. Here you have:
-
SKTileSet: the item at the top of the tree, here named Ground Tiles. -
SKTileGroup: the tile groups inside the set. In this set, they are Water Tile, Grass Tile and Grass. -
SKTileGroupRule: defines the adjacency rule for each tile. For example, Upper Left tile, Center tile or Right Edge tile.
Click on the Grass group, and select the Center rule.
-
SKTileDefinition: each Rule has a number of tile definitions. These are the tile variants. For example, the Center tile has threeSKTileDefinitionvariants that are used randomly when painting.
Select one of the Center variants at the bottom of the screen. In the Attributes Inspector, you see all the properties available to you for each SKTileDefinition variant.
If you had animated tiles, you would see the per-frame information, and you’d be able to control the frame rate. Imagine your water tiles lapping against the grass tiles :].
The Attributes Inspector for each variant is also where you can supply user data for each tile variant. This will be useful later when you want to determine whether an object is a duck or a gas can.
Dealing With Tiles in Code
Finally, you get to write some code :]. Isn’t it amazing how far you went without writing any?
When the car “drives” over the water tiles its speed should slow dramatically. There are two ways of approaching this.
You can add a user data isWater Boolean to all of the water tiles, and check the user data in code. Or, because you created the water on a separate layer, you can use the transparency in the landBackground tile map node, and test to see if the tile under the car’s position is empty. That’s what we’ll do here.
In GameScene.swift, add the property for landBackground to GameScene:
var landBackground:SKTileMapNode!
Next, add this code to loadSceneNodes():
guard let landBackground = childNode(withName: "landBackground")
                               as? SKTileMapNode else {
  fatalError("Background node not loaded")
}
self.landBackground = landBackground
Here, you loaded the tile map node into the landBackground property.
Now, add the following to update(_:):
let position = car.position
let column = landBackground.tileColumnIndex(fromPosition: position)
let row = landBackground.tileRowIndex(fromPosition: position)
update(_:) is performed every frame; it’s a good place to check the position of the car. Here, you converted the car’s position into a column and a row. This is so you can extract the actual tile from the tile map.
Next, add this code to the end of update(_:):
let tile = landBackground.tileDefinition(atColumn: column, row: row)
tile now contains the SKTileDefinition for the tile at the column and row.
Finally, add this code to the end of update(_:):
if tile == nil {
  maxSpeed = waterMaxSpeed
  print("water")
} else {
  maxSpeed = landMaxSpeed
  print("grass")
}
If there’s no tile painted, the car’s maximum speed is lowered to the appropriate value. You’re using the transparency in landBackground to determine this. Transparent tiles are assumed to be water.
Build and run the app.
The car’s maximum speed should be now be much slower when it’s driving on water. You can confirm this by reviewing the console too.
Collecting objects
Now it’s time to use the knowledge gained so far to create a tile map filled with objects for the car to collect.
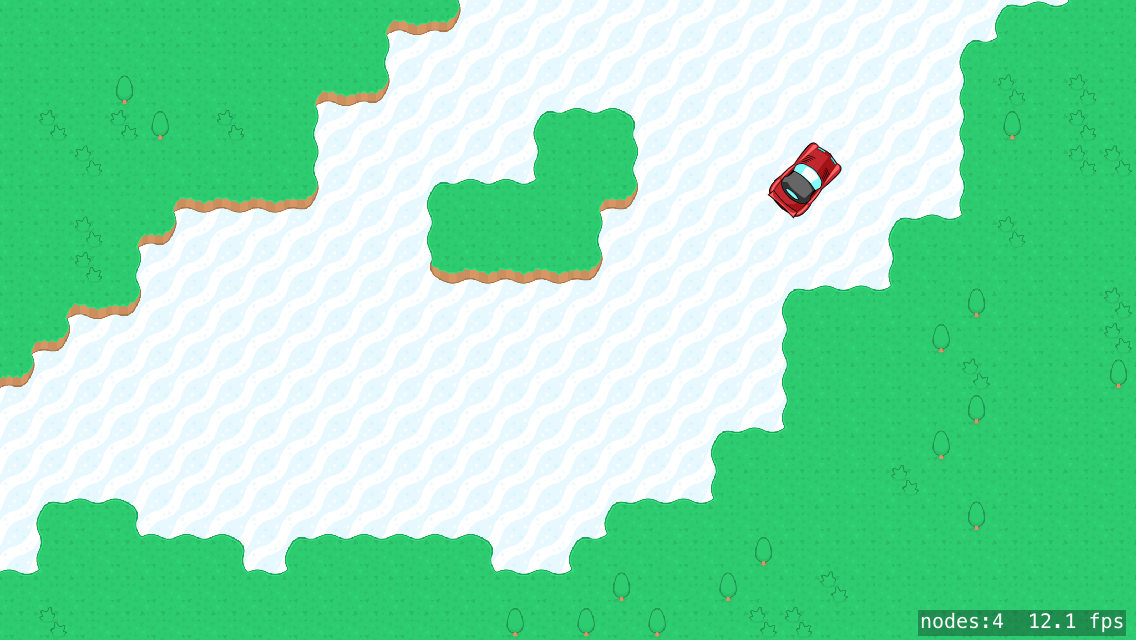
You’ll randomly fill the tile map with rubber duckies and gas cans, with one caveat — the ducks stay on water tiles, and the gas on grass tiles.
Create a new tile set for the objects. Choose File > New > File and select the iOS > SpriteKit Tile Set template, then click Next. Name the set ObjectTiles and click Create.
In ObjectTiles.sks, change the name of the tile set to Object Tiles.
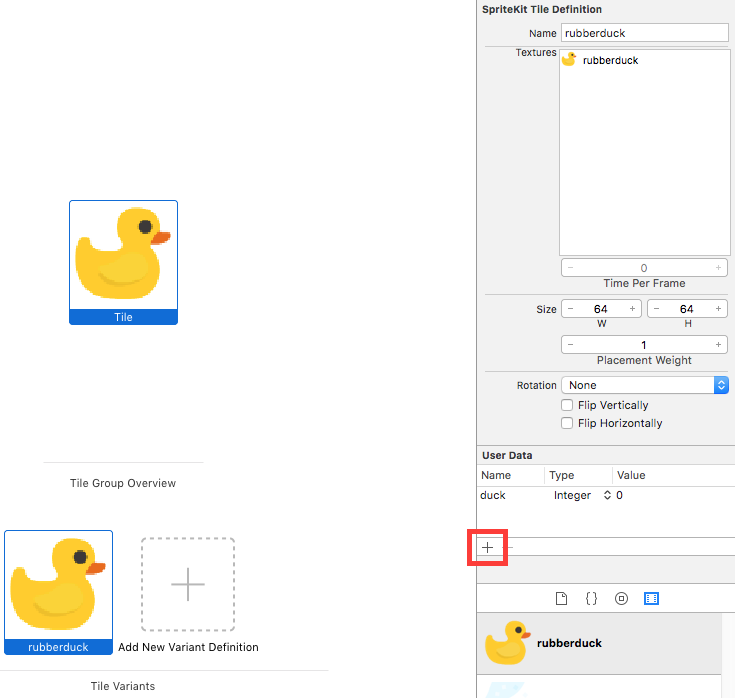
Change new tile group to Duck and drag the rubberduck image from the Media Library onto the tile.
Select the duck tile, and then the tile variant at the bottom. In the Attributes Inspector, click the + under User Data. You may have to scroll down the inspector on a smaller screen. Double-click userData1 and change this to duck. It doesn’t matter what type it is as you will just check for existence of this value, so just leave it as an Integer.
Control+click Object Tiles in the set list and choose New > Single Tile Group. Rename this group to Gas Can and drag the gascan image to the tile.
Select the gas can tile variant, and add user data just like before. Except this time, name the user data gascan.
Now you’ll create a new tile map node entirely in code.
In GameScene.swift, add this new property:
var objectsTileMap:SKTileMapNode!
After loadSceneNodes(), add a new method:
func setupObjects() {
  let columns = 32
  let rows = 24
  let size = CGSize(width: 64, height: 64)

  // 1
  guard let tileSet = SKTileSet(named: "Object Tiles") else {
    fatalError("Object Tiles Tile Set not found")
  }

  // 2
  objectsTileMap = SKTileMapNode(tileSet: tileSet,
                                 columns: columns,
                                 rows: rows,
                                 tileSize: size)

  // 3
  addChild(objectsTileMap)
}
Going through the code:
- Take the tile set you created in ObjectTiles.sks. Note that the
namedparameter is the name of the tile set and not the name of the .sks file - Create the new tile map node using the tile set.
- Add the tile map node to the scene hierarchy.
Add this to the end of setupObjects():
// 4
let tileGroups = tileSet.tileGroups

// 5
guard let duckTile = tileGroups.first(where: {$0.name == "Duck"}) else {
  fatalError("No Duck tile definition found")
}
guard let gascanTile = tileGroups.first(where: {$0.name == "Gas Can"}) else {
  fatalError("No Gas Can tile definition found")
}

// 6
let numberOfObjects = 64
Again, going through the code:
- Retrieve the list of tile groups from the tile set.
- Retrieve the tile definitions for the tiles from the tile groups array.
tileGroups.first(where:)is a handy new method in Swift 3 to find the first occurrence of an object in an array. - Set up the constant needed for placing the objects. You can change
numberOfObjectsto suit.
Now continue in the same method:
// 7
for _ in 1...numberOfObjects {

  // 8
  let column = Int(arc4random_uniform(UInt32(columns)))
  let row = Int(arc4random_uniform(UInt32(rows)))

  let groundTile = landBackground.tileDefinition(atColumn: column, row: row)

  // 9
  let tile = groundTile == nil ? duckTile : gascanTile

  // 10
 objectsTileMap.setTileGroup(tile, forColumn: column, row: row)
}
Again, going through the code:
- Loop to place 64 objects.
- Randomly select a column and row.
- If the tile selected is solid, select a gas can; otherwise select a duck. This will ensure ducks on water and gas cans on grass.
- Place the duck or gas can in the tile, at the selected column and row.
At the end of didMove(to:), call this new method:
setupObjects()
Build and run. You should see your background littered with ducks on the water and gas cans on the grass.

The final thing left to do is write the code to pick them all up with the car. This is similar to the code you wrote earlier to detect if you were on a water tile, except you’ll use the user data for the duck and the gas can.
Back in GameScene.swift, add two properties to the top of GameScene:
lazy var duckSound:SKAction = {
  return SKAction.playSoundFileNamed("Duck.wav", waitForCompletion: false)
}()
lazy var gascanSound:SKAction = {
  return SKAction.playSoundFileNamed("Gas.wav", waitForCompletion: false)
}()
Here, you created two actions to play the sounds when the objects are collected. These sounds are included in the starter project.
At the end of update(_:), add this code:
let objectTile = objectsTileMap.tileDefinition(atColumn: column, row: row)

if let _ = objectTile?.userData?.value(forKey: "gascan") {
  run(gascanSound)
  objectsTileMap.setTileGroup(nil, forColumn: column, row: row)
}

if let _ = objectTile?.userData?.value(forKey: "duck") {
  run(duckSound)
  objectsTileMap.setTileGroup(nil, forColumn: column, row: row)
}
Here, you check the user data to determine if it contains gascan or duck. Then, you play the appropriate sound and set the tile group to nil. This removes the tile from view.
Build and run the app, and collect gas cans and duckies galore! So much easier than sprite collision :].
