Unity 4.3 2D Tutorial: Scrolling, Scenes and Sounds
In this final long awaited part of the Unity 2D series, you will create the conga line as well as the win and lose states for the game. By Chris LaPollo.
Welcome back to our Unity 4.3 2D Tutorial series!
Yes, Unity 4.5 was recently released, but this series is about Unity’s 2D features, which were first introduced in version 4.3. Some bugs have been fixed in 4.5 and a few GUI elements have changed slightly. So, keep that in mind if you’re using a newer version of Unity and you see slight discrepancies between your editor and the screenshots here.
Throughout the first, second and third parts of this series, you learned most of what you need to begin working with Unity’s 2D tools, including how to import and animate your sprites.
In the fourth part of the series, you were introduced to Unity’s 2D physics engine and learned one way to deal with different screen sizes and aspect ratios.
By the end of this, the final part of this series, you’ll have cats dancing in a conga line and your player will be able to win or lose the game. You’ll even throw in some music and sound effects just for fun.
This last tutorial is the longest of the series, but it seemed better to post it as one huge chunk rather than to make you wait even one extra day for the second half.
This tutorial picks up where the fourth part of the series left off. If you don’t already have the project from that tutorial, download it here.
Unzip the file (if you needed to download it) and open your scene by double-clicking ZombieConga/Assets/Scenes/CongaScene.unity.
You’ve got most of Zombie Conga’s pieces in place, so now it’s time to do what so many aspiring game developers have trouble doing: finish the game!
Getting Started
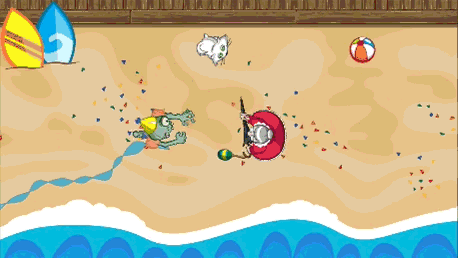
Zombie Conga is supposed to be a side-scrolling game, but so far you’re zombie has been stuck staring at one small section of beach. It’s high time he had someplace to go.
In order to scroll the scene to the left, you’ll move the camera within the game world to the right. That way, the beach, along with the cats, zombies and old ladies that hang out there, will scroll by naturally without you needing to modify their positions yourself.
Select Main Camera in the Hierarchy. Add a new C# script called CameraController. You’ve already created several scripts by this point in the tutorial series, so try it yourself. If you need a refresher, check out the following spoiler.
[spoiler title="Need help adding a new script?"]There are several ways you could create this script and add it to Main Camera. Here is just one:
- Click Add Component in the Inspector, and in the menu that appears, choose New Script.
- Enter CameraController for the name and choose CSharp for the language, then click Create and Add.
[/spoiler]
Open CameraController.cs in MonoDevelop and add the following instance variables:
public float speed = 1f;
private Vector3 newPosition;
You’ll use speed to control how quickly the scene scrolls. You only need to update the x component of the Camera‘s position, but the individual components of a Transform‘s position are readonly. Rather than repeatedly creating new Vector3 objects every time you update the position, you’ll reuse newPosition.
Because you’ll only be setting newPosition‘s x value, you need to initialize the vector’s other components properly. To do so, add the following line inside Start:
newPosition = transform.position;
This copies the camera’s initial position to newPosition.
Now add the following code inside Update:
newPosition.x += Time.deltaTime * speed;
transform.position = newPosition;
This simply adjusts the object’s position as if it were moving speed units per second.
newPosition accurately reflects the camera’s position. If you are one of said sticklers, feel free to replace that line withnewPosition.x = transform.position.x + Time.deltaTime * speed;
Save the file (File\Save) and switch back to Unity.
Play your scene and things start moving. The zombie and enemies seem to handle it fine, but they quickly run out of beach!
You need to handle the background similarly to how you handled the enemy. That is, when the enemy goes off screen, you’ll change its position so it reenters the scene from the other side of the screen.
Create a new C# script named BackgroundRepeater and add it to background. You’ve done this sort of thing several times now, so if you need a refresher, look back through the tutorial to find it.
Open BackgroundRepeater.cs in MonoDevelop and add the following instance variables:
private Transform cameraTransform;
private float spriteWidth;
You’ll store a reference to the camera’s Transform in cameraTransform. This isn’t absolutely necessary, but you’ll need to access it every time Update runs, so rather than repeatedly finding the same component, you’ll simply find it once and keep using it.
You’ll also need to repeatedly access the sprite’s width, which you’ll cache in spriteWidth because you know you aren’t changing the background’s sprite at runtime.
Initialize these variables by adding the following code in Start:
//1
cameraTransform = Camera.main.transform;
//2
SpriteRenderer spriteRenderer = renderer as SpriteRenderer;
spriteWidth = spriteRenderer.sprite.bounds.size.x;
The above code initializes the variables you added as follows:
- It finds the scene’s main
Cameraobject (which is the only camera in Zombie Conga) and setscameraTransformto point to the camera’sTransform. - It casts the object’s built-in
rendererproperty to aSpriteRendererin order to access itsspriteproperty, from which it gets the Sprite’sbounds. TheBoundsobject has asizeproperty whosexcomponent holds the object’s width, which it stores inspriteWidth.
In order to determine when the background sprite is off screen, you could implement OnBecameInvisible, like you did for the enemy. But you already learned about that, so this time you’ll check the object’s position directly.
In Zombie Conga, the camera’s position is always at the center of the screen. Likewise, when you imported the background sprite way back in Part 1 of this tutorial series, you set the origin to the sprite’s center.
Rather than calculate the x position of the left edge of the screen, you’ll estimate by assuming the background has scrolled off screen if it’s at least a full sprite’s width away from the camera. The following image shows how the background sprite is well offscreen when positioned exactly one-sprite’s width away from the camera’s position:

The left edge of the screen will be different on different devices, but this trick will work as long as the screen’s width is not larger than the width of the background sprite.
Add the following code to Update:
if( (transform.position.x + spriteWidth) < cameraTransform.position.x) {
  Vector3 newPos = transform.position;
  newPos.x += 2.0f * spriteWidth;
  transform.position = newPos;
}
The if check above checks to see if the object is sufficiently off screen, as described earlier. If so, it calculates a new position that is offset from the current position by twice the width of the sprite.
Why twice the width? By the time this logic determines that the background went offscreen, moving the sprite over by spriteWidth would pop it into the area viewable by the camera, as shown below:

Save the file (File\Save) and switch back to Unity.
Play the scene and you'll see that the background goes off screen and eventually comes back into view, as shown in the sped-up sequence below:

That works fine, but you probably don't want those blue gaps that keep showing up. To fix it, you'll simply add another background sprite to fill that space.
Right-click on background in the Hierarchy and select Duplicate from the popup menu that appears. Select the duplicated background (if it already isn't selected) and set the x value of the Transform's Position to 20.48, as shown below:

Remember from Part 1 of this series that the background sprite is 2048 pixels wide and you imported it with a ratio of 100 pixels per unit. That means that setting one background sprite's x position to 20.48 will place it immediately to the right of the other object, whose x position is zero.
You now have a much longer stretch of beach in your Scene view, as shown below:

Play the scene again and now your zombie can spend his entire apocalypse strolling along the beach, as shown in the following sped-up sequence. Don't let the glitches in this low-quality GIF fool you – in the real game, the background scrolls seamlessly.

While playing the scene, one thing that probably stands out is how utterly devoid of cats that beach is. I don't know about you, but whenever I go to the beach, I always bring my kitty.