Extend the Unity3d Editor
In this tutorial, you’ll learn to extend the Unity editor to customize it for the needs of your game. By Barbara Reichart.
Scriptable Objects: The Basics
The intended use case for ScriptableObject is for those times you need to reduce memory usage by avoiding copies of values.
How does it do that? When you create a GameObject, Unity stores all primitive types connected with it by value.
Your bullet has two integer fields: speed and damage. One integer requires 2 bytes, so you need 4 bytes total. Now imagine you have 100 bullets — you would already need at least 400 bytes. This is with no change to speed or damage. It’s a great way to quickly consume resources.
Clean up that waste

Clean up that waste
ScriptableObject stores these values by reference, so you could use it when:
- You store a lot of data for a particular type of object.
- Values are shared between many GameObjects.
While the major value of ScriptableObject is that it reduces memory requirements, you can also use it to define custom assets for dialogs, level data, tile sets and more. This allows you to decouple data and GameObjects.
Implement a ScriptableObject
In this subsection, you’ll create your first scriptable object.
Inside of Unity and in the Project Browser, open the Assets/Scripts folder, right-click it and select Create > C# Script. Name the script BulletConfig, open it and change its contents as follows:
using UnityEngine;

[CreateAssetMenu(menuName = "Bullet", fileName = "Bullet.asset")]
public class BulletConfig : ScriptableObject {
  public float speed;
  public int damage;
}
And save.
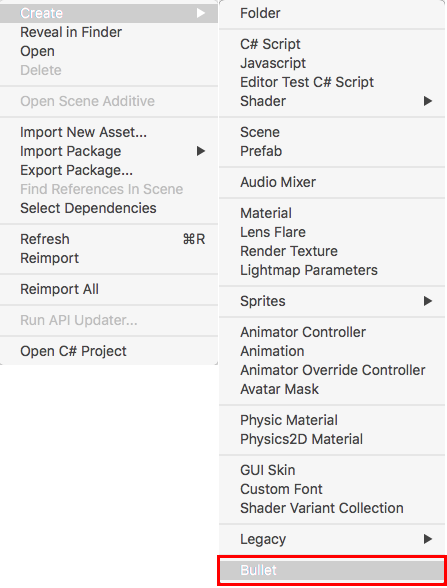
CreateAssetMenu makes the creation of a ScriptableObject available under the Assets main menu option.
Switch back to Unity, go to the Project Browser and navigate to the Assets/Bullets folder. Click on Assets/Create/Bullet from the main menu. Name the created asset Bullet1 — now you have a nice ScriptableObject.

Create two more bullets named Bullet2 and Bullet3.
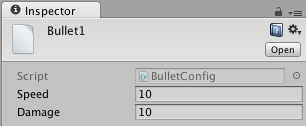
Now click on Bullet1 and go into Inspector. Set speed to 10 and damage to 10.
Repeat for Bullet2 and Bullet3 with the following values:
- Bullet2: speed = 10, damage = 15
- Bullet3: speed = 10, damage = 20
Now you’ll replace the speed and damage fields in BulletBehavior with BulletConfig. Open BulletBehavior. Remove the fields for speed and damage and add this field:
Before:
public float speed = 10;
public int damage;
After:
public BulletConfig bulletConfig;
Since all your other scripts still need read access to speed and damage, you need to create a getter for both variables.
Before the closing brace of the class, add the following:
private int damage {
  get {
    return bulletConfig.damage;
  }
}

private float speed {
  get {
    return bulletConfig.speed;
  }
}
Save those changes.
Without touching any other script, you improved memory usage by replacing the variables inside the bullets with a scriptable object.
Lastly, you need to assign your scriptable object to your bullet prefabs.
In the Project Browser, select Prefabs / Bullet1. In Inspector, set Bullet Config to the Bullet1.asset. Repeat this for Bullet2 and Bullet3 accordingly. Done!
Adding the scriptable objects to the bullet prefabs.
Adding the scriptable objects to the bullet prefabs.
Run the game to make sure everything still works.
Customize Inspector With PropertyDrawer and Editor
So far, you’ve only changed minor things, but could redraw almost everything in Inspector. This section is all about flexing your redrawing muscles.
Editor
With Editor, you can replace Inspector GUI for a MonoBehavior. The implementation is to display the health of each enemy with a slider, where the slider’s length depends on the maximum health of the enemy, making it impossible to enter invalid values.
Inspector for MoveEnemy before and after applying a custom editor

Inspector for MoveEnemy before and after applying a custom editor
Inside of the Assets / Editor folder, create a new C# script named EnemyDataEditor. Open the script in MonoDevelop. Replace the contents with the following:
using UnityEditor;

// 1
[CustomEditor(typeof(MoveEnemy))]
// 2
public class EnemyDataEditor : Editor {
  // 3
  public override void OnInspectorGUI() {
  // 4
    MoveEnemy moveEnemy = (MoveEnemy)target;
    HealthBar healthBar = moveEnemy.gameObject.GetComponentInChildren<HealthBar> ();
  // 5
    healthBar.maxHealth = EditorGUILayout.FloatField ("Max Health", healthBar.maxHealth);
  // 6
    healthBar.currentHealth = EditorGUILayout.Slider("Current Health",   healthBar.currentHealth, 0, healthBar.maxHealth);
  // 7
    DrawDefaultInspector ();
  }
}
Save your changes.
This is how each step works:
- Specify that Unity should create a
CustomEditorforMoveEnemyin this attribute. - Make
EnemyDataEditora subclass ofEditorso it can access methods such asOnInspectorGUI. - Add
OnInSpectorGUI, a method that’s called when drawing the editor. - In
Editor, you can access the instance that’s currently selected, either in the Project Browser or Hierarchy, viatarget. Then you cast it toMoveEnemy. Finally, you get its only child — theHealthBar. - Use
EditorGUILayout.FloatFieldto add a field formaxHealththat only accepts float values. - Create a slider for the actual current health with
EditorGUILayout.Slider. This differs from simply using the attribute[Range]because it allows adjustments to the slider’s range depending on a variable. In this case, it’shealthBar.maxHealth. - A custom editor replaces everything that would usually appear in the Inspector. In cases where you only want to extend the existing view, you call
DrawDefaultInspector. It draws any remaining default content in the location where you’ve added the call.
Switch back to Unity and select Prefabs / Enemy in the Project Brower and enjoy your result.

Run the game to make sure everything still works. You should now be able to select an Enemy(Clone) in the Hierarchy and change its health on the slider in the Inspector while the game is in progress. Cheating was never so much fun. :]
Slide or slider? – I know what I will choose :] (Published under CC0 on pixabay)
![Slide or slider? - I know what I will choose :]](https://koenig-media.raywenderlich.com/uploads/2016/04/blue-1005940_640.jpg)
Slide or slider? – I know what I will choose :] (Published under CC0 on pixabay)
Property Drawers
With property drawers, you can:
- Customize the GUI for every instance of a Serializable class, such as
Wave. - Customize the GUI for fields with custom PropertyAttributes, such as
Range.
In Hierarchy, select Road. Check out all the different waves in the Inspector.
Pretend that in addition to the Enemy Prefab, you also want to show a preview image of that prefab. You can do this with a PropertyDrawer for Wave.
Customized Inspector with property drawer – before and after.
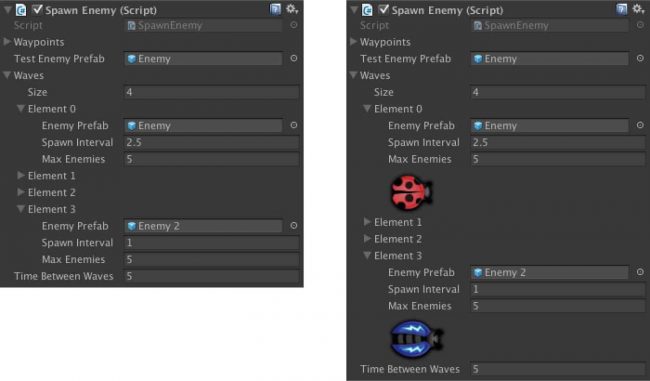
Customized Inspector with property drawer – before and after.
Start by creating a new C# Script named WavePropertyDrawer inside the Assets/Editor folder in the Project Browser. Open it in MonoDevelop and replace the entire contents as follows:
//1
using UnityEditor;
using UnityEngine;

//2
[CustomPropertyDrawer(typeof(Wave))]
//3
public class WavePropertyDrawer : PropertyDrawer {
  //4
  private const int spriteHeight = 50;
}
Save your changes.
In this code block, you:
- Import
UnityEditorto enable access to the Editor’s libraries. - Use an Attribute to tell your class it’s a
CustomPropertyDrawerforWave. - Make it a subclass of
PropertyDrawer. - Create a constant to store the height at which the enemy sprite should be drawn.
Go back in Unity and select Road in the Hierarchy. You should see the message No GUI implemented in Inspector.

Change this and add OnGUI to WavePropertyDrawer:
public override void OnGUI (Rect position, SerializedProperty property, GUIContent label) {
  EditorGUI.PropertyField(position, property, label, true);
}
Overriding OnGUI lets you implement your own GUI. The method takes three arguments:
-
position: A rectangle to draw the GUI into -
property: The property you want to draw -
label: A text that labels the property
You draw the default GUI for the property with the method EditorGUI.PropertyField; it takes all the variables you get from OnGUI.
The last parameter is a bool variable that tells Unity to draw the property itself as well as its children.
In addition to OnGUI, you need to implement GetPropertyHeight():
public override float GetPropertyHeight(SerializedProperty property, GUIContent label) {
  return EditorGUI.GetPropertyHeight (property);
}
This method returns the height for the property, and is especially important for properties that can change height depending on whether the property is expanded or not.
If you don’t implement it then Unity assumes the default height. In cases where your property is higher, it will draw on top of other fields in Inspector. This is usually not what you want. :]
Now that you have the basics in place, you’re free to customize the GUI. Add the following code to OnGUI():
// 1
if (property.isExpanded) {
  // 2
  SerializedProperty enemyPrefabProperty = property.FindPropertyRelative ("enemyPrefab");
  GameObject enemyPrefab = (GameObject) enemyPrefabProperty.objectReferenceValue;
  // 3
  if (enemyPrefab != null) {
    SpriteRenderer enemySprite = enemyPrefab.GetComponentInChildren<SpriteRenderer> ();
    // 4
    int previousIndentLevel = EditorGUI.indentLevel;
    EditorGUI.indentLevel = 2;
    // 5
    Rect indentedRect = EditorGUI.IndentedRect (position);
    float fieldHeight = base.GetPropertyHeight (property, label) + 2;
    Vector3 enemySize = enemySprite.bounds.size;
    Rect texturePosition = new Rect (indentedRect.x, indentedRect.y + fieldHeight * 4, enemySize.x / enemySize.y * spriteHeight, spriteHeight);
    // 6
    EditorGUI.DropShadowLabel(texturePosition, new GUIContent(enemySprite.sprite.texture));
    // 7
    EditorGUI.indentLevel = previousIndentLevel;
  }
}
Save your changes.
Step-by-step breakdown:
- You only want to draw the enemy sprite when the details of the property should be shown, for instance, when the user unfolds it in Inspector. In this case,
property.isExpandedis true. - Get the enemyPrefab. It calls
FindPropertyRelativefirst to retrieve the property linked to another property by name. Then it gets theobjectReferencethat stores the actual GameObject that contains theenemyPrefab. - If the
enemyPrefabis set, then you get its sprite. - Set the
indentLevelproperly. This level specifies how far to the right Unity should start drawing. Since you’ll need to restore its original value after you’re done drawing, you store it in a variable first, and then you setindentLevelto 2. - Get the position of the
indentedRectso you can calculate the coordinates required to draw inside a property drawer. Then you get the height of one normal field withGetPropertyHeight. You need the size of the enemy sprite too. With these three values, you can calculate the rect for drawing the texture. The origin is that of theindentedRect. However, you add four times thefieldHeightto reserve space for the fields drawn. Because the height should be the same, no matter the actual size of the enemy, you scale the width accordingly. - Call
DropShadowLabelto draw a texture within the specified position. - In the end, you reset the indent level.
Go back to Unity to see the enemy sprite in the proper position. It’s there, but it overlaps with the next property. Why?

[spoiler]
You need to change the implementation of GetPropertyHeight() so that it returns the height of the original property plus that of the sprite.
public override float GetPropertyHeight(SerializedProperty property, GUIContent label) {
  SerializedProperty enemyPrefabProperty = property.FindPropertyRelative ("enemyPrefab");
  GameObject enemyPrefab = (GameObject)enemyPrefabProperty.objectReferenceValue;
  if (property.isExpanded && enemyPrefab != null) {
    return EditorGUI.GetPropertyHeight (property) + spriteHeight;
  } else {
    return EditorGUI.GetPropertyHeight (property);
  }
}
Save your changes!
In GetPropertyHeight, it retrieves the enemy prefab.
If the property is expanded and the enemyPrefab isn’t null, you add spriteHeight. Otherwise, it just returns the normal property height.
[/spoiler]
Go back to Unity and select Road in the Hierarchy. In Inspector, you can now see the sprite of the enemy properly.
Aside from adding one or more sprites, you can change Inspector more significantly. One example is directly from the PropertyDrawer documentation.

Property drawers allow you to customize how Inspector is drawn for any property of a Serializable class. They allow you to dictate how one specific property of your MonoBehavior is drawn without a change to the rest of Inspector.
Property drawers are especially helpful when you want to redraw items in an array.
However, they come with some serious drawbacks. Namely, you don’t have access to EditorGUILayout(), leaving you to calculate each field’s position by yourself. Additionally, you can only access info stored in the property or its children.