ConstraintLayout Tutorial for Android: Getting Started
In this tutorial, you’ll learn the basics of creating Android views by using ConstraintLayout to build a login screen from scratch. By Fuad Kamal.
Sign up/Sign in
With a free Kodeco account you can download source code, track your progress, bookmark, personalise your learner profile and more!
Create accountAlready a member of Kodeco? Sign in
Sign up/Sign in
With a free Kodeco account you can download source code, track your progress, bookmark, personalise your learner profile and more!
Create accountAlready a member of Kodeco? Sign in
Sign up/Sign in
With a free Kodeco account you can download source code, track your progress, bookmark, personalise your learner profile and more!
Create accountAlready a member of Kodeco? Sign in
Contents
ConstraintLayout Tutorial for Android: Getting Started
25 mins
- Raze Galactic — An Intergalactic Travel Service
- Getting Started
- Checking the ConstraintLayout Version
- Setting up Android Studio for Efficient Constraint Development: Design Surfaces
- Creating a New ConstraintLayout From Scratch
- Adding an Image to Your App
- Testing the View Placement
- Getting to Know the Layout Editor Toolbar
- Autoconnect
- Infer Constraints
- Clear All Constraints
- Adding and Removing Individual Constraints
- Constraining Objects to Their Container
- Deleting Individual Constraints
- Constraining Objects to One Another
- Applying Alignment Constraints
- Constraint Bias
- Align the Left Edge and Distribute Vertically
- Using Default Margins
- Where to Go From Here?
Using Default Margins
To create vertically-distributed constraints, you simply connect constraints that have the same margins. A trick to do this quickly is to use the Default Margin tool.
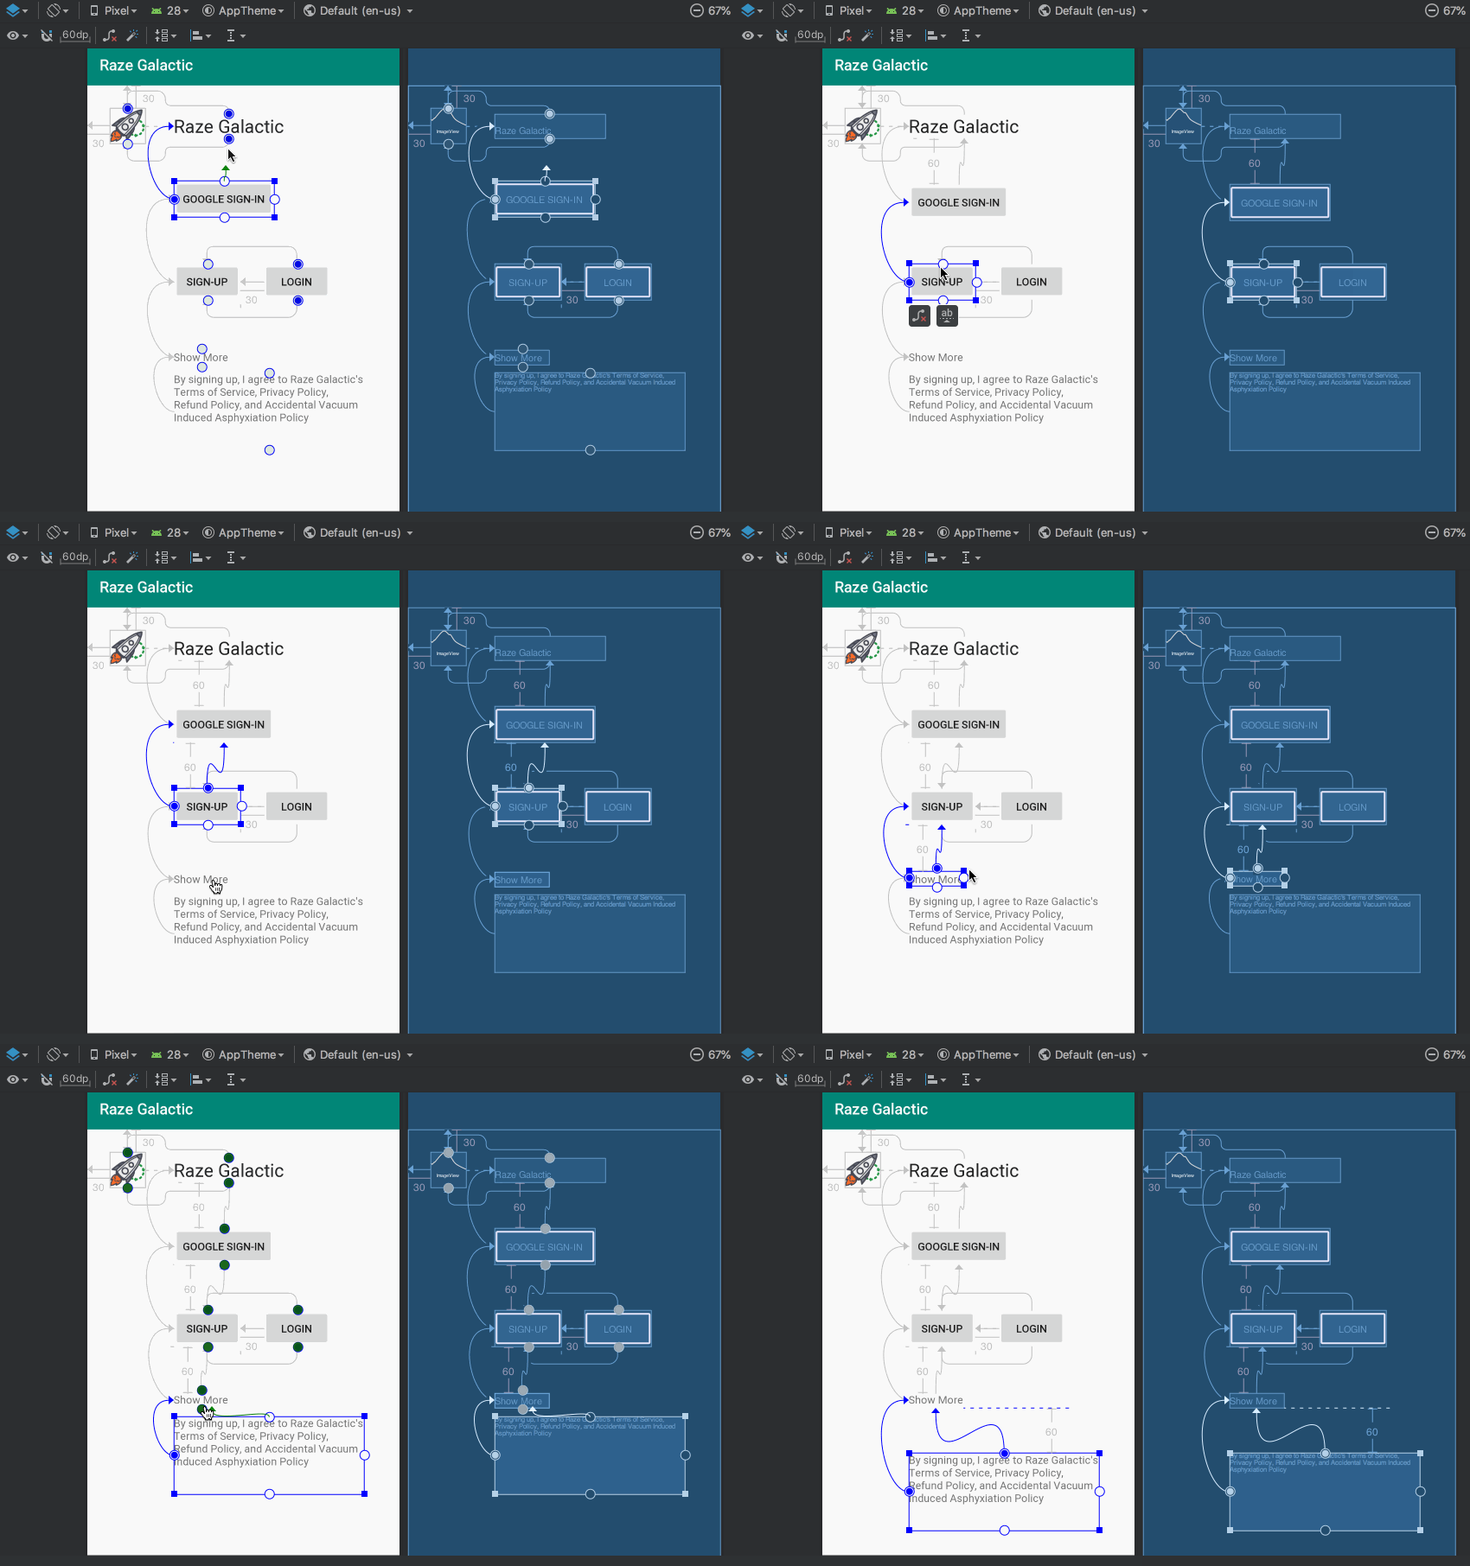
Now, click the Default Margin button and set the value 60dp. Start connecting constraints from the top Google Sign-In button to the bottom of the Raze Galactic TextView. You’ll notice that the Google Sign-In button shifts automatically, leaving a 60dp margin between it and the Raze Galactic TextView. Magic :]
Create the rest of the vertical constraints as shown in the GIF above. Finally, constrain the left side of Raze Galactic TextView to the right side of the rocket icon with a 30dp margin.
Check Component Tree to see if there are any remaining errors. If not, congratulations!
Build and run your app. Everything should now appear with the proper layout in the emulator.
Where to Go From Here?
You can download the final version of this project using the Download Materials button at the top or bottom of this tutorial.
Building UI with ConstraintLayout in Layout Editor can be frustrating because some tools are not smart enough. However, if you know the right tools, you can save lots of time.
There are other Layout Editor tools which are not mentioned in this tutorial, and you can play around with them to understand how they work. Check out Google’s documentation on ConstraintLayout to find out more.
For more complex ConstraintLayout examples see our follow up article ConstraintLayout Tutorial for Android: Complex Layouts.
To see more examples of ConstraintLayout, check out our book Android Apprentice, which uses ConstraintLayout for all of its layouts.
You’ve now mastered the basic concepts of ConstraintLayout. To learn more advanced features and to get tips on dealing with complex layouts, stay tuned for our upcoming tutorial on building complex layouts with ConstraintLayout, where you will build a much more complex constraint view for the Raze Galactic travel app, and then animate it!
If you have any questions or comments, please join the forum discussion below!


