


Getting Started with Apple’s Foundation Models
Apple’s Foundation Models framework puts a large language model right on the device — private, offline, and free to call. In this free chapter from Apple Foundation Models, you’ll build a SwiftUI chat app that checks availability, sends a prompt, and displays the response, using an on-device LLM in just two lines of Swift. By Bill Morefield.
Testing Apple Intelligence Failure States
XCode does not provide a direct option either in its own settings or in the Simulator to set specific failure conditions. You can accomplish this using schemes. In XCode, select Product ▸ Scheme ▸ Edit Scheme….
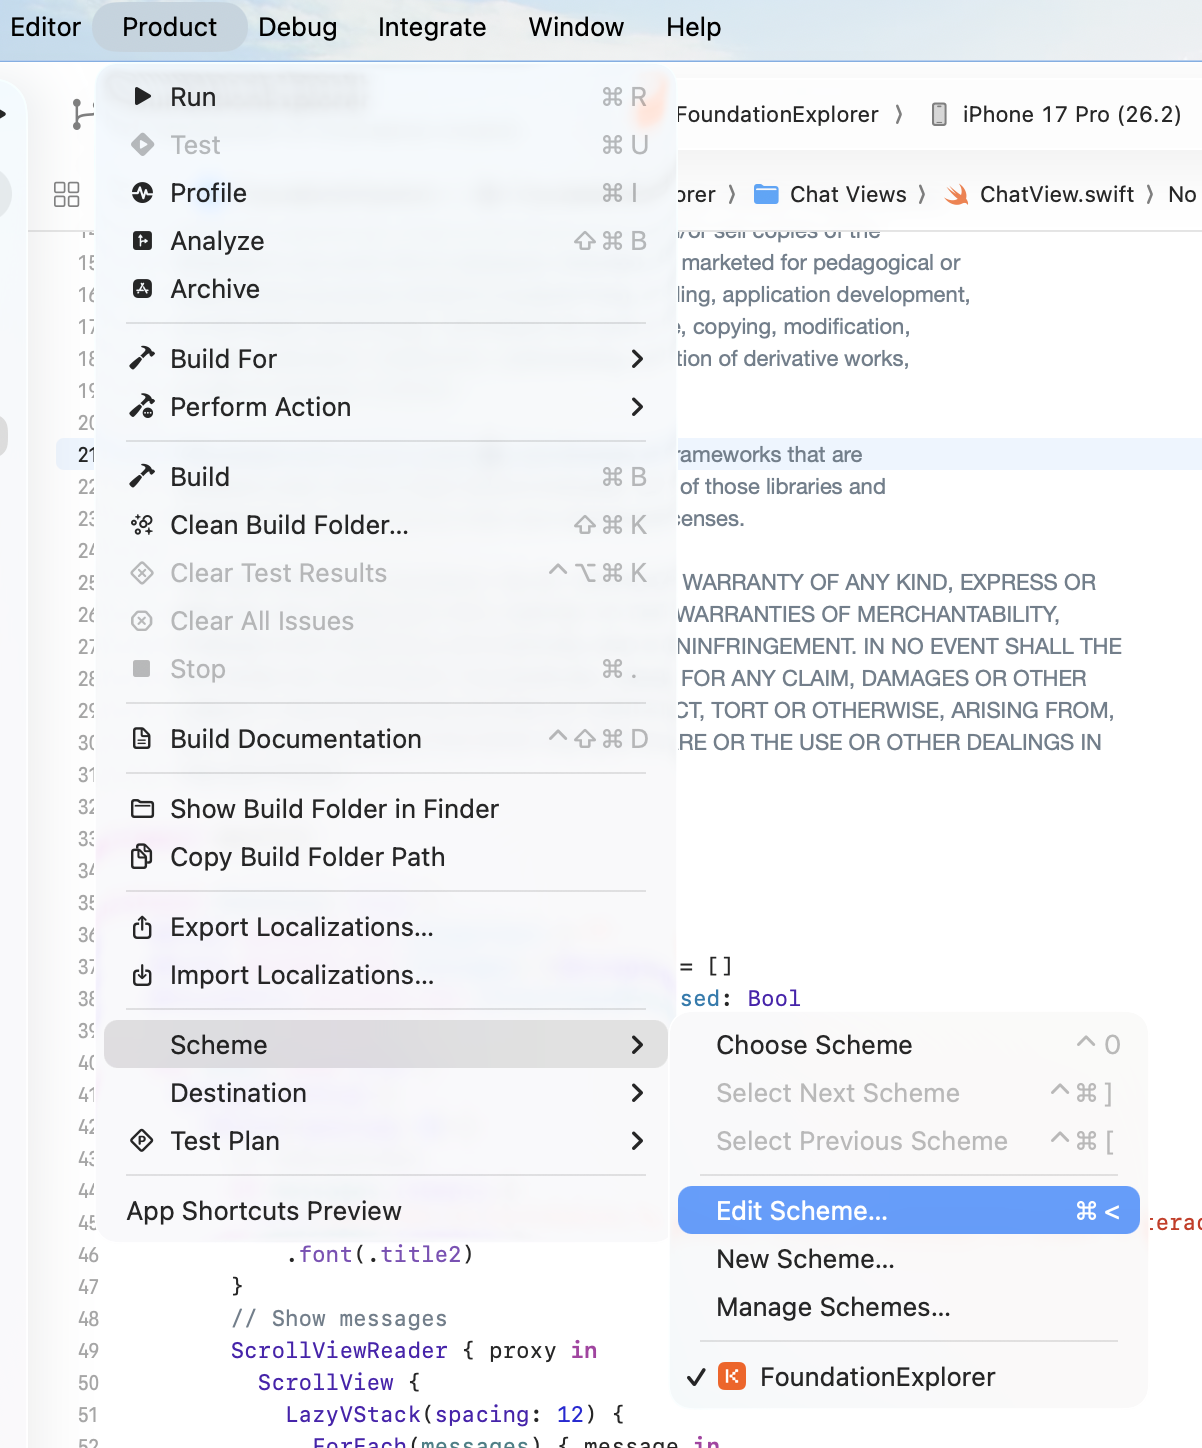
Change to the Options tab. Scroll near the bottom of the list and you will see an option Simulated Foundation Models Availability with a dropdown providing five choices. When the default Off is selected, there is no change to the state of the simulator. The other options will produce the listed error condition for Apple Intelligence regardless of the device’s settings or capabilities. For now, change it to Device Not Eligible.
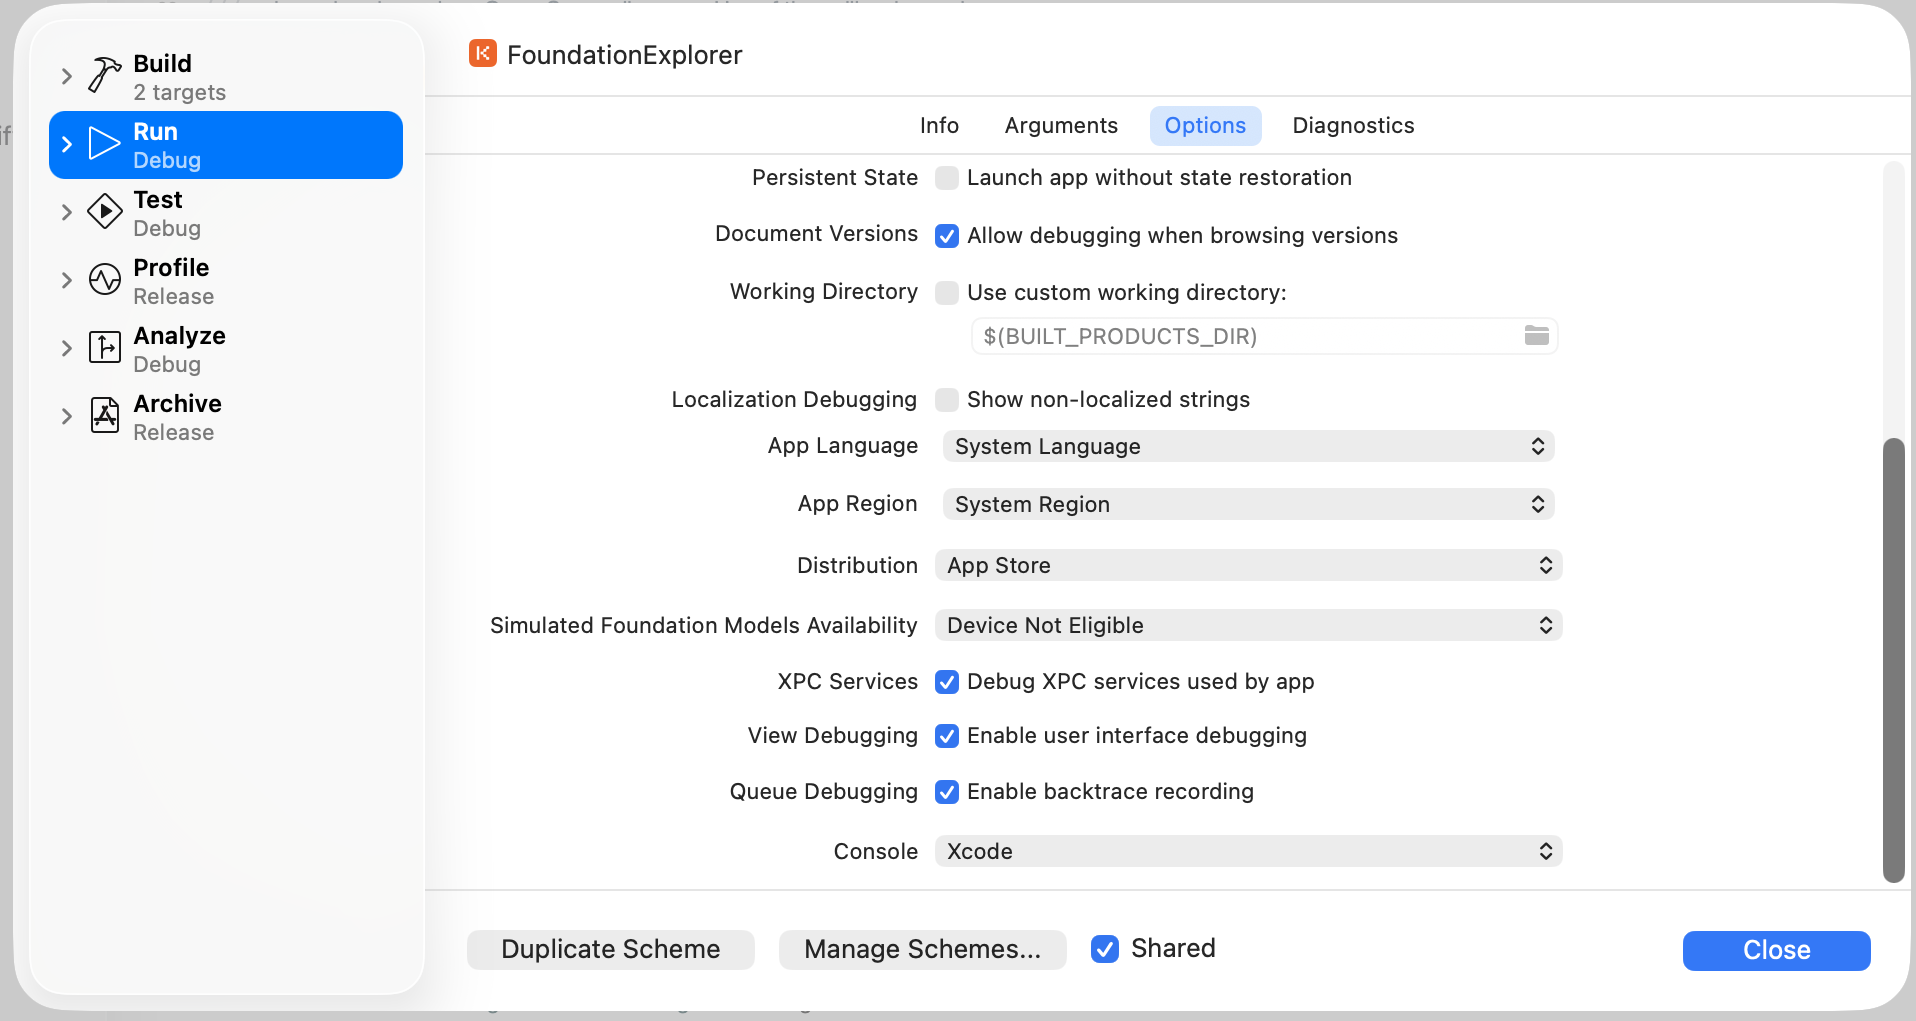
Click Close and run the app again. You will see that the app shows that Apple Intelligence is not available on this device.

With this, you can verify that the fallback processes and the error messages in your app work for the common cases where your app will not have access to Foundation Models. Make sure to go back and change the Scheme to Off before continuing in the chapter.
Sending Prompts and Getting Responses
Now that you know how to verify that Foundation Models is available on the device for your app, it’s time to finally tie this chat app into Foundation Models. Open ChatView.swift. First, import Foundation Models by adding the following import after the existing one.
import FoundationModels
Now find the sendPrompt method. Interactions with LLMs consist of a prompt sent to the model and a response from the model. In this app, the text entered by the user will be the prompt. You will then take the response from the model and add it as a “reply” to the messages list.
Replace the current method contents with:
// 1
guard !promptText.trimmingCharacters(in: .whitespacesAndNewlines).isEmpty else { return }

// 2
addMessage(promptText, type: .prompt)

// 3
let session = LanguageModelSession()

do {
  // 4
  let modelResponse = try await session.respond(to: promptText)
  promptText = ""
  // 5
  addMessage(modelResponse.content, type: .fullResponse)
} catch {
  // 6
  let errorResponse = "An error occurred while processing your message. \(error.localizedDescription)"
  addMessage(errorResponse, type: .error)
}
The most valuable benefit of Foundation Models comes from the simplicity of using it. That code provides a basic, but complete implementation of sending a prompt to the model and getting the response:
- You ensure there is useful text in the
promptTextand return without doing anything if there is no prompt to process. - You add the prompt to the list of messages using the
addMessage(_:type:animate:)method, passing the text of the prompt along with aMessageTypeenumeration indicating that this is a user prompt. - You use a
LanguageModelSessionto interact with Foundation Models. This represents a single session of interactions with the language model. You’ll learn more about what a session means throughout this book. - The
respond(to:options:)method sends a prompt to theLanguageModelSessionthat you created with a string prompt and returns aLanguageModelSession.Response. Therespond(to:options:)method generates the entire response and returns it when ready, which can take some time for complex or long prompts. Apple therefore made the calls to it asynchronous. The method will wait until the call returns before continuing. Because of this, you need toawaitits completion before continuing. Also note that this method is marked asasyncto accommodate this need. If the model returns a valid response, you clear out the user’s input text. - You use the
contentproperty of the result to get the text reply. You then add the response text to the message list using thefullResponsetype. Note that LLMs, including Foundation Models, often return text in Markdown, a simple markup language that allows styling while still written with plain text. TheMessageBubbleview already supports Markdown text and displays this content correctly. - If anything goes wrong, you put the error message into
errorResponseand add it to the messages, passing theerrorenumeration so it is formatted as such. You will learn more about error handling later in this chapter.
Run your app. Enter a simple prompt and tap the send button. After a pause of several seconds to a minute, you will get a response from the model.
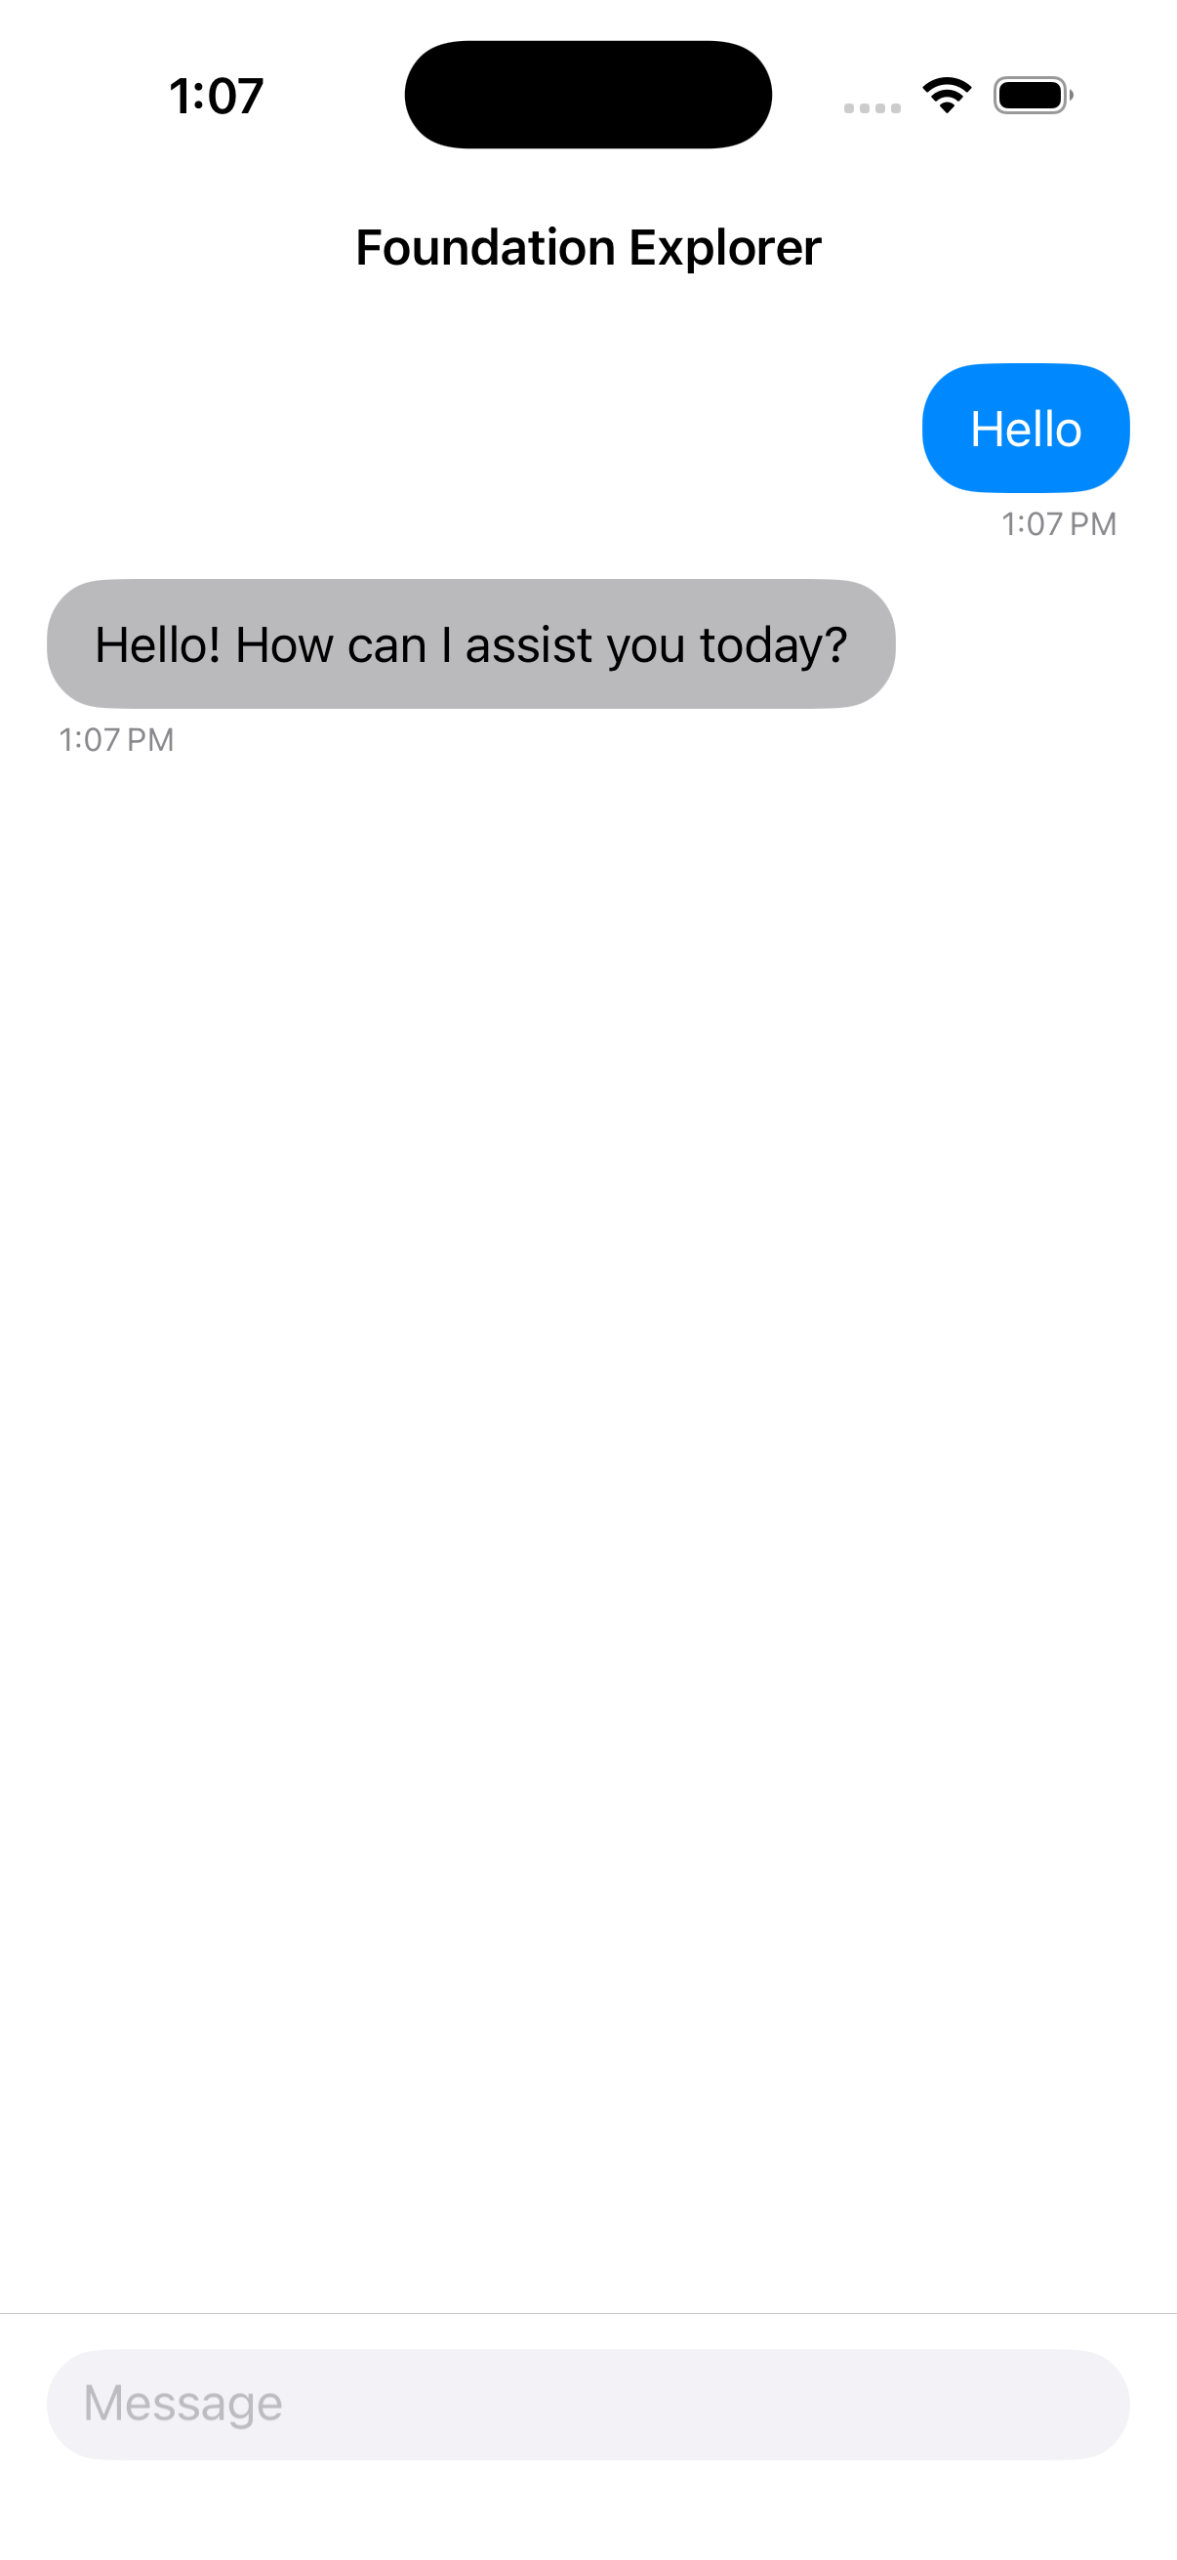
Take a moment to appreciate that you have set up and used an LLM in just two lines of code, excluding the code required for displaying text and handling errors. That provides a convenience that hasn’t been available when using LLMs before.
Keep reading
That’s the start. From here, Apple Foundation Models goes on to give the conversation a memory with a reusable session, stream responses into your UI as they generate, tune prompts for reliable and safe output, use guided generation to turn a prompt straight into a typed Swift struct, give the model tools so it can do real work in your app, and build full on-device projects — including transcribing and analyzing voice notes.
Get the book → — $59.99, and 25% off with code FOUNDATION25 through Sunday, 2 August. It’s also included with a Kodeco Personal Plan.