OpenGL ES Transformations with Gestures
Learn all about OpenGL ES Transformations by making a 3D, gesture-based model viewer. By Ricardo Rendon Cepeda.
In this tutorial, you’ll learn how to use gestures to control OpenGL ES transformations by building a sophisticated model viewer app for 3D objects.
For this app, you’ll take maximum advantage of the iPhone’s touchscreen to implement an incredibly intuitive interface. You’ll also learn a bit of 3D math and use this knowledge to master basic model manipulation.
The hard work has already been done for you, specifically in our tutorial series How To Export Blender Models to OpenGL ES, allowing you to concentrate on nothing but transformations and gestures. The aforementioned series is an excellent build-up to this tutorial, since you’ll be using virtually the same code and resources. If you missed it, you’ll also be fine if you’ve read our OpenGL ES 2.0 for iPhone or Beginning OpenGL ES 2.0 with GLKit tutorials.
Note: Since this is literally a “hands-on” tutorial that depends on gestures, you’ll definitely need an iOS device to fully appreciate the implementation. The iPhone/iPad Simulator can’t simulate all the gestures covered here.
Note: Since this is literally a “hands-on” tutorial that depends on gestures, you’ll definitely need an iOS device to fully appreciate the implementation. The iPhone/iPad Simulator can’t simulate all the gestures covered here.
Getting Started
First, download the starter pack for this tutorial.
As mentioned before, this is essentially the same project featured in our Blender to OpenGL ES tutorial series. However, the project has been refactored to present a neat and tidy GLKit View Controller class—MainViewController—that hides most of the OpenGL ES shader implementation and 3D model rendering.
Have a look at MainViewController.m to see how everything works, and then build and run. You should see the screen below:
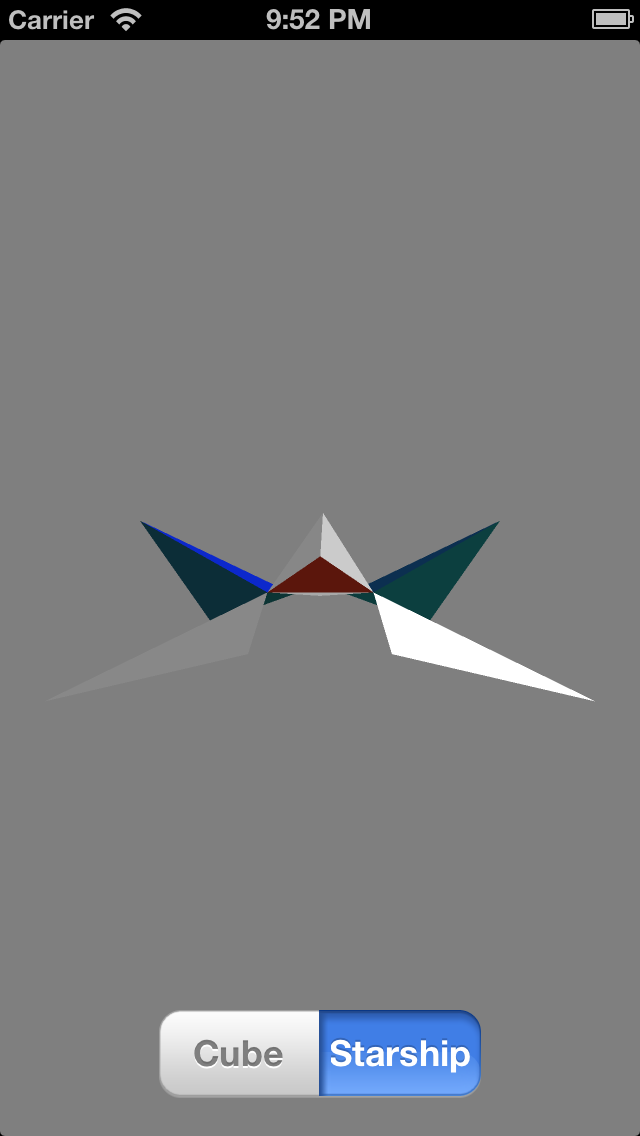
The current model viewer is very simple, allowing you to view two different models in a fixed position. So far it’s not terribly interesting, which is why you’ll be adding the wow factor by implementing gesture recognizers!
Gesture Recognizers
Any new iPhone/iPad user will have marveled at the smooth gestures that allow you to navigate the OS and its apps, such as pinching to zoom or swiping to scroll. The 3D graphics world is definitely taking notice, since a lot of high-end software, including games, requires a three-button mouse or double thumbsticks to navigate their worlds. Touchscreen devices have changed all this and allow for new forms of input and expression. If you’re really forward-thinking, you may have already implemented gestures in your apps.
An Overview
Although we’re sure you’re familiar with them, here’s quick overview of the four gesture recognizers you’ll implement in this tutorial:
Pan (Two Fingers)

Pinch

Rotation

The first thing you need to do is add them to your interface.
Adding Gesture Recognizers
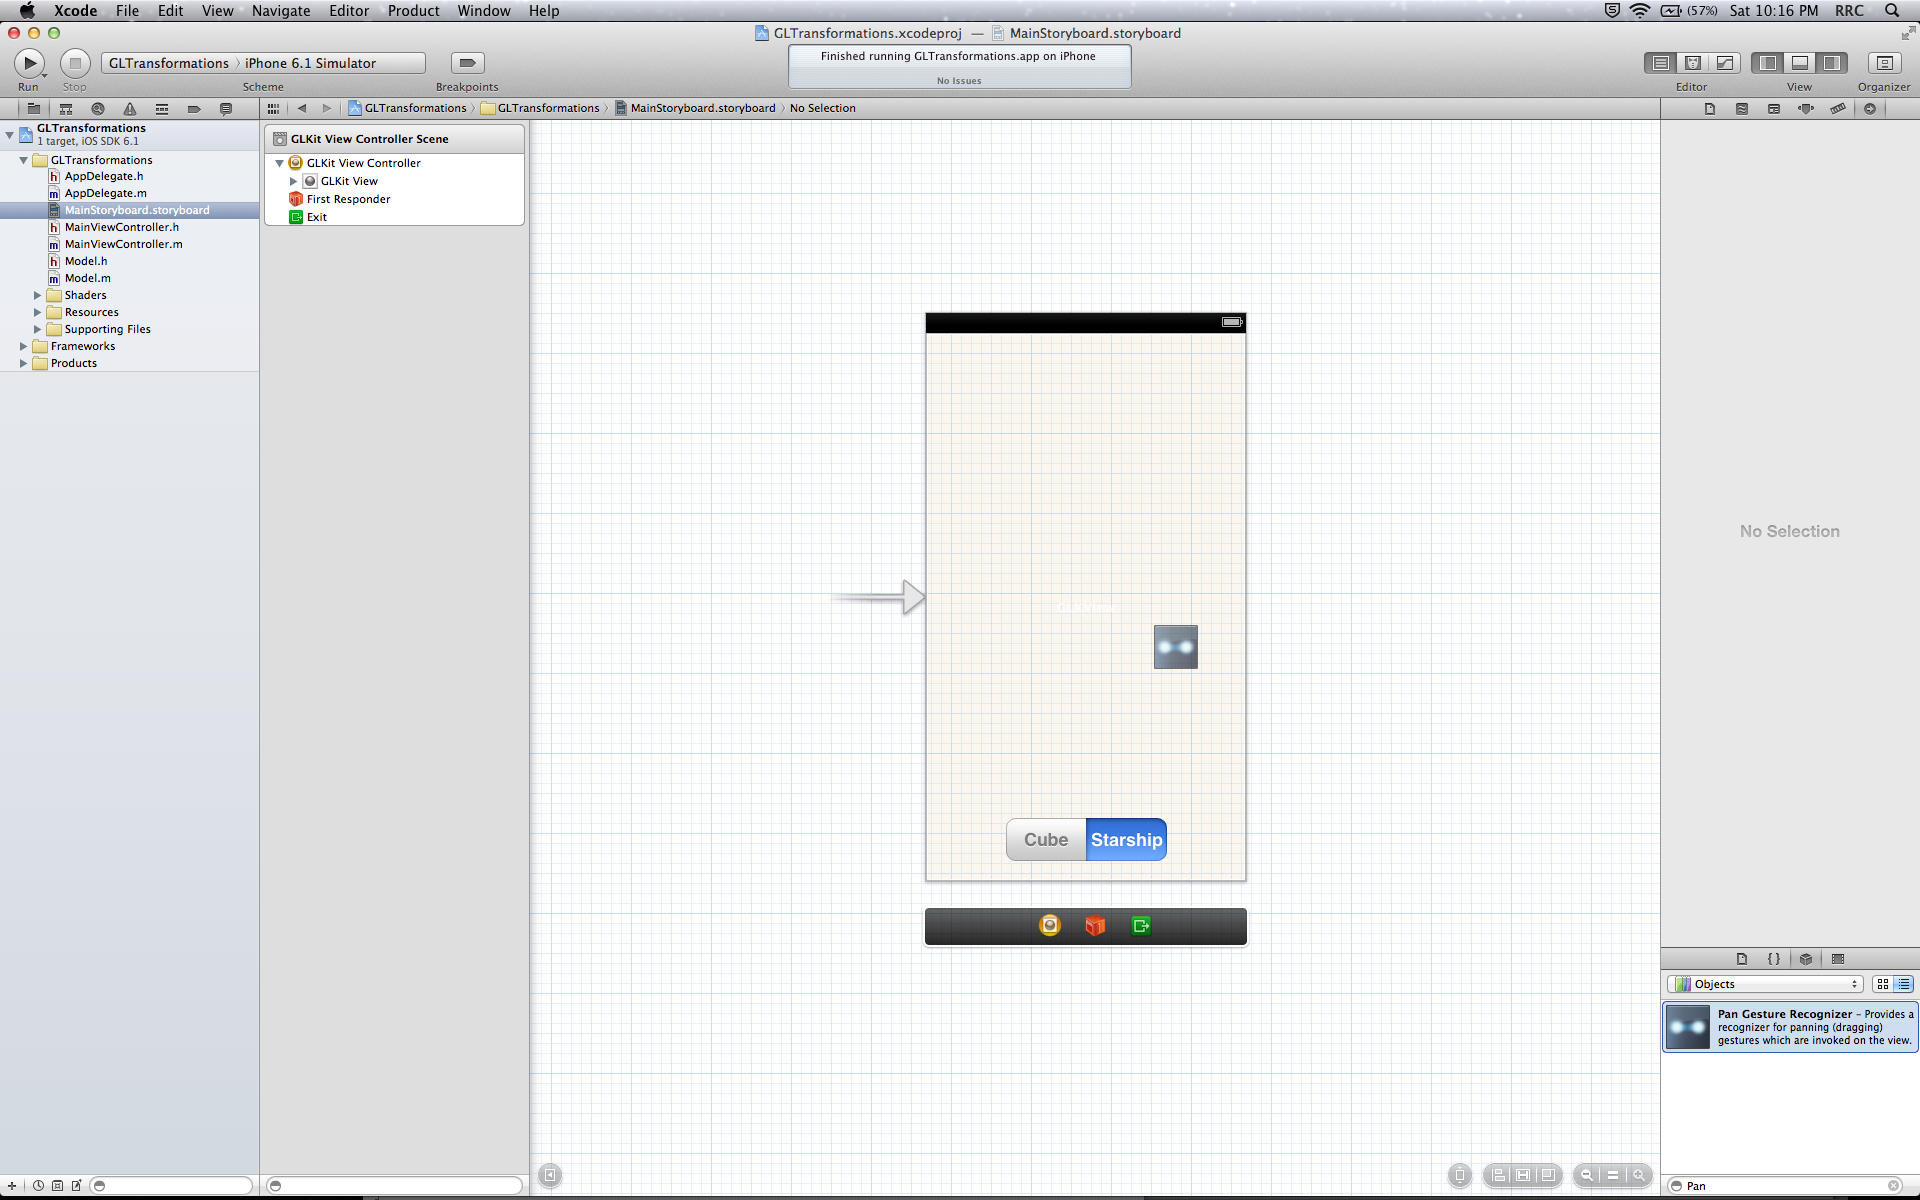
Open MainStoryboard.storyboard and drag a Pan Gesture Recognizer from your Object library and drop it onto your GLKit View, as shown below:
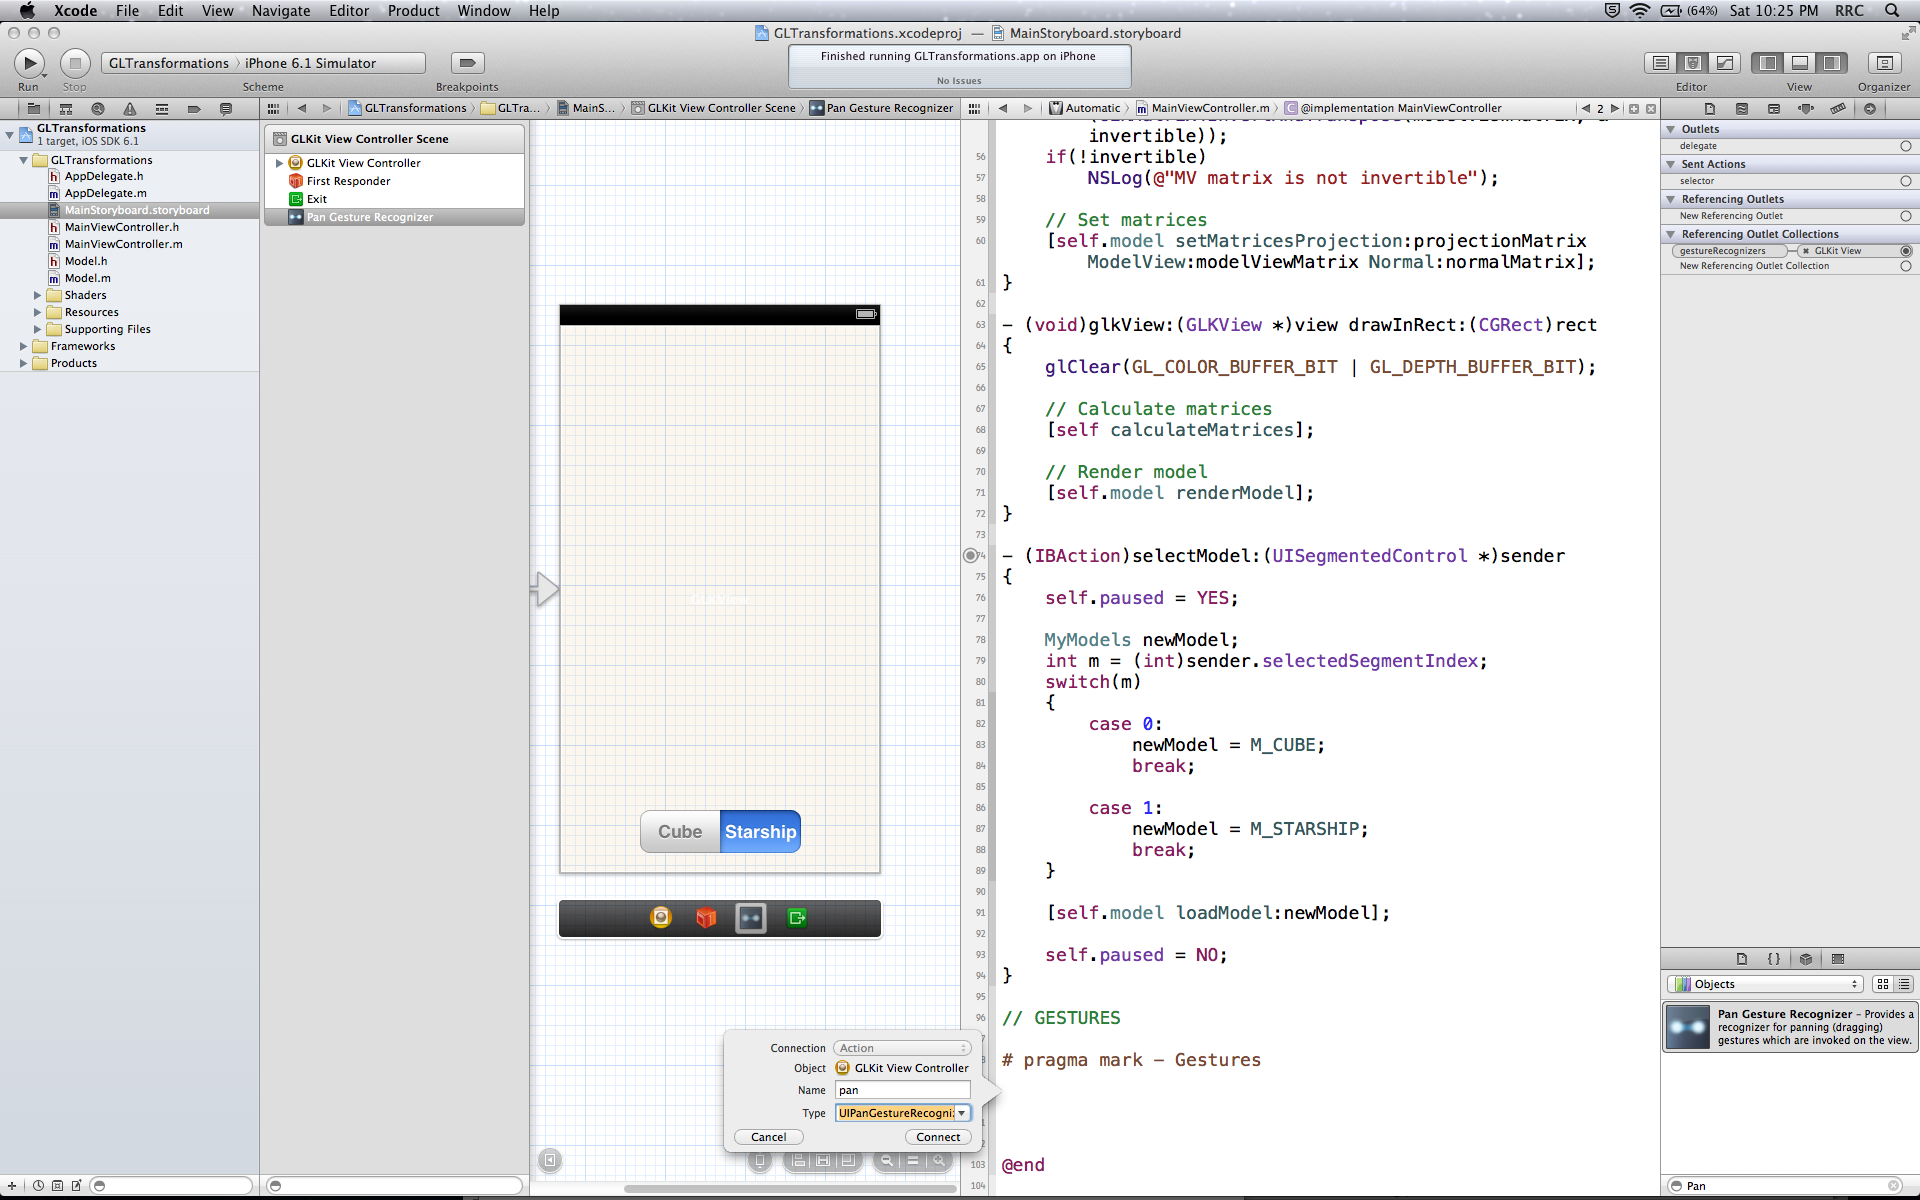
Next, show the Assistant editor in Xcode with MainStoryboard.storyboard in the left window and MainViewController.m in the right window. Click on your Pan Gesture Recognizer and control+drag a connection from it to MainViewController.m to create an Action in the file. Enter pan for the Name of your new action and UIPanGestureRecognizer for the Type. Use the image below as a guide:
Repeat the process above for a Pinch Gesture Recognizer and a Rotation Gesture Recognizer. The Action for the former should have the Name pinch with Type UIPinchGestureRecognizer, while the latter should have the Name rotation with Type UIRotationGestureRecognizer. If you need help, use the image below:
[spoiler title="Adding Pinch and Rotation Gesture Recognizers"]

[/spoiler]
Revert Xcode back to your Standard editor view and open MainStoryboard.storyboard. Select your Pan Gesture Recognizer and turn your attention to the right sidebar. Click on the Attributes inspector tab and set the Maximum number of Touches to 2, since you’ll only be handling one-finger and two-finger pans.
Next, open MainViewController.m and add the following lines to pan::
// Pan (1 Finger)
if(sender.numberOfTouches == 1)
{
    NSLog(@"Pan (1 Finger)");
}

// Pan (2 Fingers)
else if(sender.numberOfTouches == 2)
{
    NSLog(@"Pan (2 Fingers)");
}
Similarly, add the following line to pinch::
NSLog(@"Pinch");
And add the following to rotation::
NSLog(@"Rotation");
As you might have guessed, these are simple console output statements to test your four new gestures, so let’s do just that: build and run! Perform all four gestures on your device and check the console to verify your actions.
Gesture Recognizer Data
Now let’s see some actual gesture data. Replace both NSLog() statements in pan: with:
CGPoint translation = [sender translationInView:sender.view];
float x = translation.x/sender.view.frame.size.width;
float y = translation.y/sender.view.frame.size.height;
NSLog(@"Translation %.1f %.1f", x, y);
At the beginning of every new pan, you set the touch point of the gesture (translation) as the origin (0.0, 0.0) for the event. While the event is active, you divide its reported coordinates over its total view size (width for x, height for y) to get a total range of 1.0 in each direction. For example, if the gesture event begins in the middle of the view, then its range will be: -0.5 ≤ x ≤ +0.5 from left to right and -0.5 ≤ y ≤ +0.5 from top to bottom.
Pop quiz! If the gesture event begins in the top-left corner of the view, what is its range?
[spoiler title="Pan Gesture Range"]
0.0 ≤ x ≤ +1.0
0.0 ≤ y ≤ +1.0
[/spoiler]
The pinch and rotation gestures are much easier to handle. Replace the NSLog() statement in pinch: with this:
float scale = [sender scale];
NSLog(@"Scale %.1f", scale);
And replace the NSLog() statement in rotation: with the following:
float rotation = GLKMathRadiansToDegrees([sender rotation]);
NSLog(@"Rotation %.1f", rotation);
At the beginning of every new pinch, the distance between your two fingers has a scale of 1.0. If you bring your fingers together, the scale of the gesture decreases for a zoom-out effect. If you move your fingers apart, the scale of the gesture increases for a zoom-in effect.
A new rotation gesture always begins at 0.0 radians, which you conveniently convert to degrees for this exercise with the function GLKMathRadiansToDegrees(). A clockwise rotation increases the reported angle, while a counterclockwise rotation decreases the reported angle.
Build and run! Once again, perform all four gestures on your device and check the console to verify your actions. You should see that pinching inward logs a decrease in the scale, rotating clockwise logs a positive angle and panning to the bottom-right logs a positive displacement.