OpenGL ES Transformations with Gestures
Learn all about OpenGL ES Transformations by making a 3D, gesture-based model viewer. By Ricardo Rendon Cepeda.
X- and Y-Axis Rotation With the Two-Finger Pan Gesture
This implementation for rotation about the x-axis and/or y-axis is very similar to the one you just coded for rotation about the z-axis, so let’s start with a little challenge!
Add two new variables to Transformations.m, _right and _up, and initialize them inside your class initializer. These variables represent two 3D vectors, one pointing right and the other pointing up. Take a peek at the instructions below if you’re not sure how to implement them or if you want to verify your solution:
[spoiler title="Right and Up Vectors"]
Add the following lines inside your @interface extension:
GLKVector3      _right;
GLKVector3      _up;
Then, initialize them inside initWithDepth:Scale:Translation:Rotation: by adding the following lines:
_right = GLKVector3Make(1.0f, 0.0f, 0.0f);
_up = GLKVector3Make(0.0f, 1.0f, 0.0f);
[/spoiler]
For an added challenge, see if you can initialize your (x,y) rotation properly, just as you did for your z-axis rotation with the angle r.z and the vector _front. The correct code is available below if you need some help:
[spoiler title="Rotation Initialization"]
Add the following lines to initWithDepth:Scale:Translation:Rotation::
r.x = GLKMathDegreesToRadians(r.x);
r.y = GLKMathDegreesToRadians(r.y);
Also add these lines, which should go before the existing assignment that rotates around the z-axis:
_rotationEnd = GLKQuaternionMultiply(GLKQuaternionMakeWithAngleAndVector3Axis(-r.x, _right), _rotationEnd);
_rotationEnd = GLKQuaternionMultiply(GLKQuaternionMakeWithAngleAndVector3Axis(-r.y, _up), _rotationEnd);
[/spoiler]
Good job! There’s not a whole lot of new code here, so let’s keep going. Still in Transformations.m, add the following lines to rotate:withMultiplier:, just above dz:
float dx = r.x - _rotationStart.x;
float dy = r.y - _rotationStart.y;
Once again, this should be familiar—you’re just repeating your z-axis logic for the x-axis and the y-axis. The next part is a little trickier, though…
Add the following lines to rotate:withMultiplier:, just after _rotationStart:
_rotationEnd = GLKQuaternionMultiply(GLKQuaternionMakeWithAngleAndVector3Axis(dx*m, _up), _rotationEnd);
_rotationEnd = GLKQuaternionMultiply(GLKQuaternionMakeWithAngleAndVector3Axis(dy*m, _right), _rotationEnd);
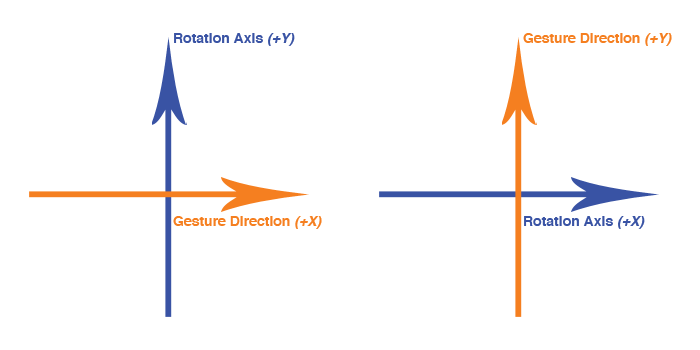
For the z-axis rotation, your implementation rotated the ship about the z-axis and all was well, because that was the natural orientation of the gesture. Here, you face a different situation. If you look closely at the code above, you’ll notice that dx rotates about the _up vector (y-axis) and dy rotates about the _right vector (x-axis). The diagram below should help make this clear:
And you finally get to use m! A pan gesture doesn’t report its values in radians or even degrees, but rather as 2D points, so m serves as a converter from points to radians.
Finish the implementation by opening MainViewController.m and replacing the contents of your current two-touch else if conditional inside pan: with the following:
const float m = GLKMathDegreesToRadians(0.5f);
CGPoint rotation = [sender translationInView:sender.view];
[self.transformations rotate:GLKVector3Make(rotation.x, rotation.y, 0.0f) withMultiplier:m];
The value of m dictates that for every touch-point moved in the x- and/or y-direction, your model rotates 0.5 degrees.
Build and run! Your model is fully rotational. Woo-hoo!
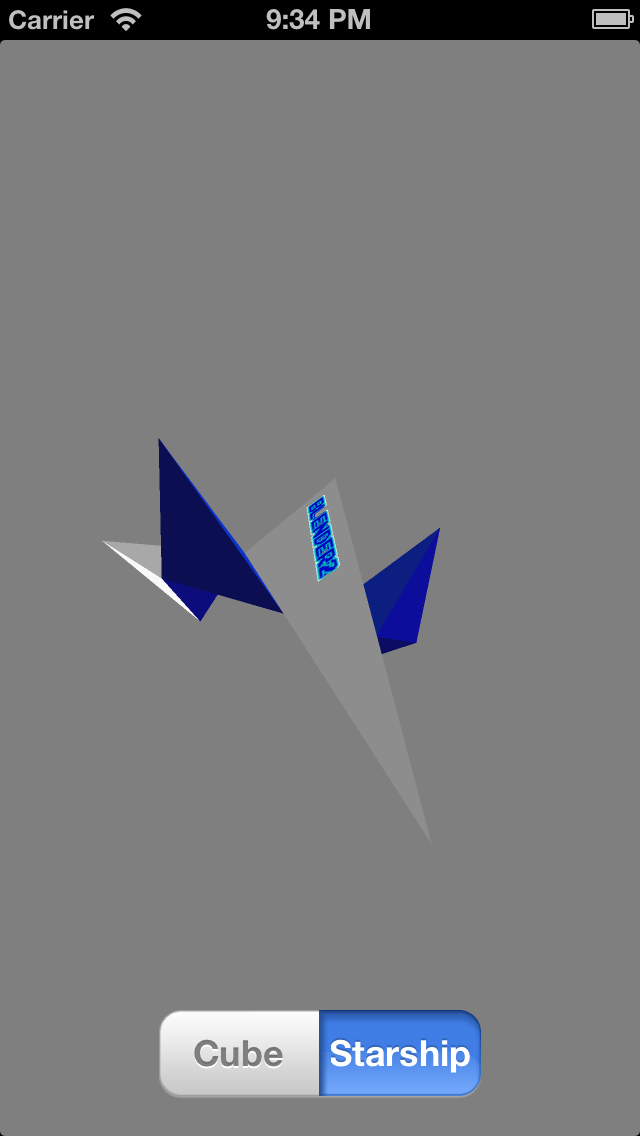
Nice one—that’s a pretty fancy model viewer you’ve built!
Locking Your Gestures/Transformations
You’ve fully implemented your transformations, but you may have noticed that sometimes the interface accidentally alternates between two transformations—for example, if you remove a finger too soon or perform an unclear gesture. To keep this from happening, you’ll now write some code to make sure your model viewer only performs one transformation for every continuous touch.
Open Transformations.h and add the following enumerator and property to your file, just below your @interface statement:
typedef enum TransformationState
{
    S_NEW,
    S_SCALE,
    S_TRANSLATION,
    S_ROTATION
}
TransformationState;

@property (readwrite) TransformationState state;
state defines the current transformation state of your model viewer app, whether it be a scale (S_SCALE), translation (S_TRANSLATION) or rotation (S_ROTATION). S_NEW is a value that will be active whenever the user performs a new gesture.
Open Transformations.m and add the following line to start:
self.state = S_NEW;
See if you can implement the rest of the transformation states in their corresponding methods.
[spoiler title="Transformation States"]
Add the following lines to…
scale:
self.state = S_SCALE;
translate:withMultiplier:
self.state = S_TRANSLATION;
rotate:withMultiplier:
self.state = S_ROTATION;
[/spoiler]
Piece of cake! Now open MainViewController.m and add a state conditional to each gesture. I’ll give you the pan: implementations for free and leave the other two as a challenge. :]
Modify pan: to look like this:
- (IBAction)pan:(UIPanGestureRecognizer *)sender
{
    // Pan (1 Finger)
    if((sender.numberOfTouches == 1) &&
        ((self.transformations.state == S_NEW) || (self.transformations.state == S_TRANSLATION)))
    {
        CGPoint translation = [sender translationInView:sender.view];
        float x = translation.x/sender.view.frame.size.width;
        float y = translation.y/sender.view.frame.size.height;
        [self.transformations translate:GLKVector2Make(x, y) withMultiplier:5.0f];
    }

    // Pan (2 Fingers)
    else if((sender.numberOfTouches == 2) &&
        ((self.transformations.state == S_NEW) || (self.transformations.state == S_ROTATION)))
    {
        const float m = GLKMathDegreesToRadians(0.5f);
        CGPoint rotation = [sender translationInView:sender.view];
        [self.transformations rotate:GLKVector3Make(rotation.x, rotation.y, 0.0f) withMultiplier:m];
    }
}
Click below to see the solution for the other two—but give it your best shot first!
[spoiler title="Pinch and Rotation States"]
- (IBAction)pinch:(UIPinchGestureRecognizer *)sender
{
    // Pinch
    if((self.transformations.state == S_NEW) || (self.transformations.state == S_SCALE))
    {
        float scale = [sender scale];
        [self.transformations scale:scale];
    }
}

- (IBAction)rotation:(UIRotationGestureRecognizer *)sender
{
    // Rotation
    if((self.transformations.state == S_NEW) || (self.transformations.state == S_ROTATION))
    {
        float rotation = [sender rotation];
        [self.transformations rotate:GLKVector3Make(0.0f, 0.0f, rotation) withMultiplier:1.0f];
    }
}
[/spoiler]
Build and run! See what cool poses you can set for your model and have fun playing with your new app.

Congratulations on completing this OpenGL ES Transformations With Gestures tutorial!
Where to Go From Here?
Here is the completed project with all of the code and resources from this tutorial. You can also find its repository on GitHub.
If you completed this tutorial, you’ve developed a sophisticated model viewer using the latest technologies from Apple for 3D graphics (GLKit and OpenGL ES) and touch-based user interaction (gesture recognizers). Most of these technologies are unique to mobile devices, so you’ve definitely learned enough to boost your mobile development credentials!
You should now understand a bit more about basic transformations—scale, translation and rotation—and how you can easily implement them with GLKit. You’ve learned how to add gesture recognizers to a View Controller and read their main event data. Furthermore, you’ve created a very slick app that you can expand into a useful portfolio tool for 3D artists. Challenge accepted? ;]
If you have any questions, comments or suggestions, feel free to join the discussion below!