Make Your First Android App: Part 1/3
Learn the basics of how to make your first Android app and learn the ins and outs of working with Android Studio. By Matt Luedke.
Running on an Emulator or Device
All right: You’ve got Android Studio and you’ve created an app. Let’s see this app live on an emulator or device!
Press Edit Configurations. You’ll find it marked in the image below. Note that some windows have it moved to the right a little and the option may take a minute to appear as Studio finishes all processes.
![]()
A new dialog will appear showing you some options for Run/Debug Configurations.

Well, you want to run your app, so you must be in the right place. Look where it says Target Device. Here’s where you tell Studio where you want to run the app.
At this point, it would be best if you have an Android device handy — more about readying your device in just a bit. But for those without one, you also have the choice to run on an emulator.
Now, let me say a word about the emulator. Android Studio comes free with the ability to set up a software-based Android device on your computer and run apps on it, browse websites, debug and everything. This capability is known as the Android emulator.
You can set up multiple emulators if you want and you can set the screen size and platform version for each new emulator to whatever you like. This is great, as you can avoid having to buy multiple devices for testing.
The downside to the emulator is a big one. Unfortunately, the emulator is painfully slow. For those coming from iOS development, you will really start to appreciate the iOS Simulator after using the Android emulator.

All of that being said… let’s set up an emulator anyway.
In Target Device, click the Emulator option, followed by the button to the right of the drop-down.
![]()
Note: You need to select the button to the right only if you want to create a new emulator. If your Android development set up already contains some emulators you’ve created, then you can simply select one of those from the drop down instead.
Note: You need to select the button to the right only if you want to create a new emulator. If your Android development set up already contains some emulators you’ve created, then you can simply select one of those from the drop down instead.
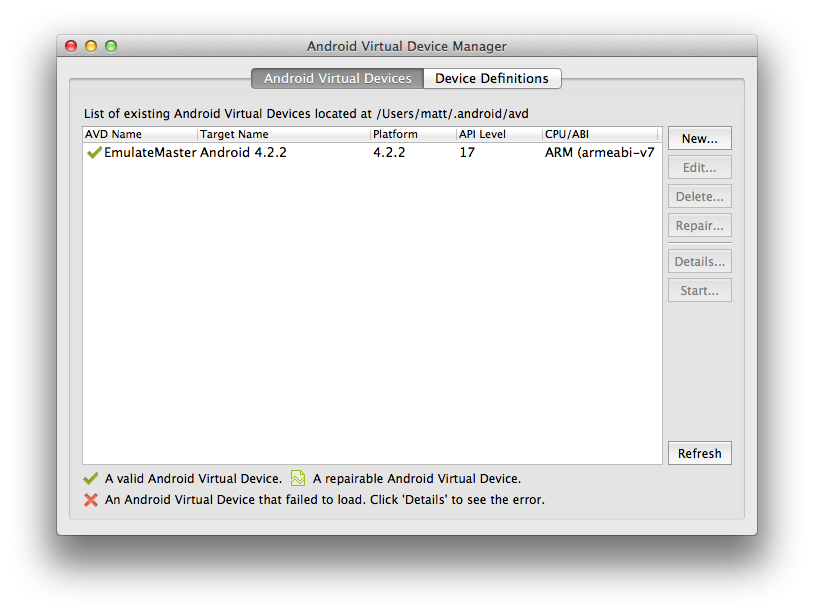
This opens the Android Virtual Device (AVD) Manager. This is the place where you can create, edit, and delete the various emulators you might want to work with. Since your list is probably empty (if you are just starting Android development), you need to create your first one. Click New.
![]()
Now you see a bunch of options to create your emulator:

There are options to base your virtual device off a real one (I chose Nexus 4), set its Target API Level (I chose 4.2.2 Jelly Bean) and so on. You have some flexibility here, but if you’re not sure what to choose, you can copy my settings from the image above. Once you’re ready, click OK.
You’ll see a brief summary pop-up of the options you just chose. Dismiss that, and then your newly-created emulator is on the list and ready to run your app!
Now, close the AVD Manager to go back to the Run/Debug Configurations dialog. You now have the option to choose your new AVD as the default configuration:

Set the new AVD as the default configuration, click Apply and then OK. You’re back at Android Studio’s main view. Now that you’ve configure everything, there’s but one step left…
Click the Run button. It looks like a “play” icon.

You may have to wait a while as the emulator loads, and you may even need to try it more than once for the emulator to get it right, but once it’s ready, you should see something like this:

Congratulations! You made your first Android app!
Android apps used to be something you only interacted with on the consumer side, but now… you’re a creator. There’s power and possibility in that. It’s worth taking a moment to think about where you might want to go with this newfound ability.
When you’re ready, you need to revisit something I quickly glossed over earlier — testing on devices.
Navigating the Android Candy Store
One of Android’s advantages, the diversity of devices that can run the platform, is also a major complication for developers. You have to consider just about everything, such as the items on the following non-exhaustive list, to be variable:
- Screen sizes, both physically and in terms of pixels.
- Screen density, or the number of pixels per mm.
- The ratio of the screen width to the screen height.
- The number of simultaneous touches the touchscreen can register.
- The quantity and positioning (front vs. back) of cameras.
- Bluetooth capabilities.
- Platform and software versions.
If you want to make an app that will run on a hundred different devices, how can you tell if it’s going to work? Well, there are six main strategies I can recommend:
- Nail down your target.
- Filter your manifest.
- Check Android’s best practices.
- Emulate.
- Pick at least one representative device.
- Fake other screens on your device.
Let’s go through them one by one.
1. Nail down your target.
Does your app have some specific, indispensable hardware or software requirement? What about nice-to-haves? Take stock of device needs early, so that if your app is camera-based, or communicates with a specific product through Bluetooth, you’re ready to target your app to devices with those capabilities.
Check the often-updated Android Dashboards to see the prevalence of platform versions as well as screen sizes and densities. You can see, for example, that your choice in this tutorial to only support Ice Cream Sandwich and higher will (at press time) lose you about a quarter of Android users. It’s a reasonable sacrifice in your case.