ProBuilder Tutorial: Rapid Prototyping in Unity
ProBuilder is a Unity in-editor prototyping tool that has everything you need to block out your level and create new game worlds in the blink of an eye. This tutorial will teach you the basics of how to use it. By Mauro Fuentes.
Vertex Painting
Moving on, do you want to know how to paint your tree? Be warned: This is the most difficult, arduous, backbreaking, titanic action ever performed by a game engine in the history of game engines.
Select the Trunk GameObject in the Hierarchy. Press F to focus. Locate the Vertex Colors button on the ProBuilder’s tab.

A new window will pop up. Press Apply on the color you want. If you don’t like any of them, click the dropper on the right and select the color you want.

Done! Next!
Seriously, that’s all.
Paint the top of the tree, and that’s it for this part.
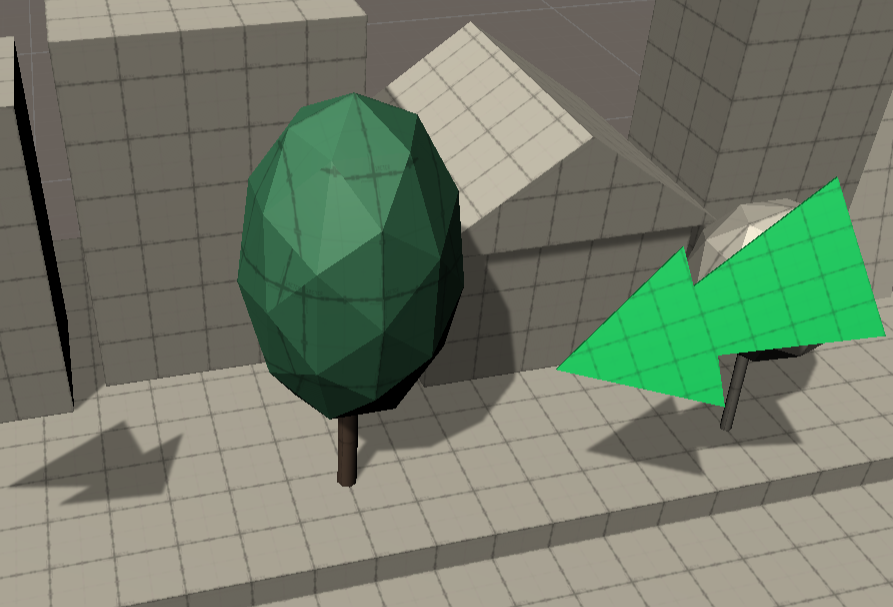
Remember that the prototype should resemble the archetype. Green means the tree is alive and that it has leaves. Imagine what a yellowish color would mean.
Congratulations!
Remember that this tutorial is about prototyping, but it’s also about showing off ProBuilder and what you can do with it. So, sometimes you need to deliver prototypes that are better or more specific than a bunch of cubes. After all, games are all about conveying and projecting sensations and feelings.
So, suppose you want to block out a simple city. Suppose you want to convey some humor and, at the same time, transmit a sense of tranquility and familiarity. Well, add a park, add people, and add some common everyday stuff.
What? A coffee shop? Why not a donut shop! Welcome to WenderDonuts!

If you take a look around, everything has been made, painted and arranged using ProBuilder. It’s your turn to add something. Follow the next part of this tutorial.
Making a Donut
Inhale deeply. Can you smell it? The smell of a fresh-baked chocolaty donut? Aaah.
Locate Third Level in the Hierarchy. Go to You Build Donut Here. Press F to focus.
This time, you’ll need to trust that Unity will create your procedural shape in place. Press Control-Shift-K. You might be tempted to create a cube, or to create a cylinder and stretch it, but Unity has put a Torus in the Shape Selector.
Select the Torus shape, but before starting to change it, it’s a good idea to have it in the right place.
Make sure you are in Object Selection Mode, then use the Move and Rotate tools to position it the way you like until you feel it’s part of the WenderDonuts sign.

Now tweak the values. Although they should be self-explanatory, it’s best to familiarize yourself with them. For instance, you don’t need to change the Rows or the Columns amount unless you see the quality of the mesh is too low.
In this case, you only need to change Radius and Tube Radius until you see something similar looking to an edible donut.
Once your donut is in place, press Build. Parent the donut to You Build Donut Here.
In RayWenderLand, donuts without glaze are illegal (and that’s punishable by a paddling). As you already know how to paint, it’s just a matter of selecting faces. Select the donut, focus in on it with F, and change to Face Selection mode.
Now, you could be tempted to select faces one by one. But, it’s easier to select half a column. Then, if you press Alt-G or the Grow Selection button, Unity will select all rows across.
Click Vertex Colors to select a color for the glaze area face selection. Now to do the other side. Press Control-I or click the Invert Selection button in the ProBuilder editor. Choose Vertex Colors again to choose a different color for the other side. Have fun!
As it’s difficult to explain face selection by typing, here’s a visual aid:

Add some sprinkles to make it yummier! Use MMB to position the editor location for each sprinkle placement. Press Control-Shift-K to open the Shape Tool window. Select the Cube shape and hold Alt while moving values around. This allows you to make precise adjustments to add sprinkles.
These values should be OK:
- X = 0.08
- Y = 0.39
- Z = 0.1
Click Build. Now make some copies, paint them with Vertex Colors, and rotate them to your liking. Remember to parent them to the Donut. Then you’re done!


Making an Arch
Now that you’ve mastered donuts, it’s time to make an arch. The intersection between the street and the bridge seems to be a good place for this, so go to You Build Arch Here.
The instructions must look familiar to you by now. Can you do this step from memory? Try it!
After you press Control-Shift-K, search for Arch. In this case, the arch needs some tweaking.
First of all, in Object Selection mode, change to the Rotate tool and make sure the arch crosses the street.
Ironically, it’s difficult to picture the size of the arch in perspective view. But Unity has you covered with Isometric and Orthographic views.
The Scene window shows the world coordinates in the upmost right corner. Press Y to look from above and then press Top (for the orthographic view).
If your cat stumbled over your keyboard and messed up your Arch shape settings, don’t panic. Use these values instead:
- Radius: 6.5
- Thickness: 1
- Depth: 1
- Number of Sides: 8
- Arch Degrees: 180

Once you’re satisfied with the values, press Build.
Now, Select the two faces of the Arch that are facing down (Use Face Selection mode). Press Control-E to extrude, and move them near to the floor. That’s a nice arch portal.

Polygon Shapes
It’s awesome to have procedural shapes, cubes, cylinders and more, but what if you want to make a gingerbread person? You guessed it: Unity can do that too.
Follow the usual method step by step, only this time, instead of creating a new shape, select New Poly Shape from ProBuilder’s tab.
Your mouse is now a vertex creator. So, every time you click, Unity will ‘catch’ a Vector3 position in the editor and create a vertex there. You can go on drawing whatever you want. To confirm your creation, press Enter.
Careful here! After following that last step, your mouse will take the perpendicular (normal) direction to the original figure you’ve drawn and extrude it.
You’ll confirm the final step by clicking once more. It’s OK, you can go back using Control-Z, as Unity’s undo is awesome and quick.
Save the scene to capture your progress.
