Elegant Networking in Flutter with Chopper
Learn how to easily create REST API calls and parse JSON data from the internet using the Flutter networking library Chopper. By Kevin D Moore.
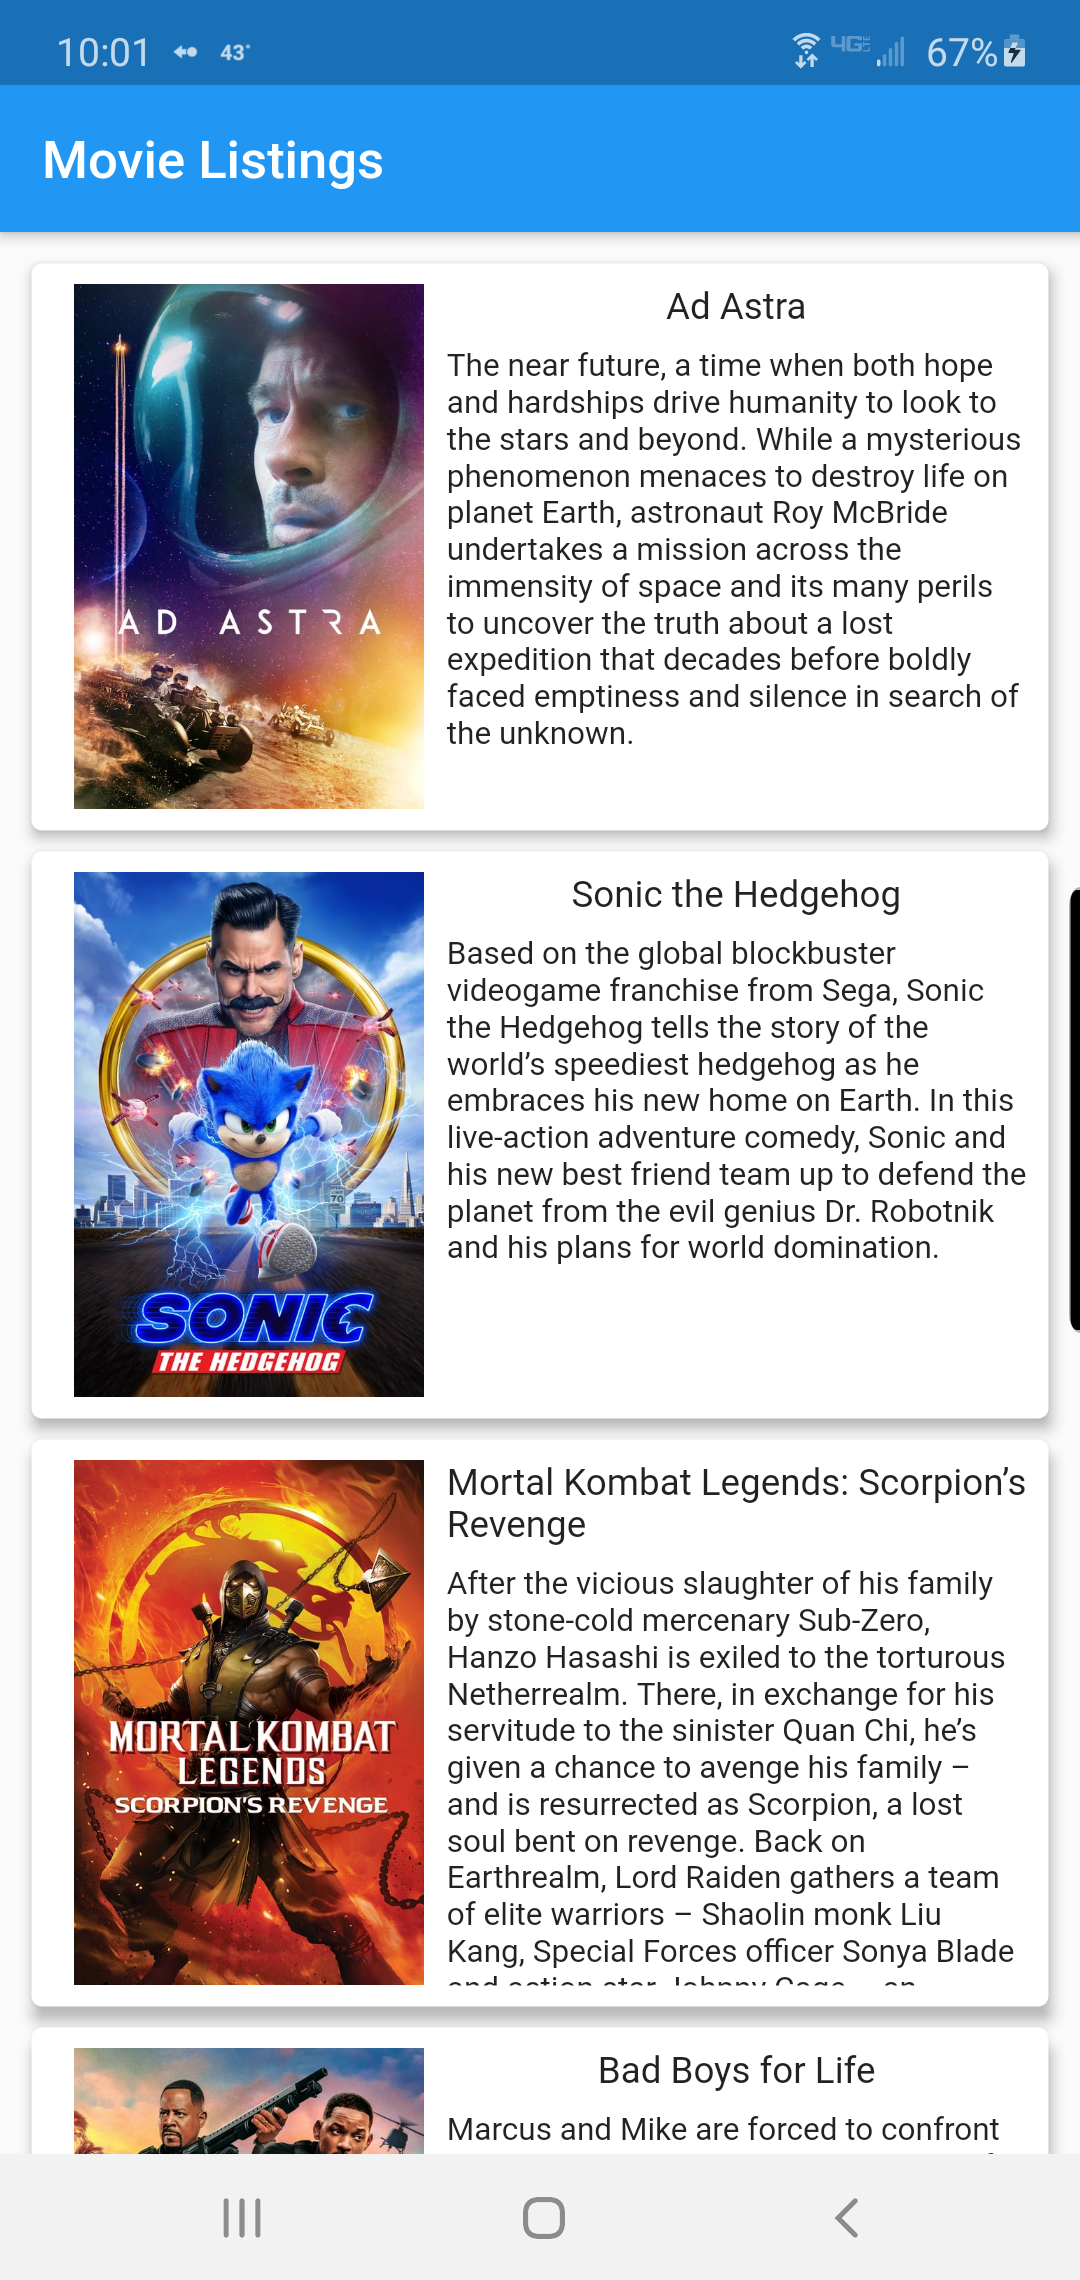
UI: Movie Listing
To access your MovieService class, you’ll use the Provider library to create the class and provide it to all widgets.
In main.dart, in the build method, replace return MaterialApp( with:
    return Provider(
        create: (_) => MovieService.create(),
        dispose: (_, MovieService service) => service.client.dispose(),
        child: MaterialApp(
At the top, add the needed import statements:
import 'package:movies/service/movie_service.dart';
import 'package:provider/provider.dart';
You’ll need to add an extra closing parenthesis at the end just before the ;. This uses Provider which creates the MovieService class in the create section and calls dispose() in the dispose section.
Open movie_listings.dart. At the top, add the needed import statements:
import 'package:chopper/chopper.dart';
import 'package:movies/models/popular.dart';
import 'package:movies/service/movie_service.dart';
import 'package:provider/provider.dart';
Replace the _buildBody method with:
// 1
FutureBuilder<Response<Popular>> _buildBody(BuildContext context) {
    return FutureBuilder<Response<Popular>>(
      // 2
      future: Provider.of<MovieService>(context).getPopularMovies(),
      builder: (context, snapshot) {
        // 3
        if (snapshot.connectionState == ConnectionState.done) {
          // 4
          if (snapshot.hasError) {
            return Center(
              child: Text(
                snapshot.error.toString(),
                textAlign: TextAlign.center,
                textScaleFactor: 1.3,
              ),
            );
          }
          // 5
          final popular = snapshot.data.body;
          // 6
          return _buildMovieList(context, popular);
        } else {
          // 7
          // Show a loading indicator while waiting for the movies
          return Center(
            child: CircularProgressIndicator(),
          );
        }
      },
    );
  }
Here’s a breakdown:
- This method returns a FutureBuilder.
- It gets the MovieService from the Provider and calls
getPopularMovies, which returns a Future. - It checks to see if the call is done.
- If there’s an error, it shows the error string.
- The body contains the Popular class.
- Use
Call _buildMovieListto build the ListView of movies. - This shows a progress indicator if the results are not ready.
Now replace the _buildMovieList method with:
  ListView _buildMovieList(BuildContext context, Popular popular) {
    // 1
    return ListView.builder(
      // 2
      itemCount: popular.results.length,
      padding: EdgeInsets.all(8),
      itemBuilder: (context, index) {
        // 3
        return Card(
          elevation: 4,
          child: Padding(
            padding: const EdgeInsets.all(8.0),
            child: Row(
              mainAxisAlignment: MainAxisAlignment.start,
              children: <Widget>[
                Container(
                  width: 150,
                  height: 200,
                  decoration: BoxDecoration(
                      image: DecorationImage(
                          // 4
                          image: NetworkImage(
                              IMAGE_URL + popular.results[index].posterPath),
                          fit: BoxFit.contain)),
                ),
                Expanded(
                  child: Container(
                    height: 200,
                    child: Column(
                      children: <Widget>[
                        // 5
                        Text(popular.results[index].title,
                          style: TextStyle(fontSize: 14),
                        ),
                        SizedBox(
                          height: 8,
                        ),
                        Expanded(
                            child: Container(
                                child: Text(
                          // 6
                          popular.results[index].overview,
                          style: TextStyle(fontSize: 12),
                        ))),
                      ],
                    ),
                  ),
                )
              ],
            ),
          ),
        );
      },
    );
  }
The above code is responsible for building up the list of cards to display your newly fetched movies. Breaking it down a bit more, it:
- Use ListView.builder to create your ListView.
- Set the itemCount since you know how many items there are.
- Use a Card as the main widget.
- Show the movie image,
- the movie title
- and the movie description.
Run the app and you’ll see the list of movies, each in their card. Depending on popularity, the list may look different.
Where to Go From Here?
Congratulations! That was a lot of work, but you made it. Now you can handle any kind of networking, along with showing images in ListViews.
You can download the final version of this project by using the Download Materials button at the top or bottom of this tutorial.
If you want to learn more about Flutter, there are many Flutter articles on raywenderlich.com
I hope you enjoyed this tutorial. If you have any questions, comments or musings, please join the forum discussion below.