Android Networking With Kotlin Tutorial: Getting Started
In this tutorial, you’ll get started with Android networking by creating a simple app to retrieve and display a list of GitHub repositories. By Fuad Kamal.
Updating the UI
You have successfully made a network request when the user’s device has connectivity. The next step is to update the UI to see the results on the screen.
Defining a Data Model
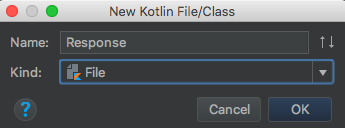
Get started by defining a data model that makes sense of the JSON response. Right-click on the data package in the project materials. From the context menu, select New ▸ Kotlin File/Class. In the dialog, name it Response and choose File for the type.
The file Response.kt will open. Enter the following code:
data class RepoResult(val items: List<Item>)

data class Item(
    val id: Long?,
    val name: String?,
    val fullName: String?,
    val owner: Owner,
    val private: Boolean,
    val htmlUrl: String?,
    val description: String?)

data class Owner(val login: String?, val id: Long?, val avatarUrl: String?)
In Kotlin, data class offers a convenient way to express a value object. RepoResult is a list of Item objects from your JSON response. You can convert your JSON response to model representation from external Android Studio plugins and web plugin like : jsonschema2pojo.
Updating the RecyclerView Adapter
The next step is to open the RepoListAdapter.kt file. You’ll notice that the Adapter accepts a list of hard-coded strings in the parameter. You’ll modify the Adapter for your RecyclerView to accept this more complex object instead from network.
To accomplish this, replace the contents of the file below package with the following:
// Other import statements here
//1
import kotlinx.android.synthetic.main.item_repo.view.*

class RepoListAdapter(private val repoList: RepoResult) : RecyclerView.Adapter<RepoListAdapter.ViewHolder>() {

  override fun onCreateViewHolder(parent: ViewGroup, viewType: Int): ViewHolder {
    //2
    val view = LayoutInflater.from(parent.ctx).inflate(R.layout.item_repo, parent, false)
    return ViewHolder(view)
  }

  override fun onBindViewHolder(holder: ViewHolder, position: Int) {
    //3
    holder.bindRepo(repoList.items[position])
  }

  //4
  override fun getItemCount(): Int = repoList.items.size

  class ViewHolder(view: View) : RecyclerView.ViewHolder(view) {
    fun bindRepo(repo: Item) {
      //5
      itemView.username.text = repo.owner.login.orEmpty()
      //6
      itemView.repoName.text = repo.fullName.orEmpty()
      //7
      itemView.repoDescription.text = repo.description.orEmpty()
    }
  }
}
Here’s what’s happening:
- The import statement uses Kotlin Android Extensions. This allows you to reference components from the XML layout directly in your Kotlin code.
-
R.layout.item_repoprovides the layout defined in item_repo.xml - You reference your position in
Itemrather than the position in the hard-coded list. - This response sets the list size rather than the hard-coded list.
- You pass
Item, as defined earlier in your data class. - Then you populate the username text defined in item_repo.xml with the
owner.login, defined in your data class definitions. - Finally, you populate the name of the repository and the repository description.
An important best practice when dealing with JSON responses from an API: Don’t assume every value will be non-empty. If there’s no value for the field, make it an empty string. This practice also illustrates some of Kotlin’s safety features. Your app will no longer crash because it tried to access a null value.
Adding the GSON Library
In this section, you will now use a library to simplify the serialization and deserialization. GSON can be used to change JSON string to your model objects and model back to JSON string. Now, open the build.gradle file of the app module and add the following dependency:
implementation 'com.google.code.gson:gson:2.8.6'
This addition lets you use the GSON library in your code.
Click on sync project at the top of Android Studio to resolve dependency. Now in the next section you will be using GSON to resolve the model objects from your JSON string.
Updating the Network Call
Open Request.kt. Then replace the entire class definition of Request with the following:
class Request {

  companion object {
    //1
    private const val URL = "https://api.github.com/search/repositories"
    private const val SEARCH = "q=super+mario+language:kotlin&sort=stars&order=desc"
    private const val COMPLETE_URL = "$URL?$SEARCH"
  }
  //2
  fun run(): RepoResult {
    //3
    val repoListJsonStr = URL(COMPLETE_URL).readText()
    //4
    return Gson().fromJson(repoListJsonStr, RepoResult::class.java)
  }
}
Here’s what’s happening in the code above:
- You define a companion object to hold the API endpoint (URL), a search term and a concatenated string of the two.
-
run()now returns a data structure,RepoResult, which you defined in Response.kt. - You execute the actual request using
readText(). - You use the
GSONlibrary to parse the JSON into your model.
Open MainActivity.kt. In onCreate(), remove repoList.adapter near the top of the method. Then update the code inside the first if with the following:
doAsync {
  val result = Request().run()
  uiThread {
    repoList.adapter = RepoListAdapter(result)
  }
}
This code replaces the toast message with a single line of code. That line updates RecyclerView with the response from your network call.
Delete the declaration for items as you’re no longer using the hard-coded list.
Build and run. You’ll see a list of repositories from GitHub in your UI:

Cool! Your app connected to the GitHub API and retrieved a list of repositories for your perusal.
Lengthening Your Search Result

Logcat has a size limit, which may prevent you from seeing the entire JSON if you have a large number of results. But if you’re populating the UI with your actual search results, you can scroll to see them in your UI. Here’s how.
Open the Request class and replace search with the following:
private const val SEARCH = "q=language:kotlin&sort=stars&order=desc&?per_page=50"
This line will change the search query for the API to give you 50 results for one request. Hence, this will populate list with 50 items.
Build and run. You should see more search results now.

Updating Your App With Retrofit
In the days of Java, performing network operations on Android was tedious. It’s much simpler with Kotlin. The URL APIs has its own limitations for example it does not offers you good exception handling API. This brings you the need of a better shaped APIs.
Hence next, you’ll update your app to use the most popular third-party library, Retrofit from Square. As a bonus, you’ll glam up your UI with some images, too.
Introducing Retrofit
Retrofit is an Android and Java library that excels at retrieving and uploading structured data, such as JSON and XML. This library makes HTTP requests using OkHttp, another library from Square.
OkHttp is an efficient HTTP client that supports synchronous and asynchronous calls. It handles the opening and closing of connections along with InputStream-to-string conversion. It’s compatible with Android 2.3 and above.
With Retrofit, you can specify any of the following libraries for the data serialization and deserialization:
To use Retrofit, add the following dependencies to build.gradle in the app module:
implementation 'com.squareup.retrofit2:retrofit:2.6.3'
implementation 'com.squareup.retrofit2:converter-gson:2.6.3'
This will add the retrofit dependency for creating network requests and the second dependency adds a converter which automatically integrates GSON to deserialize the JSON and get the model and vice-versa.
Finally, delete the GSON dependency you added earlier: implementation 'com.google.code.gson:gson:2.8.6'. You no longer need it because the libraries specified with Retrofit handle the parsing and integrates GSON. Then, resync your Gradle files.
For all these dependencies, the version numbers above represent availability at the time of writing. Double-check the current versions, and use those in your build.gradle file.
Click to the sync project button at the top of Android Studio to resolve the dependencies.