Introduction to the SpriteKit Scene Editor
Learn how to use the visual scene editor to create SpriteKit games with almost no code! By Caroline Begbie.
Reference Nodes
The scene editor allows you to reference content between different .sks (scene) files, meaning you can put together a bunch of sprites in a single archived scene and then reference the archive from another scene.
You might wonder why you would need more than one scene. There are a couple of reasons:
- You can reuse the same collection of sprites in multiple different scenes, so you don’t have to recreate them over and over again.
- If you need to change the referenced content in all of your scenes, all you have to do is edit the original scene and the content automatically updates in every scene that references it. Smart, right?
Creating a Wall Scene
And now that you’ve read about it, you’ll create some reusable components. For your game, it would be nice if you could add some walls, so kick off this part by adding a wall scene.
In the project navigator, control-click the Scenes folder and from the pop-up menu, click New File…. Choose the iOS/Resource/SpriteKit Scene file template, and then click Next. Call the new file Wall.sks, and save it in the project’s folder.
Xcode automatically opens the newly created Wall.sks file and presents you with an empty editor window. In exactly the same way as before, your task is to resize the scene to your needs and add some sprites. Set the scene size to be 50 x 400 pixels.
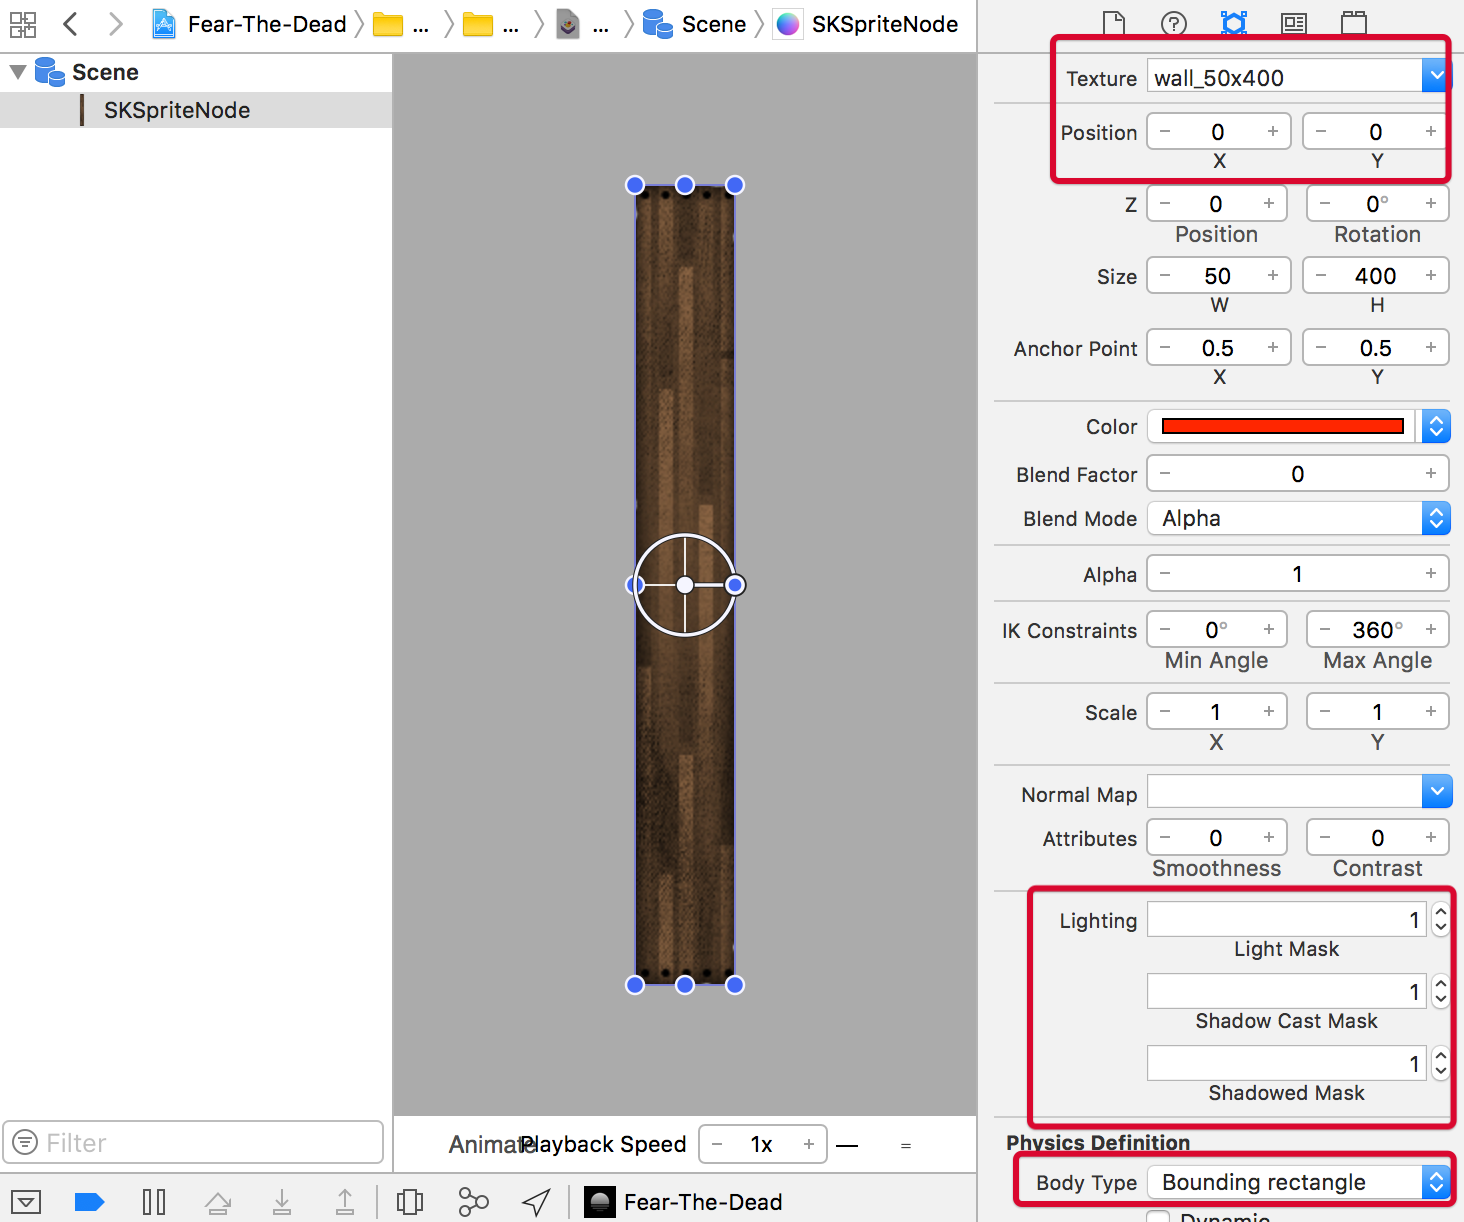
Next, select a Color Sprite from the Object Library, drop it onto the scene and add the following properties to it:
- Texture: wall_50x400
- Position: (0, 0)
- Size: 50 x 400
- Light, Shadow Cast, and Shadowed Masks: 1
- Body Type: Bounding rectangle
- Dynamic, Allows Rotation, Affected By Gravity: Unchecked
That’s it – you now have a reusable wall!
Creating a Room Scene
Now that you have a reusable wall, you have the building blocks to create a new reusable room scene. Just like before, in the project navigator, control-click the Scenes folder and select New File…. Choose the SpriteKit Scene file template, click Next, name the new file Room.sks and save it in the project’s folder. Next, set the scene’s size to be 400 x 400 pixels.
Now, instead of selecting Color Sprite, select a Reference from the Object Library.

Drag and drop three reference objects onto the scene and give them the following properties:
Wall 1:
- Reference: Wall – this is the .sks scene archive file you’re referencing
- Position: (-175, 0)
Wall 2:
- Reference: Wall
- Position: (175, 0)
Wall 3:
- Reference: Wall
- Position: (0, -175)
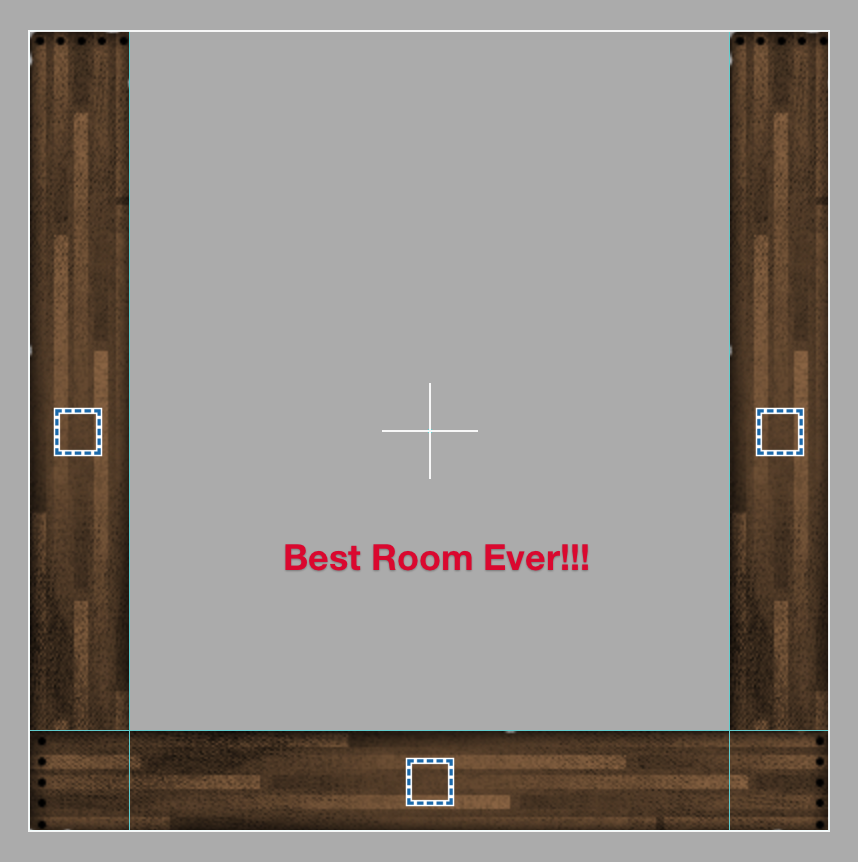
- Rotation: 270
With this in place your room should look as follows:
Adding Rooms and Walls to the level
Go back to GameScene.sks and add a Reference object from the Object Library for each of the following:
Rooms (Reference / Position)
- Room / (-340, 550)
- Room / (340, 550)
- Room / (-340, -90)
Walls (Reference / Position / Rotation)
- Wall / (10, 85) / 90
- Wall / (340, -265) / 90
- Wall / (340, -580) / 90
- Wall / (-165, -755) / 0
That was quite the task, but with these fancy reference objects added your amazing level should look like this:

Build and run the game to see if you can complete your newly created level. It’s harder than it looks…

Positional Audio using SKAudioNode
SKAudioNodes allow you to add positional sound right in your SpriteKit game. Best of all, they are super simple to set up.
All you have to do is specify the sound asset that should play back, as well as the node that will be the listener for positional audio coming from SKAudioNodes. With these in place, SpriteKit automatically calculates volume based on the relative distance of the listener and the SKAudioNode, ensuring immersive, positional audio in your game.
A quiet zombie just isn’t right, so let’s add some sound to make them more, um, undead-like. First, open GameScene.swift, locate didMove(to:), and add the following line underneath the setup of the player:
listener = player
This sets the player as the node listening for positional audio.
Next, directly underneath, change the for-loop for adding zombies so that it looks like this:
// Set up zombies
for child in children {
  if child.name == "zombie" {
    if let child = child as? SKSpriteNode {

      // Add SKAudioNode to zombie
      let audioNode = SKAudioNode(fileNamed: "fear_moan.wav")
      child.addChild(audioNode)

      zombies.append(child)
    }
  }
}
Here you first create an audio node with the file named fear_moan.wav, and then add it to the individual zombie. This ensures that the moaning sound comes from the zombie and only the zombie itself.
Before running your code, add an audio node to your scene. Select GameScene.sks, open the Object Library and locate the Audio object. Drag and drop the object on top of the player and set its Filename to be fear_bg and its parent to be player.
Easy, right?

Build and run the game, and you should be able to hear the zombies moaning and the background music. You should notice the zombie’s audio becoming richer, more centered and louder as it nears the player, which is the listener, and more one-sided and distant as it moves away.
For a more immersive feel, try wearing headphones.
Animations and Action-References
Wouldn’t it be cool if you could also add actions to nodes without having to write it all in code? Well, you can! In the Action Editor View you can drag and drop actions from the Object Library.
To open the Action Editor View, open GameScene.sks and click the Show the Action Editor View icon. This is at the bottom left of the editor panel, to the left of the word Animate:
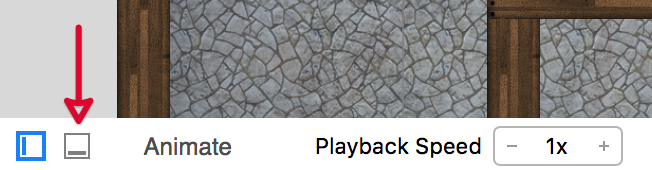
The action editor displays all the nodes in the scene and a timeline with rows that correspond to each node. If you’ve ever worked with animation or video software, you might be familiar with this user interface. You’re going to use the action editor to create a nifty zoom-out effect when you first launch the game.
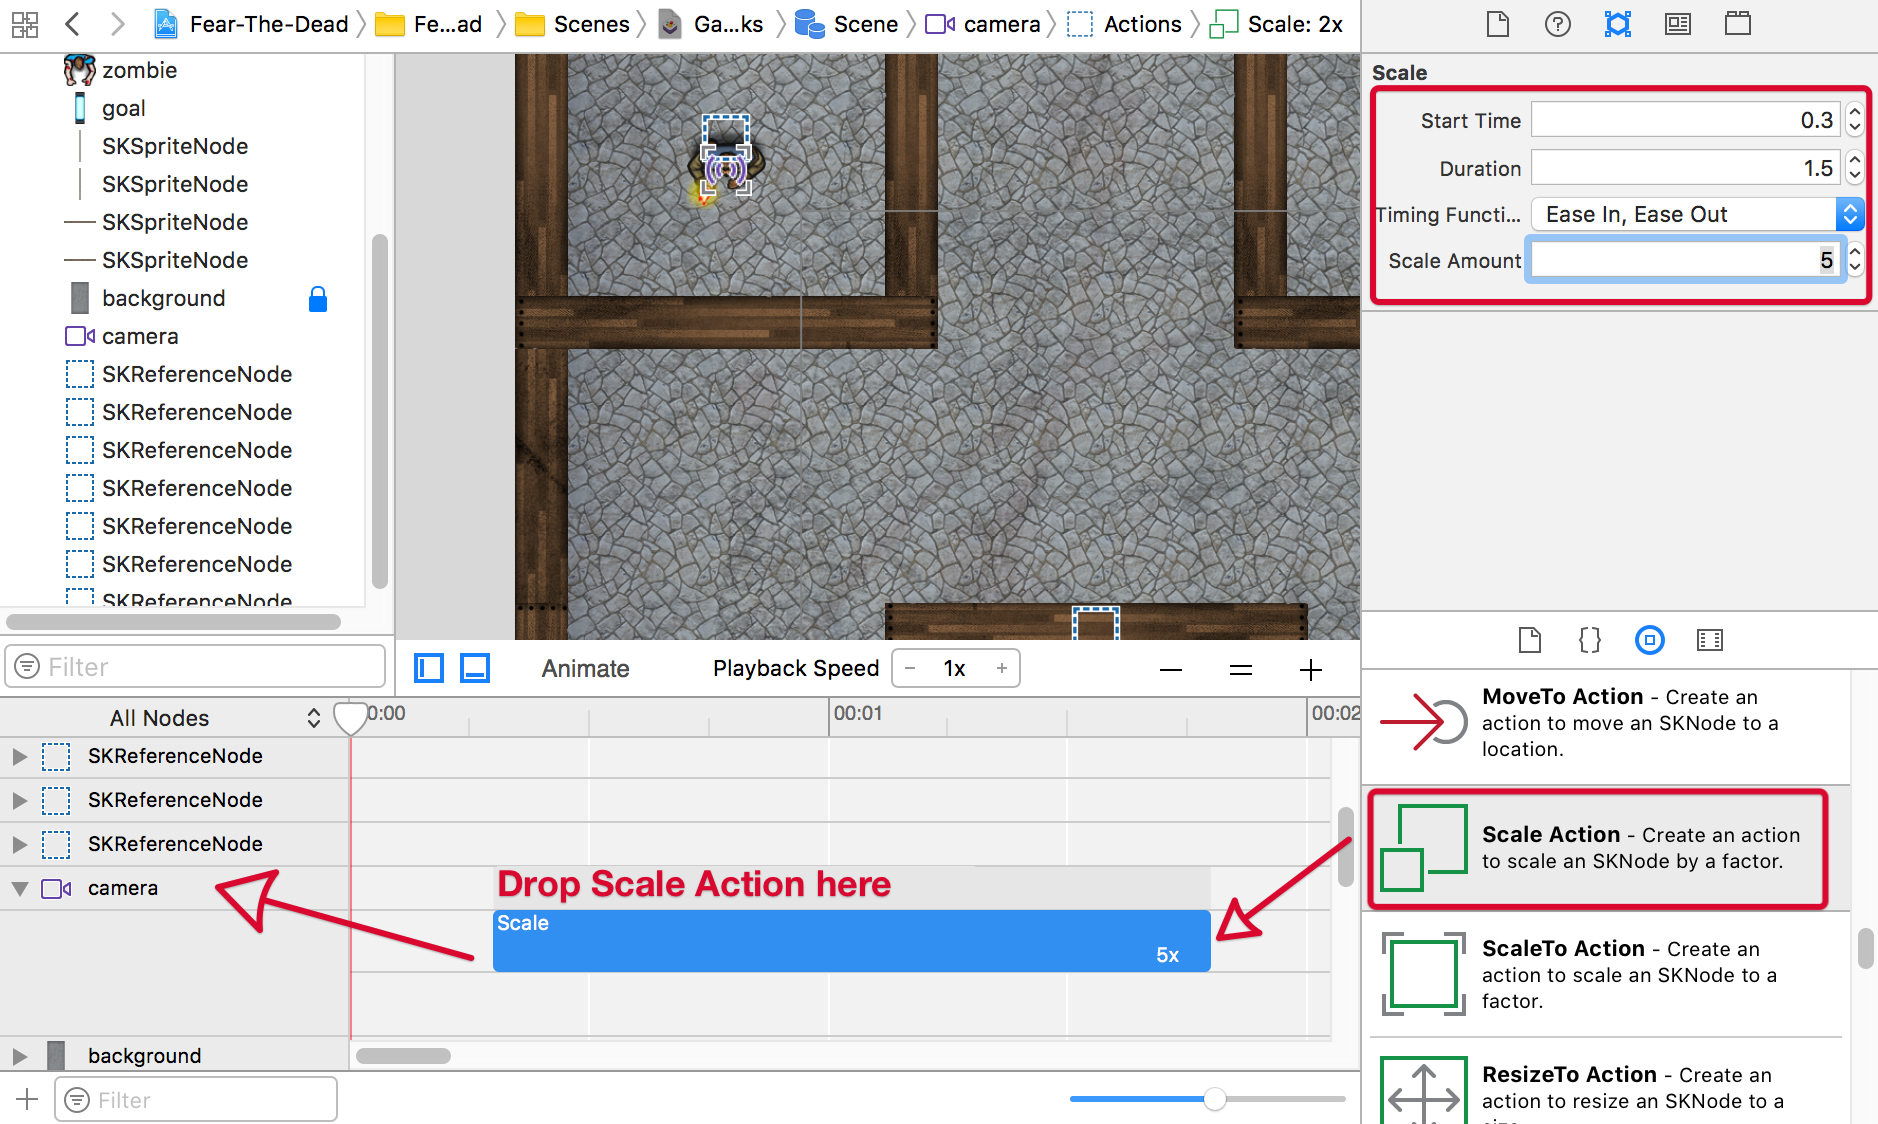
Grab a Scale Action object from the Object Library and drop it onto the timeline track for the camera node. Next, locate the Attributes Inspector for the action up in the upper-right corner, and change the properties as follows:
- Start time: 0.3
- Duration: 1.5
- Timing Function: Ease in, Ease out
- Scale Amount: 5
With this action, you scale the camera by a factor of five. However, you don’t want to change the scene-to-camera ratio you previously defined. Therefore, click the camera node in the scene hierarchy and change its scale to be X = 0.1, Y = 0.1. After the action has been triggered, this will end up being 0.5, just like it was before.
Build and run the game, and you should see a cool zoom-out effect happening at launch.
