Introduction to the SpriteKit Scene Editor
Learn how to use the visual scene editor to create SpriteKit games with almost no code! By Caroline Begbie.
Did you know that creating game levels can be easy, fun and done with almost no contact with code? In this tutorial, you’ll learn how to do just that using the powerful SpriteKit scene editor.
You’ll create a fancy level for a spooky 2D zombie game named Fear the Dead. In the process, you’ll learn:
- What the scene editor is, how to navigate its layout, and how you can add sprites to it
- How you can use file references to reuse an SKScene
- How to create a dark vibe using an SKLightNode
- How to work with SKCameraNodes
- How to use the Action Editor to add animations to nodes without any code
- How to use SKAudioNodes to create positional audio
- How to survive a zombie apocalypse. :]
As you can see we have a lot to cover, so let’s get started!
Note: This SpriteKit scene editor tutorial assumes that you already know the basics of Swift as well as the basics of the SpriteKit. If you’re new to Swift, check out the Swift Apprentice book, and if you’re new to SpriteKit, check out the SpriteKit Swift 3 Tutorial for Beginners.
Note: This SpriteKit scene editor tutorial assumes that you already know the basics of Swift as well as the basics of the SpriteKit. If you’re new to Swift, check out the Swift Apprentice book, and if you’re new to SpriteKit, check out the SpriteKit Swift 3 Tutorial for Beginners.
Getting Started
In order to get you up and running without a bunch of noise, download the starter project for this tutorial. It’s based on the SpriteKit Game template and already has some of the more tedious work done for you.
This way you can focus on creating an awesome zombie-rich environment level without tinkering with all the underlying logic. The starter project comes with:
- The logic needed for actually playing the game, including the logic for moving around the player and the zombies, as well as logic for when these collide.
- All the sounds and images you need.
- A MenuScene that denotes the end of a game and also gives the option to restart the game.
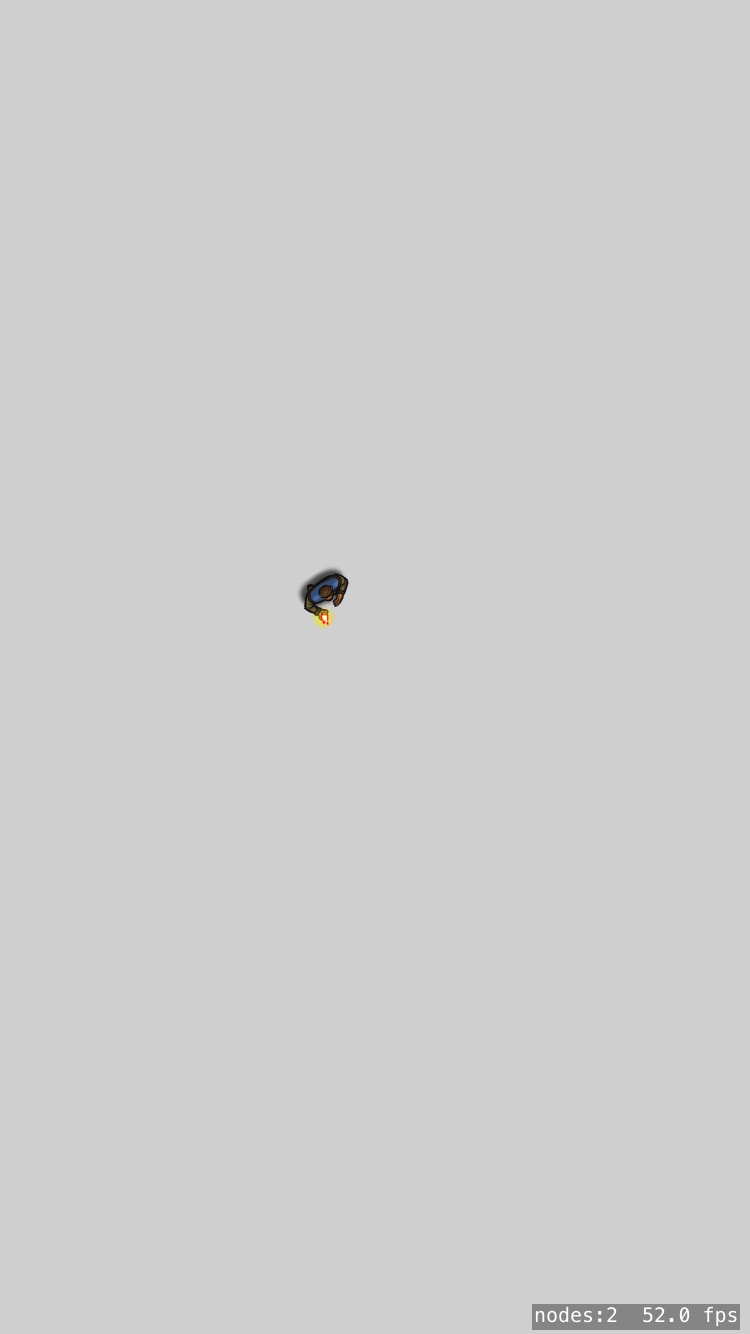
Once you’ve downloaded and unzipped the project, open it in Xcode and build and run. After the splash screen intro, you should see the following appear on your device or in the simulator:

As you can see, there’s not much to play with yet, so let’s get started with the scene editor, shall we?
The Scene Editor
First, a bit about the game you’re building. Fear the Dead leads you on a nail-biting adventure where you have to escape from one room into another without being bitten by nasty, infected zombies. For a full-blown game, there would be tons of exciting levels.
Creating levels in code, however, can be very tedious and cumbersome, and could lead you to become one of the zombies you’re trying to escape. This is where the scene editor, a built-in Xcode tool designed to help you build levels without having to write everything in code, comes in.
Setting up the Scene
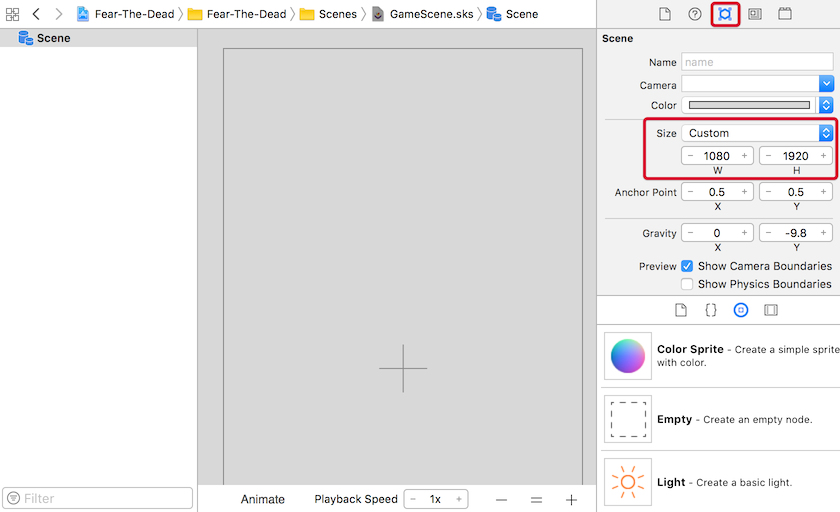
In the project navigator, locate the Scenes folder and select the file GameScene.sks. You’ll see an editor panel that shows a gray background as shown in the screenshot below:

The scene hierarchy appears to the left of the editor panel. When you have multiple elements in the scene, you can select them here. You can even drag and drop to rearrange parent / child relationships.
Click the – button in the lower right corner until you see a black rectangle appear. This is the boundary of your scene and all of your level’s components will be placed within this. Alternatively, you can also pinch your trackpad to zoom in and out. You should now have a view similar to:

When creating a new scene, the default scene size is 750 x 1334 pixels, but you want your level to be a bit bigger. First, make sure you have the utilities editor open on the right-hand side, and select the Attributes Inspector.
If you do not see the utilities editor, simply click View\Utilities\Show Attributes Inspector and it should show itself. Next, change the dimensions of the scene to be 1080 x 1920.
Awesome! The scene is now ready for you to add some elements to it.
The Object Library

At the bottom of the utilities editor, select the Object Library.
The Object Library displays all the different objects you can drop onto your scene and configure. In this tutorial you’ll be working primarily with Color Sprites, but there many other objects to choose from, including:
- Shape Node: a node that allows you to easily draw squares, circles and other shapes with Core Graphics paths.
- Label: you’ve probably used labels in your games before, and this one is no different. However, this time you’ll be able to easily place it on the screen and edit it with a few clicks.
- Light: A very cool object you can add is a light, and by placing one on your scene you get a spotlight effect; you can then make your other objects cast shadows. You’ll add a light later in the tutorial. :]
If you’ve used SKSpriteNodes in other games, then you’ll already be familiar with the configuration options that come with a Color Sprite. You can determine the node’s size, position, texture and even add a physics body to it.
Here’s the best part: you don’t have to manage these in code nor re-run your program every few seconds to make sure everything is placed correctly. Quite neat, right?
Adding a Player Sprite
So how about you add a sprite to the scene?
Drag and drop a Color Sprite from the Object Library onto the scene. You’ll notice that the sprite is selected by default and that a ton of properties are shown in the Attributes Inspector to the right.
![]()
Most of these properties should be recognizable. You can set the sprite’s name, position and anchor point, its parent node and the image file you want to use as the texture.
The default anchor point for the scene is X: 0.5, Y: 0.5. If you add a node to the scene with position X: 0, Y: 0, the node will be exactly at the center of the scene.
To position a node on the left of the scene, you’ll use negative X values, and to position the node in the bottom half of the scene, you’ll use negative Y values.
Make this sprite your player by changing the following properties:
- Name: player
- Texture: character
- Position: (-340, 520)
- Size: 75 x 75
But wait! There’s more. If you scroll further down the Attributes Inspector, you’ll notice a section called Physics Definition where you can set the body type of your sprite. That way you don’t have to define it in code. Awesome, right?
When it comes to body type, you have three different options to choose from:
- Bounding rectangle: This sets the body be the exact size of the node.
- Bounding circle: This sets the body be a circle with a diameter the size of the node’s longest side.
- Alpha mask: This makes SpriteKit define the physical shape of your node based on the outline of the sprite’s texture image – unless you’re working with rectangles and/or circles, this is the most accurate one of the three.

Generally, you want to choose the simplest possible shape to get the desired accuracy you need for your game, as the more complicated the shape, the higher the performance cost. For this game, you want collisions to be very accurate (after all, it’s hard enough to survive a zombie apocalypse), so you will choose alpha mask.
With the player node selected in the scene, click the Body Type menu and select Alpha mask. Next, uncheck Allows Rotation and Affected By Gravity as neither are needed for this tutorial. Finally, change the Category Mask to 1.
Note: The category mask will come into play later to detect contacts between the player and other nodes.
Note: The category mask will come into play later to detect contacts between the player and other nodes.
As previously mentioned, Fear the Dead will also use lighting to create a spooky feel. To ensure that the game is ready for this, set the Light Mask, Shadow Cast Mask and Shadowed Mask of the player to be 1.

One last thing before you build and run. Open GameScene.swift and add the following lines to didMove(to:), right after the contact delegate has been set:
// Set up player
player = childNode(withName: "player") as? SKSpriteNode
With this simple line of code you have hooked up the player sprite from the scene editor to the actual code inside GameScene.swift. This works because you set the name of the sprite to “player” inside the scene editor earlier.
Easy, right? Build and run the game and you should now be able to move the player around by touching the screen. Oh yeah, progress!