
Maps Compose Library Tutorial for Android: Getting Started
Learn how to use the Maps Compose library for the Maps SDK for Android to add maps to your Android app. By Harun Wangereka.
Marking Polygon Positions
There are two options available to create your geo marker:
- Drawing polylines: You use the location update feature to draw polylines as a user walks in a certain area. You draw polylines after a user updates their location at set intervals.
- Draw polygons: You draw polygons from a list of
LatLngcoordinates. For this tutorial, you’ll be using this option.
Head over to presentation/screens/GeoMarkerScreen.kt and you’ll see:

In this file, you have a GeoMarkerScreen composable that has several map state variables defined. It has a Scaffold inside where you have your GoogleMap composable. You have three TODOs you’ll address in a moment.
Build and run the app. Tap Mark Area.
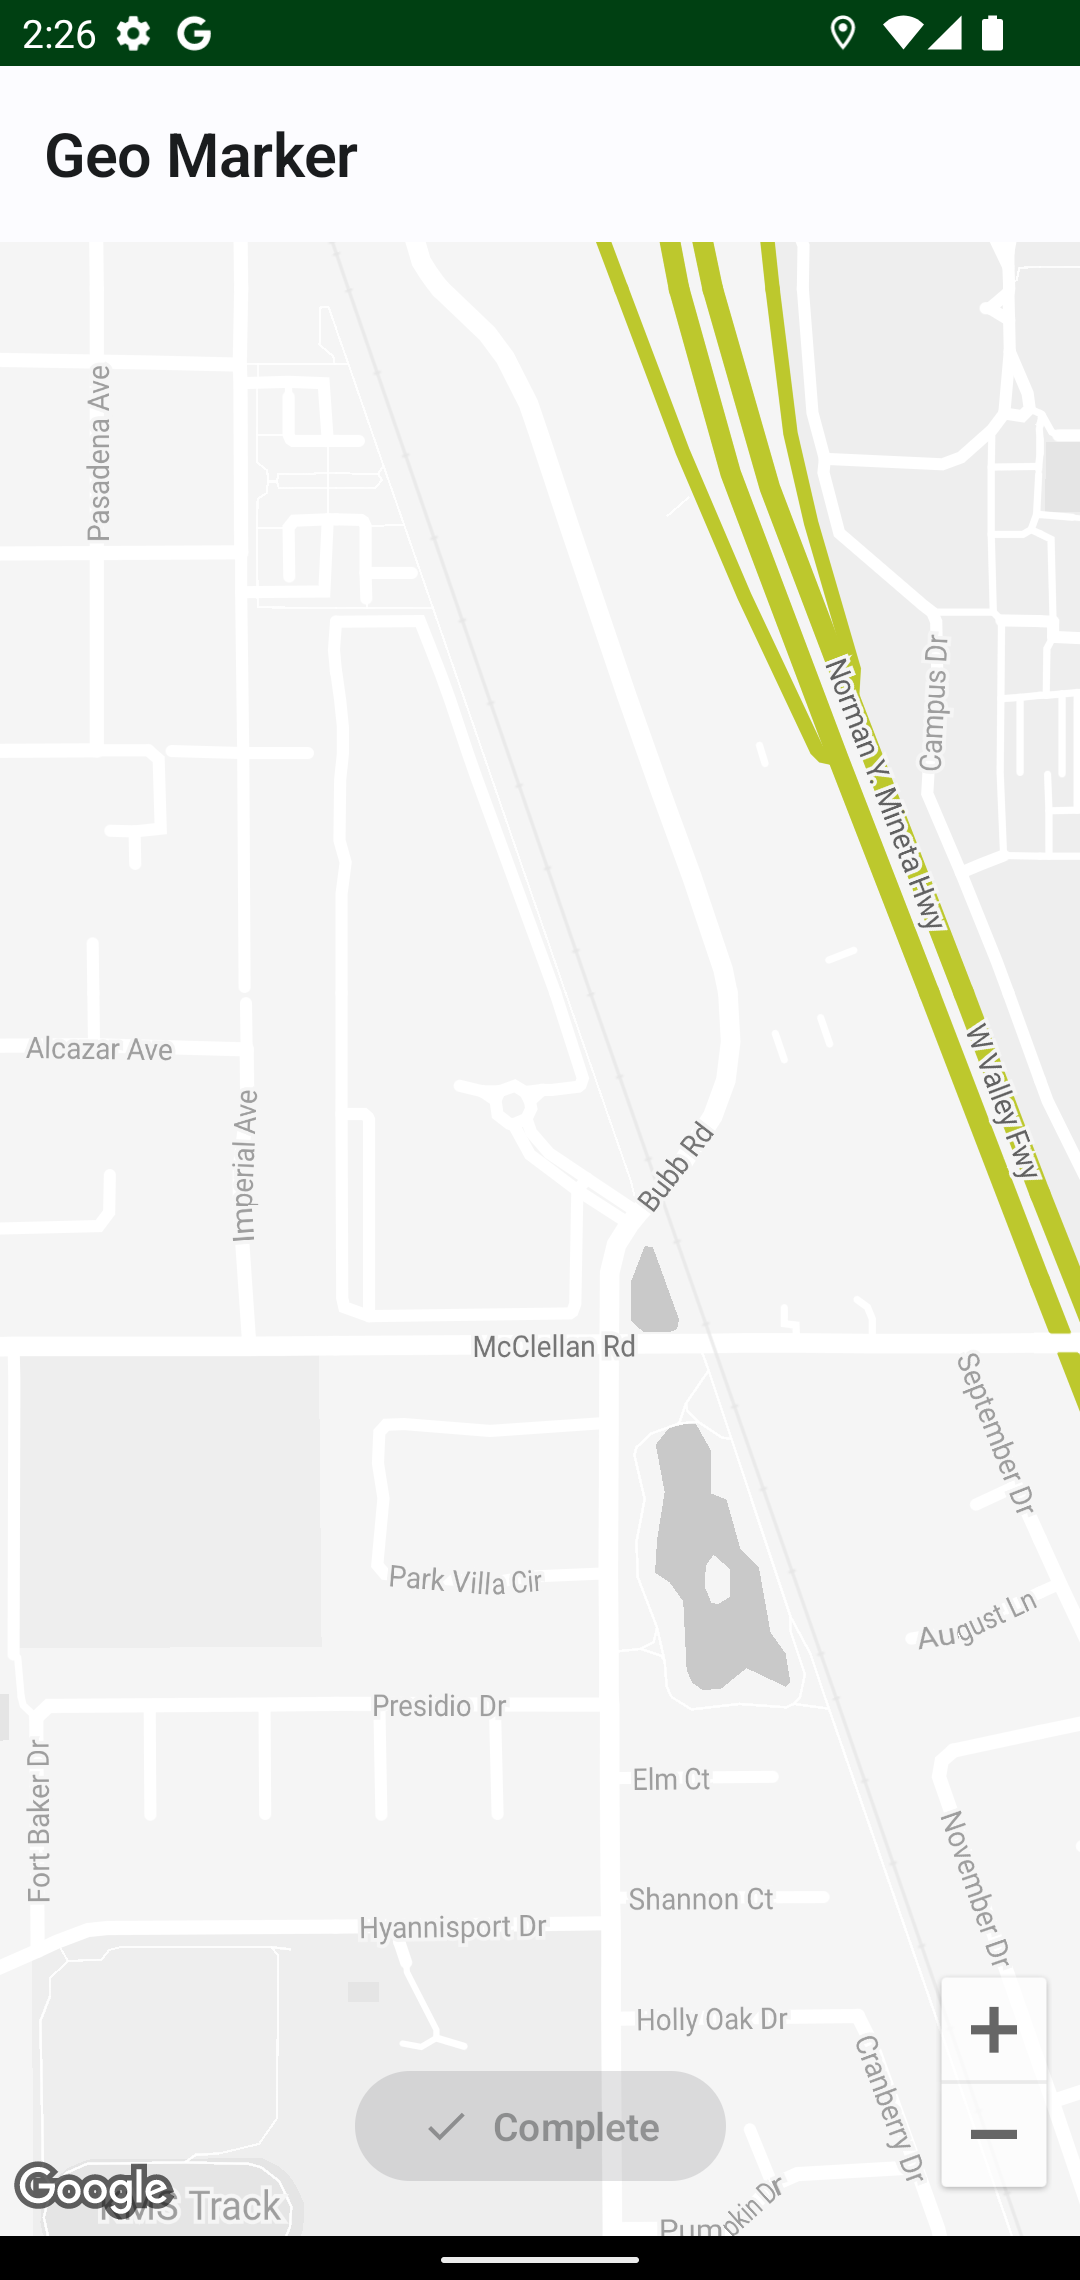
You can see the map and a button at the bottom of the map. You’ll be adding functionality for adding geo points by clicking any three points on the map.
To begin with, replace // TODO Add click listener with:
if (!drawPolygon) {
  showSavePoint = true
  clickedLocation = it
}
Here, you do a conditional check to check whether the polygon is already drawn. When the condition isn’t satisfied, you update the showSavePoint, which is a Boolean that determines whether to show the UI to save the clicked point. Clicking a map also returns a LatLng of the clicked point. You assign this value to the clickedLocation variable.
Next, replace // TODO Save Point UI with:
if (showSavePoint) {
  SaveGeoPoint(latLng = clickedLocation) {
    showSavePoint = it.hideSavePointUi
    areaPoints.add(it.point)
  }
} else {
  if (areaPoints.isEmpty()) {
    Text(
        modifier = Modifier
            .fillMaxWidth(),
        color = Color.Blue,
        text = "Click any point on the map to mark it.",
        textAlign = TextAlign.Center,
        fontWeight = FontWeight.Bold
    )
  }
}
Add any missing imports by pressing Option-Return on a Mac or Alt-Enter on a PC. You add another conditional check.
When showSavePoint is true, you show the SaveGeoPoint composable. SaveGeoPoint is a custom composable with UI for saving the clicked point. You pass the clickedLocation from the map click listener. When the condition evaluates to false, you show a text with instructions on how to mark points on the map.
Build and run the app. Navigate to the Geo Marker Screen once more. You’ll see:

Tap any point on the map.
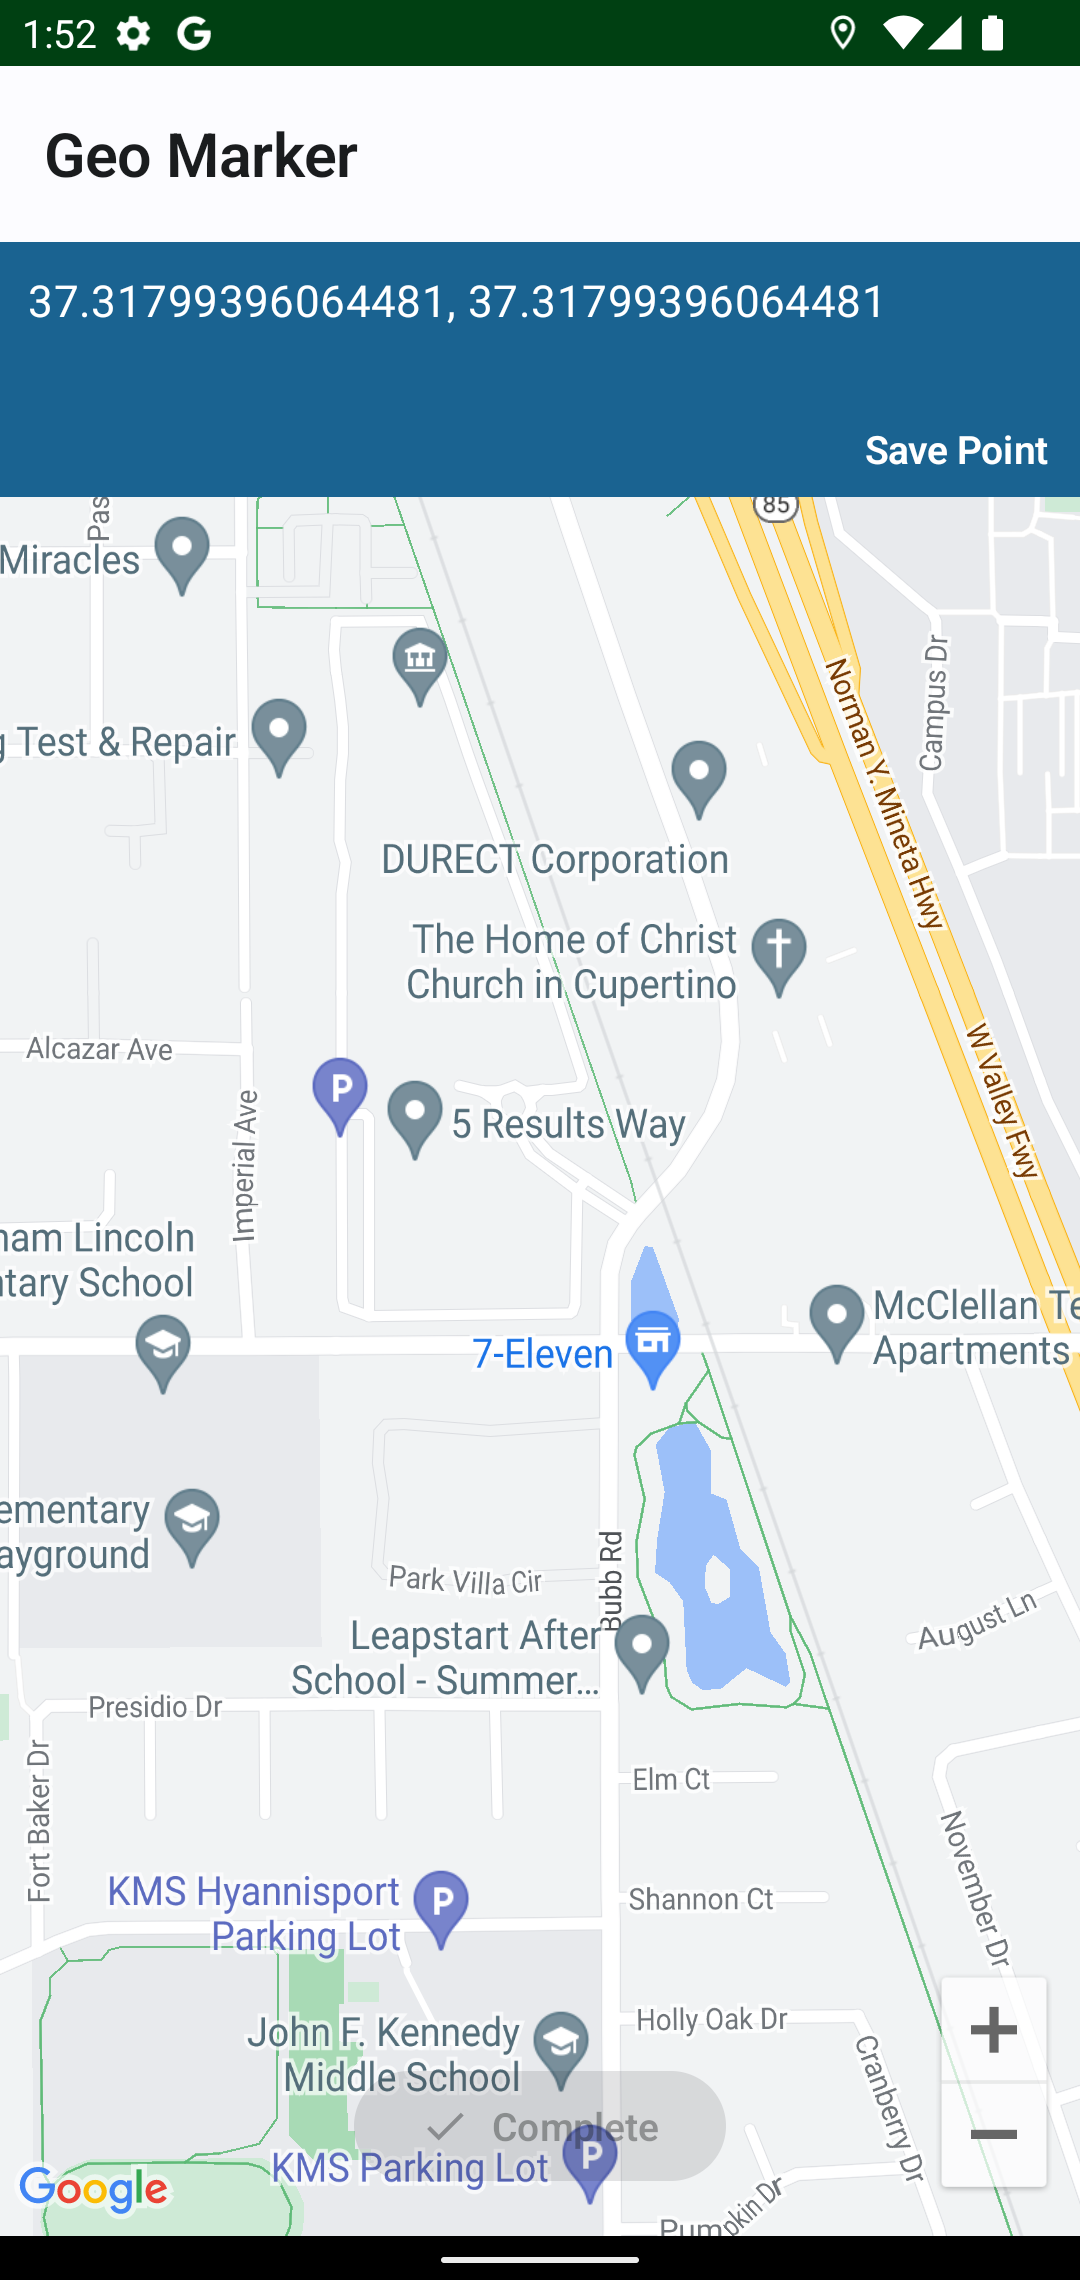
You can see the UI to save the point on your map. It displays the LatLng and the Save Point action which saves your point.
You’ll notice when you save three points that the Complete button at the bottom becomes active. Tap Complete. Nothing happens on the map; it only shows a reset button. Like me, you were expecting to see a polygon. Don’t worry. You’ll fix this behavior in a moment.
Replace // TODO Add Polygon with:
// 1
if (drawPolygon && areaPoints.isNotEmpty()) {
  // 2
  areaPoints.forEach {
    Marker(state = MarkerState(position = it))
  }

  // 3
  Polygon(
      points = areaPoints,
      fillColor = Color.Blue,
      strokeColor = Color.Blue
  )
}
// 4
if (showSavePoint) {
  Marker(state = MarkerState(position = clickedLocation))
}
Add any missing imports by pressing Option-Return on a Mac or Alt-Enter on a PC.
Here’s what the code above does:
- This is a conditional check to check whether the polygon is drawn. You also check if the
areaPointshas values because you need a list ofLatLngto draw a polygon. - Here, for each item in the
areaPointslist, you add a marker on your map. - You use
Polygoncomposable, to draw your polygon. You pass in the points to draw and the colors for your polygon. - This is a marker for each point you click on the map.
Build and run the app, then tap the marker area button and add three markers. Finally, tap the complete button.

Congratulations! You’ve been able to create a geo marker with a polygon. You can reset the map and draw as many polygons as you want.
Writing Map UI Tests
Tests are usually important in any piece of software. Google Map Compose library was not left behind in terms of writing tests for your map logic. To make it more interesting, it’s easier for you to write the UI tests for your map composables.
Head over to your androidTest directory and open GoogleMapTest.kt. The test class GoogleMapTest only has a handy setup method that runs before your tests run. It initializes a CameraPositionState with a location and a zoom level.
Before writing your tests, you need to set up your map. Add the following method below the setup method:
private fun loadMap() {
  val countDownLatch = CountDownLatch(1)
  composeTestRule.setContent {
    GoogleMap(
        modifier = Modifier.fillMaxSize(),
        cameraPositionState = cameraPositionState,
        onMapLoaded = {
          countDownLatch.countDown()
        }
    )
  }
  val mapLoaded = countDownLatch.await(30, TimeUnit.SECONDS)
  assertTrue("Map loaded", mapLoaded)
}
Replace your imports at the top with:
import androidx.compose.foundation.layout.fillMaxSize
import androidx.compose.ui.Modifier
import androidx.compose.ui.test.junit4.createComposeRule
import com.google.android.gms.maps.model.CameraPosition
import com.google.android.gms.maps.model.LatLng
import com.google.maps.android.compose.CameraPositionState
import com.google.maps.android.compose.GoogleMap
import junit.framework.Assert.assertTrue
import org.junit.Before
import org.junit.Rule
import java.util.concurrent.CountDownLatch
import java.util.concurrent.TimeUnit
You have a CountDownLatch to allow waiting for the map to load before doing any operation on the map. You set the content of your screen with the composeTestRule. In the setContent lambda, you add the GoogleMap composable. You also pass the cameraPositionState modifier, and inside your onMapLoaded, you start your countdown.
Lastly, you perform an assertion after waiting 30 seconds to check whether the map was loaded. You’ll use this method to initialize your map in consecutive tests.
You’ll now add tests to show the camera position and map zoom level are set to the correct values.
Add the following tests:
@Test
fun testCameraPosition() {
  loadMap()
  assertEquals(singapore, cameraPositionState.position.target)
}
@Test
fun testZoomLevel() {
  loadMap()
  assertEquals(cameraZoom, cameraPositionState.position.zoom)
}
In the code above, you have two tests: one for testing the camera position and the other for testing the zoom level of your map. In each of these tests, you call loadMap() and then assert that the position and zoom level on the map is similar to your initial location. Run the test.
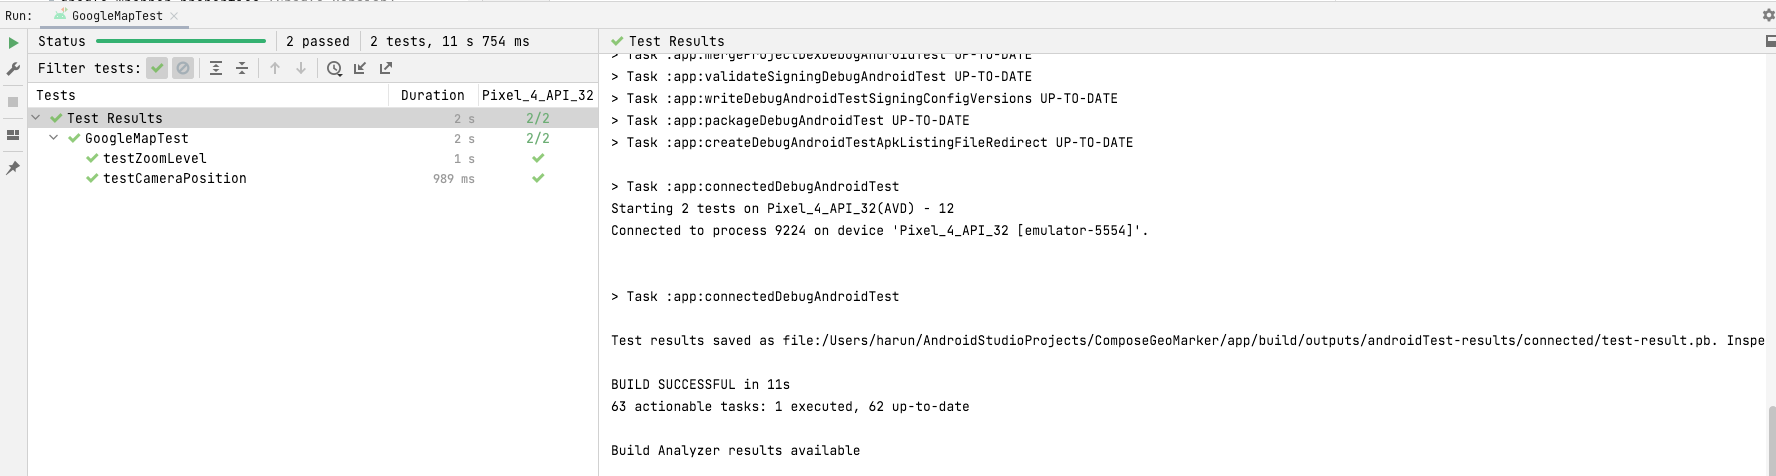
You can see all your tests run successfully!
Where to Go From Here?
Download the final project by clicking Download Materials at the top or bottom of the tutorial.
You can explore the drawing polyline option to demonstrate someone walking through a field. You can perhaps add more tests to test your map-related functionalities.
Check out the official Google Maps Compose documentation to learn more about maps in Compose. To learn more about testing your compose layouts, checkout the official testing documentation.
Hopefully, you enjoyed this tutorial. If you have any questions or comments, please join the forum discussion below!