
Maps Compose Library Tutorial for Android: Getting Started
Learn how to use the Maps Compose library for the Maps SDK for Android to add maps to your Android app. By Harun Wangereka.
Google Maps is a modern toolkit that provides detailed information about geographical regions. Today, it has more than a billion users per day.
However, it gets complicated when you want to use the former library, Maps SDK for Android, with Jetpack Compose. You must write complex and often large View interoperability code blocks to combine Jetpack Compose with the standard map UI component – MapView. This opposes one of Jetpack Compose’s primary objectives of being simple and precise. To solve this, Google created a new and simpler way of handling Google Maps in Jetpack Compose projects.
In February 2022, Google released the Maps Compose library. It is an open-source set of composable functions that simplify Google Maps implementation. Besides that, the library contains specific data types related to Maps SDK for Android suited to Jetpack Compose.
In this tutorial, you’ll build the GeoMarker app. The app allows you to use Maps Compose features like markers, circles and info windows. Additionally, you’ll also be able to mark points on your UI and be able to draw a polygon from chosen points.
During the process, you’ll learn:
- Setting up Google Maps in compose.
- Requesting location permissions.
- Adding markers, info windows and circles on your map.
- Adding custom map styling.
- Drawing polygons on your map.
- Testing some map features.
To start with Kotlin, check out this Introduction to Kotlin for Android tutorial and the book Kotlin Apprentice.
For Android development, check out these Getting Started with Android tutorials and the book Android Apprentice.
In case you haven’t gotten your hands dirty with Jetpack Compose yet, start with Jetpack Compose Tutorial for Android: Getting Started.
Getting Started
Download the starter project by clicking Download Materials at the top or bottom of the tutorial.
Open Android Studio Chipmunk or later and import the starter project. Build and run the project. You’ll see the following screens:

The app shows an empty screen with a ‘Mark Area’ floating action button at the bottom. You’ll display your map and other map components on this screen. You’ll also add the geo-marking functionality.
Setting Up
To start working on maps in compose, you must complete the following steps:
The first is the Maps Compose library, and the other two are the Play Services maps SDK and location SDKs. Note that these dependencies already exist in the starter project, so there’s no need to re-add them.
- Setting up the dependencies:
- Secondly, you need a Google Maps API key for you to be able to use any of Google Maps APIs. You can find instructions on how to get your key here. Once you have your key, proceed to add it to your local.properties file as follows:
MAPS_API_KEY=YOUR_API_KEY
  implementation 'com.google.maps.android:maps-compose:2.4.0'
  implementation 'com.google.android.gms:play-services-maps:18.1.0'
  implementation 'com.google.android.gms:play-services-location:20.0.0'
The first is the Maps Compose library, and the other two are the Play Services maps SDK and location SDKs. Note that these dependencies already exist in the starter project, so there’s no need to re-add them.
  implementation 'com.google.maps.android:maps-compose:2.4.0'
  implementation 'com.google.android.gms:play-services-maps:18.1.0'
  implementation 'com.google.android.gms:play-services-location:20.0.0'
MAPS_API_KEY=YOUR_API_KEY
Now that you have everything set, time to get your hands dirty with maps in compose. You’ll start by requesting location permissions for your app.
Requesting Location Permissions
Your app needs location permissions for you to be able to show maps. Head over to presentation/screens/MapScreenContent.kt. Replace //TODO Add Permissions with:
// 1
val scope = rememberCoroutineScope()
// 2
val context = LocalContext.current
// 3
var showMap by rememberSaveable {
  mutableStateOf(false)
}
// 4
PermissionDialog(
    context = context,
    permission = Manifest.permission.ACCESS_FINE_LOCATION,
    permissionRationale = stringResource(id = R.string.permission_location_rationale),
    snackbarHostState = snackbarHostState) { permissionAction ->
  // 5
  when (permissionAction) {
    is PermissionAction.PermissionDenied -> {
      showMap = false
    }
    is PermissionAction.PermissionGranted -> {
      showMap = true
      scope.launch {
        snackbarHostState.showSnackbar("Location permission granted!")
      }
      fetchLocationUpdates.invoke()
    }
  }
}
To resolve errors, replace your imports at the top with:
import android.Manifest
import androidx.compose.material3.SnackbarHostState
import androidx.compose.runtime.*
import androidx.compose.runtime.saveable.rememberSaveable
import androidx.compose.ui.platform.LocalContext
import androidx.compose.ui.res.stringResource
import com.android.composegeomarker.R
import com.android.composegeomarker.permissions.PermissionAction
import com.android.composegeomarker.permissions.PermissionDialog
import kotlinx.coroutines.launch
Here’s what the code above does:
- You create a
CoroutineScopevariable you’ll use to show your Snackbar. - This is a variable to get the context of your current composable.
- You have a Boolean variable
showMapthat represents whether the app has necessary permissions. - Here, you call
PermissionDialog, a custom composable that handles all the permissions logic. - The
PermissionDialoghas a callback that returns which permission option the user has chosen. It can either bePermissionGrantedorPermissionDenied. On each of this, you update theshowMapvariable. When the user grants the permission, you show a Snackbar with a “Location permission granted!” message and start the location updates.
With this, you’re ready to show locations on a map, and that’s the next step.
Displaying a Position in a Map
Navigate to presentation/composables/MapView.kt. You’ll see two TODOs that you’ll work on in a moment.
But before that, replace your imports with the following:
import android.content.Context
import androidx.compose.foundation.layout.fillMaxSize
import androidx.compose.runtime.Composable
import androidx.compose.ui.Modifier
import com.google.android.gms.maps.model.CameraPosition
import com.google.android.gms.maps.model.LatLng
import com.google.maps.android.compose.GoogleMap
import com.google.maps.android.compose.rememberCameraPositionState
Start by replacing // TODO add Camera Position State with:
val cameraPositionState = rememberCameraPositionState {
  position = CameraPosition.fromLatLngZoom(location, 16f)
}
In the code above, you create a CameraPositionState instance, which holds the configurations for your map. In this case, you set your map’s location and zoom level.
Second, replace // TODO Add Google Map with:
GoogleMap(
    modifier = Modifier.fillMaxSize(),
    cameraPositionState = cameraPositionState
)
GoogleMap is a container for a MapView, to which you pass both values, modifier and cameraPositionState. And that’s all you need to show a single location on a map in compose :]
Last, you need to call your custom MapView composable in your MapScreenContent.kt. You pass in the context and location as parameters. For an example, you’ll use a fixed location in Singapore. Go back to presentation/screens/MapScreenContent.kt and below PermissionDialog add:
val currentLocation = LatLng(1.35, 103.87)
if (showMap) {
  MapView(context, currentLocation)
}
Add the following imports to your import statements to resolve the errors.
import com.android.composegeomarker.presentation.composables.MapView
import com.google.android.gms.maps.model.LatLng
Here, you added the conditional to check whether your map should be displayed. Once the condition is met, you call MapView passing in the context and current location.
Build and run the app:
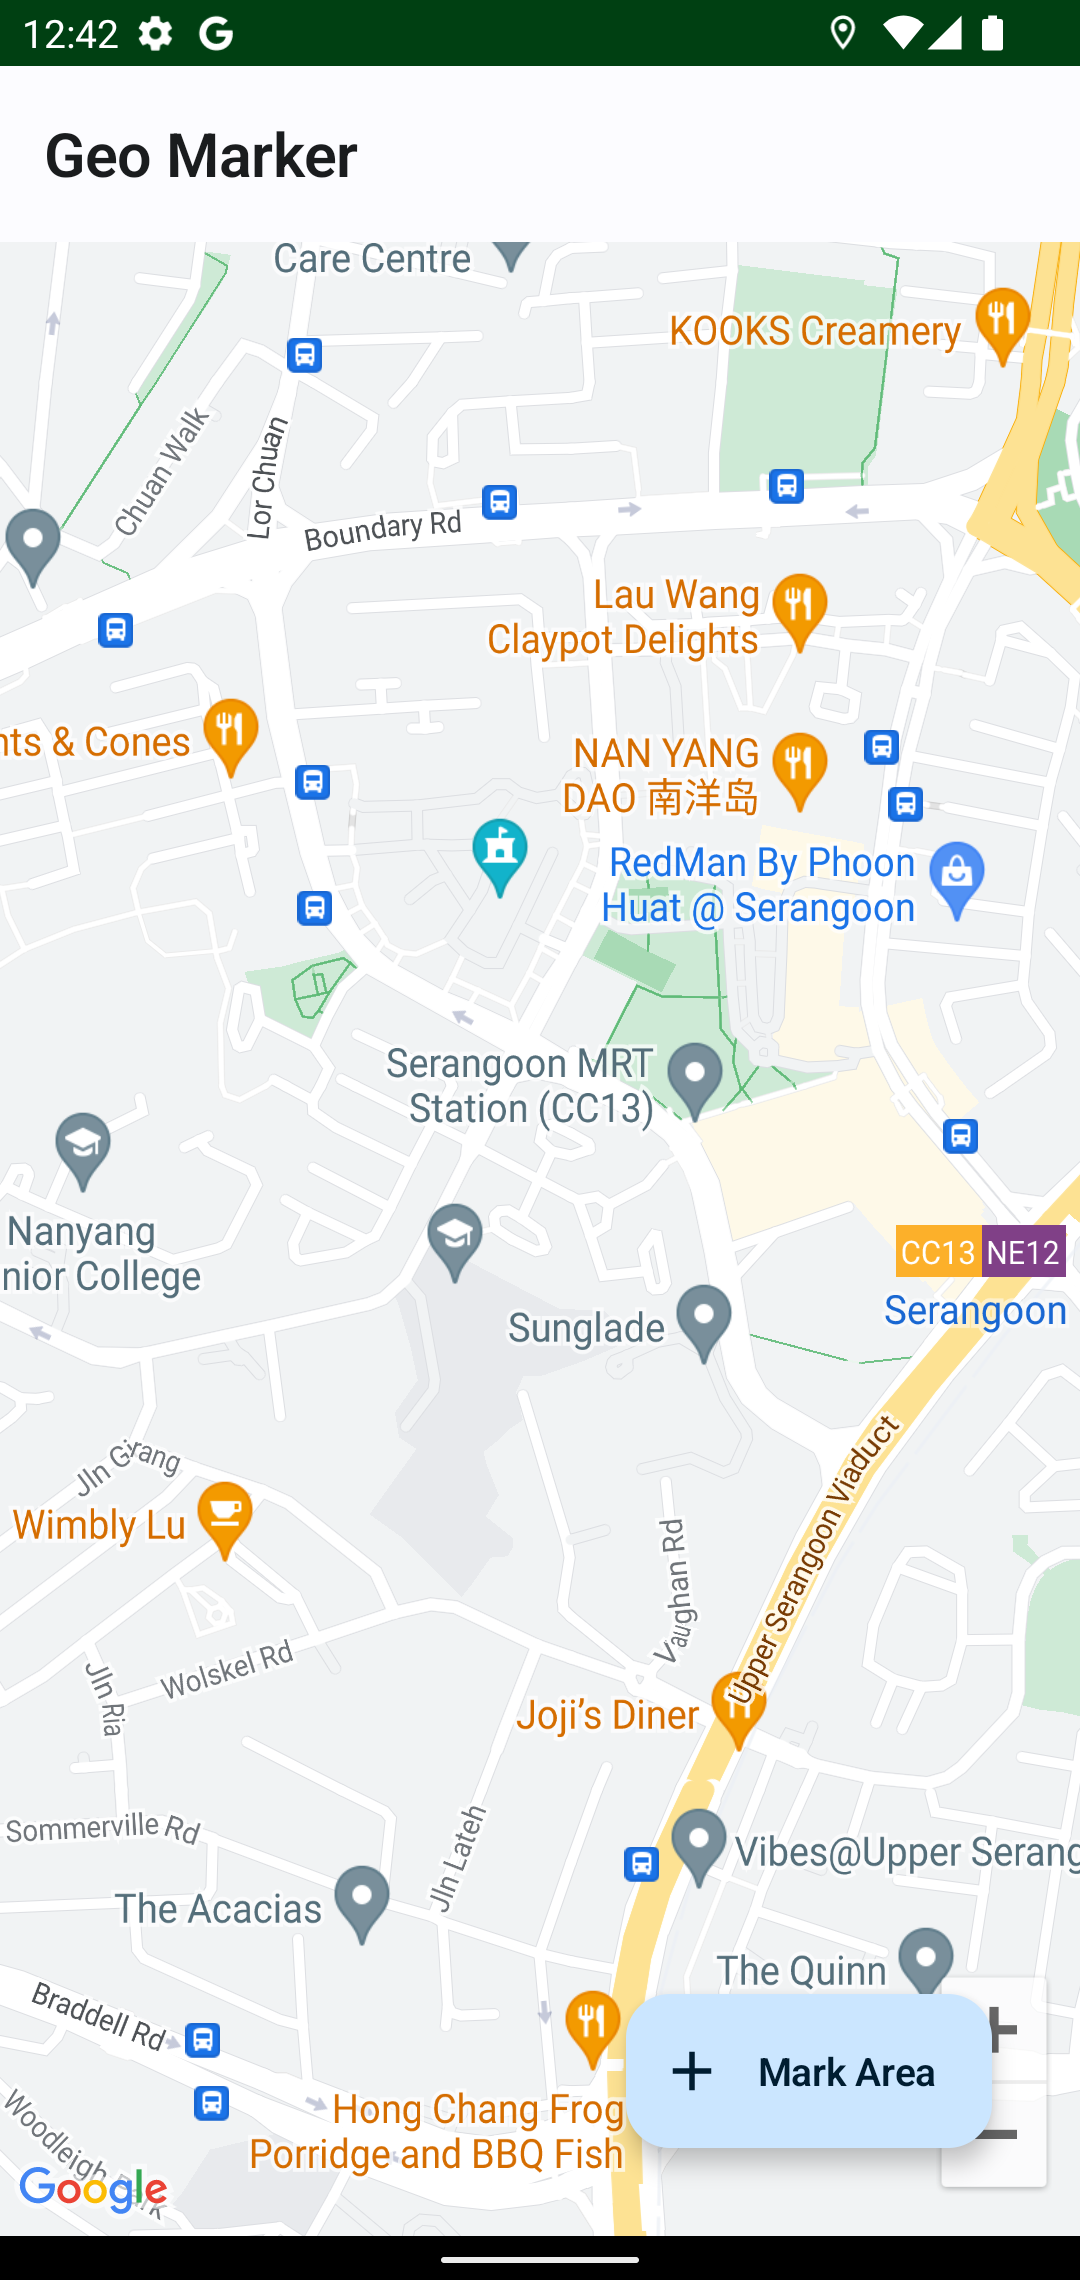
The app now shows the location in Singapore on the map. In the next section, you’ll add a marker to this location.