CreateML Tutorial for iOS: Creating a Customized Image Filter using Style Transfer
Style Transfer is a machine learning technique. Through this, you can transform any given image stylized as another! In this tutorial, you’ll learn how to leverage Apple’s ML Frameworks to achieve this on your iOS device. By Vijay Subrahmanian.
On-Device Model Generation
Once the training is complete, the model is ready for use. Right now you’re not doing anything with the created model. So let’s fix that now.
Open MLModelTrainer.swift. Then add the code below to the end of the trainModel(using:validationImage:sessionDir:onCompletion:) method:
// 5
let modelPath = sessionDir.appendingPathComponent(Constants.Path.modelFileName)
job.result.sink(receiveCompletion: { result in
    debugPrint(result)
}, receiveValue: { model in
    do {
        try model.write(to: modelPath)
        onCompletion(modelPath)
        return
    } catch {
        debugPrint("Error saving ML Model: \(error.localizedDescription)")
    }
    onCompletion(nil)
})
.store(in: &subscriptions)
Here, you’re using Combine to get the result once the training completes. In the receiveValue closure, you’ll get the trained model, which we store in the file system for later use.
Build and run.
When you run the app, choose an image for the style and a picture of your lovely pet (or find an image on the internet if you don’t have a pet!). You can then choose Apply Style! and see what happens.
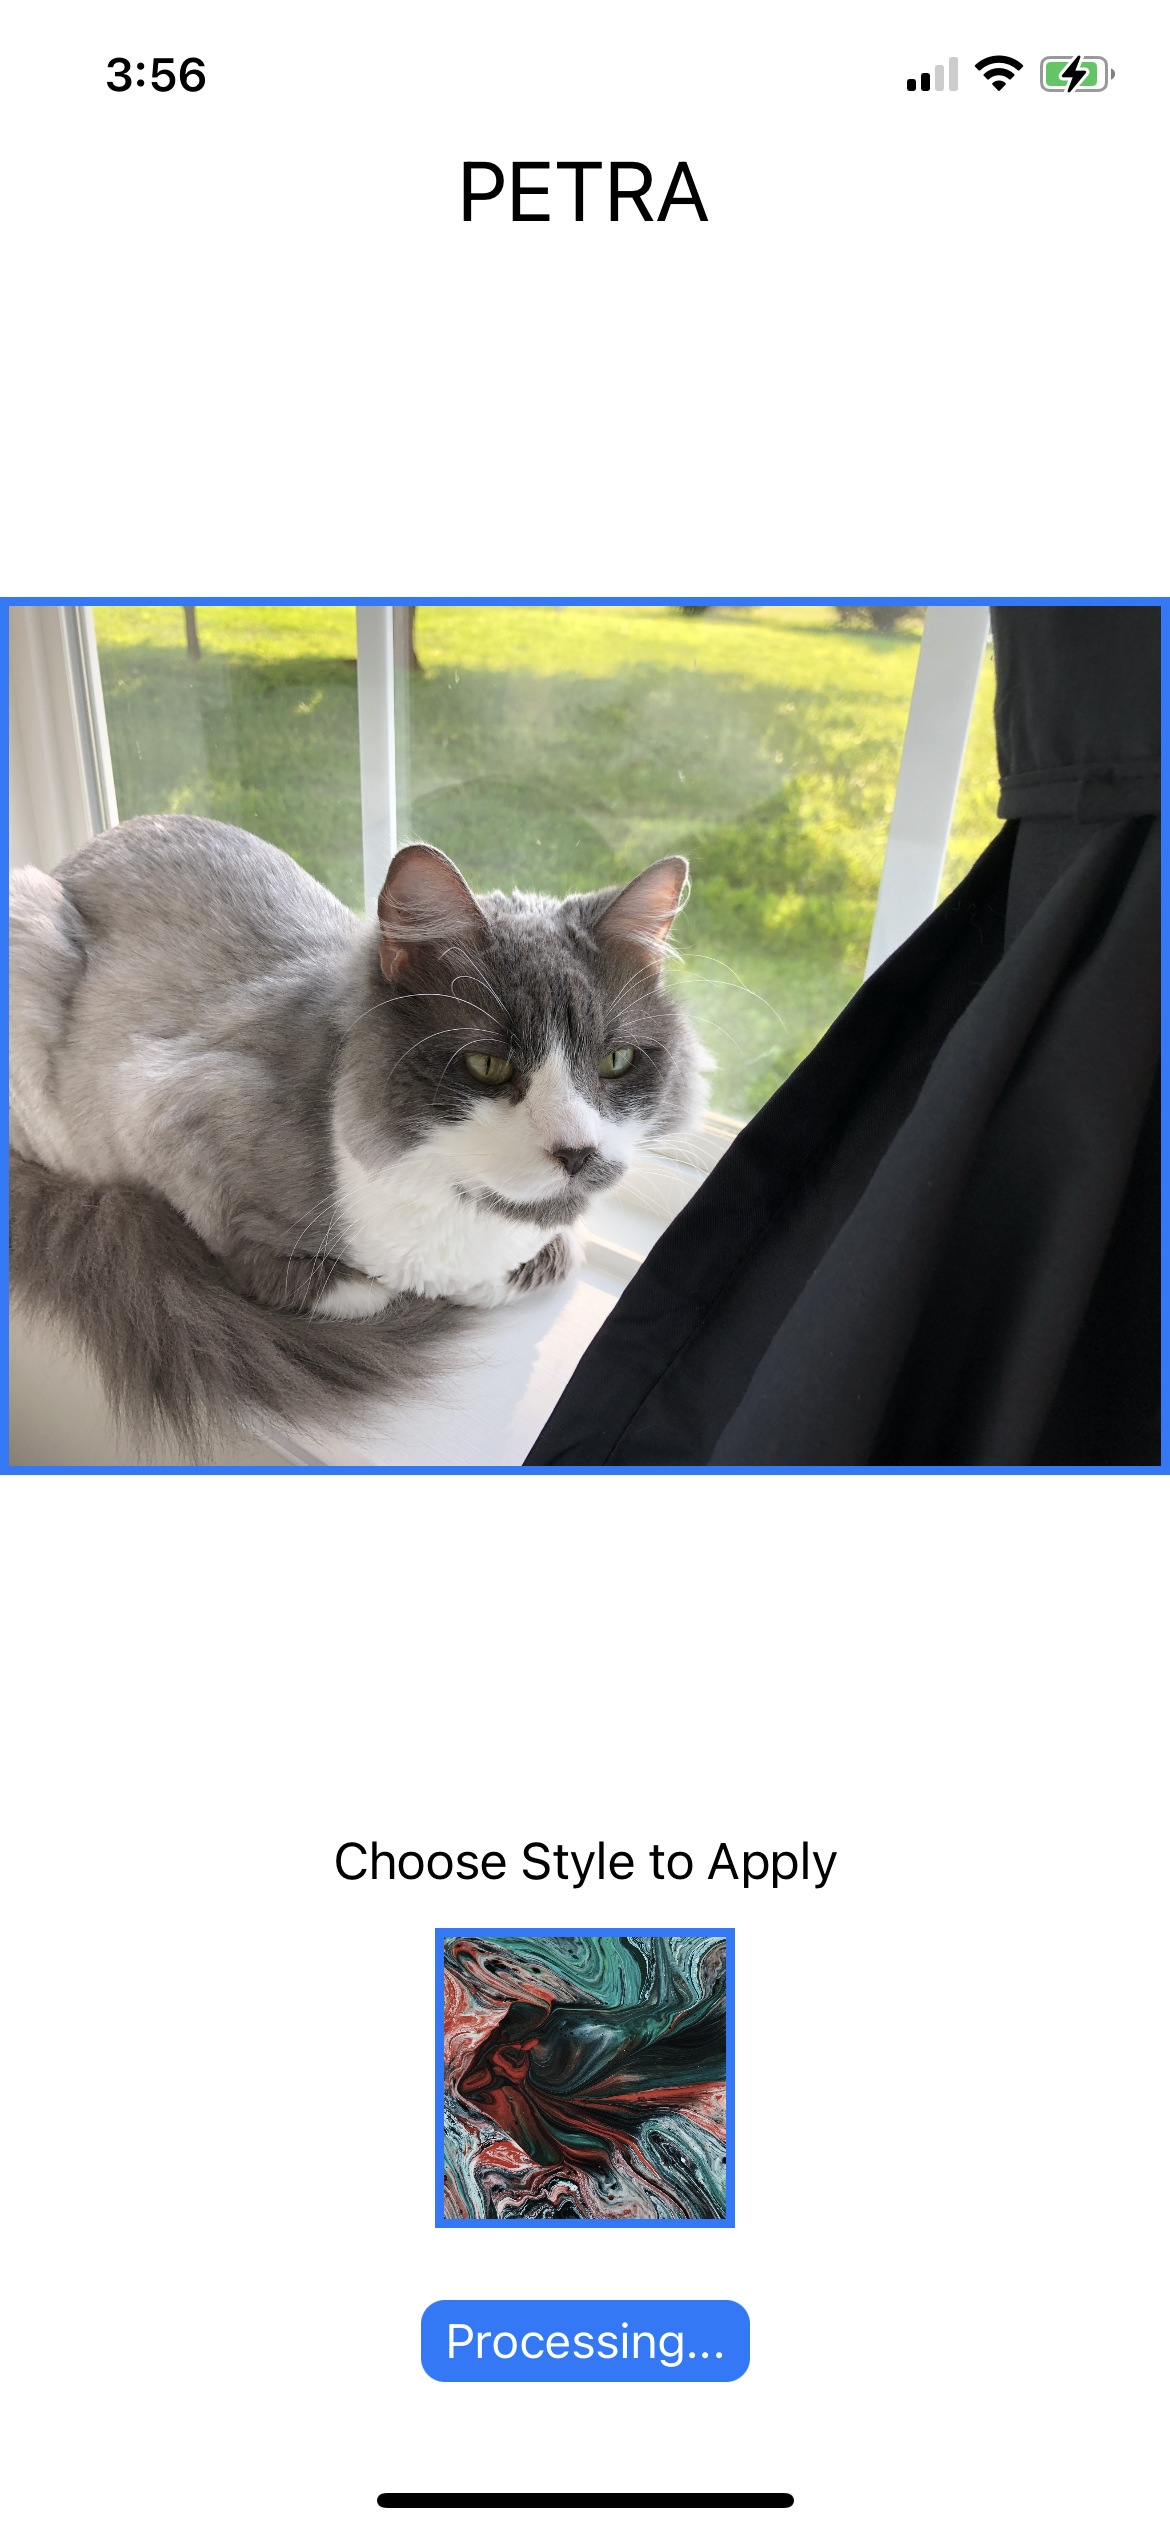
Even though it’s completed, you won’t yet see the stylized image of the pet. However, the model generation is complete. The Xcode console shows information similar to what’s below:
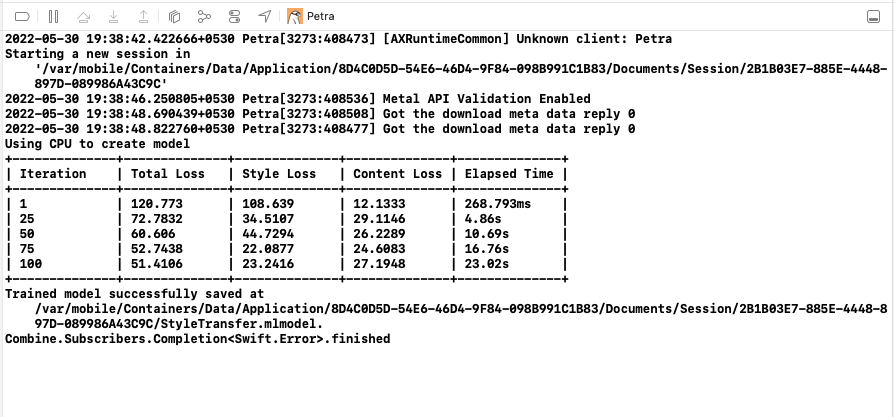
Note: Check the reference section for links to know more about various loss equations. One matter you’ll notice is that the total loss keeps reducing as iterations increase. Total loss is the sum of content and style losses. Hence, the less the total loss, the more efficient the model will be.
Note: Check the reference section for links to know more about various loss equations. One matter you’ll notice is that the total loss keeps reducing as iterations increase. Total loss is the sum of content and style losses. Hence, the less the total loss, the more efficient the model will be.
The devices generates important data. To view them, choose Window ▸ Devices and Simulators from Xcode menu. Now, select your device under Devices and choose Petra under Installed Apps. Select the Actions button and choose Download Container as in the screenshot below.

Save the file to your Mac. This can take a while to download so make sure you wait until it has completed. Using Finder, navigate to the downloaded file, right-click — Show Package Contents to look inside. The contents will look like below:

Navigate into AppData ▸ Documents ▸ Session. There will be one folder here per session, i.e. each time you tap on the Apply Style button.
Inside each session’s folder, you’ll see the training data, various metadata and most importantly, the generated CoreML model which is saved under the filename StyleTransfer.mlmodel.

Learning From User’s Data
The customization with on-device learning becomes limitless when you use the user data. Because inspiration strikes anytime and anywhere, the user can simply take a picture and use it for styling. Personalization doesn’t mean losing your privacy in this case because the data never has to leave the device with on-device learning.
Results can improve when learning from user data. However the training set should be as close as possible to the expected input image. If the user has a pet cat, then a training set containing cat images will yield better results.
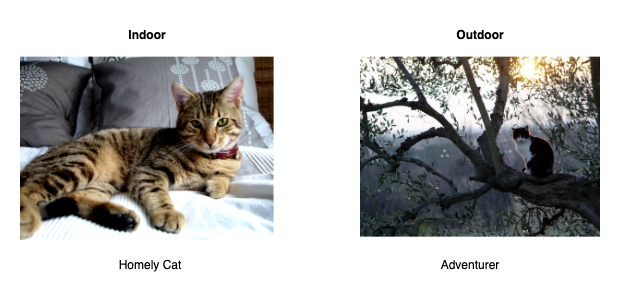
Likewise, a model trained using indoor images might not perform well on an outdoor test image because of the differences in lighting and background, as seen below.
Good training results in good learning. But in some cases, too many iterations and too much training data might result in overfitting. This means the model is learning nuances that don’t apply to most cases. In such cases, reducing the training iterations can help.
Open the Constants.swift file and check the following:
enum MLModelParam {
  static var maxIterations = 200
  static var styleDensity = 128 // Multiples of 4
  static var styleStrength = 5 // Range 1 to 10
}
The model training uses the values defined here. You’ll see how these values affect the style transfer output shortly.
Now, go to MLModelTrainer.swift file and find the code below.
// 3
let modelParams = MLStyleTransfer.ModelParameters(
    algorithm: .cnn,
    validation: .content(validationImage),
    maxIterations: Constants.MLModelParam.maxIterations,
    textelDensity: Constants.MLModelParam.styleDensity,
    styleStrength: Constants.MLModelParam.styleStrength)
As you saw earlier, you can use one of two different algorithms — .cnn and .cnnLite. As per Apple’s documentation:
- cnn: A style-transfer training algorithm that generates a model that prioritizes image quality over speed.
- cnnLite: A style-transfer training algorithm that generates a model that ranks speed over image quality.
Using these parameters, you’ll be able to fine-tune your model for better personalization.
In the next session, you’ll put the model and the training to good use and actually style an image. Ready?
Style On!
Now that you have a perfect model, use it to generate your distinct Pet Art.
Open MLPredictor.swift and replace the contents of predictUsingModel(_: inputImage: onCompletion:) method with the below code.
// 1
guard
    let compiledModel = try? MLModel.compileModel(at: modelPath),
    let mlModel = try? MLModel.init(contentsOf: compiledModel)
else {
    debugPrint("Error reading the ML Model")
    return onCompletion(nil)
}
// 2
let imageOptions: [MLFeatureValue.ImageOption: Any] = [
    .cropAndScale: VNImageCropAndScaleOption.centerCrop.rawValue
]
guard
    let cgImage = inputImage.cgImage,
    let imageConstraint = mlModel.modelDescription.inputDescriptionsByName["image"]?.imageConstraint,
    let inputImg = try? MLFeatureValue(cgImage: cgImage, constraint: imageConstraint, options: imageOptions),
    let inputImage = try? MLDictionaryFeatureProvider(dictionary: ["image": inputImg])
else {
    return onCompletion(nil)
}
A few things are happening here:
- Before you can use the model for prediction, the model is first compiled. It’s then initialized as an
MLModelobject. The compiled file gets saved in a temporary directory as ModelName.mlmodelc.
mlmodel file consumes less space compared with the compiled mlmodelc file. This is a technique for saving space in your app or if the model is downloaded from a server.- Here, you create an
MLDictionaryFeatureProviderdictionary required by the model for prediction. You’re also formatting the input image using the model’s constraints and options. You generate anMLFeatureValueand passed to the constructor of theMLDictionaryFeatureProvider.
To finally generate the stylized image, add the code below after that.
// 3
guard
  let stylizedImage = try? mlModel.prediction(from: inputImage),
  let imgBuffer = stylizedImage.featureValue(for: "stylizedImage")?.imageBufferValue
else {
  return onCompletion(nil)
}
let stylizedUIImage = UIImage(withCVImageBuffer: imgBuffer)
return onCompletion(stylizedUIImage)
Here’s what that code does:
- Calling the
prediction(from:)method performs a single prediction and outputs an MLFeatureProvider. You then extract the generated image from it and create an UIImage instance from the image buffer.
Voila! The stylizedUIImage is the output image with the style blended into your pet image.
Build and run.
Tap Apply Style! after selecting the pet image and style. The processing takes a few minutes to complete as before. After that, you should now see the result on the screen:
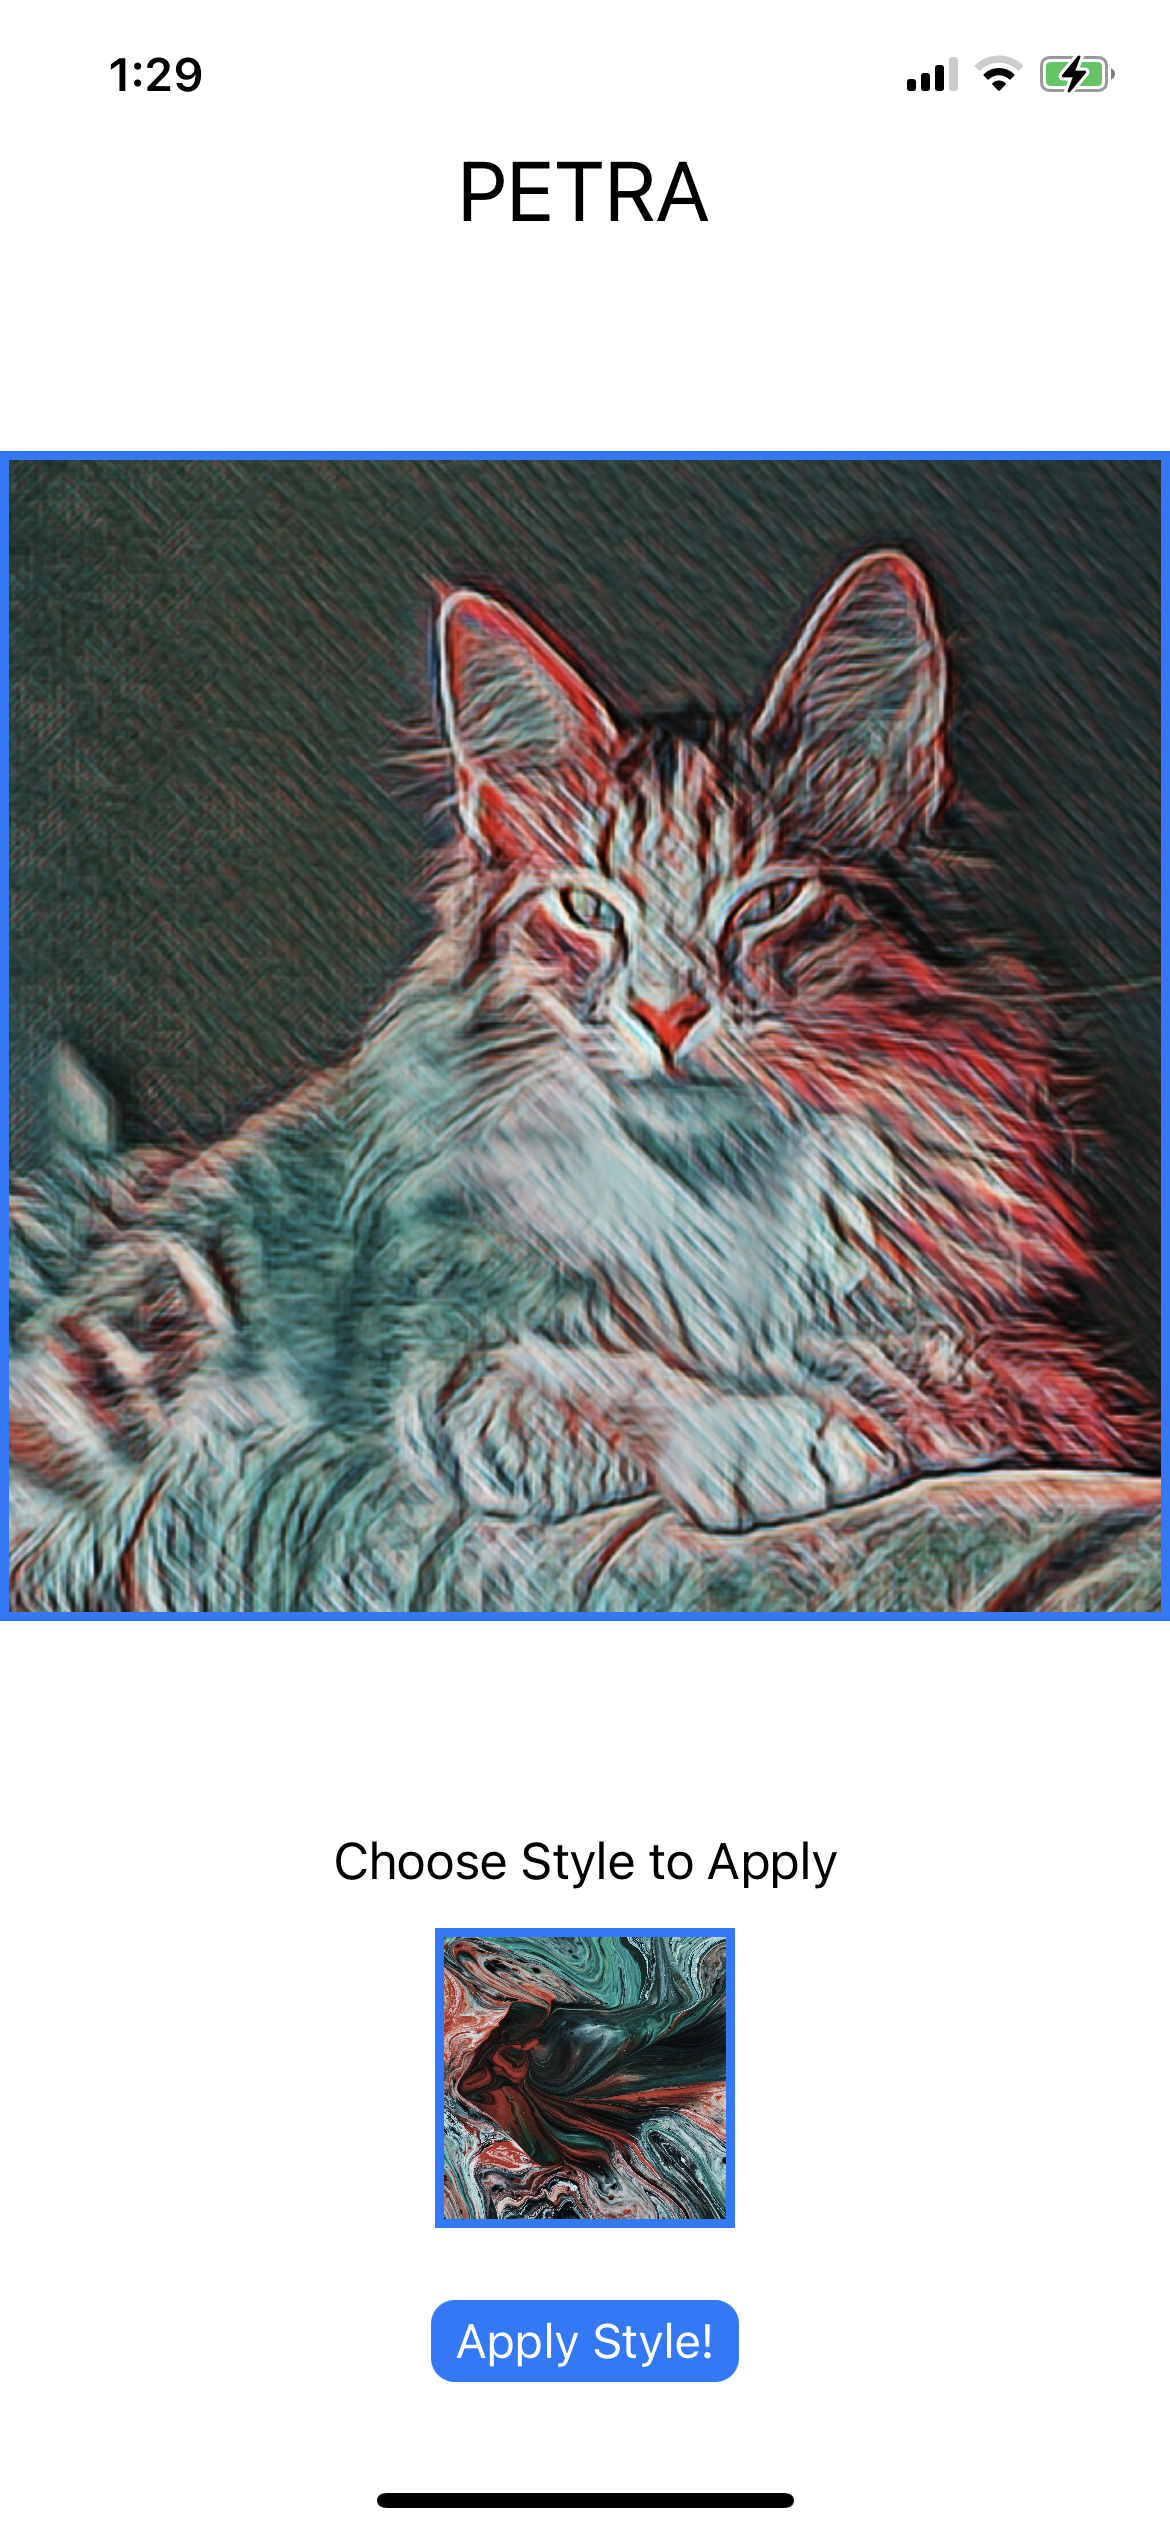
Isn’t it amazing how you can train and generate stylized images with only a few lines of code?
.cropAndScale as .centerCrop in the imageOptions earlier.Wait! That’s not all! If the results fall short of your imagination, you can fine-tune it.
You’ll now see how tweaking the parameters of the training model can affect the result. Head to the Constants.swift and find the MLModelParam enum. In the following sections you’ll learn what each of these means. Feel free to play with the numbers and re-run the app as you go.
Style density is also called Textel Density. This controls how coarse or fine the model should learn the style. That gives a distinct stylized result when you use a higher/lower value.
The style density is currently set to 128, which is less than the default value of 256. Note that this should always be a multiple of 4 and the recommended range is 64 to 1024.
In the example below, you can see how the style density affects the output.

A higher value will make the model learn more style and less content. A smaller value learns to do less styling.
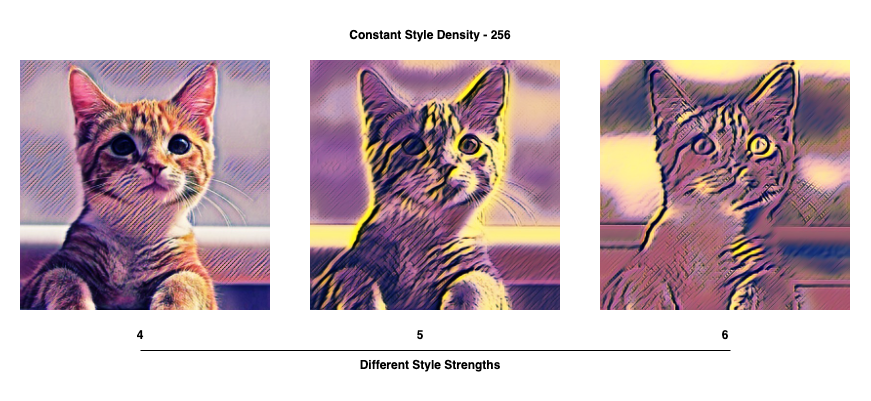
In the sample it’s set to 5, which is the default value. It can range from 1 to 10.
Below is an example of how it affects your results:
Note that maxIterations value in the model parameter is ignored when you set the iterations session parameter.
Play around with iterations, style density and style strength to get a likeable model for your pets. :]
And that’s it! Congratulations you’ve completed the tutorial and learned how to train and use an ML model for style transfer!