Tweening Animations in Unity with LeanTween
Learn how to use LeanTween to animate the User Interface and various GameObjects in Unity 3D by creating a Breakout game clone. By Ricardo Santos.
Adding LeanTween to Your Project
To add LeanTween to your projects, go to its Asset Store page and add to your assets.
When you finish, it’ll appear in your package explorer window in Unity. Select it and then click Install. When prompted, click Import to add the package to your project.
Now, on to using the recently added package in your game.
Animating the Paddle With the Tween Library
The first GameObject you’ll animate is the paddle. Initially, the paddle doesn’t react to the ball collisions, which doesn’t seem realistic. After all, when things hit each other in real life, there’s always a reaction.
For the player to feel the action, the paddle needs to react to the collision. You’ll use the translation functions to displace the paddle accordingly.
Translating Objects with LeanTween
As you already learned, you can use tweening to displace game elements for a specific amount of time. With LeanTween, the move function takes care of general displacement. You specify the initial position, final position and time that the movement should take.
However, more specialized functions move the GameObject in a single axis: moveX, moveY and moveZ. In this tutorial, you’ll use the function specialized to move the paddle along the Y-axis.
Bouncing the Paddle
You need to add some displacement to the paddle and make it react to the collision with the ball. Go to Paddle.cs and replace the entire OnCollisionEnter2D() with:
private void OnCollisionEnter2D(Collision2D collision)
{
    //1
    if (collision.gameObject.tag.Equals("Cog"))
    {
        //2
        LeanTween.cancel(gameObject);
        //3
        LeanTween.moveY(gameObject, transform.position.y - 0.5f, 0.5f).setEaseShake();
    }
}
This code does three main things:
- This line checks if there’s a collision between the paddle and the ball (the “Cog”). In this example, the paddle can’t collide with anything else, but it’s good practice to be clear about which collision you want to handle.
- This function tells LeanTween to stop any other effects that might act on this GameObject. This step helps you avoid errors by ensuring no other animation effect operates simultaneously on the element.
- Finally, this is the line that really creates movement. If it were a sentence in English, this function would say, “move the y-axis of the gameObject half a unit downwards, over half a second”.
Now press the Play button. You’ll see the paddle bounces up and down for half a second and then returns to the initial position.
Bounce, paddle, bounce!
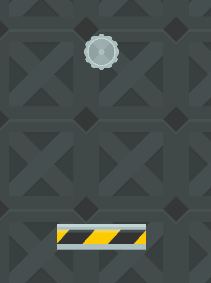
Bounce, paddle, bounce!
However, even though the paddle moves along the Y-axis, it goes back to its initial position in the end. This happens because of the setEaseShake() appended at the end of LeanTween.moveY(). This ease curve defines that the movement should end at the same point where it started, creating the bounce effect shown on the paddle.
If you want, remove setEaseShake() and watch as the paddle gets relentlessly pounded to the bottom of the screen. But remember to add it back in when you’re done.
Where are you going, paddle?
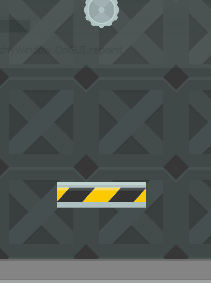
Where are you going, paddle?
Adding Character to the Ball
In the starter project, the ball bounces around, breaking the crates and bouncing off the paddle. However, you can make it a more interesting character.
Currently, the ball animation is based solely on physics: When the ball collides, it reflects and keeps moving. But, with tweening techniques, you can make the ball a little more interesting.
To create some interesting graphics, begin by changing the scale of the ball with tweening effects.
Scaling the ball
All the examples thus far were about movement. However, you can choose a value for any given property.
To illustrate that concept, replace OnCollisionEnter2D() in BallScript.cs with:
private void OnCollisionEnter2D(Collision2D collision)
{
    if (collision.gameObject.tag.Equals("Player"))
    {
        hitPosition = (ballRigidbody.position.x - collision.rigidbody.position.x)
                / collision.collider.bounds.size.x;

            direction = new Vector2(hitPosition, 1).normalized;
            ballRigidbody.velocity = direction * BallSpeed;
    }
    // 1
    LeanTween.cancel(gameObject);
    transform.localScale = new Vector3(0.4f, 0.4f, 0.4f);
    // 2
    LeanTween.scale(gameObject, new Vector3(1.0f, 1.0f), 1.0f).setEase(LeanTweenType.punch);
}
Here’s a code breakdown:
- These two lines reset the GameObject behavior. In addition to
LeanTween.cancel(), the ball’s scale needs to reset to avoid any error propagation. If the ball collides with another element before the animation ends, the beginning scale will be incorrect, and, in the end, the “normal” size of the ball will be modified. - Again, this is the code that actually performs the operation. This time, however, you’re scaling the GameObject instead of moving it. This scales the ball from its normal size (0.4) to 1.0 and back, thanks to the
puncheasing function.
Press the Play button. Look at how nice the ball behaves now:

Personalized Easing Functions
In this example, you used a predefined easing curve for the scale operation. But setEase isn’t limited to only LeanTweenType easing curves.
This function also gives you the flexibility of drawing your own curves with Unity’s help. Add the following animationCurve variable to the BallScript class:
public AnimationCurve animationCurve;
Then, replace:
LeanTween.scale(gameObject, new Vector3(1.0f, 1.0f), 1.0f).setEase(LeanTweenType.punch);
With:
LeanTween.scale(gameObject, new Vector3(1.0f, 1.0f), 1.0f).setEase(animationCurve);
Save the script changes and go to the Hierarchy window. Expand the Player Objects GameObject, select the Cog GameObject and look at the Inspector window.
Here you can set your own easing curve.

Here you can set your own easing curve.
You’ll see a new parameter that lets you draw your easing function graphically. You can also select a predefined curve defined by Unity.

This is particularly helpful for testing because you can try various curves and behaviors for your scene elements in Play Mode. You can fine-tune your game as much as you want until the game feels exactly as you intend.
For example, if you set the curve to quickly ascend, like this:

The ball grows quickly in the beginning, and then plateaus, like so:

However, if the curve is inverted:

The ball will begin growing slowly and pick up momentum:

Because you set the ball to reset its scale for every collision in the code, it’ll work with whatever curve you choose to elaborate. However, to avoid relying on setting the size by code, you could try a curve that comes back to the initial size in the end after applying some scaling, like this:

Right click the curve and add as many keys as you like to create various effects. This curve gives the ball a rubbery feeling:

Now create your own rubbery curve and select it as the Animation Curve for your script.