How To Write A Simple Node.js/MongoDB Web Service for an iOS App
Learn how to create a simple Node.js and MongoDB web service for an iOS app in this tutorial. By Michael Katz.
Updating and Deleting Data
You’ve implemented the Create and Read operations of CRUD — all that’s left are Update and Delete. These are relatively straightforward and follow the same pattern as the other two.
Add the following code to CollectionDriver.js before the exports.CollectionDriver line:
//update a specific object
CollectionDriver.prototype.update = function(collectionName, obj, entityId, callback) {
    this.getCollection(collectionName, function(error, the_collection) {
        if (error) callback(error);
        else {
            obj._id = ObjectID(entityId); //A convert to a real obj id
            obj.updated_at = new Date(); //B
            the_collection.save(obj, function(error,doc) { //C
                if (error) callback(error);
                else callback(null, obj);
            });
        }
    });
};
update() function takes an object and updates it in the collection using collectionDriver‘s save() method in line C. This assumes that the body’s _id is the same as specified in the route at line A. Line B adds an updated_at field with the time the object is modified. Adding a modification timestamp is a good idea for understanding how data changes later in your application’s lifecycle.
Note that this update operation replaces whatever was in there before with the new object – there’s no property-level updating supported.
Add the following code to collectionDriver.js just before the exports.CollectionDriver line:
//delete a specific object
CollectionDriver.prototype.delete = function(collectionName, entityId, callback) {
    this.getCollection(collectionName, function(error, the_collection) { //A
        if (error) callback(error);
        else {
            the_collection.remove({'_id':ObjectID(entityId)}, function(error,doc) { //B
                if (error) callback(error);
                else callback(null, doc);
            });
        }
    });
};
delete() operates the same way as the other CRUD methods. It fetches the collection object in line A then calls remove() with the supplied id in line B.
Now you need two new routes to handle these operations. Fortunately, the PUT and DELETE verbs already exist so you can create handlers that use the same semantics as GET.
Add the following code to index.js just after the app.post() call:
app.put('/:collection/:entity', function(req, res) { //A
    var params = req.params;
    var entity = params.entity;
    var collection = params.collection;
    if (entity) {
       collectionDriver.update(collection, req.body, entity, function(error, objs) { //B
          if (error) { res.send(400, error); }
          else { res.send(200, objs); } //C
       });
   } else {
       var error = { "message" : "Cannot PUT a whole collection" };
       res.send(400, error);
   }
});
The put callback follows the same pattern as the single-entity get: you match on the collection name and _id as shown in line A. Like the post route, put passes the JSON object from the body to the new collectionDriver‘s update() method in line B.
The updated object is returned in the response (line C), so the client can resolve any fields updated by the server such as updated_at.
Add the following code to index.js just below the put method you added above:
app.delete('/:collection/:entity', function(req, res) { //A
    var params = req.params;
    var entity = params.entity;
    var collection = params.collection;
    if (entity) {
       collectionDriver.delete(collection, entity, function(error, objs) { //B
          if (error) { res.send(400, error); }
          else { res.send(200, objs); } //C 200 b/c includes the original doc
       });
   } else {
       var error = { "message" : "Cannot DELETE a whole collection" };
       res.send(400, error);
   }
});
The delete endpoint is very similar to put as shown by line A except that delete doesn’t require a body. You pass the parameters to collectionDriver‘s delete() method at line B, and if the delete operation was successful then you return the original object with a response code of 200 at line C.
If anything goes wrong during the above operation, you’ll return the appropriate error code.
Save your work and restart your Node instance.
Execute the following command in Terminal, replacing {_id} with whatever value was returned from the original POST call:
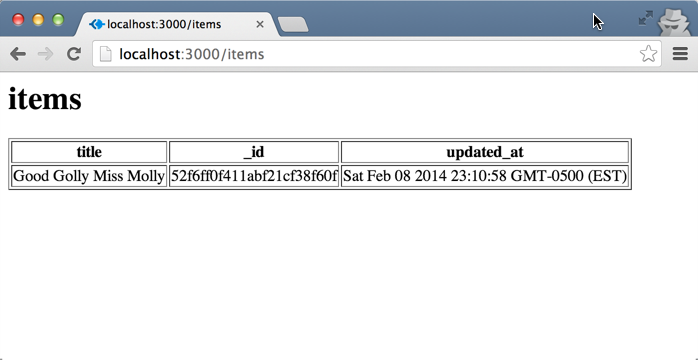
curl -H "Content-Type: application/json" -X PUT -d '{"title":"Good Golly Miss Molly"}' http://localhost:3000/items/{_id}
You’ll see the following response in Terminal:

Head to your browser and reload http://localhost:3000/items; you’ll see the item you inserted show up in the table:
Execute the following command in Terminal to delete your record:
curl -H "Content-Type: application/json" -X DELETE http://localhost:3000/items/{_id}
You’ll receive the following response from curl:

Reload http://localhost:3000/items and sure enough, your entry is now gone:

And with that, you’ve completed your entire CRUD model using Node.js, Express, and MongoDB!
Where to Go From Here?
Here is the completed sample project with all of the code from the above tutorial.
Your server is now ready for clients to connect and start transferring data. In the second part of this tutorial series, you’ll build an iOS app to connect to your new server and take advantage of some of the cool features of MongoDB and Express.
For more information MongoDB, check out the official MongoDB documentation.
If you have any questions or comments about this tutorial, please join the discussion below!