Storyboards Tutorial in iOS 7: Part 1
Storyboards tutorial to get you started with designing user interfaces for your iPhone apps on iOS 7. By Matthijs Hollemans.
Designing Your Own Prototype Cells
Using a standard cell style is OK for many apps, but for this app you want to add an image on the right-hand side of the cell that shows the player’s rating (one to five stars). Having an image view in that spot is not supported by the standard cell styles, so you’ll have to make a custom design.
Switch back to Main.storyboard, select the prototype cell in the table view, and set its Style attribute to Custom. The default labels now disappear.
First make the cell a little taller. Either drag its handle at the bottom or change the Row Height value in the Size inspector. Make the cell 55 points high.
Drag two Label objects from the Objects Library into the cell and place them roughly where the standard labels were previously. Just play with the font and colors and pick something you like.
Drag an Image View into the cell and place it on the right, next to the disclosure indicator. Make it 81 points wide; the height isn’t very important. Set its Mode to Center (under View in the Attributes inspector) so that whatever image you put into this view is not stretched.
Make the labels 190 points wide so they don’t overlap with the image view. The final design for the prototype cell looks something like this:

Because this is a custom designed cell, you can no longer use UITableViewCell’s textLabel and detailTextLabel properties to put text into the labels. These properties refer to labels that aren’t on this cell anymore; they are only valid for the standard cell types. Instead, you will use tags to find the labels.
Give the Name label tag 100, the Game label tag 101, and the Image View tag 102. You can do this in the Attributes inspector.
Then open PlayersViewController.m and add a new method, imageForRating:.
- (UIImage *)imageForRating:(int)rating
{
    switch (rating) {
        case 1: return [UIImage imageNamed:@"1StarSmall"];
        case 2: return [UIImage imageNamed:@"2StarsSmall"];
        case 3: return [UIImage imageNamed:@"3StarsSmall"];
        case 4: return [UIImage imageNamed:@"4StarsSmall"];
        case 5: return [UIImage imageNamed:@"5StarsSmall"];
    }
    return nil;
}
Change tableView:cellForRowAtIndexPath: to the following:
- (UITableViewCell *)tableView:(UITableView *)tableView cellForRowAtIndexPath:(NSIndexPath *)indexPath
{
    UITableViewCell *cell = [tableView dequeueReusableCellWithIdentifier:@"PlayerCell"];

    Player *player = (self.players)[indexPath.row];

    UILabel *nameLabel = (UILabel *)[cell viewWithTag:100];
    nameLabel.text = player.name;

    UILabel *gameLabel = (UILabel *)[cell viewWithTag:101];
    gameLabel.text = player.game;

    UIImageView *ratingImageView = (UIImageView *)[cell viewWithTag:102];
    ratingImageView.image = [self imageForRating:player.rating];

    return cell;
}
That should do it. Now run the app again. It is possible that the app shows up like this:
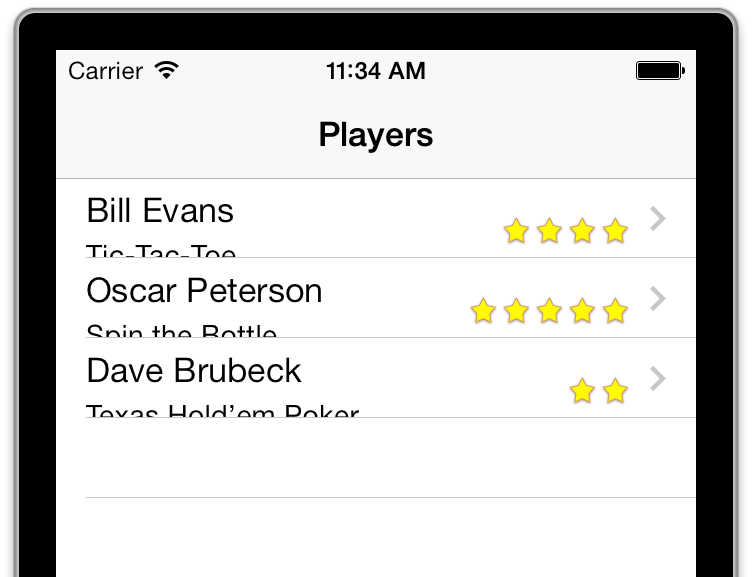
Hmm, that doesn’t look quite right, the cells appear to overlap one another. You did change the height of the prototype cell but the table view doesn’t necessarily take that into consideration. There are two ways to fix it: you can change the table view’s Row Height attribute or implement the tableView:heightForRowAtIndexPath: method. The former is much easier, so let’s do that.
Note: You would use heightForRowAtIndexPath if you did not know the height of your cells in advance, or if different rows can have different heights.
Note: You would use heightForRowAtIndexPath if you did not know the height of your cells in advance, or if different rows can have different heights.
Back in Main.storyboard, in the Size inspector of the Table View, set Row Height to 55:

If you run the app now, it looks a lot better!

By the way, if you changed the height of the cell by dragging its handle rather than typing in the value, then the table view’s Row Height property was automatically changed too. So it may have worked correctly for you the first time around.
Using a Subclass for the Cell
The table view already works pretty well but I’m not a big fan of using tags to access the labels and other subviews of the prototype cell. It would be much more handy if you could connect these labels to outlets and then use the corresponding properties. As it turns out, you can.
Add a new file to the project, with the Objective-C class template. Name it PlayerCell and make it a subclass of UITableViewCell.
Change PlayerCell.h to:
@interface PlayerCell : UITableViewCell

@property (nonatomic, weak) IBOutlet UILabel *nameLabel;
@property (nonatomic, weak) IBOutlet UILabel *gameLabel;
@property (nonatomic, weak) IBOutlet UIImageView *ratingImageView;

@end
The class itself doesn’t do much; it just adds properties for nameLabel, gameLabel and ratingImageView, all of which are IBOutlets.
Back in Main.storyboard, select the prototype cell and change its Class to PlayerCell on the Identity inspector. Now whenever you ask the table view for a new cell with dequeueReusableCellWithIdentifier:, it returns a PlayerCell instance instead of a regular UITableViewCell.
Note that you gave this class the same name as the reuse identifier — they’re both called PlayerCell — but that’s only because I like to keep things consistent. The class name and reuse identifier have nothing to do with each other, so you could name them differently if you wanted to.
Now connect the labels and the image view to these outlets. Select the label and drag from New Referencing Outlet in its Connections inspector to the table view cell and select nameLabel and gameLabel, respectively:

Important: You should hook up the controls to the table view cell, not to the view controller! You see, whenever your data source asks the table view for a new cell with dequeueReusableCellWithIdentifier, the table view doesn’t give you the actual prototype cell but a copy (or one of the previous cells is recycled if possible).
This means there will be more than one instance of PlayerCell at any given time. If you were to connect a label from the cell to an outlet on the view controller, then several copies of the label will try to use the same outlet. That’s just asking for trouble. (On the other hand, connecting the prototype cell to actions on the view controller is perfectly fine. You would do that if you had custom buttons or other UIControls on your cell.)
Now that you’ve hooked up the properties, you can simplify the data source code one more time. First import the PlayerCell class in PlayersViewController.m:
#import "PlayerCell.h"
And then change cellForRowAtIndexPath to:
- (UITableViewCell *)tableView:(UITableView *)tableView cellForRowAtIndexPath:(NSIndexPath *)indexPath
{
    PlayerCell *cell = (PlayerCell *)[tableView dequeueReusableCellWithIdentifier:@"PlayerCell"];

    Player *player = (self.players)[indexPath.row];
    cell.nameLabel.text = player.name;
    cell.gameLabel.text = player.game;
    cell.ratingImageView.image = [self imageForRating:player.rating];

    return cell;
}
That’s more like it. You now cast the object that you receive from dequeueReusableCellWithIdentifier to a PlayerCell, and then you can simply use the properties that are wired up to the labels and the image view. Isn’t it great how using prototype cells makes table views a whole lot less messy?
Run the app and try it out. It should still look the same as before, but behind the scenes it’s now using your own table view cell subclass!