Storyboards Tutorial in iOS 7: Part 1
Storyboards tutorial to get you started with designing user interfaces for your iPhone apps on iOS 7. By Matthijs Hollemans.
Just Add It To My Tab
The Ratings app has a tabbed interface with two screens. With a storyboard it is really easy to create tabs.
Switch back to Main.storyboard, and drag a Tab Bar Controller from the Object Library into the canvas. You may want to maximize your Xcode window first, because the Tab Bar Controller comes with two view controllers attached and you’ll need some room to maneuver. You can zoom out using the little floating panel in the bottom-right corner of the canvas.

The new Tab Bar Controller comes pre-configured with two other view controllers, one for each tab. UITabBarController is a so-called container view controller because it contains one or more other view controllers. Two other common containers are the Navigation Controller and the Split View Controller (you’ll see both of them later).
The container relationship is represented by the arrows between the Tab Bar Controller and the view controllers that it contains.

Note: If you want to move the Tab Bar Controller and its attached view controllers as a group, you can ⌘-click to select multiple scenes and then move them around together. (Selected scenes have a thick blue outline.)
Drag a label into the first view controller and give it the text “First Tab”. Also drag a label into the second view controller and name it “Second Tab”. This allows you to actually see something happen when you switch between the tabs.
Note: You can’t drag stuff into the scenes when the editor is zoomed out. You’ll need to return to the normal zoom level first. You can do that quickly by double-clicking in the canvas.
Select the Tab Bar Controller and go to the Attributes inspector. Check the box that says Is Initial View Controller.

In the canvas the arrow that at first pointed to the regular view controller now points at the Tab Bar Controller:
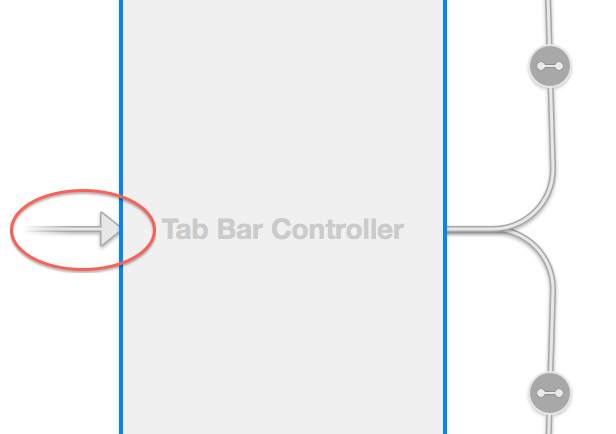
This means that when you run the app, UIApplication will make the Tab Bar Controller the main screen. The storyboard always has a single view controller that is designated the initial view controller, that serves as the entry point into the storyboard.
Tip: To change the initial view controller, you can also drag the arrow between view controllers.
Run the app and try it out. The app now has a tab bar and you can switch between the two view controllers with the tabs:

Xcode actually comes with a template for building a tabbed app (unsurprisingly called the Tabbed Application template) that you could have used, but it’s good to know how this works so you can also create a Tab Bar Controller by hand if you have to.
Note: If you connect more than five scenes to the Tab Bar Controller, it automatically gets a More… tab when you run the app. Pretty neat!
Note: If you connect more than five scenes to the Tab Bar Controller, it automatically gets a More… tab when you run the app. Pretty neat!
Remove the view controller that was originally added by the template, as you’ll no longer be using it. The storyboard now contains just the tab bar and the two scenes for its tabs.
Adding a Table View Controller
The two scenes that are currently attached to the Tab Bar Controller are both regular UIViewControllers. You are going to replace the scene from the first tab with a UITableViewController instead.
Click on that first view controller to select it, and then delete it. From the Object Library drag a new Table View Controller into the canvas in the place where that previous scene used to be:
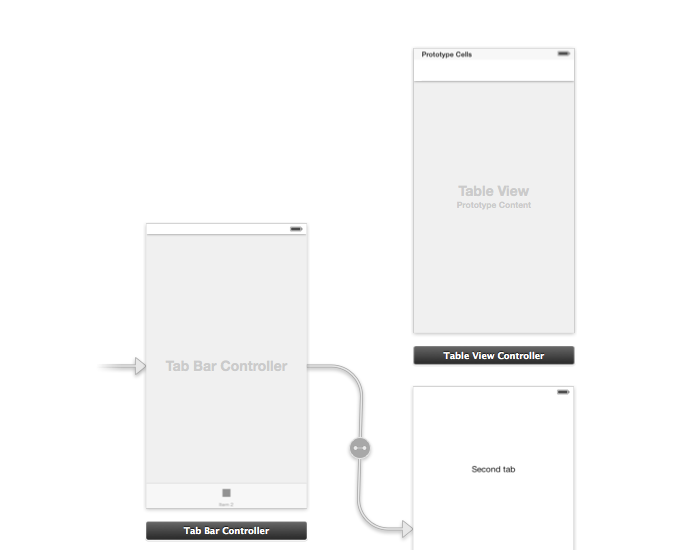
With the Table View Controller selected, choose Editor\Embed In\Navigation Controller from Xcode’s menubar. This adds yet another view controller to the canvas:

You could also have dragged in a Navigation Controller from the Object Library, but this Embed In command is just as easy.
Because the Navigation Controller is also a container view controller (just like the Tab Bar Controller), it has a relationship arrow pointing at the Table View Controller. You can also see these relationships in the Document Outline:

Notice that embedding the Table View Controller gave it a navigation bar. Interface Builder automatically put it there because this scene will now be displayed inside the Navigation Controller’s frame. It’s not a real UINavigationBar object but a simulated one.
If you look at the Attributes inspector for the Table View Controller, you’ll see the Simulated Metrics section at the top:

“Inferred” is the default setting for storyboards and it means the scene will show a navigation bar when it’s inside of a Navigation Controller, a tab bar when it’s inside of a Tab Bar Controller, and so on. You could override these settings if you wanted to, but keep in mind they are here only to help you design your screens. The Simulated Metrics aren’t used during runtime; they’re just a visual design aid that shows what your screen will end up looking like.
Let’s connect these two new scenes to the Tab Bar Controller. Ctrl-drag from the Tab Bar Controller to the Navigation Controller:

When you let go, a small popup menu appears:

Choose the Relationship Segue – view controllers option. This creates a new relationship arrow between the two scenes:

The Tab Bar Controller has two such relationships, one for each tab. The Navigation Controller itself has a relationship connection to the Table View Controller. There is also another type of arrow, the segue, that we’ll talk about later.
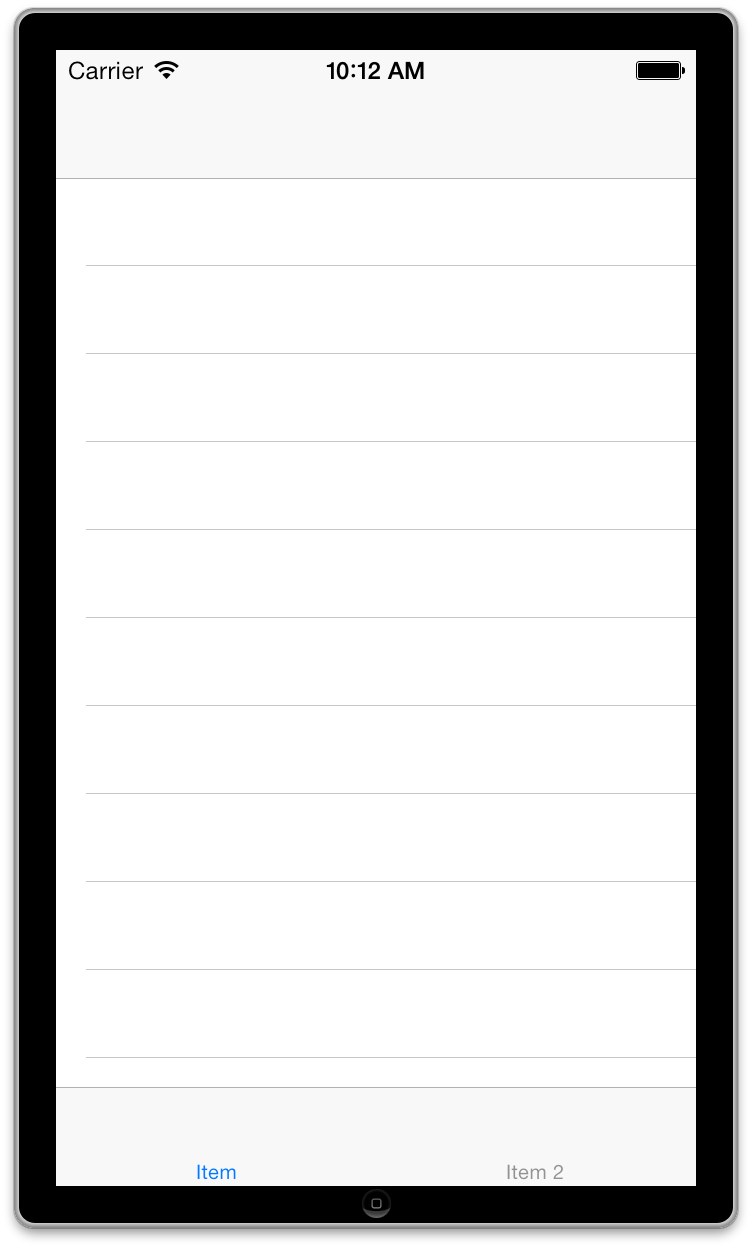
When you made this new connection, a new tab was added to the Tab Bar Controller, simply named “Item”. For this app, you want this new scene to be the first tab, so drag the tabs around to change their order:

Run the app and try it out. The first tab now contains a table view inside a navigation controller.
Before you put some actual functionality into this app, let’s clean up the storyboard a little. You will name the first tab “Players” and the second “Gestures”. Unlike what you may expect, you do not change this on the Tab Bar Controller itself, but in the view controllers that are connected to these tabs.
As soon as you connect a view controller to the Tab Bar Controller, it is given a Tab Bar Item object. You use the Tab Bar Item to configure the tab’s title and image.
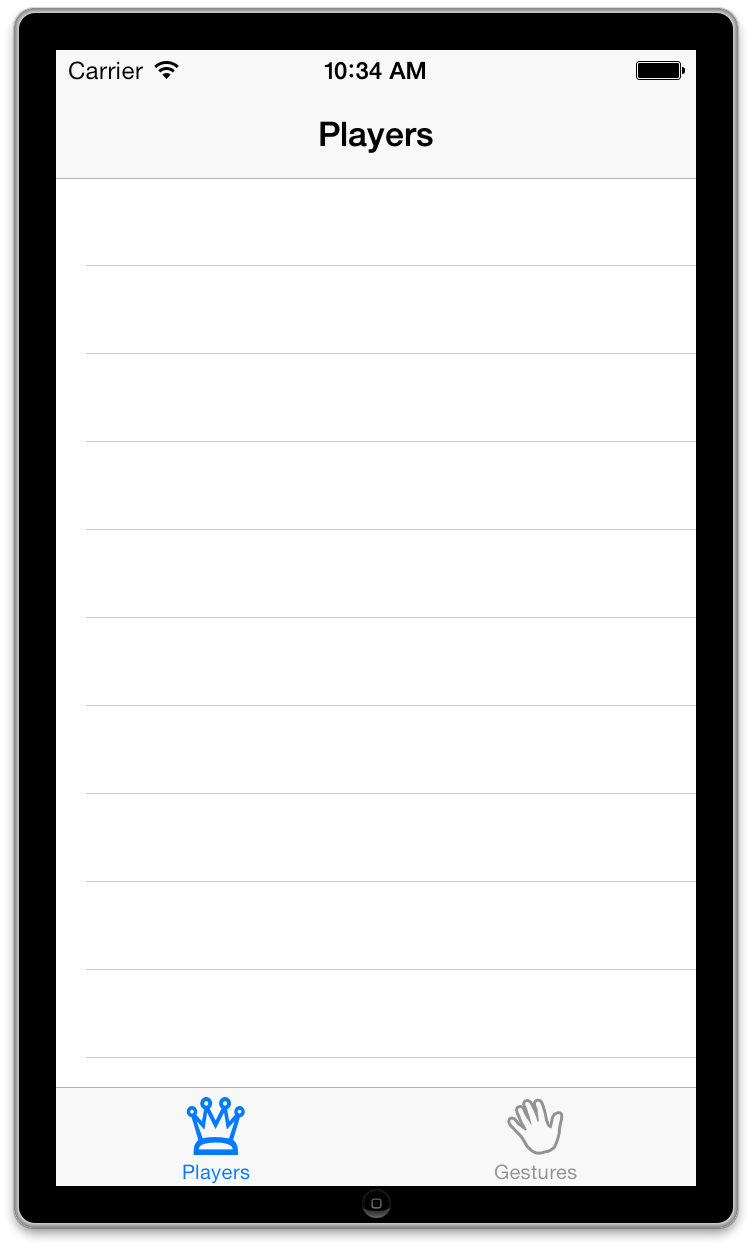
Select the Tab Bar Item inside the Navigation Controller, and in the Attributes inspector set its Title to Players:

Rename the Tab Bar Item for the view controller from the second tab to Gestures.
A well-designed app should also put some pictures on these tabs. The resources for this tutorial contains a subfolder named Images. Add that folder to the project. In the Attributes inspector for the Players Tab Bar Item, choose the Players.png image. You probably guessed it, but give the Gestures item the image Gestures.png.
A view controller that is embedded inside a Navigation Controller has a Navigation Item that is used to configure the navigation bar. Select the Navigation Item for the Table View Controller (you can find it in the Document Outline) and change its title in the Attributes inspector to Players.
Alternatively, you can double-click the navigation bar and change the title there. (Note: you should double-click the simulated navigation bar in the Table View Controller, not the actual Navigation Bar object in the Navigation Controller.)

Run the app and marvel at your pretty tab bar, all without writing a single line of code!