Android Accessibility Tutorial: Getting Started
In this Android accessibility tutorial, learn how to make apps that everyone can use, including people with vision, motor, or hearing disabilities. By Tori Gonda.
Espresso tests
For more in depth checks, you can turn on checks in your Espresso tests. Do this by adding the following line to your test or test runner.
AccessibilityChecks.enable()
Check the Google docs for how you can further configure these tests.
Accessibility Scanner
Google also gives us an Accessibility Scanner that you can download from the Play Store. Download it now so you can use it with this tutorial. After downloading, the scanner can be turned on in the same Accessibility settings menu you were in before to turn on TalkBack. Navigate to Settings/Accessibility/Accessibility Scanner, and toggle it on.
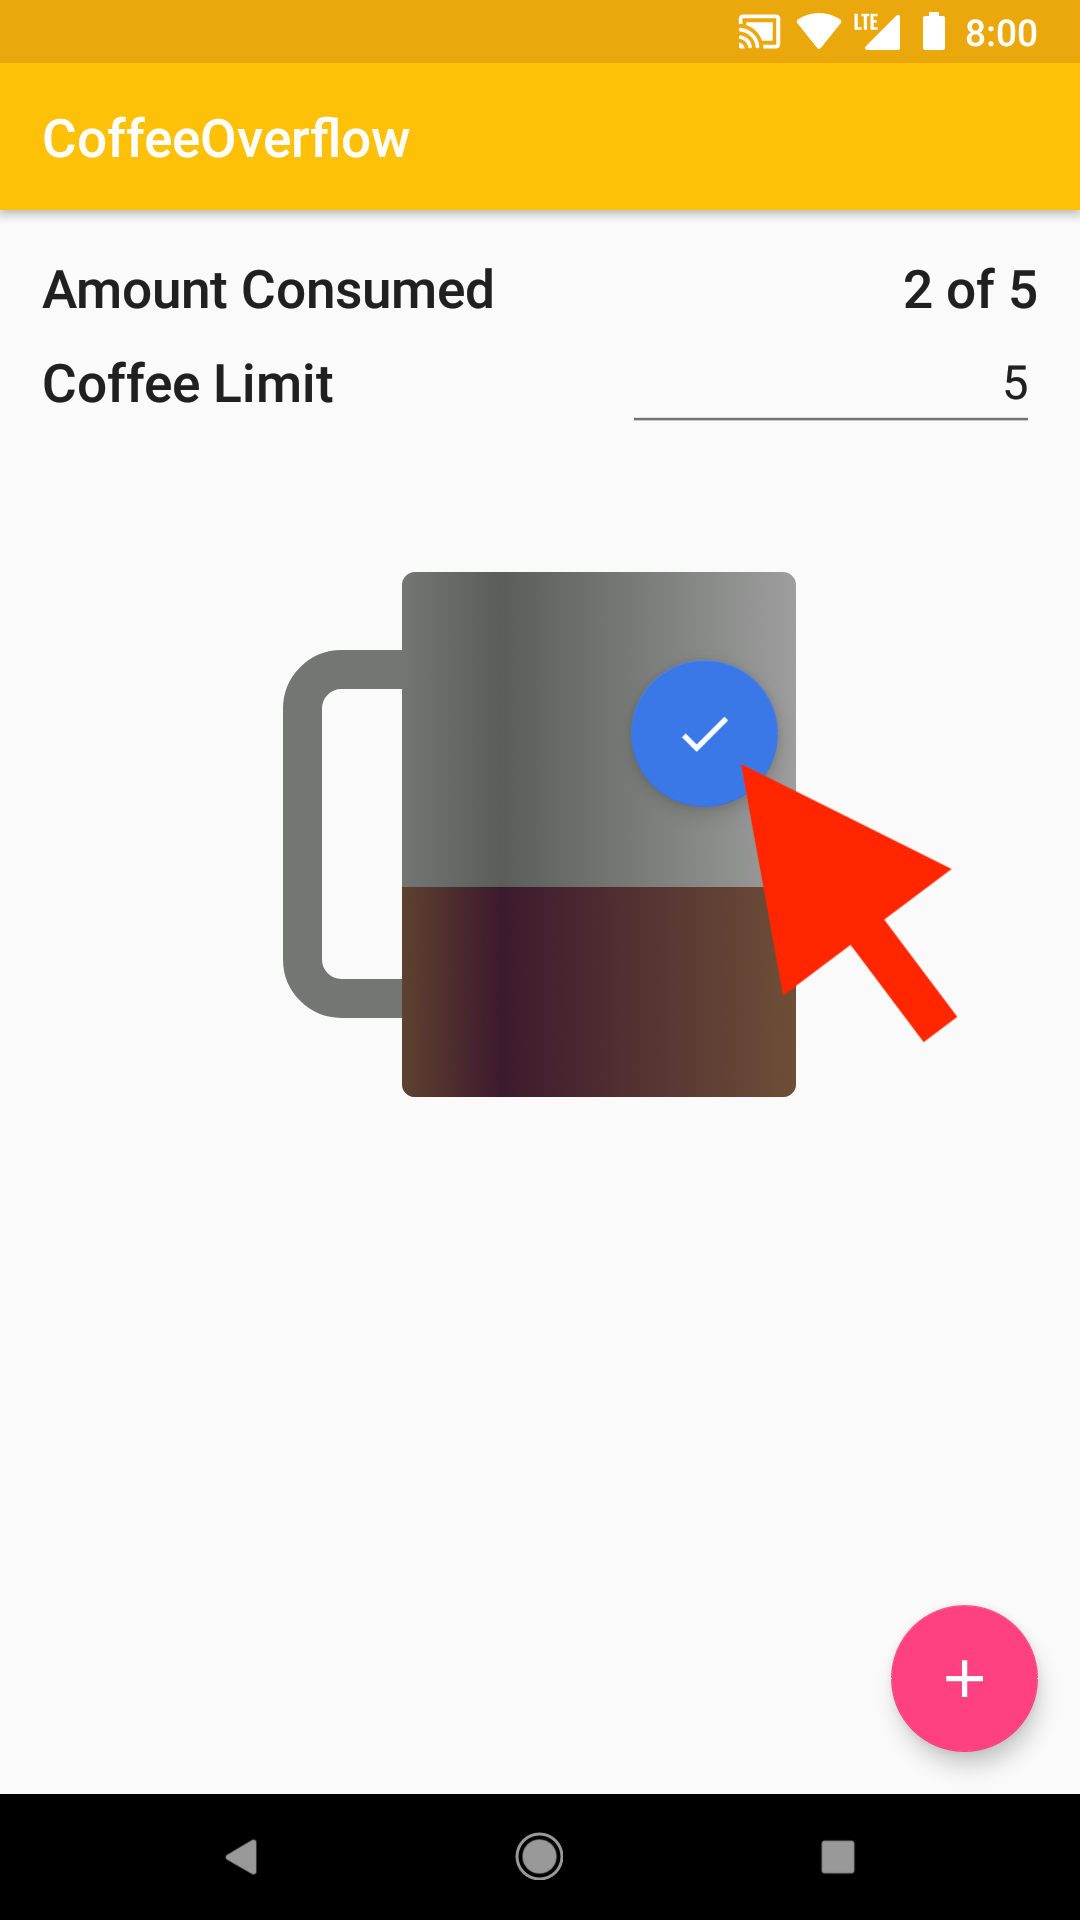
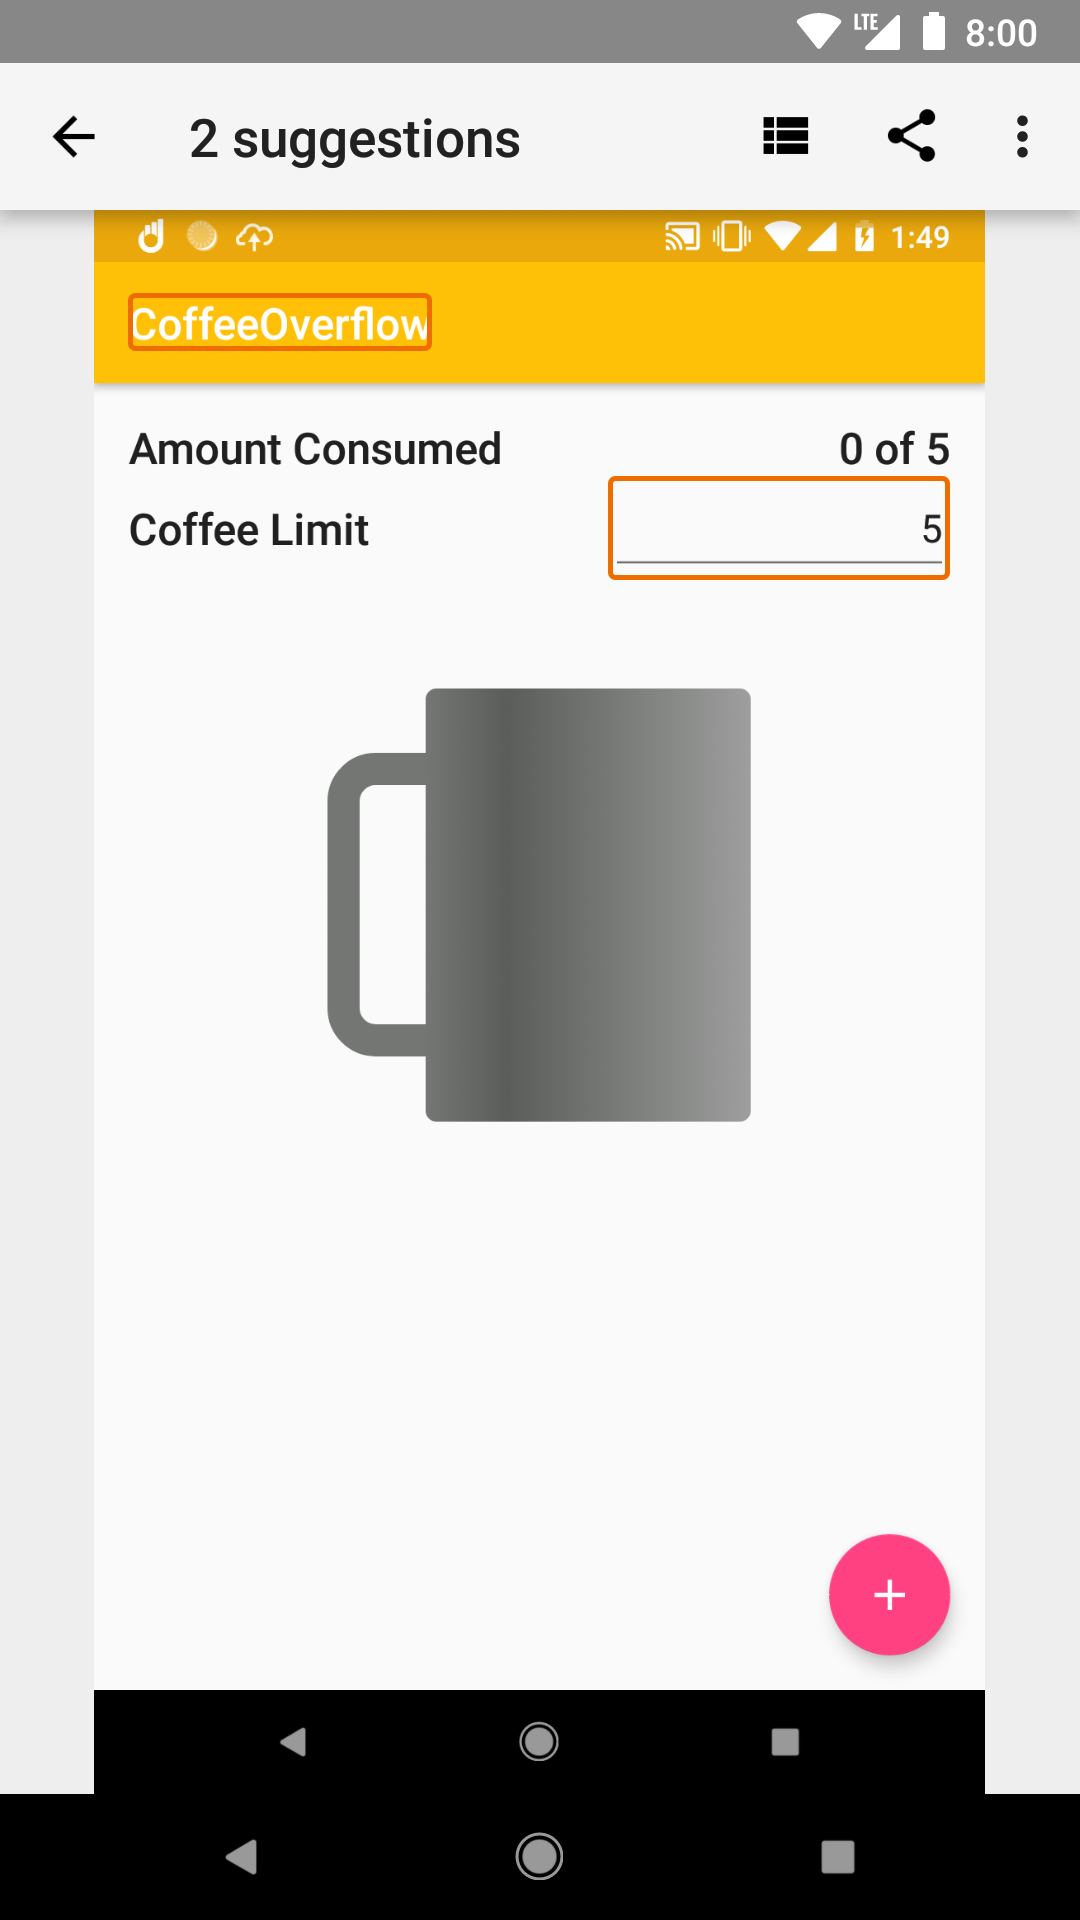
Once turned on, navigate to the screen you want to scan, tap the check mark in the blue circle. Wait a moment for the results of the scan to show.
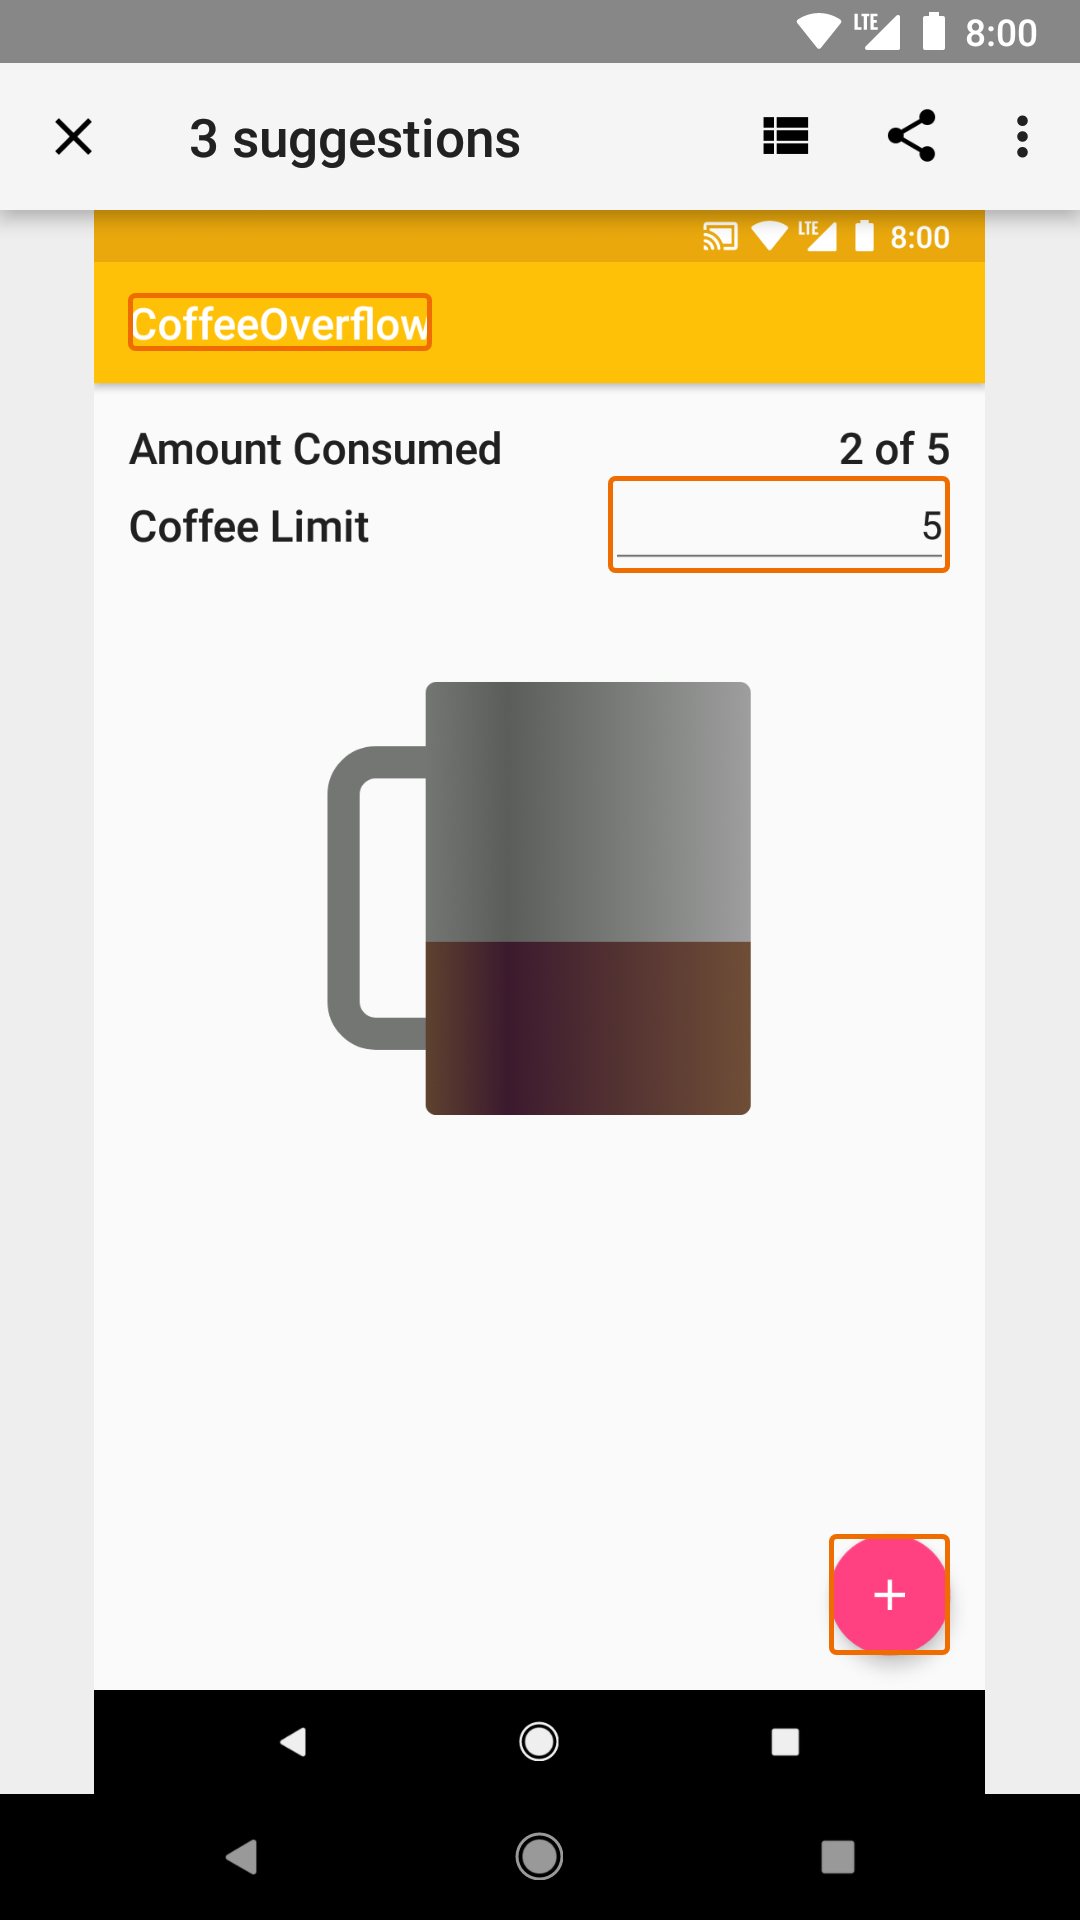
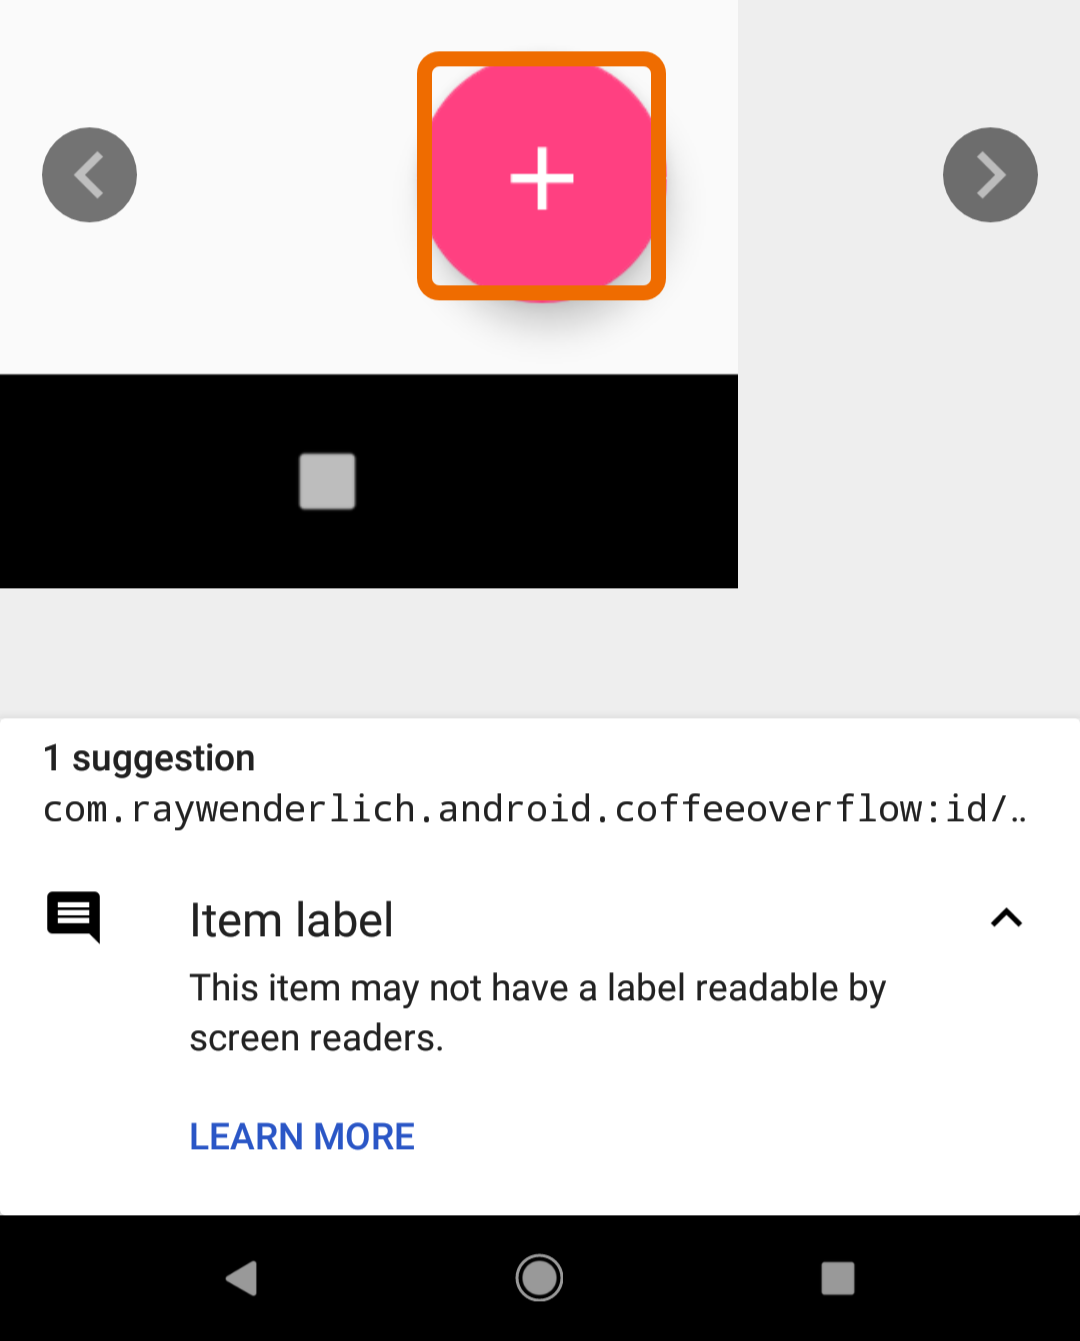
The results will show the scanned screen with orange boxes around any issues it found. By clicking on any of these boxes, you’ll get the description of what was found to be wrong, and a suggestion for how to fix it.
Now that you know how to find accessibility issues, you can get to work on fixing them, and making the world a better place!
Accessibility Attributes
One of the things that are highlighted by the Accessibility Scanner is the “add coffee” FloatingActionButton. It gives you the message “This item may not have a label readable by screen readers.”
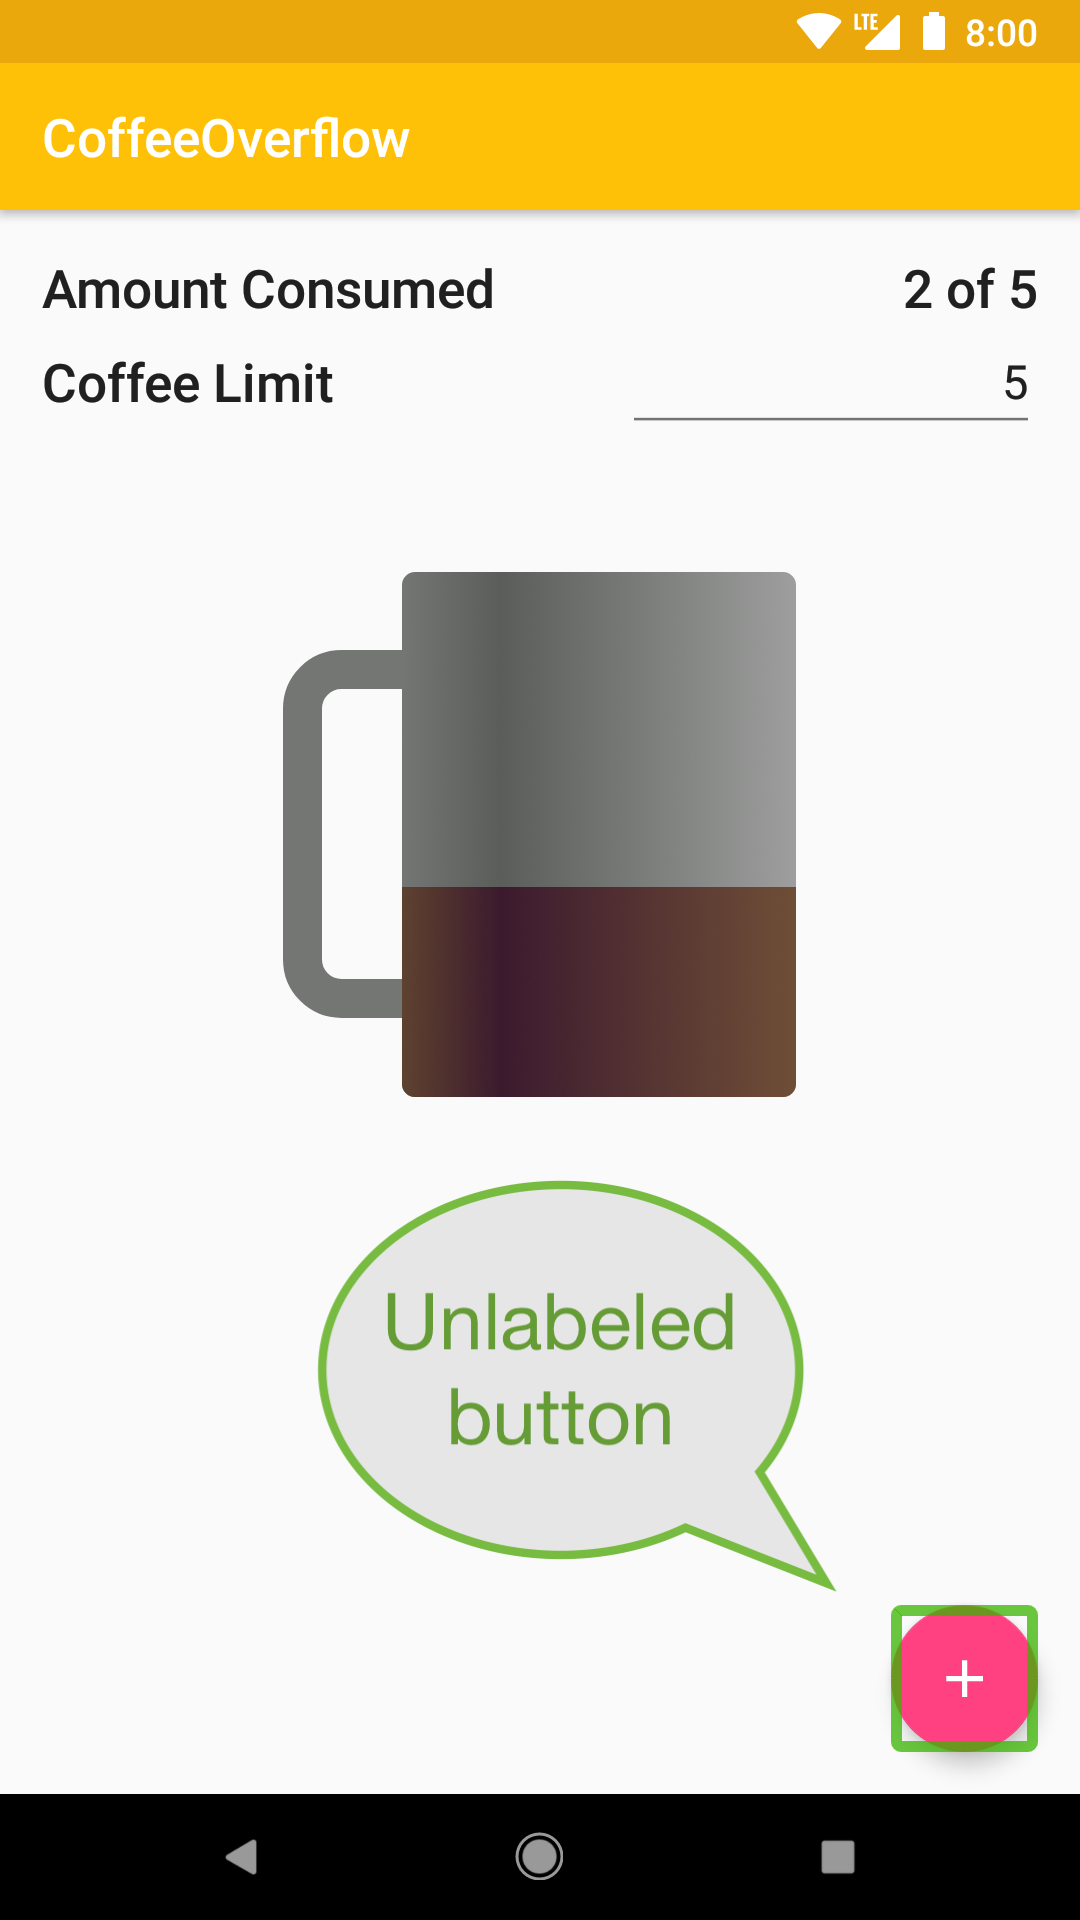
You can better understand the implications of this while using TalkBack. Try navigating to it using TalkBack. When the button comes into focus you hear the audio “unlabeled button”. This is not very descriptive for a person who cannot see the screen well enough to infer the meaning.
Content description
You can easily improve this user experience by adding a android:contentDescription attribute to the “add coffee” FloatingActionButton. contentDescription is a small bit of text that describes the view. You don’t need to include that it is a button in your description. This is already inferred by the screen reader, and it will announce it on its own. Add the content description “Add Coffee” to the button. This is done directly on that element in activity_main.xml. You will also need to add the string resource in the strings.xml.
activity_main.xml
<android.support.design.widget.FloatingActionButton
   android:id="@+id/addCoffee"
   android:layout_width="wrap_content"
   android:layout_height="wrap_content"
   android:clickable="true"
   android:contentDescription="@string/add_coffee"
   android:focusable="true"
   android:src="@drawable/ic_add_24px"
   app:fabSize="normal"
   app:layout_anchor="@id/mainContent"
   app:layout_anchorGravity="bottom|right|end"
   tools:targetApi="lollipop_mr1"/>
strings.xml
<resources>
  <string name="app_name">CoffeeOverflow</string>
  <string name="coffee_limit_label">Coffee Limit</string>
  <string name="default_coffee_limit">5</string>
  <string name="coffee_limit_input_hint">Limit</string>
  <string name="amount_consumed">Amount Consumed</string>
  <string name="consumed_format">%1$d of %2$s</string>
  <string name="add_coffee">Add Coffee</string>
</resources>
Once this change is made, build and run the app again. By running the Accessibility Scanner, you will no longer see this warning.
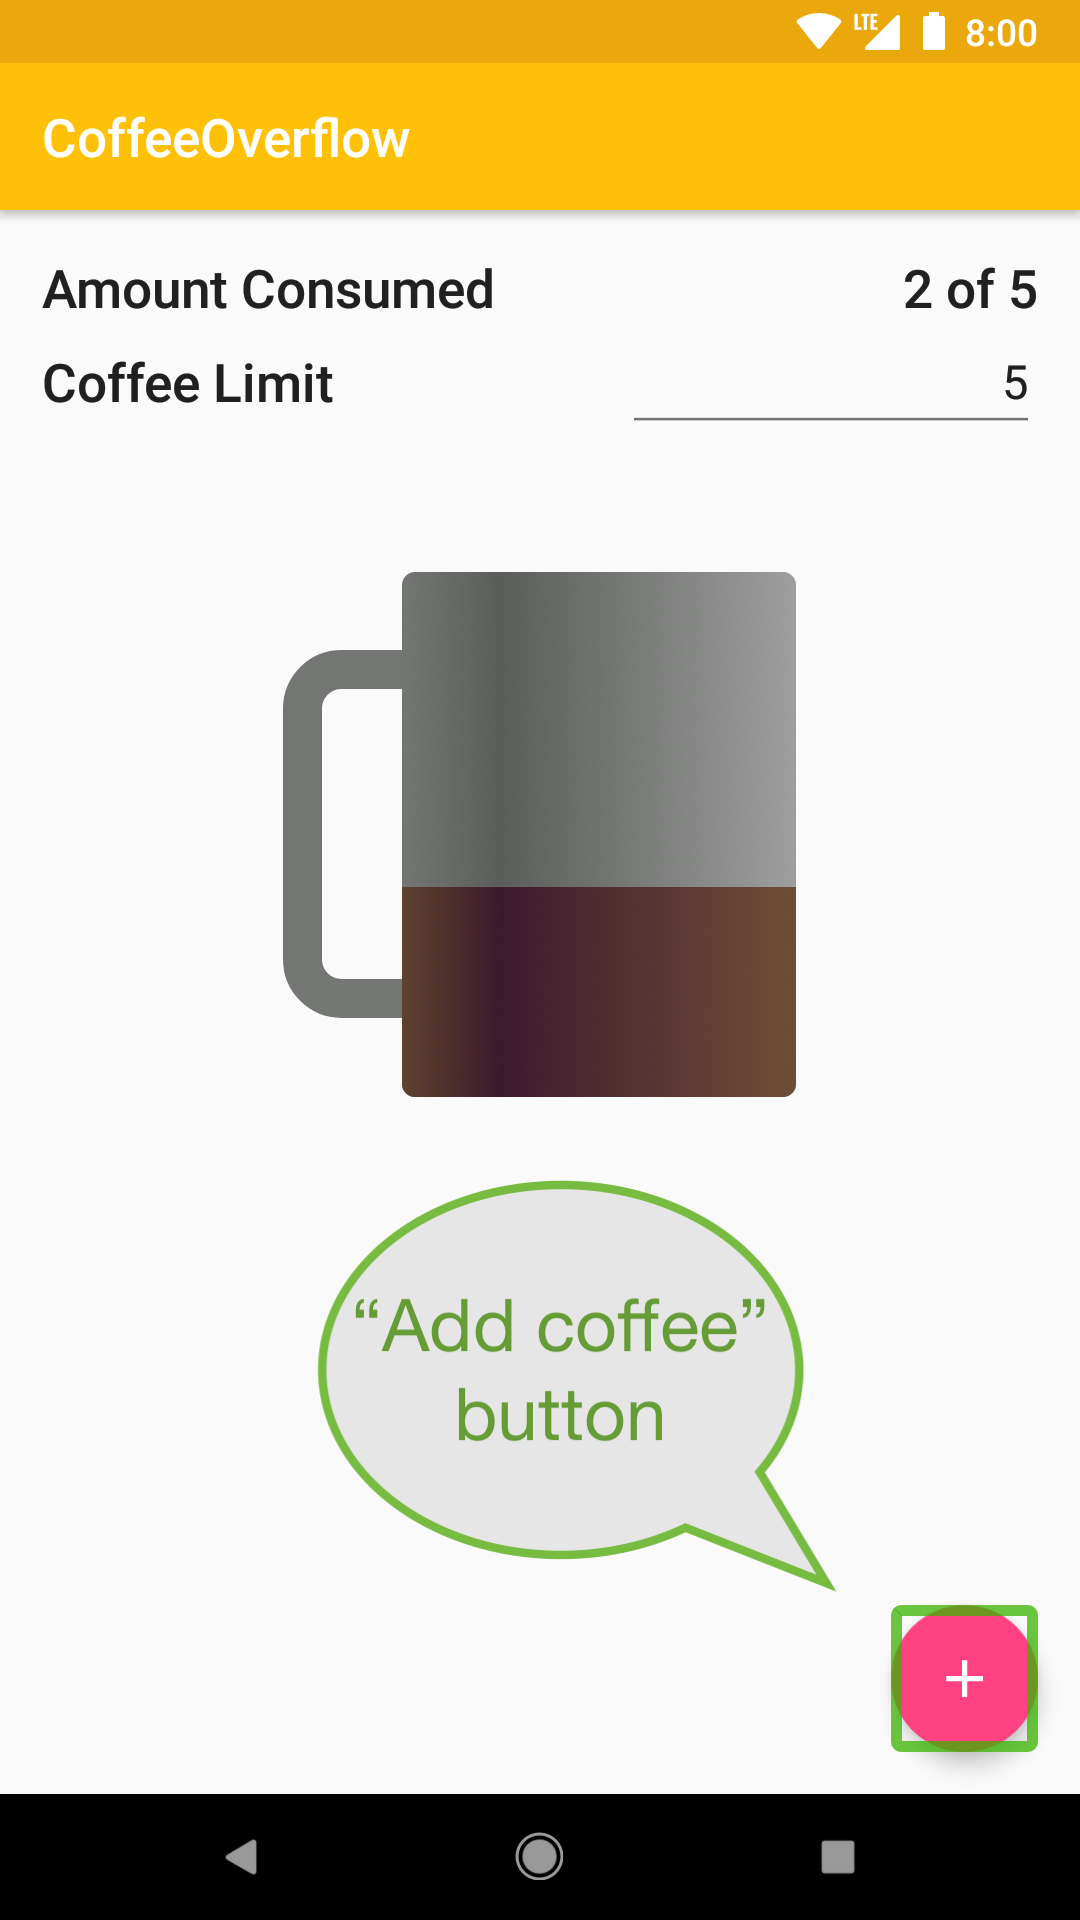
Then, when you test it out with TalkBack, you will hear the audio “add coffee button” when the FloatingActionButton is selected. Yay! Already making improvements.
See how the reader includes “button” in the audio without us including that into the description, along with instructions on how to use: “double tap to activate.” When a user can further interact with an element they have in focus, the screen reader will give clues on how to do that automatically.

Adding a content description is something you should do for every image or button that does not otherwise have text for the screen reader to read. If the element is not important to understand what is on the screen, the contentDescription can be set to @null. If you do this, TalkBack, and other screen readers will skip the element entirely, and move onto the next thing in the view.
Another attribute you can use to tell the screen reader to skip the view element is android:isImportantForAccessibility. When set to ”no”, the screen reader will skip this element while traversing the view.
Grouping
While using the TalkBack tool, you may have noticed how hard it was to get to the “add coffee” FloatingActionButton.
TalkBack traverses through everything on the screen, in order of the file. This can make some core actions, like incrementing the cups of coffee, harder to reach. There are other things, like label/value pairs, that require extra steps to get all the information when they should be grouped together. You should make sure everything on the screen is reached in a logical order, and grouped in a way that makes sense.
There are attributes you can use to improve these issues. Start with the “Amount Consumed” label, and the associated value. These are both parts of the same piece of information, and should be grouped together instead of requiring you to traverse each one separately.
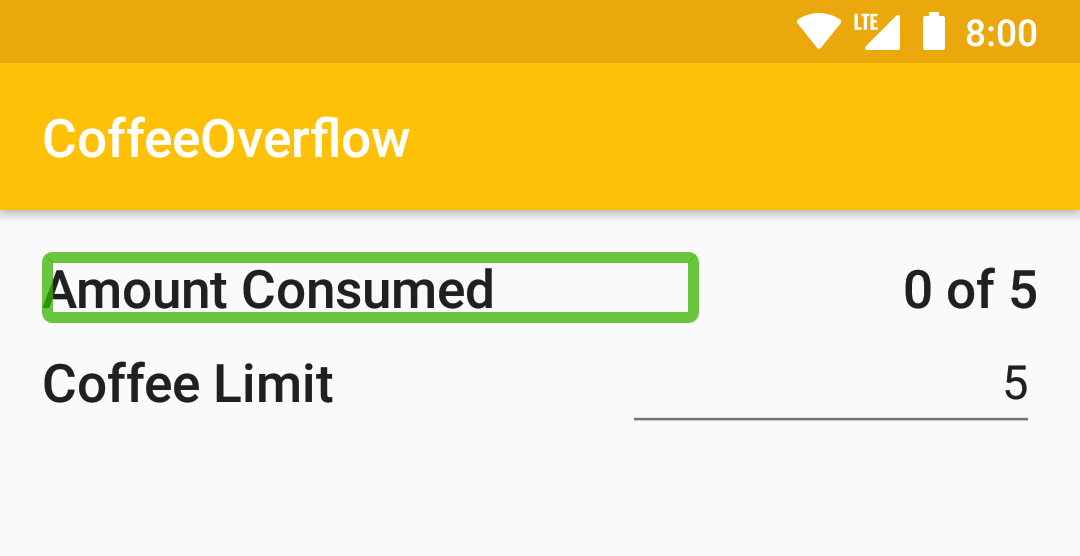
To specify that both the elements should be in focus at the same time, add the android:focusable attribute with the value ”true” the parent element of the two, the LinearLayout with the id consumedContainer. Also add the attribute android:focusableInTouchMode with the value ”false”, as you only want this to be focusable for the screen reader.
activity_main.xml
<LinearLayout
   android:id="@+id/consumedContainer"
   android:layout_width="match_parent"
   android:layout_height="wrap_content"
   android:focusable="true"
   android:focusableInTouchMode="false"
   android:orientation="horizontal">
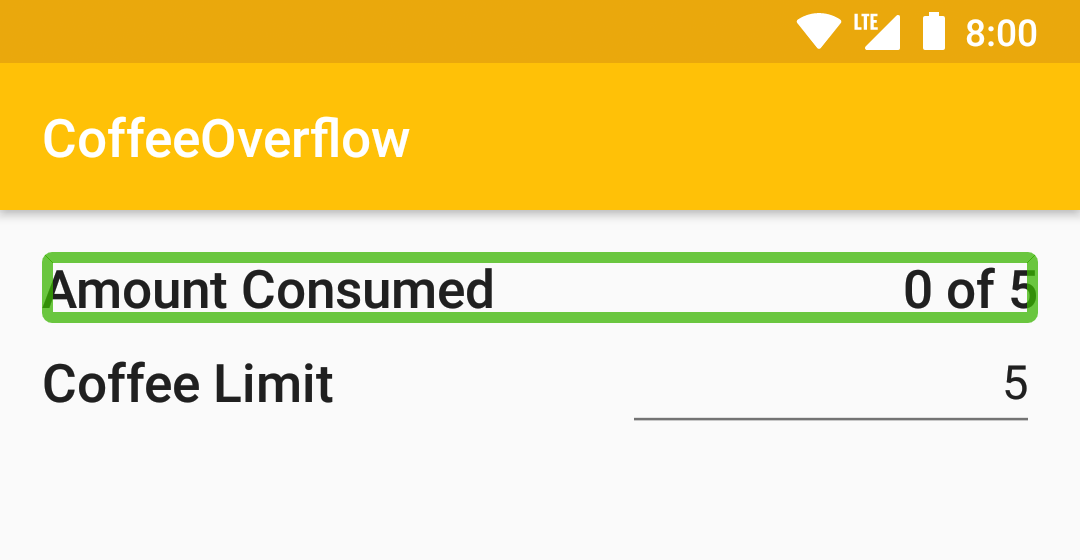
Run the app with these changes, and try out TalkBack. Observe that “Amount Consumed” and the value are read at the same time. Now that the information is grouped together, it is clear that they are part of the same bit of information, and is it quicker to understand and consume.
Labels
That solved the grouping for the consumption, but you have a similar issue for “Coffee Limit”. The label is read separately from the editable value, with nothing linking the two. This will use a different solution than you used for the amount consumed. The EditText still needs to be individually focusable to change the value. Add the android:labelFor attribute to the “Coffee Limit” TextView, with a value of the id of the EditText value, coffeeLimitValue.
activity_main.xml
<TextView
   android:id="@+id/coffeeLimitLabel"
   android:layout_width="wrap_content"
   android:layout_height="wrap_content"
   android:layout_gravity="start|center_vertical"
   android:layout_weight="1"
   android:labelFor="@id/coffeeLimitValue"
   android:text="@string/coffee_limit_label"
   android:textAppearance="@style/TextAppearance.AppCompat.Title"/>
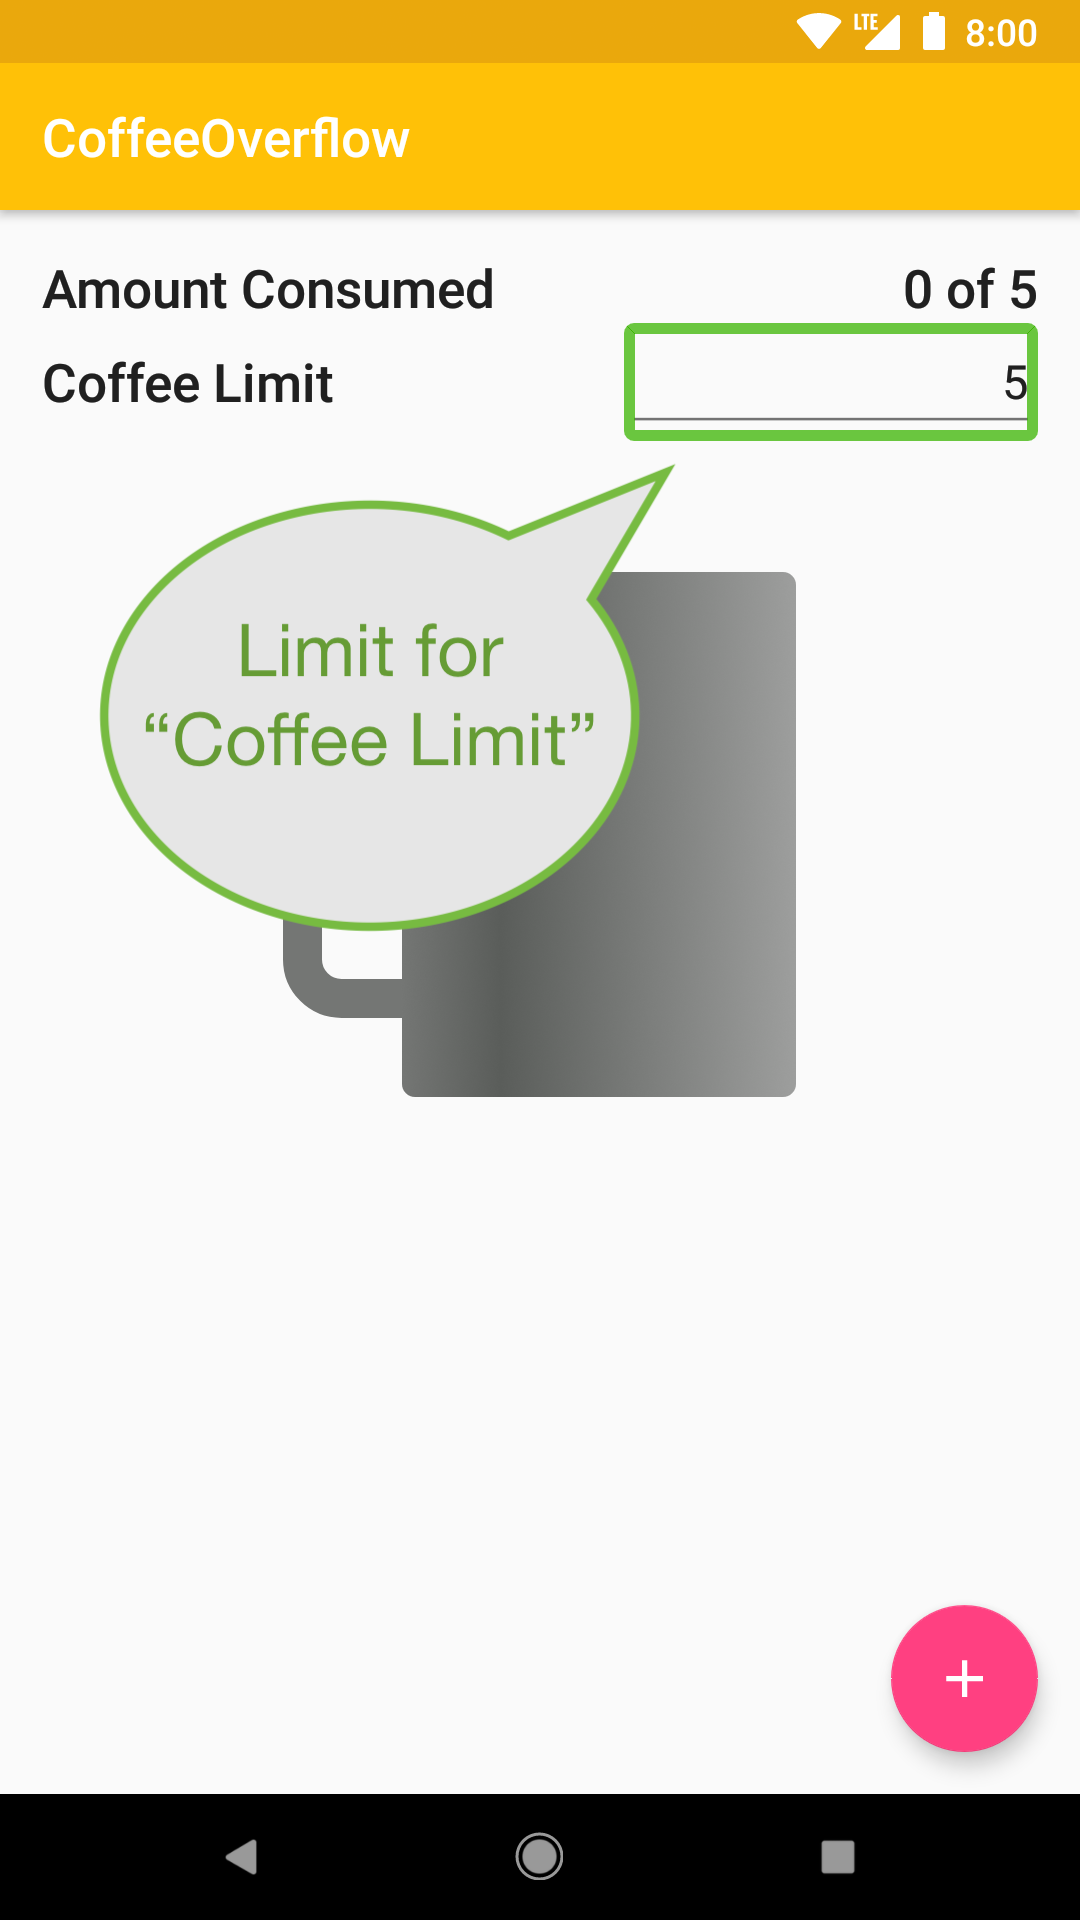
Now run the app to observe the changes. When the EditText with the value for the limit is selected, it includes the text of the label in the audio: ‘limit for “Coffee Limit”’. This provides the user context about what the editable value is for, relating it to the previous element. Use labelFor whenever you have a situation where you have a label and a value that should be individually focusable, but are referring to the same thing.