Open-Source Collaboration Using Git and GitHub
In this tutorial, you will learn how to collaborate on open-source projects through Git and GitHub. By Kelvin Lau.
- You already have a GitHub account. If you don’t, sign up for a free one here.
- Git is installed on your system. You can check this by opening up Terminal and typing which git. If there’s a result — typically /usr/bin/git — then you’re good to go. If not, you can install Xcode or download an installer from the Git website here.
You’ve come across a project on GitHub you want to contribute to. Great! That seems easy enough. But working on a global, open-source project can be quite intimidating for first-timers.
In this tutorial, you’ll learn the ins and outs of contributing to open-source by moving through the entire workflow of open-source contributions, from retrieving the code, to creating issues, to pushing your new contributions. And you’ll get a good laugh along the way as you dive into the tutorial’s sample project!
Getting Started
Open-source development is a huge part of the software development industry. Many tools and libraries you use everyday have been shaped by millions of humans all around the globe. Dependency managers such as CocoaPods and Carthage that iOS developers use daily are driven by public contributions. Even the Swift language itself is open-source.
There are many reasons to contribute to open-source projects:
- It’s a great way to build a highly accessible portfolio. Your GitHub profile can be a treasure trove of your technical expertise for inquiring minds.
- Open-source contributions rely on collaboration between fellow developers. Your participation and contributions to project discussions are an excellent indication of your abilities as a team player.
- Current and future employers, along with your peers in the industry, will take note of your work in the community.
- It’s a great way to learn and expand your development skills!
Contributing to open-source starts by choosing the project you want to contribute to. One way to find a project that is relevant to your interests is to check out the topics section in GitHub. Here’s the Swift topic list:

Checking out the trending category is a good way to find popular projects as well.
If you know exactly which repo you want to contribute to, you can also visit the project page directly. Last year, Ray Wenderlich unloaded many programming dad jokes at RWDevCon, leaving the audience gasping for air.
In an effort to bring more humor to the programming industry, you’ll be contributing your very own programming dad jokes to our first open-source joke repository.
Navigate to the URL for the repository for this tutorial — https://github.com/raywenderlich/DadJokes and you should see the DadJokes project on GitHub.
You should see something like this:

Keep this page handy, you’ll be visiting it often.
A Bit of Terminology
Before you begin piling on the puns, you’ll need to know some common terminology behind open-source-projects.
Repo
Short for repository, a repo is a project on GitHub. DadJokes can therefore be classified as a repo. You’ll use and hear this word fairly often in your forays into open-source.
Maintainers
“Maintainers” refers to the users who have permission to make changes to the repo. The owner of the repo has power to grant different level of privileges to certain users. The ability to set these access levels is important to prevent malicious users from altering the code – or in this case, blunting the puns.
README
The README file usually refers to the Markdown file that summarizes what the project is about.
Raising an Issue
A good first step in the open-source process is to look at an issue. An issue is a way to create a discussion in the community, whether it’s to bring up a question, provide feedback, or contacting the maintainers.
Navigate to the DadJokes repo and click on the Issues tab:
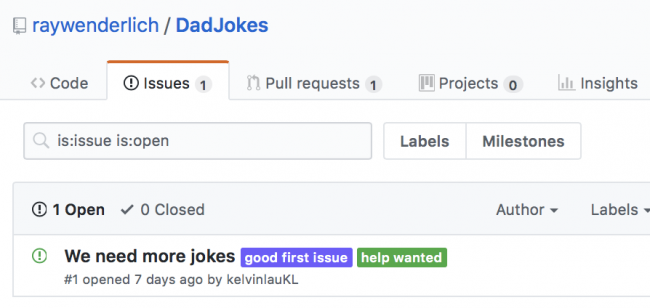
This tab contains a list of issues raised by community members. You’ll begin your adventure by creating an issue.
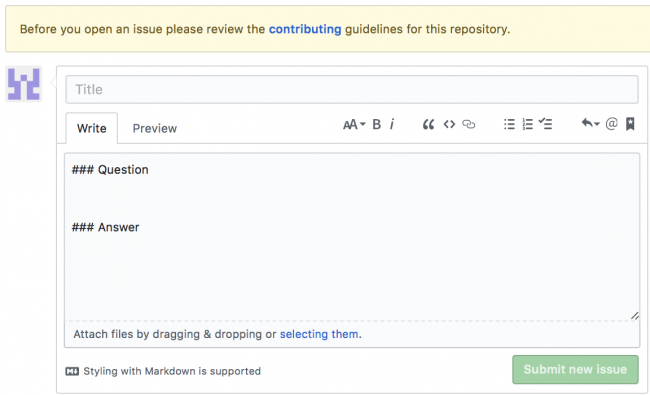
Click the green New Issue button, and you should see the following:
If contributing guidelines are available for a repo, you’ll see a warning dialog. Since you’re a good citizen, click on the highlighted contributing text and check out the rules.
After being humored by the contributing guidelines, head back to the issue creation page. The first order of business is to create a title. Write Joke as your title.
Next is the body of the issue. You should see some pre-filled text. If the maintainer added an ISSUE_TEMPLATE.md file to their repository, GitHub will render the contents of the file as a template for every new issue.
For this particular issue, write the following into the issue body:
Issue created in response to #1

### Question
What did the Swift String hash function say to the others?

### Answer
I Sip Hash Are You?
All GitHub issues are paired with a number. This number can be referenced within the repository, allowing you to “deep link” an issue from various discussions. In this particular issue, you’ve referenced issue #1 as part the body. Click the Preview tab to check out the issue:

Click on Submit new issue to create your first issue.
Downloading a Repo
After writing an issue, you’ll probably wait for feedback to decide how to proceed. While you wait for that, you’ll explore the project in depth. The first step is to actually get the project code onto your machine.
Forking
Before downloading someone else’s repo, you’ll need to create a fork, which is a personal copy of someone else’s project. Forks act as a bridge between the original repository and your personal copy.
Create a fork by clicking on the Fork button located at the top-right corner of the repo:

In a few moments, GitHub should complete forking the repository. You’ll find yourself in a familiar page:

This is your personal replica of the original repo. You’re free to make any changes with this copy, and it won’t affect the original one. Now that you have your fork, it’s time to clone it onto your computer.