Understanding and Managing Xcode Space
Learn how to free up space hogged by Xcode in caches, derived data, archives and simulators! By Keegan Rush.
Sign up/Sign in
With a free Kodeco account you can download source code, track your progress, bookmark, personalise your learner profile and more!
Create accountAlready a member of Kodeco? Sign in
Sign up/Sign in
With a free Kodeco account you can download source code, track your progress, bookmark, personalise your learner profile and more!
Create accountAlready a member of Kodeco? Sign in
Sign up/Sign in
With a free Kodeco account you can download source code, track your progress, bookmark, personalise your learner profile and more!
Create accountAlready a member of Kodeco? Sign in
Contents
Understanding and Managing Xcode Space
20 mins
- Getting Started
- Clearing Derived Data
- When to Delete Derived Data
- Deleting Derived Data
- Clearing Archives
- Archiving Stellar Space
- Clearing the Archived Build
- When to Clear Archives
- Clearing Simulators
- Storing Simulator Data
- Erasing Simulator Content
- Deleting Unavailable Simulators
- Device Support
- Finding Device Support Files
- Other Platforms
- Caches
- Supporting Caches
- Tying it All Together
- Creating a Script
- Running the Script
- Where to Go From Here?
Xcode is more than a plain old text editor. It’s a full-blown Integrated Development Environment (IDE).
Using an IDE for iOS development comes with myriad benefits. Xcode makes it easy to build projects, debug them and code-sign the resulting app.
But all the functionality provided by an IDE takes up space in your Mac’s storage. A fresh installation of Xcode takes 11 gigabytes on your Mac. But those 11 gigabytes are just the tip of the iceberg. For all its good qualities, Xcode is a notorious storage hog.
Over time, Xcode’s storage size bloats when considering some of its tools and directories:
- Derived data
- Caches
- Old archives
- Unavailable simulators
- Device support files
To make matters worse, this saved data doesn’t only eat into your Mac’s precious storage. It can also be a source of strange bugs and compilation issues.
If you see strange behavior when building an app, clearing folders such as derived data and caches can help to restore normality. Even Xcode needs a bit of spring cleaning sometimes. :]
In this tutorial, you’ll learn more about the purpose of each directory and why you might want to clear it.
Once you understand what each directory does, you’ll write a script to help keep your Mac in tip-top shape.
So get ready to reclaim some long-lost Mac storage!
Getting Started
First, download the project materials by clicking the Download Materials button at the top or bottom of this tutorial. Then, open the starter project in Xcode. Make sure to choose a simulator as the build target, then build and run.
Using NASA’s Astronomy Picture of the Day API, Stellar Space shows images taken by NASA for users to choose and save to their device.
Images saved to your iOS simulators use storage on your Mac. Clearing that storage is one of the things you’ll learn in this tutorial.
Earlier, when you built Stellar Space, Xcode saved some caches and build files. Next, you’ll clear it up.
Clearing Derived Data
When you build a project, Xcode stores build files for that project in your derived data. You’ll find your derived data folder in your macOS user library.
To find your derived data folder, open a new Finder window. In the Finder menu bar, select Go ▸ Go to Folder….
Here, type the location of your derived data folder:
~/Library/Developer/Xcode/DerivedData
Click Go to change the Finder window’s path to DerivedData.
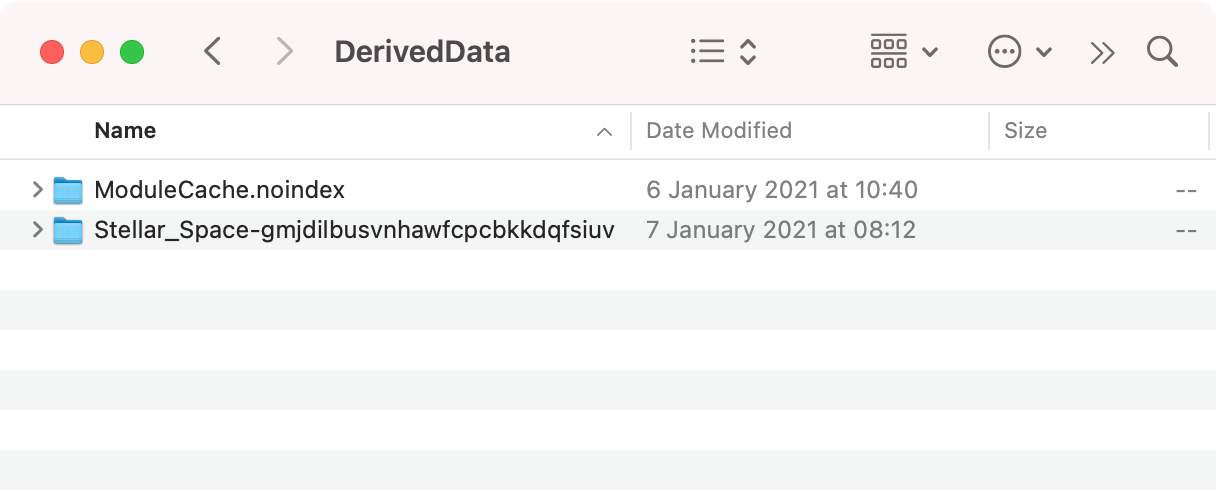
Your derived data contains a ModuleCache.noindex folder as well as folders for any projects you’ve built in Xcode, such as Stellar Space.
ModuleCache.index stores modules that Xcode compiled earlier. Xcode shares these cached modules between projects and builds to quicken build time.
Similarly, the individual project folders also quicken build time. In the Stellar Space folder, you’ll find supporting files that Xcode generated the last time you built Stellar Space.
When to Delete Derived Data
Everything in DerivedData is safe to delete. In fact, clearing derived data is a common trick among iOS developers to sort out pesky compilation issues.
Although deleting derived data is safe, your build will take a little longer next time while Xcode builds your project from scratch.
Deleting Derived Data
Clearing your derived data is as simple as deleting the entire folder from Finder. Next, you’ll delete only the Stellar Space folder, in case you want to keep the data for any other apps that have particularly long build times. :]
In your Finder window, look for Stellar Space’s derived data.
Mine is named Stellar_Space-gmjdilbusvnhawfcpcbkkdqfsiuv, but yours will be different.
Right-click the Stellar_Space folder and select Move to Trash to delete it.
With that, you’ve cleared the derived data for Stellar Space. Remember: To delete all your derived data, you need to delete the entire DerivedData folder.
This clears up the debug version of Stellar Space that you built. But archived release versions are stored elsewhere.
Clearing Archives
Whenever you archive an app for distribution on TestFlight or the App Store, that archive is stored locally on your Mac. You could have years-old archives waiting to be cleaned up.
In this section, you’ll archive Stellar Space and then remove that archive from your Mac, saving valuable storage space. But first, you need to prepare Stellar Space for code-signing.
Archiving Stellar Space
In Xcode, follow these steps to reach the Signing and Capabilities settings for Stellar Space:
- In the Project navigator, select Stellar Space.
- Select Stellar Space under Targets.
- Select the Signing & Capabilities tab.
Currently, the Team used to archive Stellar Space is set to None. Change the value for Team to that of your own Apple Developer account.
You can’t archive an app when building for a simulator, so change the run destination to Any iOS Device (arm64):
Now, you’re ready to archive the app. From Xcode’s menu bar, select Product ▸ Archive.
If prompted, enter your macOS user’s password:
When Xcode finishes building, the Archives window will open with the result.
Xcode created your archive. The actual .xcarchive folder resides on your Mac in ~/Library/Developer/Xcode/Archives.
Clearing the Archived Build
To open the archives folder, open a Finder window. In the Finder menu bar, click Go ▸ Go to Folder…, and type in the path to your archives folder:
~/Library/Developer/Xcode/Archives
Click Go.
Each archive is stored in a subfolder named for the day when you created it. Open today’s folder to see the Stellar Space archive that you made earlier.
Right-click the .xcarchive and select Move to Trash.
You’ve deleted the archive, saving a modest amount of disk space. But there could be gigabytes worth of .xcarchives in the archives folder. When is it safe to clear them?
When to Clear Archives
Unlike derived data, your archives have no effect on your future build; they’re the finished product of building the app and don’t speed up compilation in any way. But this doesn’t mean that you can clear the archives folder whenever you’re low on space.
Sometimes, it can be a good idea to save old archives. If you ever need to re-release an old archive, you’ll need the .xcarchive that’s stored in the archives folder.
Also, debugging live versions of an app requires a certain file called a dSYM that’s packaged in your archive.
So a good recommendation is to not delete any archives for versions of apps that are currently live — or old archives that you might want to bring to life later!
Before you archive your app in Xcode, you’ll probably run it on the simulator to test your app. Next, you’ll learn how to clear those simulators and remove old data.
Clearing Simulators
When you install Stellar Space on one of your simulators, it takes some space on your computer. Stellar Space can also save images to your simulator’s Photos library, taking more space.
Sometimes, you might also want to test an app as a new user would. That means starting with a fresh simulator. So clearing those simulators can help to keep your Mac in tip-top shape.
Storing Simulator Data
Before you clear a simulator, you need to run Stellar Space so you have something to clear.
In Xcode, make sure your run destination is set to one of your simulators:
Then, build and run Stellar Space.
Doesn’t everyone love awe-inspiring images of the cosmos? Go ahead and tap Save to save today’s image to your simulator’s Photos.
Tap OK when iOS prompts you for permission to access your Photos.
Tap Back to look at yesterday’s photo of the day and feel free to explore some more. Save your favorite photos by tapping Save.
When you’re done, swipe up from the bottom of your simulator to reach the Home screen. Alternatively, you can also select Device ▸ Home or press Command-Shift-H on your keyboard.
Next, open Photos. You might need to swipe to a different Home tab to find the Photos icon.
Here, you see all the images you’ve saved on the simulator.
Deleting an app on an iPhone doesn’t delete all the data the app might have stored elsewhere, such as files, photos or Core Data databases. To do that, you need to erase the simulator’s content.
Erasing Simulator Content
Erasing a simulator restores it to factory content and settings, removing any apps or data you stored on it.
With your simulator open, click Device ▸ Erase All Content and Settings… in the menu bar.
If you’re prepared to lose the data on that simulator, click Erase.
Wait while the simulator reboots. Once it’s done, open Photos again.
You’re left with the default photos available on any simulator, ready to start your testing anew!
Erasing simulator content helps clean the simulators you have access to. But you might be losing a lot of storage to simulators you can’t even see.
Deleting Unavailable Simulators
If you’ve been building iOS apps for a while, you’ve probably been through a few cycles of simulators.
When Apple releases a new iPhone, new versions of Xcode and iOS usually come along with it. These new iPhones need their own simulators, and older simulators become obsolete. If you have old, unusable simulators, they might be using storage on your Mac.
To clear all unavailable simulators at once, you need to execute a terminal command.
Open Terminal.app. Then, enter the following command:
xcrun simctl delete unavailable
Press Enter.
If you have unavailable simulators, you’ll get an output telling you what’s been cleared. If the output is blank, like in the previous screenshot, then you’re doing a great job at pruning your old simulators regularly. :]
Like unavailable simulators, your Mac also stores support files for old iOS versions. While you’re at it, you can reclaim some space by clearing any support files that you no longer need.
Device Support
When you attach a physical device to your Mac to install or debug one of your apps, Xcode creates device support files. Xcode uses these files to support developer functionality, like viewing crash logs.
Device support files are specific to each version of iOS, even minor versions. So if you build to your devices often, you might have support files for iOS 14.1, 14.2, 14.2.1 and so on.
Xcode will never delete these files for you, so they tend to build up over time. Fortunately, there’s no harm in deleting them yourself. Any time you use a physical device, Xcode installs the device support files automatically.
Finding Device Support Files
To find your iOS device support files, open a new Finder window. In the Finder menu bar, select Go ▸ Go to Folder…, and type this path:
~/Library/Developer/Xcode/iOS DeviceSupport
Click Go.
These support files use a whopping 11 gigabytes on my Mac — a prime candidate for cleaning. A good recommendation is to delete all but the most recent two iOS versions in the iOS DeviceSupport folder as it’s likely that you’ll still be supporting those versions.
This folder is only for iOS device support, but the watchOS and tvOS follow a similar pattern.
Other Platforms
Like the iOS files, you’ll find your watchOS support files at ~/Library/Developer/Xcode/watchOS DeviceSupport. Xcode stores tvOS device support files at ~/Library/Developer/Xcode/tvOS DeviceSupport.
If you haven’t connected an Apple Watch to your Mac for development purposes, you won’t have the watchOS DeviceSupport folder. The same applies to iOS and tvOS.
Caches
The last place to look for space savings is in various caches.
A cache stores data so programs using the cache can run faster, without needing to recompute data in the cache.
Caches are always transient, meaning that the data they contain are expected to be temporary. Deleting cached data has no adverse effect because the program that created the cache can regenerate it at any time. But for larger caches, you might experience a delay while the cache rebuilds.
Deleting caches is a common strategy to reclaim space. For example, when deleting Xcode’s cache, any old, unused data will remain deleted. Xcode can regenerate anything it still needs at a later date.
If you’re having trouble with Xcode or one of its related tools, clearing caches can help with this as well.
Most caches are stored in ~/Library/Caches, including the Xcode cache. You’ll find Xcode’s cache at ~/Library/Caches/com.apple.dt.Xcode.
Supporting Caches
Two other caches of note are those of Carthage and CocoaPods. These dependency managers help you to manage third-party libraries that you may be using in your apps.
If you use Carthage, you’ll find its cache at ~/Library/Caches/org.carthage.CarthageKit.
CocoaPods has a special command you can use to clear its cache. To clear the CocoaPods cache, run this in the terminal:
pod cache clean --all
Using the dedicated cache clean
command is better than manually deleting a folder. This is because if CocoaPods changes where it stores its cache, the command will still work for the new location. That’s great news if you decide to write a script to clear your caches!
In fact, in the next section, you’ll do just that, tying together everything you’ve learned so far in the ultimate spring-cleaning script!
Tying it All Together
Rather than trying to remember where to go to free some data, it can be much easier to codify each step into an automation script and then run that script when you’re short on space.
It’s important that an automated solution doesn’t do anything too destructive. You need to be cautious when clearing certain folders, like your archives.
For caches and other folders that don’t need a human touch, a script is a fitting solution.
Creating a Script
First, open a Terminal window. Run this command:
cd ~/Documents && touch clean-xcode.sh
This changes the terminal window’s directory to your Documents folder. Afterward, it creates a new, blank script.
Open the empty script in your favorite text editor. Then, type this:
#!/usr/bin/env bash
# 1
echo "Removing Derived Data..."
rm -rf ~/Library/Developer/Xcode/DerivedData/
# 2
echo "Removing Device Support..."
rm -rf ~/Library/Developer/Xcode/iOS\ DeviceSupport
rm -rf ~/Library/Developer/Xcode/watchOS\ DeviceSupport
rm -rf ~/Library/Developer/Xcode/tvOS\ DeviceSupport
# 3
echo "Removing old simulators..."
xcrun simctl delete unavailable
# 4
echo "Removing caches..."
rm -rf ~/Library/Caches/com.apple.dt.Xcode
rm -rf ~/Library/Caches/org.carthage.CarthageKit
# 5
if command -v pod &> /dev/null
then
# 6
pod cache clean --all
fi
echo "Done!"
At the beginning of the file is a shebang, which tells your computer how to execute the script. The shebang always has to be the first line of the script.
The rest of the file is the culmination of everything you’ve learned so far. Here’s what’s happening, step by step:
- First,
echo
prints out a message to the terminal, so you know how the script is running. Then,rm
deletes the derived data folder. - Print another status update, then delete each device support folder. If the folders don’t exist, nothing happens.
- Delete unavailable simulators.
- Delete the caches for Xcode and Carthage, if they exist.
- Check to see if CocoaPods is installed on this computer.
- If CocoaPods is installed, clean the CocoaPods cache.
Next, save the file. In TextEdit, do this by clicking File ▸ Save in TextEdit’s menu bar.
You’ve created your script, and you’re almost ready to try it out.
Running the Script
If you try to run clean-xcode.sh as-is, you’ll get an error:
That’s because your computer sees it as a text file, not something you can execute like a script or program. To make it executable, you need to run a command in Terminal.
In your Terminal window, run this:
chmod u+x clean-xcode.sh
Now, your computer will recognize clean-xcode.sh as an executable script.
Finally, you can run clean-xcode.sh by specifying its path in the terminal:
./clean-xcode.sh
The script executes, printing out status reports as it cleans out derived data, device support, simulators and caches.
With one command, you’ve reclaimed some of the storage that Xcode builds up over time. Great job!
Where to Go From Here?
For a completed version of clean-xcode.sh, download the final project by clicking the Download Materials button at the top or bottom of this tutorial.
In this tutorial, you learned some ways to reclaim some of your storage that Xcode claimed for itself. You learned when you’d want to clear each location and when you should be more careful about deleting certain files. You also gained some understanding of how Xcode’s caches and intermediary data can affect compilation issues.
To learn more about how Xcode works along the whole build process and get your feet wet with some more scripts for build automation, take a look at iOS App Distribution & Best Practices.
I hope you’ve freed up some space on your Mac in this tutorial, and learned some tips and tricks along the way. If you have any questions or comments, please join the forum discussion below!
All videos. All books.
One low price.
A Kodeco subscription is the best way to learn and master mobile development — plans start at just $19.99/month! Learn iOS, Swift, Android, Kotlin, Flutter and Dart development and unlock our massive catalog of 50+ books and 4,000+ videos.
Learn more