Make Your First Android App: Part 3/3
Build upon the foundations of the first two part on how to make your first Android app and create a book search application using web APIs. By Matt Luedke.

This tutorial is the third and final part of the series devoted to helping you make your first Android app! Check out Part One to get started with Android and Part Two to learn more about Android UI and project structure.
In this final part of the tutorial, you’ll learn how to leverage the powerful capabilities of the web to search and display data and images. More specifically, you’ll make an app that searches the Open Library API — a database of over 20 million books —, displays information and cover images of the books it finds, and allows you to recommend books to friends!
When you’re done, you’ll know how to:
- Add powerful third-party libraries to your app via Gradle;
- Access a typical RESTful API;
- Understand JSON format and parse JSON results;
- Responsibly download web images without affecting your UI performance;
- Customize list cells with multiple views; and
- Build intuitive native app navigation between activities.
These are very useful and transferable skills for all sorts of Android apps you’ll want to make in the future.
To begin this part of the tutorial, you should be at the point where you have an app that takes user input, lists names, and shares messages through social networks. Your app should also ask for your name when you first open the app and greet you by name thereafter.

So the personal part is done — now it’s time to interwebify!
Getting Started
It’s time to do a bit of rebranding. No longer is this just a little demo app — it is a book search and recommendation engine!
The default Android icon can only take you so far. Download the following files and drag them onto the src/main/res/drawable-hdpi directory to add them to your project:
Click OK when asked to confirm the move.

Your src/main/res/drawable-hdpi directory should now look something like this:

hdpi assets are provided here. For future projects, it is a good idea to add assets for the other dpi values as well.Open AndroidManifest.xml. As you recall, this is “the boss” of your app. If you want to change the app’s icon, you need to talk to the boss.
Find the opening application tag and change the icon attribute line from:
android:icon="@drawable/ic_launcher"
To:
android:icon="@drawable/ic_books"
From now on, the app icon will be a stack of books instead of the default Android icon. Depending on your Studio version (and/or SDK version) you may also see that the application has an attribute for setting the application name. You’re going to update the application name as well, but not in the manifest.
First, while you’re still looking at the manifest, you need to let the manifest know that you plan to start accessing the Internet. Between the uses-sdk and application tags, add the following:
<!-- NEED TO ADD TO BE ABLE TO GO ONLINE AND GET DATA -->
<uses-permission android:name="android.permission.INTERNET"/>
If you don’t let “the boss” know your plans, it won’t file the appropriate paperwork with Android to make the web call happen. But now you’re good to go.
Now it’s time to change your app’s name. Open res/values/strings.xml and replace the strings for everything except action_settings with the following new values:
<string name="app_name">Bookmaster General</string>
<string name="textview">Search For Books!</string>
<string name="button">Search</string>
<string name="hint">Title and/or Author</string>
That’s right — I used the title Bookmaster General.
Finally, remove this line from onCreate in MainActivity.java:
mainTextView.setText("Set in Java!");
Run your app, you should see the new icon in the top left corner and the new application name on the Action Bar.
![]()
Your device or emulator’s home screen should also reflect the name and icon updates. For example:
![]()
Now that you’ve rebranded your app, it’s time to start adding the web interactions!
Networking Considerations
There are a lot of things to keep in mind when adding networking capabilities to your app. For example, you need to consider how to keep all the network interactions off the UI thread, so that the user can continue to use your app without everything locking up until a download completes. If you were using an app and it became completely unresponsive for lengths of time, you’d get pretty frustrated!
Thankfully, you can solve issues such as this by simply using third-party libraries. These have been specially designed and supported by Android experts to facilitate networking. Some of the most well-regarded include Retrofit, Volley, and Android Async Http. For the purposes of this tutorial, you’ll use Android Async Http.
Image downloads are also a consideration since each image takes time to download. Also, in the case of a list of books, if you have your list set to download images as needed, you might find that you end up downloading the same image over and over as your user scrolls through the list of items. You really don’t want that type of behavior. You’ll use another third-party library called Picasso to manage image downloads for you.
A way to easily manage your project’s dependencies would sure be great! That leads us to Gradle.
A Glance at Gradle
When you created your project in Android Studio, you may remember mentions of Gradle and Maven. Refer to Part One if you need a reintroduction. Now you’ll see them in action.
Open OMGAndroid/build.gradle. Note that there are two build.gradle files in your project. You want the one that’s within the OMGAndroid folder – not the one at the project root level:
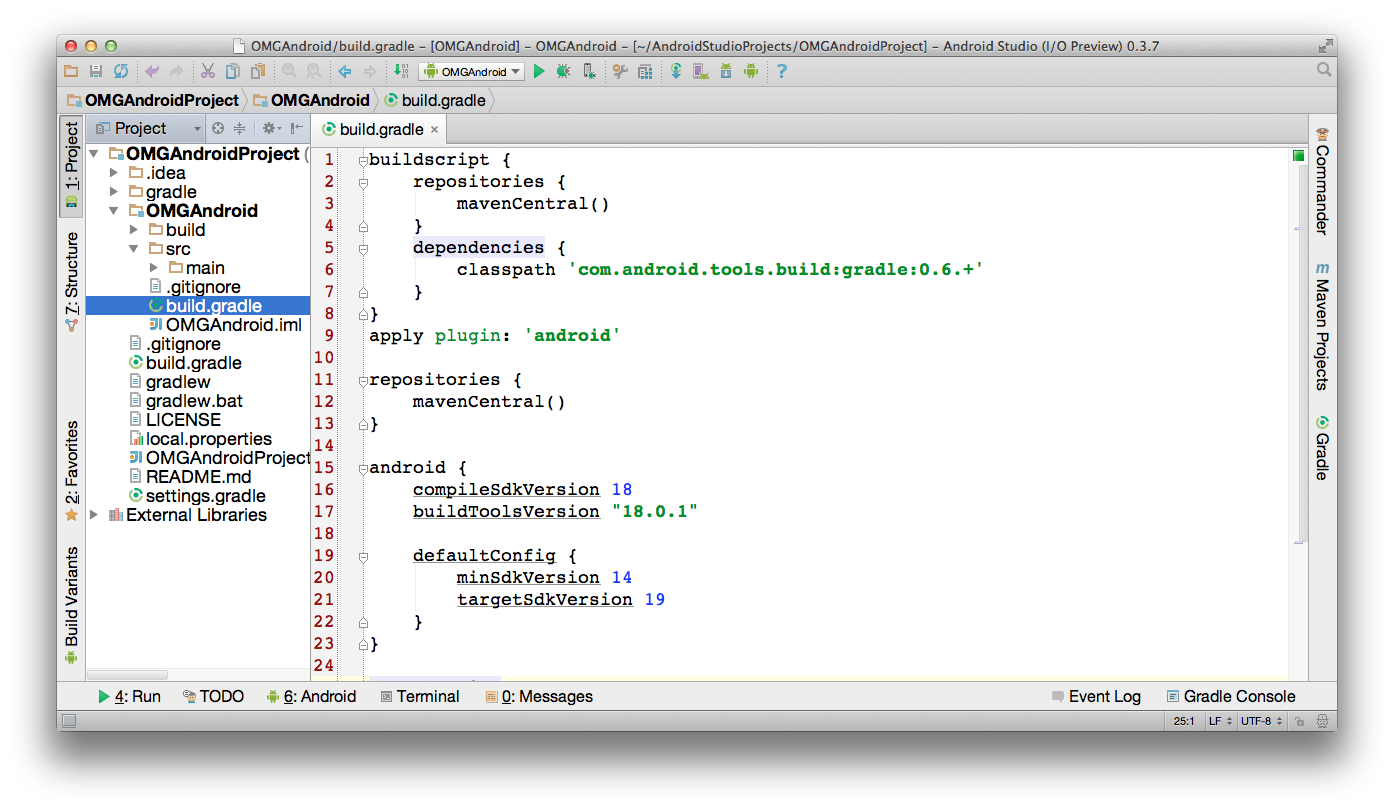
Note: The contents of your build.gradle file might not look exactly the same as the screenshot above. Android Studio is still in a state of flux and depending on the changes to Studio since the tutorial, the contents of the build.gradle file might be slightly different.
Note: The contents of your build.gradle file might not look exactly the same as the screenshot above. Android Studio is still in a state of flux and depending on the changes to Studio since the tutorial, the contents of the build.gradle file might be slightly different.
Some of the stuff happening in here is beyond the scope of this tutorial, but if you become serious about Android development, I recommend looking into Gradle a little more, starting of course, with the Gradle website. For now, just notice that the Android plugin is being applied to the project (apply plugin: 'android').
You might also see a reference to the Maven Central Repository (mavenCentral()) but depending on on Android Studio changes, the Maven Central references could also have moved to the other build.gradle file. Suffice it to say that if you see a line similar to mavenCentral(), that’s setting up a reference to the Maven Central Repository.
Scroll down to the area labeled dependencies. There might be two places this word appears (again, depending on the Android Studio version); you want the one that at the end of the file, after the android section. There may already be a support library listed there, or it may be empty. You’re going to add two new libraries.
Add the libraries like this:
dependencies {

	...

	// there may or may not be a support library above these
	compile 'com.loopj.android:android-async-http:1.4.4'
	compile 'com.squareup.picasso:picasso:2.1.1'
}
Then find the Sync Project with Gradle Files button on the Studio toolbar and press it. It looks like this:
![]()
Believe it or not, that’s it! Just like that, you’ve included the Android Async Http and Picasso libraries in your project and you can start using them whenever you like.
It’s so easy because both of these libraries are available via the Maven Central Repository, to which your project already contains a reference. So, when you tell Gradle which libraries you’d like to use, it simply grabs them from the source and you’re good to go.
If you need to include any libraries which are not available on the Maven Central Repository, then you’d still have to go through the old school method of copying the source (or the library) into your project. But most of the time, you won’t have to go through all that pain since the Maven Repository contains a lot of third-party libraries for you to use. So you’ll probably be able to find an alternative to the library you’re interested in. If interested, you can even browse all the libraries available on the Maven Repository.