Multiplayer Game Programming for Teens with Python: Part 1
Have you ever wondered how a multiplayer game works? This tutorial will teach teens and adults about multiplayer game programming in python with PyGame. By .
This is a post by Tutorial Team Member Julian Meyer, a 13-year-old python developer. You can find him on Google+ and Twitter.
I’m sure that once in a while, you and your friends go online to play a multiplayer game. Have you ever wondered about the inside of that game and how everything works?
In this tutorial, you will learn about multiplayer game programming by creating a sample game. Along the way you will also learn about object-oriented programming.
For this tutorial, you will be using Python and the PyGame modules. If you are new to Python or PyGame, you should first look at this earlier tutorial on beginning game programming, which explains some of the basics of PyGame.
Getting Started
The first step is to make sure that you have PyGame installed. You can download a Mac installer for PyGame here. Make sure you download the Lion installer if you have Mac OSX 10.7 or up. Otherwise, download the Snow Leopard installer.
You can also download and install PyGame in these ways:
- With MacPorts using:
sudo port install python2.7 py27-game - With Fink using:
sudo fink install python27 pygame-py27 - With Homebrew and pip using the command found here.
If you are running Windows, then you can find your installer here.
Note: If you had trouble in the last tutorial, make sure you have the 32-bit version of Python on your system. If you have a 64-bit system, then you need to run python2.7-32 to run Python.
Note: If you had trouble in the last tutorial, make sure you have the 32-bit version of Python on your system. If you have a 64-bit system, then you need to run python2.7-32 to run Python.
Lastly, download the resources for this project, which include some images and sounds that you’ll need for this game.
The Rules of the Game
The game you’re going to make in this tutorial is called “Boxes”. You may be familiar with playing this game on paper with some friends while you were in school!
In case you’re not familiar with the game, here are the rules:
- The board consists of a 7×7 grid of points (which makes a 6×6 grid of cubes if you were to connect the dots).

- On each player’s turn, the player fills in the horizontal or vertical line segment connecting two neighboring points.

- If filling in a line segment completes a box on the grid, the player becomes the owner of that square and gets a point. The player also gets to place another line segment on the same turn.

- The player with the most squares/points at the end of the game wins!
Although these rules are very simple, it’s a fun game to play, especially if you’re bored. But wouldn’t it be great if you could play this online?
Object-Oriented Programming: A Quick Introduction
Before we begin, let’s discuss something called Object-Oriented Programming which you’re going to use in this tutorial.
Object-oriented programming, also known as OOP, is a type of programming based on objects. Object are bundles of data and associated logic. For example, you might have a “dog” object that consists of some data (the dog’s name or favorite treat) and associated logic (for example, instructions on how to bark).
Objects are made from templates called classes that define what kinds of data the object can hold and what kinds of things the object can do. These are known as the object’s properties and methods, respectively.
Methods are functions that represent something you can ask the object to do. For example, the statement car.drive() can be interpreted as telling the object in the “car” variable to “drive”. Properties are variables that belong to an object. Continuing the example, your car object might have a property called gas, and the statement car.gas = 100 would set the car’s gas to 100.
These two statements manipulate a car object that already exists. Recall that the car’s class is the template that defines how to make a car object and what a car is by defining its properties and methods. Within the definitions of those methods, you will find the code that manipulates the car from the inside. For instance, instead of car.gas = 100, you might find self.gas=100, which is a car object telling itself – self, get it? – to set its own gas to 100.
OOP is a large topic but the basics above are all you need to get started. Your code will describe the Boxes game as the interaction of various objects. Those objects all have properties and methods, which you will define in the object’s class. And when you write a piece of code, you should remember whether you’re writing the class code that defines what an object can do from the “inside” of the object, or code that manipulates an object from the “outside” of that object.
Setting Up a Basic Object-Oriented Game
There are a couple of ways to use an object-oriented framework for your game. Your Boxes game will take a simple approach in which there is one class for the client and one for the server. For now, let’s just create the main client class that will run when the user starts the game.
At the start of making every game, I like to make a folder for the game. When you unzipped the resources for this project, it should have created a folder or you called boxes. This is where you will put your source code for the game – right here alongside all the images.
Create a file in this directory called boxes.py using your favorite text editor (if you don’t have one, you can use TextEdit on the Mac, or Notepad in Windows). Then add this import of the file:
import pygame
This imports the PyGame module for you to use. Before you go any further, you should test that at least this much is working. To do this, open Terminal and switch to your boxes directory using the cd command. Then enter python boxes.py. For example, here’s what it looks like on my machine:
cd /Users/jmeyer/Downloads/boxes
python boxes.py
If you get no errors after running this, that means you have PyGame installed correctly, and you are good to go.
Note: If running the code above gives you an ImportError saying there is “No module named pygame”, then you have not installed PyGame or else you have installed PyGame into a copy of Python different from the one you are running. For instance, if you used MacPorts to install Python 2.7 and PyGame with port install python2.7 py27-game, then make sure to run the same Python by calling python2.7 from the Terminal.
If running the code above gives you this specific error:
That means you need to run Python in 32-bit mode, like this:
Note: If running the code above gives you an ImportError saying there is “No module named pygame”, then you have not installed PyGame or else you have installed PyGame into a copy of Python different from the one you are running. For instance, if you used MacPorts to install Python 2.7 and PyGame with port install python2.7 py27-game, then make sure to run the same Python by calling python2.7 from the Terminal.
If running the code above gives you this specific error:
ImportError: /Library/Frameworks/SDL.framework/Versions/A/SDL: no appropriate 64-bit architecture (see "man python" for running in 32-bit mode)
That means you need to run Python in 32-bit mode, like this:
python2.7-32
ImportError: /Library/Frameworks/SDL.framework/Versions/A/SDL: no appropriate 64-bit architecture (see "man python" for running in 32-bit mode)
python2.7-32
Next add the class definition, as well as one thing every class should have:
class BoxesGame():
    def __init__(self):
        pass
        #put something here that will run when you init the class.
The first line of this code tells the compiler that you are creating a new class called BoxesGame. The second line defines a method called __init__. The surrounding double underscores are a hint that this is a special method name. In fact, this name identifies the method as the class’s __init__ method, the method that you run whenever you want to create or instantiate an object of the class.
Now you’ll fill in the body of the init function to do some PyGame initialization. Add this to the code you wrote above, in place of the comment beginning with #put something here...:
#1
pygame.init()
width, height = 389, 489
#2
#initialize the screen
self.screen = pygame.display.set_mode((width, height))
pygame.display.set_caption("Boxes")
#3
#initialize pygame clock
self.clock=pygame.time.Clock()
Make sure you indent it correctly, so that everything lines up to the left margin of where the “#put something here…” comment was. You can read more about the matter here: Python Indentation.
Let’s look at the code you just added, one chunk at a time:
- First you initialize PyGame and two variables that you’ll use to set up the screen,
widthandheight. - Then you initialize the screen using those two variables. You also set the title of the screen.
- Finally, you initialize the PyGame clock, which you’ll need for tracking time in the game.
Next let’s add the update() loop, which runs every periodically to update the game, draw the graphics and receive user input. Do this by simply adding the following after the __init__ method (the left margin should be equal to the left margin of __init__):
def update(self):
    #sleep to make the game 60 fps
    self.clock.tick(60)

    #clear the screen
    self.screen.fill(0)

    for event in pygame.event.get():
        #quit if the quit button was pressed
        if event.type == pygame.QUIT:
            exit()

    #update the screen
    pygame.display.flip()
This is a basic update loop that clears the screen and checks to see if the user wants to quit the game. You’ll be adding more to this later.
Running the Python file now won’t do anything yet, as all you’ve done is defined the class BoxesGame. You still need to create an object of this class and start the game!
Now that you have the update loop ready, let’s add the code that will run the main game class. After that, you’ll set up some of the basic graphics in the game, such as drawing the board.
Add this code to the end of the file to start the game (the left margin should be equal to the left margin of the file):
bg=BoxesGame() #__init__ is called right here
while 1:
    bg.update()
This is the nice thing about object-oriented programming: The code that actually makes things happen is only three lines long!
At this point, the entire file should look like this:
import pygame

class BoxesGame():
    def __init__(self):
        pass
        #1
        pygame.init()
        width, height = 389, 489
        #2
        #initialize the screen
        self.screen = pygame.display.set_mode((width, height))
        pygame.display.set_caption("Boxes")
        #3
        #initialize pygame clock
        self.clock=pygame.time.Clock()
    def update(self):
        #sleep to make the game 60 fps
        self.clock.tick(60)

        #clear the screen
        self.screen.fill(0)

        for event in pygame.event.get():
            #quit if the quit button was pressed
            if event.type == pygame.QUIT:
                exit()

        #update the screen
        pygame.display.flip()

bg=BoxesGame() #__init__ is called right here
while 1:
    bg.update()
That’s it. Now wasn’t that easy? This is a good time to run the game:
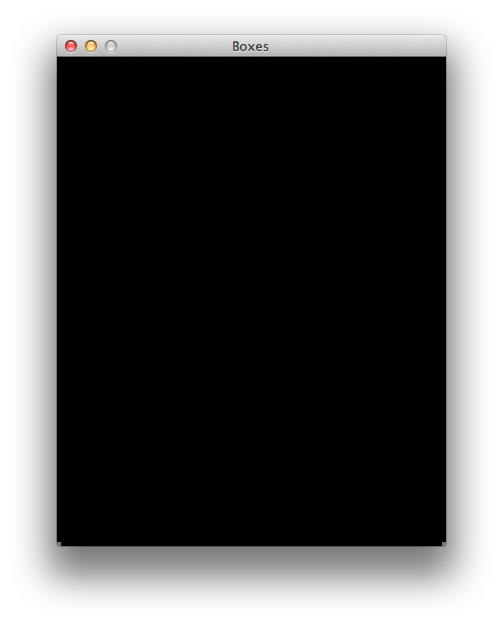
As you can see, running the game results in a very impressive black screen! Yay!
You may not understand this now, but game writing is a strategic process. Think of it as being an architect. You have just built a strong base for your building. Large buildings must have very good bases and so you must think your plan through before you start.
Let’s add another method. If you don’t remember what this means, reread the section of the tutorial called, “Object Oriented Programming: A Quick Introduction.”