Multiplayer Game Programming for Teens with Python: Part 1
Have you ever wondered how a multiplayer game works? This tutorial will teach teens and adults about multiplayer game programming in python with PyGame. By .
Finishing Touches
One thing that really bugs me are the spaces at the junctions of the lines. Fortunately, you can fix this quite easily using a 7x7 grid of square dots to fill in those spaces. Of course, you do need the image file, so let's load that right now and at the same time add all of the other images you will be using in this section.
Add this to the end of initGraphics():
self.separators=pygame.image.load("separators.png")
self.redindicator=pygame.image.load("redindicator.png")
self.greenindicator=pygame.image.load("greenindicator.png")
self.greenplayer=pygame.image.load("greenplayer.png")
self.blueplayer=pygame.image.load("blueplayer.png")
self.winningscreen=pygame.image.load("youwin.png")
self.gameover=pygame.image.load("gameover.png")
self.score_panel=pygame.image.load("score_panel.png")
Now that you image is loaded, let's draw each of the 49 dots onto the screen. Add this to the end of drawBoard():
#draw separators
for x in range(7):
    for y in range(7):
        self.screen.blit(self.separators, [x*64, y*64])
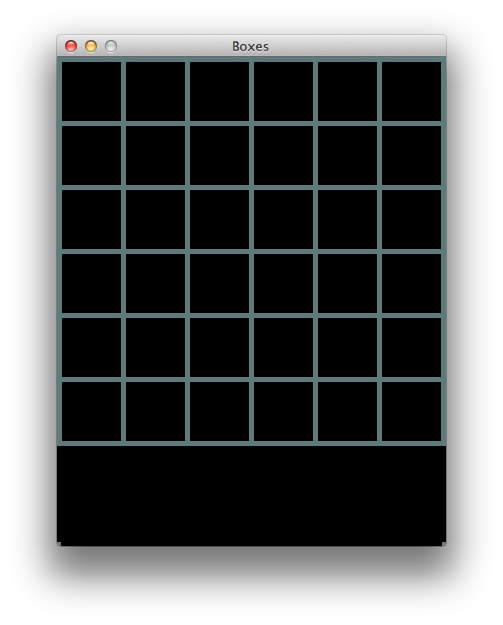
All right, enough code! It's time for a test run. Run the game, and you should get a better-looking grid.
Next, let's put a head-up display or HUD at the bottom of the screen. First, you need to create the drawHUD() method. Add this code after drawBoard():
def drawHUD(self):
    #draw the background for the bottom:
    self.screen.blit(self.score_panel, [0, 389])
This code also draws the background of the score panel.
Let me go over the way PyGame handles fonts. There are three steps:
- First you define a font with a set size.
- Next you call
font.render("your text here")to create a surface for those letters in that font. - Then you draw the surface just as you would an image.
Now that you know that, you can use this information to draw the next part of the HUD: the "Your Turn" indicator. Add this code at the bottom of drawHUD():
#create font
myfont = pygame.font.SysFont(None, 32)

#create text surface
label = myfont.render("Your Turn:", 1, (255,255,255))

#draw surface
self.screen.blit(label, (10, 400))
Also add this after the call to pygame.init():
pygame.font.init()
This code creates the font, renders it in white and then draws it onto the screen. Before you try running the game, add this after the call to self.drawBoard():
self.drawHUD()
Run the program and you should get some text that says "Your Turn" at the bottom of the screen. If you look closely, you can also see the nicely textured background.
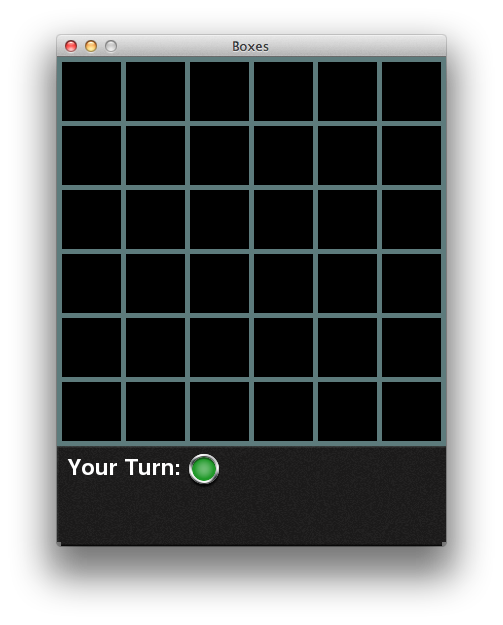
This is great, but you still need to add the indicator after the "Your Turn" text to let the player know it's their round.
Before you do, though, you want the game to know whose turn it is. Make sure it knows by adding this to the end of __init__:
self.turn = True
Now for that indicator. Add this to the end of drawHUD():
self.screen.blit(self.greenindicator, (130, 395))
Run the game and you will see the green score indicator. You can check that off of your list of things to do.
Next let's add the text for each player's score. Initialize the variables for the two scores by tacking this onto the end of __init__:
self.me=0
self.otherplayer=0
self.didiwin=False
Here you also add another variable that you will use later in this step.
Remember how to add text? You're going to do the same type of thing you did before, but with differently sized fonts. Add this to the end of drawHUD():
#same thing here
myfont64 = pygame.font.SysFont(None, 64)
myfont20 = pygame.font.SysFont(None, 20)

scoreme = myfont64.render(str(self.me), 1, (255,255,255))
scoreother = myfont64.render(str(self.otherplayer), 1, (255,255,255))
scoretextme = myfont20.render("You", 1, (255,255,255))
scoretextother = myfont20.render("Other Player", 1, (255,255,255))

self.screen.blit(scoretextme, (10, 425))
self.screen.blit(scoreme, (10, 435))
self.screen.blit(scoretextother, (280, 425))
self.screen.blit(scoreother, (340, 435))
Run the game to check out your work.

You are now officially done with the HUD. There are just a couple more things to do on the client side, so bear with me.
Next, let's add a very simple owner grid that contains values representing a player. These values will let you keep track of who owns which squares. You need this to color the squares properly, and to keep track of the score. Remember, the person who controls the most squares wins!
First initialize another array by adding this at the end of __init__:
self.owner = [[0 for x in range(6)] for y in range(6)]
Now draw the owner grid onto the screen using the same kind of 2d-array loop that you used to loop through the lines arrays. Add this to the bottom of the class:
def drawOwnermap(self):
    for x in range(6):
        for y in range(6):
            if self.owner[x][y]!=0:
                if self.owner[x][y]=="win":
                    self.screen.blit(self.marker, (x*64+5, y*64+5))
                if self.owner[x][y]=="lose":
                    self.screen.blit(self.othermarker, (x*64+5, y*64+5))
This method checks if it needs to draw in a given square and if it does, it draws the correct color (each player will have his or her own color).
Right now this code won't work because you need the server to tell the client which color to draw, which you will do in the next part of the tutorial. For now, you just won't call this method.
You have one more thing to add to the user interface: winning and losing screens. Define this last method and add it to the bottom of the class:
def finished(self):
    self.screen.blit(self.gameover if not self.didiwin else self.winningscreen, (0,0))
    while 1:
        for event in pygame.event.get():
            if event.type == pygame.QUIT:
                exit()
        pygame.display.flip()

Of course, there is no way yet to trigger these screens in the game. That, too, you'll take care of in the next part of the tutorial, when you implement the server side of the game.
Remember that by adding all of these game elements now, you are making sure that the server will be able to manipulate the client however it wants. From here on out, you won't need to make many changes to the client other than a little glue between the client and the server.
But just to make sure it works, try calling the finished() method in the last part of __init__. You should get a game over screen that looks like the image to the right.

Where to Go from Here?
Here is the source code from the tutorial so far.
Congratulations! You have finished the client side of a very organized and good-looking game. This, of course, is not the end since you haven't implemented any game logic, but excellent job on the client side!
Now you should go look at Part 2 of this tutorial, which is all about the server-side - and you'll finally start making this game truly multiplayer!