CareKit Tutorial for iOS: Part 1
In the first part of our CareKit Tutorial for iOS, you’ll learn the basics of using CareKit by building a Zombie Training and Symptom Tracker. By Jeff Rames.
HealthKit Integration
As you’ve seen, CareKit is able to leverage ResearchKit to gather health data. Both of these frameworks also work closely with HealthKit, which makes it easy to access, transform and store health data. This enables powerful flows such as CareKit obtaining a pulse from HealthKit, which may have passively collected it from an Apple Watch or other device.
Because you’re already using ResearchKit to gather this data, enabling the option to pull from HealthKit is as trivial as enabling HealthKit in your project. Just be warned—there’s no hiding the fact that you’re a zombie from your Watch. :]
First, select the ZombieKit target, then the General tab. Set the bundle identifier to match your domain or naming convention, then select the Team associated with your development account. This is necessary so that Xcode can create an App ID with the appropriate entitlement.

With the target still selected, switch to the Capabilities tab. Flip the switch for HealthKit to enable it for your newly created app ID.
Select ResearchKit.xcodeproj from the Linked Frameworks group, then the ResearchKit target. Set your team here for this target as well.
Build and run, select the Symptom Tracker tab, and attempt one of the assessments. You will now see a prompt requesting HealthKit access, with the message you defined earlier, before the task controller is displayed. And if you’re running on a device that has pulse or temperature data stored, you’ll see the most recent reading automatically populate!
Unbalanced calls to begin/end appearance transitions. This is a known ResearchKit issue that occurs on the automatic display of the initial permission request view controller. Unfortunately, it’s built into the ResearchKit framework, so it can’t be avoided.
HealthKit Permission Prompt
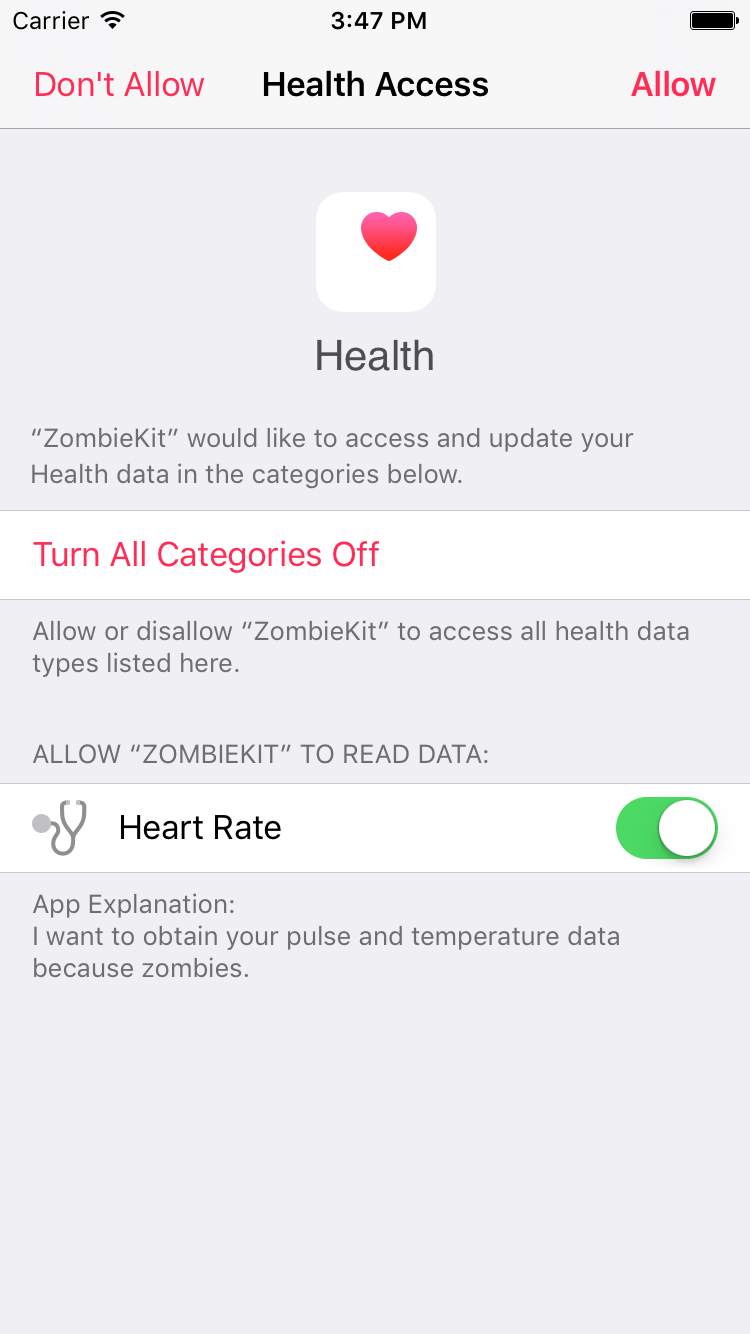
HealthKit Permission Prompt
Data populated from HealthKit!
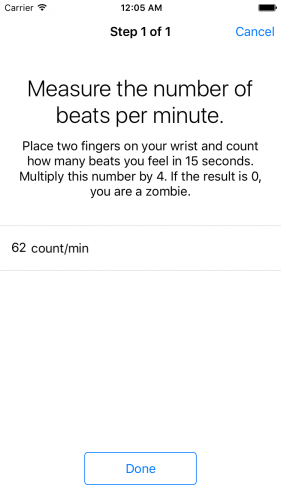
Data populated from HealthKit!
Where To Go From Here?
Download the completed code for this CareKit tutorial here. Note that the final project does not have HealthKit enabled, since doing so requires access to your developer account. If you want to skip to the final project and wish to see HealthKit, follow the quick config steps in the HealthKit Integration section above.
To learn about more ResearchKit tasks you can leverage for assessments, check out ResearchKit Tutorial with Swift: Getting Started and Accessing Heart Rate Data for Your ResearchKit Study. You can also review HealthKit Tutorial with Swift: Getting Started for a refresher on working with HealthKit.
To keep learning more about CareKit, check out Part 2 of this series, where you’ll build on ZombieKit to visualize the collected data via Insights and share it using Connect.
We hope you enjoyed this CareKit tutorial and feel empowered to help people take control of their health. Please join the discussion about this CareKit tutorial and the coming zombie apocalypse below!