AsyncDisplayKit 2.0 Tutorial: Automatic Layout
In part two of this AsyncDisplayKit 2.0 tutorial, learn how easy it is to build fast and flexible layouts in your iOS apps. By Luke Parham.
Adding the Gradient
Now that you have the animal image, the next logical step is to add the gradient node on top of it. ASOverlayLayoutSpec is just the spec for the job.
First, add the following line after the initialization of imageRatioSpec:
ASOverlayLayoutSpec *gradientOverlaySpec = [ASOverlayLayoutSpec
                                              overlayLayoutSpecWithChild:imageRatioSpec
                                                                 overlay:self.gradientNode];
When building up your layout specs, you’ll always end up with one that contains the rest. This is now the case for the gradientOverlaySpec.
Replace the current return statement with the following.
return gradientOverlaySpec;
Build and run to see the gradient stretched over the entirety of each imageNode.

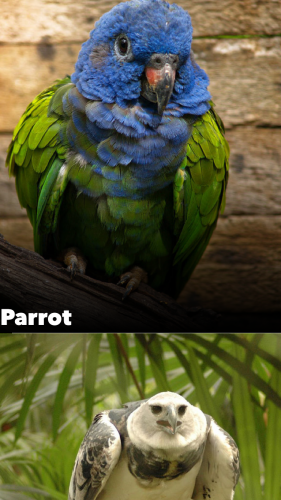
A gradient for every bird — how nice!
Adding the Animal Name Text
The only thing left to do on the top half is to display the animal’s name.
While it seems simple, there are a few requirements to consider:
- The name should be placed above the gradient.
- The name should be in the bottom left hand corner of the animal image.
- There should be 16 points of padding on the left side and 8 points of padding on the bottom.
You already know how to stick that text on top of what’s been laid out. Its time to break out the tried and true overlay spec.
Add the following line right after the gradientOverlaySpec.
ASOverlayLayoutSpec *nameOverlaySpec = [ASOverlayLayoutSpec
                                          overlayLayoutSpecWithChild:gradientOverlaySpec
                                                             overlay:self.animalNameTextNode];
As well, you need to change the return statement to the following:
return nameOverlaySpec;
Now you can build and run to see the text on the screen:

Not bad; you just need to move it to the bottom corner.
This is a good time to mention a common case you’ll run into. You have some text on the bird, so your natural tendency may be to wrap the nameOverlaySpec in other specs to put it where you want. You’ll usually need to take a step back and think about what you’re trying to express.
In this case, you’re using nameOverlaySpec to stretch something else over the existing content.
But you don’t actually want to stretch the name over the content. You want to tell the name it should be in the bottom left hand corner of its available space, and then stretch that layout spec over the available space.
Introducing ASRelativeLayoutSpec
What you actually want is ASRelativeLayoutSpec.
ASRelativeLayoutSpec takes an ASLayoutElement child object, considers the space it has available, and then places that child item according to your instructions.
When you define a relative spec, you can set its verticalPosition and horizontalPosition properties.
These two properties can be one of the following:
ASRelativeLayoutSpecPositionStartASRelativeLayoutSpecPositionCenterASRelativeLayoutSpecPositionEnd
The combination lets you place your object at one of the corners, one of the edges, or in the center of the space it has available.
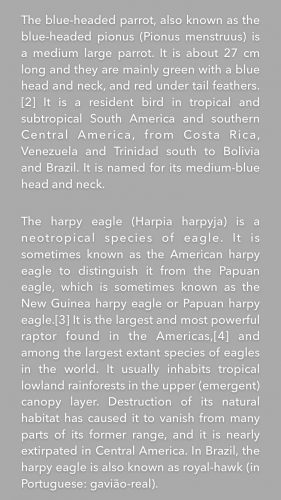
As an exercise, how would you put this frog on the right edge of his available space?

If you said, “Set verticalPosition to ASRelativeLayoutSpecPositionCenter and horizontalPosition to ASRelativeLayoutSpecPositionEnd”, you’d be right!
Now that you’ve had practice, the next line should make a little more sense. Add the following line right before nameOverlaySpec you added earlier:
ASRelativeLayoutSpec *relativeSpec = [ASRelativeLayoutSpec
      relativePositionLayoutSpecWithHorizontalPosition:ASRelativeLayoutSpecPositionStart
                                      verticalPosition:ASRelativeLayoutSpecPositionEnd
                                          sizingOption:ASRelativeLayoutSpecSizingOptionDefault
                                                 child:self.animalNameTextNode];
As you can see, you’re setting the child’s horizontalPosition to start and the verticalPosition to end. In froggy terms it would look something like this:

Now that you have the relative spec set up, change the nameOverlaySpec definition to the following:
ASOverlayLayoutSpec *nameOverlaySpec = [ASOverlayLayoutSpec
                                           overlayLayoutSpecWithChild:gradientOverlaySpec
                                                              overlay:relativeSpec];
Build and run to see what you have:
All right! There’s just one more thing to do on this half of the cell.
Introducing ASInsetLayoutSpec
The last thing you need to do is pad the animal name by 16 points on the left and 8 points on the bottom. You have ASInsetLayoutSpec at your disposal for this.
To add a little padding around any of your objects, simply wrap an object in an inset spec and provide UIEdgeInsets to define exactly how much padding you want.
Add the following line after your nameOverlaySpec:
ASInsetLayoutSpec *nameInsetSpec = [ASInsetLayoutSpec
                               insetLayoutSpecWithInsets:UIEdgeInsetsMake(0, 16.0, 8.0, 0.0)
                                                   child:nameOverlaySpec];
Then, once again, change the return statement to return the outermost spec.
return nameInsetSpec;
Build and run and you’ll see the following:


Kidding — I was just trying to see if you were awake! :]
You don’t want the inset to be applied to the entire area the overlay encompasses, since that includes your animal image.
What you actually want is to apply an inset to the space relativeSpec has available. To fix this, first delete the current nameInsetSpec definition.
Next, add the following new and improved version right before the nameOverlaySpec definition:
ASInsetLayoutSpec *nameInsetSpec = [ASInsetLayoutSpec
            insetLayoutSpecWithInsets:UIEdgeInsetsMake(0, 16.0, 8.0, 0.0) child:relativeSpec];
Now you need nameOverlaySpec to overlay the new inset, not relativeSpec anymore. Replace the old nameOverlaySpec definition with:
ASOverlayLayoutSpec *nameOverlaySpec = [ASOverlayLayoutSpec
	                overlayLayoutSpecWithChild:gradientOverlaySpec overlay:nameInsetSpec];
Finally, change return back to:
return nameOverlaySpec;
Now build and run to see exactly what you were hoping for:

Top half accomplished!
The Bottom Half
The second half of things is quite a bit easier; it’s simply the animal’s description with an inset around it…and you already know how to do that.
Add the following line before the return statement to create an inset with the description text.
ASInsetLayoutSpec *descriptionTextInsetSpec = [ASInsetLayoutSpec
                            insetLayoutSpecWithInsets:UIEdgeInsetsMake(16.0, 28.0, 12.0, 28.0)
                                                child:self.animalDescriptionTextNode];
If you were to return this inset and then build and run, you’d see the following:
This is exactly what you’d expect. Now that you have both halves figured out, putting them together is a snap.
Intrinsic Content Sizes
You may have noticed that you didn’t have to worry about the text having a content size to fill the space. That’s because ASTextNode has an intrinsic content size based on its text and attributes.
The following nodes do not have a default size:
-
ASDisplayNodesubclasses -
ASNetworkImageNodeandASMultiplexImageNode -
ASVideoNodeandASVideoPlayerNode
The commonality is that these nodes have no content to start with, and therefore no way of defining their own size. These nodes will either need to have preferredFrameSize set or be put in a layout spec before they’ll have a concrete size to work with.