In-App Purchases: Non-Renewing Subscriptions Tutorial
Learn to offer access to time-limited content to users and monetize your app using In-App Purchases in this Non-Renewing Subscriptions Tutorial. By Owen L Brown.
Getting Started
When you’re ready to begin, download the starter project here.
The starter project already has the basics for IAP, such as StoreKit handling, some product ids, and others. It also contains the code required for logging into the Parse Server, but everything directly related to non-renewing subscriptions and setting up the server has yet to be implemented.
Take a peak at the To Do List below to get an idea of the steps you will be taking.
To Do List
- Get a copy of Parse Server
- Connect a new Heroku app to the Parse Server
- Setup the app to use MongoLab for the server database
- Connect the InsomniOwl app to Heroku
- Add new products to iTunes Connect
- Setup a Sandbox Tester
- Add new products to InsomniOwl app
- Expiration date handling
- Display the content
- Final touches
Now that you know where you are going, time to get to it!
Parse Server & Heroku
First, you’ll need to set up an app in Heroku for this tutorial. To do this, do the following:


Note: Enter random characters in the APP_ID and MASTER_KEY fields. Keep these secret as it prevents others from accessing your app backend. You’ll use them shortly in the iOS app.


- Head over to the Parse Server GitHub.
- Click the Fork button at the top right and select one of your existing repositories. This will create a copy of the Parse Server example that you can integrate with Heroku.
- Scroll down the forked repository and click the Deploy to Heroku button. This will open the Heroku website and begin the Parse Server integration.
- Create a new Heroku account or login to an existing one.
- A new Parse Server Example app will appear. Enter an app name.
- The MongoLab Add-On is free, but you may need to enter credit card information to use it. Finish filling out the remaining fields. Leave the PARSE_MOUNT value at the default /parse location. Replace the yourappname section in the SERVER_URL field with, you guessed it, your app name. But be sure to keep the .herokuapp.com/parse part.
- Click Deploy and wait until the deployment process completes. The automatic process is copying over the Parse SDK server to Heroku and setting up the variables needed for access.
- Once deployment is successful, click on Manage App. Then click Settings to view the application variables.
- Now click the Reveal Config Vars button to display the configuration variables created during deployment. There are 3 variables to copy to the Xcode project: APP_ID, MASTER_KEY, and SERVER_URL. Take note of them!
Note: Enter random characters in the APP_ID and MASTER_KEY fields. Keep these secret as it prevents others from accessing your app backend. You’ll use them shortly in the iOS app.
Note: Enter random characters in the APP_ID and MASTER_KEY fields. Keep these secret as it prevents others from accessing your app backend. You’ll use them shortly in the iOS app.
Now that you’ve finished the Heroku and the Parse Server setup, open the Xcode starter project. Open AppDelegate.swift and in application(_:didFinishLaunchingWithOptions:) replace the applicationId, clientKey and server property values with your Heroku’s configuration values.
let configuration = ParseClientConfiguration {
  $0.applicationId = "com.razeware.InsomniOwl.somethingRandomHere"
  $0.clientKey = "myMasterKeyKeepItSecret"
  $0.server = "https://insomniowl.herokuapp.com/parse"
}
Note: You must prefix the server property with https, NOT http. Otherwise, the app will not access the Parse Server and the Console will display an error: The resource could not be loaded because the App Transport Security policy requires the use of a secure connection.
Note: You must prefix the server property with https, NOT http. Otherwise, the app will not access the Parse Server and the Console will display an error: The resource could not be loaded because the App Transport Security policy requires the use of a secure connection.
Build and run. When the app launches for the first time, you need to create a new account before the displaying the products list.

Enter a username and password to create a new account and select Sign Up. When you’re done, you should see something like this:
Who stole the goods!
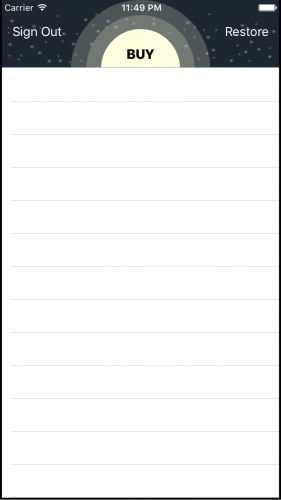
Who stole the goods!
Wait a second, where are the cool Owl images? Well…they’re not in your iTunes Connect account yet. Head over there now!
iTunes Connect
Add In-App Purchase Items
You must register In-App purchased products into iTunes Connect before they will appear in an app. Do the following:
- Log onto iTunes Connect
- Click My Apps
- Add a new iOS app for this project.
- Select the new app and click on Features.
- Click In-App Purchases and then the + button.

To provide the app some purchasing variety, add the following Consumable, Non-Consumable and Non-Renewing Subscriptions. For the tutorial, only enter the name, product ID, and a price. The product ID should be your reverse website, app name and product name. For example: com.yoursite.yourappname.3monthsOfRandom. The last part (ex. 3monthsOfRandom) for each item must match perfectly as listed below in order for the tutorial app to grab the correct Owl image.
Also, be sure to check the Cleared for Sale box or the item won’t display in the app.
Enter the following items and use the specified Product ID suffix:
- Non-Renewing Subscription: 3monthsOfRandom
- Non-Renewing Subscription: 6monthsOfRandom
- Non-Consumable: CarefreeOwl
- Non-Consumable: CouchOwl
- Non-Consumable: CryingOwl
- Non-Consumable: GoodJobOwl
- Non-Consumable: GoodNightOwl
- Non-Consumable: InLoveOwl
- Non-Consumable: LonelyOwl
- Non-Consumable: NightOwl
- Non-Consumable: ShyOwl
- Consumable: RandomOwls
Note: It is important that you specify the duration of any subscription-based IAP, and the most common way to do this is in the display name or description. There’s a good chance Apple will reject the app if it fails to clearly state the duration of any subscription.
Note: It is important that you specify the duration of any subscription-based IAP, and the most common way to do this is in the display name or description. There’s a good chance Apple will reject the app if it fails to clearly state the duration of any subscription.
When it is all said and done, you should see the following:

It’s important to get the Product IDs specified correctly. The Product IDs prefix must match your apps Bundle Identifier. The suffix uniquely describes the product. Ex: com.yourwebsite.yourappname.3monthsOfRandom.
If you are using your own Bundle Identifier in the app, you’ll need to update the Product IDs in the starter project. Open OwlProducts.swift and update productIDsNonConsumables to match the Product IDs you setup in iTunes Connect.
static let productIDsNonConsumables: Set<ProductIdentifier> = [
  "com.back40.InsomniOwl.CarefreeOwl",
  "com.back40.InsomniOwl.GoodJobOwl",
  "com.back40.InsomniOwl.CouchOwl",
  "com.back40.InsomniOwl.NightOwl",
  "com.back40.InsomniOwl.LonelyOwl",
  "com.back40.InsomniOwl.ShyOwl",
  "com.back40.InsomniOwl.CryingOwl",
  "com.back40.InsomniOwl.GoodNightOwl",
  "com.back40.InsomniOwl.InLoveOwl"
]