Jetpack Compose Tutorial for Android: Getting Started
In this Jetpack Compose tutorial, you’ll learn to use the new declarative UI framework being developed by the Android team by creating a cookbook app. By Alex Sullivan.
Improving the Recipe Card's Look
Start by adding a text style inside the recipe title Text():
Text(recipe.title, style = +themeTextStyle { h4 })
Here, you use the style parameter to style your text. The +themeTextStyle functionality requests the h4 text style from your app's theme. If you rebuild the preview, you'll see that your title is now larger and bolder. Nice!

Adding Padding to the Recipe Card
To add the padding to your card, wrap the title and ingredient Text() inside another Column() and add the following modifier:
Column(modifier = Spacing(16.dp)) {
  Text(recipe.title, style = +themeTextStyle { h4 })
  for (ingredient in recipe.ingredients) {
    Text("• $ingredient")
  }
}
Modifiers let you adjust the UI of a composable. In this scenario, you're using a modifier to add spacing around the column.
You can use modifiers for much more than spacing, including expanding a composable or applying an aspect ratio.
Rebuild the preview. You should see a beautiful recipe card:
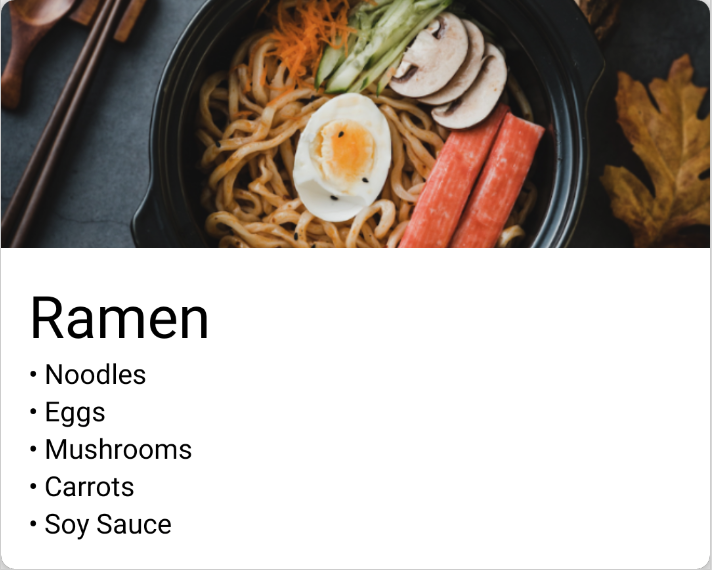
Your recipe card looks great now. It's time to give your users the ability to make lists of their favorite recipes.
Creating a List of Recipes
Normally, to make a list you'd use something like a RecyclerView. The Jetpack Compose authors are still working through the best way to make a list of items in the new UI toolkit. For now, you'll use a VerticalScroller(). This works similarly to a ScrollView in the old UI toolkit.
To start putting together your list of recipes, right-click on the root code package once more, and select New ▸ New Kotlin File/Class. Then select File from the list and type the name RecipeList. Finally, add RecipeList() to the file:
@Composable
fun RecipeList(recipes: List<Recipe>) {
  // 1
  VerticalScroller {
  // 2
    Column {
    // 3
      for (recipe in recipes) {
      // 4
        Padding(16.dp) {
          RecipeCard(recipe)
        }
      }
    }
  }
}
Make sure to import the missing references. Here's a breakdown of what you just added:
-
You use a
VerticalScrollerto create a scrollable list of recipe cards. -
VerticalScrollerexpects to have only one child, similar to how aScrollViewworks, so you add aColumn. -
You then loop through each recipe in your list and create a
RecipeCard, which adds them to theColumn. -
Finally, you add 16 dp of padding around each
RecipeCardto make the list look better.
Now that you have a composable to show your list of recipes, it's time to wire everything up in your MainActivity and see your hard work on a device!
Wiring Everything Up
Navigate to MainActivity and replace the contents of setContent() with the following:
MaterialTheme {
  RecipeList(defaultRecipes)
}
You need to include the MaterialTheme() in the root of your content so the components that reach for theme values have something to grab onto, just like you did with the DefaultRecipeCard().
Build and run. You'll see a mouth-watering list of delicious foods.

The app looks good, but it's missing a toolbar! You'll add one as your final step.
Adding a Toolbar
Having a Toolbar is the default behavior of Android applications, so it's important to include it! Replace the contents of setContent() with the following:
MaterialTheme {
  // 1
  FlexColumn {
    // 2
    inflexible {
      // 3
      TopAppBar(title = {
        Text("ComposableCookBook")
      })
    }
    // 4
    flexible(flex = 1f) {
      RecipeList(defaultRecipes)
    }
  }
}
That's a lot of new stuff! Here's a breakdown of the new concepts:
You can think of flex as a LinearLayouts with weights; that is, a system where you size items depending on how many other items are in the column.
-
You use
FlexColumn()to house the app bar and your list of recipes. AFlexColumnis similar to a normalColumnexcept that it uses a flex system to lay out and size components.You can think of flex as a
LinearLayouts with weights; that is, a system where you size items depending on how many other items are in the column. -
You don't want to size the actual toolbar with flex – instead, you want it to have a static height. To do this, you wrap the toolbar in an
inflexiblecall. -
You then use the
TopAppBar()to create a view at the top of the screen similar to theToolbarin the current UI toolkit. -
Finally, you add your
RecipeListand tell it to expand to fill the remaining space by giving it a flex value of 1.
Build and run and you'll see a fancy new toolbar at the top of ComposeCookbook.

Congratulations! You've built your first app using Jetpack Compose.
Where to Go From Here?
You've now experienced some of the latest and greatest changes coming to the world of UI on Android. But you've only scratched the surface of what Compose has to offer, and many of these APIs are bound to change dramatically before the library is stable.
In this tutorial, you learned about:
- The philosophy and motivation behind Jetpack Compose.
- How to build a composable using the
@Composableannotation. - How to preview a composable using the
@Previewannotation. - The basics of laying out composables using the
Columncomposable. - How to add theme styling to your components using the
+method.
To learn more about Jetpack Compose, check out the official developer docs.
You can also see some of the latest and great elements in action by browsing the (JetNews sample app, which some of the authors of Jetpack Compose develop and maintain.
You could also check out the Jetpack Compose Primer course from our very own video course team! It covers most of what you covered in this tutorial, but it touches upon some details of FlexRow. You can also watch it to repeat the things you've learned here, on a different example! :]
We hope that you've enjoyed this tutorial! If you have any questions or comments, feel free to join the forum discussion below.