Building a Museum App with ARKit 2
Have you ever stood at a museum exhibit and wanted to know more about the art or artifact than the little placard provides? There should really be an app for that. Well, you can make such an app with image and object detection and tracking in ARKit 2! By Michael Katz.
Sign up/Sign in
With a free Kodeco account you can download source code, track your progress, bookmark, personalise your learner profile and more!
Create accountAlready a member of Kodeco? Sign in
Sign up/Sign in
With a free Kodeco account you can download source code, track your progress, bookmark, personalise your learner profile and more!
Create accountAlready a member of Kodeco? Sign in
Sign up/Sign in
With a free Kodeco account you can download source code, track your progress, bookmark, personalise your learner profile and more!
Create accountAlready a member of Kodeco? Sign in
Contents
Building a Museum App with ARKit 2
30 mins
- Getting Started
- Building Image Detection
- Adding Reference Images
- Adding Image Tracking
- Handling Detected Images
- Tryin’ It Out
- Adding Object Detection and Tracking
- Object Detection
- Selecting Reference Objects
- Creating the Reference Objects
- Importing the Reference Objects
- Looking for Objects
- Finding the Objects
- Displaying Text Nodes
- Simultaneous Image and Object Tracking
- Adding Sound
- Where to Go From Here?
Have you ever stood at a museum exhibit and wanted to know more about the art or artifact than the little placard provides? There should really be an app for that. Well, you can make such an app with image and object detection and tracking in ARKit 2!
To make the experience fun and interesting, ARKit lets apps add dynamic virtual content to real-world objects. It allows you to build interactive guide apps for real-world places and things. ARKit makes it easy with built-in image and object tracking. This is perfect for companion apps at museums, galleries, amusement parks and colleges. It can bring to life any place that you want to provide a dynamic or user-specific experience.
In this tutorial, you’ll build out TriassicLoupe, a companion app for a dinosaur exhibit at a natural history museum. The concept is that of a jeweler’s loupe; this app reveals hidden details as a user points it around the exhibit. Don’t worry if you don’t have any dinosaurs lying around — you’ll be able to use regular household items as stand-ins.
The final app displays a short animation on top of an informational image. It also shows information about a dinosaur next to a free-standing replica object. The app will also add some scary sound effects to that object.
The app uses ARKit with SceneKit, the 3D graphics framework for iOS. You’ll see that ARKit does all the heavy lifting with SceneKit. For image and object tracking, you’ll use only very basic SceneKit capabilities, and nothing you learn about it from this tutorial is incidental. Learning more about SceneKit will enable you to build richer apps, but that’s outside the scope of this tutorial. See the Where to Go From Here? section at the end for further reading suggestions.
Getting Started
ARKit relies on the built-in functionality of the A9 or later processor. It uses machine learning, the rear camera, and video and image processing. This means that ARKit apps need to run on an iPhone 6s or newer, and they won’t work in the Simulator.
It’s handy to have an extra-long Lightning cable or for you to set up your device to connect to Xcode through Wi-Fi. ARKit requires moving around a little bit to get a good world map. A world map is ARKit’s awareness of physical space. It’s a collection of feature points, measurements, orientations and anchors.
To get started, use the Download Materials button at the top or bottom of this tutorial to download the starter project. The .zip file contains a helper project, assets to use later in the tutorial and the starter and final projects.
Open the starter project. The app itself is very simple with a single ViewController
where you’ll add all the logic. There’s a helper struct, DinosaurFacts
, which contains some basic information about a few dinosaurs.
If you build and run, you’ll see a black screen since you haven’t yet wired up the ARKit session.
Building Image Detection
The first thing to do is build the image detection. Image detection might be the simplest function of ARKit. To build an image detector, all you have to do is provide an image tracking session with a copy of the image. These provided images are called reference images.
Adding Reference Images
TriassicLoupe uses the artwork from informational signs for the reference images. When the user points the app at one of these signs, the app will add a dinosaur image overlay.
Like other app images, augmented reality (AR) reference images live in the asset catalog. Reference images are a little special because they need to be grouped specially for ARKit.
Open Assets.xcassets and click the + button at the bottom.
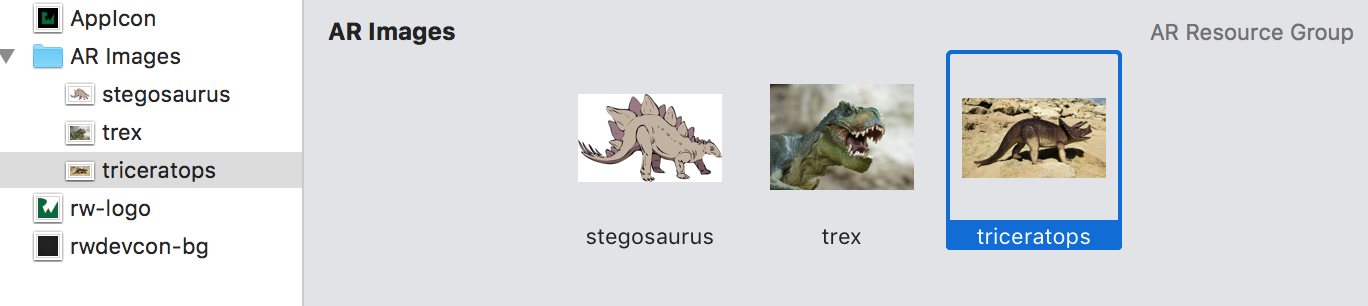
From the pop-up menu, select New AR Resource Group to create a new group. Rename it AR Images since this group will hold the reference images.
In finder, open the Dinosaur Images folder from the downloaded materials. Drag each image file one by one into the AR Images in Xcode. Once done, you should have three images with yellow warning triangles.
Xcode warns you if the reference images are not good enough to be a reference. This might be because they are too small or don’t have enough features or contrast. Images that have lots of empty space, few colors or lack distinctive shapes are hard to detect.
In this case, the warnings are “Unsupported Configuration” warnings. This is because reference images must have non-zero, positive width
. AR reference images require you to specify their real-world sizes!
Select the stegosaurus image in the asset library. Then select the Attributes inspector.
Change the units to Inches. Next, enter a width of 4.15. When you do that, the height will automatically become 2.5711, based on the aspect ratio! These fields are where you bridge the virtual world and the real one.
For the other two images, use these values:
- trex: Inches, width: 6.3333, height: 4.75
- triceratops: Inches, width: 5, height: 2.8125
Once you’ve entered the sizes, the warnings disappear.
These images correspond to the slides of the included Dinosaurs.key Keynote file. Each slide represents an informational placard that would be next to a museum display. When printed out on U.S. letter-sized paper, the specified sizes are the physical image size.
These images are each a different style to demonstrate a small part of ARKit’s range. The two things that matter here: 1. There is a enough shape and contrast in the image. 2. The real-world version is flat, well-lit and non-reflective.
A book page, wallpaper or printing on a mirror are bad candidates. A photo, painting or illustration will work well. Xcode will warn you if the image isn’t good enough. No need to guess at runtime!
Now, it’s time to move on writing the code to look for those images.
Adding Image Tracking
In ViewController.swift, add a new variable under the comment: // Add configuration variables here:
private var imageConfiguration: ARImageTrackingConfiguration?
This sets up a variable to hold the image-tracking configuration, once created.
Now, look for setupImageDetection()
and add the following code:
imageConfiguration = ARImageTrackingConfiguration()
This sets that instance variable to a new ARImageTrackingConfiguration
. As the name implies, this class is an ARKit configuration that is set up to detect and track images.
Under that line, add the following:
guard let referenceImages = ARReferenceImage.referenceImages(
inGroupNamed: "AR Images", bundle: nil) else {
fatalError("Missing expected asset catalog resources.")
}
imageConfiguration?.trackingImages = referenceImages
This creates an ARReferenceImage
set using the images in the AR Images
group that you just created in the asset catalog. You then add them to the configuration as the list of images to track.
To use the configuration, add the following to viewWillAppear(_:)
:
if let configuration = imageConfiguration {
sceneView.session.run(configuration)
}
This starts the ARKit session with the imageConfiguration
. Once this runs, ARKit will process the camera data to detect the reference images.
To make sure this all gets kicked off, add the following to the bottom of viewDidLoad()
:
setupImageDetection()
Finally, to balance out the session running, add to viewWillDisappear(_:)
:
sceneView.session.pause()
This pauses the session when the view disappears. ARKit sessions are battery drains due to camera use, video processing and rendering. It’s not a big deal in our one-view app, but it’s always a good idea to respect the user’s device and pause the session whenever it’s not shown.
Handling Detected Images
Once an image is detected, the AR session adds an ARImageAnchor
to its world map. When that happens, you’ll get a callback at renderer(_:didAdd:for:)
.
Find this function at the bottom of ViewController.swift and add the following code:
DispatchQueue.main.async { self.instructionLabel.isHidden = true }
if let imageAnchor = anchor as? ARImageAnchor {
handleFoundImage(imageAnchor, node)
}
This code checks that the newly added node was added for an image anchor. This means that an image was detected in the real world.
Replace the handleFoundImage(_:_:)
body with:
let name = imageAnchor.referenceImage.name!
print("you found a \(name) image")
let size = imageAnchor.referenceImage.physicalSize
if let videoNode = makeDinosaurVideo(size: size) {
node.addChildNode(videoNode)
node.opacity = 1
}
This obtains the name and size of the image from the anchor’s reference image. You specified those values in the asset catalog. Using the size, a helper function is called to create a video player to sit on top of the detected image.
To make the video node, replace the contents of makeDinosaurVideo(size:)
with:
// 1
guard let videoURL = Bundle.main.url(forResource: "dinosaur",
withExtension: "mp4") else {
return nil
}
// 2
let avPlayerItem = AVPlayerItem(url: videoURL)
let avPlayer = AVPlayer(playerItem: avPlayerItem)
avPlayer.play()
// 3
NotificationCenter.default.addObserver(
forName: .AVPlayerItemDidPlayToEndTime,
object: nil,
queue: nil) { notification in
avPlayer.seek(to: .zero)
avPlayer.play()
}
// 4
let avMaterial = SCNMaterial()
avMaterial.diffuse.contents = avPlayer
// 5
let videoPlane = SCNPlane(width: size.width, height: size.height)
videoPlane.materials = [avMaterial]
// 6
let videoNode = SCNNode(geometry: videoPlane)
videoNode.eulerAngles.x = -.pi / 2
return videoNode
This function creates a video player and puts it in a SceneKit node sized to the image. It does that by:
- Grabbing the video from the resource bundle. This has a simple animation used for all the dinosaurs. But you could use the image anchor’s name to serve up a different video for each dinosaur type.
- Creating and starting an
AVPlayer
for that video. -
AVPlayer
instances don’t automatically repeat. This notification block loops the video by listening for the player to finish. It then seeks back to the beginning and starts it over again. - SceneKit doesn’t use
UIView
s and, instead, uses nodes to render a scene. AnAVPlayer
can’t be added directly. Instead, the video player can be used as a node’s texture or “material.” This will map video frames on to the associated node. - The detected image is a flat square (i.e., a plane), so the node that will overlap it is a
SCNPlane
of the same size as the detected image. This plane gets decorated with the video as its texture. - Creating the actual node that will be part of the scene. This is flipped on the x-axis so that it shows up correctly to the user.
Tryin’ It Out
Finally, after all this, it’s time to build and run! But, first, print out at least one of the slides of Dinosaurs.key. Place it flat (vertical or horizontal) in a well-lit area.
Build and run the app. Once you accept camera permissions and the video appears, point it at the printed page. It may take a second or two of a steady hand to detect the image. When done correctly, you’ll see a comment in the console and an animated overlay on the screen.
Unfortunately, if the session starts but it doesn’t detect an image, there is no error message. Most of the time, ARKit is not expecting to find the image, so it’s not considered an error. As long as there are no warnings in the asset catalog about the image, it should eventually be detected.
Adding Object Detection and Tracking
Now, you’ve seen image detection in action. Next, you’ll add object detection to the app. From a developer perspective, object detection works pretty much the same way. The main difference is that it will look for three-dimensional objects rather than flat images. Object detection is slightly more complicated to set up. Object reference creation is a fair bit more complicated as well.
To review, here are the steps for using image and object detection:
- Create the references.
- Put the references in an AR Resources group in the asset catalog.
- Set up an ARKit session.
- Load the reference images/objects and set the session to detect them.
- Start the session.
- Wait for the callback when an anchor is added.
- Add the interactive nodes to the scene, or take other action.
Object Detection
Another useful ARKit function is object detection and tracking. TriassicLoupe detects known objects and annotates them. In reality, these would be dinosaurs in a diorama or dinosaur skeletons. For this tutorial, you’ll use whatever you have on hand.
Selecting Reference Objects
The first thing you need in order to detect an object is a reference object. With image detection, you can create, scan or take a picture of the image. But with a 3D object, the reference is harder to construct.
ARKit provides its own API for creating reference objects by scanning them with an iPhone. TriassicLoupe doesn’t use this directly since it only detects an already-known set of objects. You can scan them ahead of time using an Apple-provided utility.
You should download Apple’s Object Scanner project, if you can. It’s also included in the project download in the ScanningAndDetecting3DObjects folder, for your convenience. Note that the included project may be out of date by the time you read this.
This app scans objects and lets you export an .arobject
file. You can then import this file as an asset into your Xcode project. Successful scanning requires having an appropriate object and good lighting. An appropriate object is:
- Solid.
- Has lots of details (like shape and color).
- Not reflective or transparent.
- Probably somewhere between the size of a softball and a chair.
You likely don’t have a 3D dinosaur display in your home, so you can use any household object for this tutorial. Good objects are a cookie jar, action figure or plant. Place the object on a flat surface with space around it under good lighting.
Creating the Reference Objects
Build and run this app to a device. For best results, use an iPhone 8, 8+ or X, which has enough processing power to maintain a good frame rate while performing the scan.
- Aim the phone’s camera at the object. A yellow box should appear around the object. Once the object is in the middle of the box, tap Next.
- Resize the bounding box by moving it around and long-pressing and dragging the edges. The box should contain just the object. Like the new Measure app, this scanner uses ARKit to measure the object’s real world size. Tap the Scan button once the object is in the middle.
- Walk around the object, aiming the phone at the object. Be sure to get at several angles, above and the sides, as well. The yellow box will fill in as the scan gets enough information to represent the object. Try to get as much covered as possible.
- The next step sets the anchor point. This point controls how the model’s node geometry interplays with the real world. For this tutorial, the exact position is not critical. Try to have it on the bottom plane of the object in its middle. Press Finish when you’re ready.
- Tap the Export button, and send the
.arobject
file to yourself through AirDrop, file sharing or email.
Repeat this process for two more objects.
Importing the Reference Objects
Go back to Assets.xcassets and create a new AR Resource Group. Name it AR Objects.
Drag each of the .arobject
files into this group. You’ll see a little photo preview of the object from when it was scanned. Rename the objects to match these dinosaur names: brachiosaurus, iguanodon and velociraptor.
Unlike images, you don’t have to specify the size since it was already measured by the object scanning process.
Looking for Objects
The next step is to set up a configuration to look for these objects. At the top of ViewController.swift, under the the imageConfiguration
definition, add:
private var worldConfiguration: ARWorldTrackingConfiguration?
This creates a variable to store the world-tracking configuration. This configuration is necessary for object detection. Unlike image detection, there is no configuration just for objects.
Next, replace the body of setupObjectDetection()
with:
worldConfiguration = ARWorldTrackingConfiguration()
guard let referenceObjects = ARReferenceObject.referenceObjects(
inGroupNamed: "AR Objects", bundle: nil) else {
fatalError("Missing expected asset catalog resources.")
}
worldConfiguration?.detectionObjects = referenceObjects
This creates an instance of ARWorldTrackingConfiguration
. This configuration is the fullest-featured ARKit configuration. It can detect horizontal and vertical planes as well as objects. It uses the rear-facing camera along with all the motion sensors to compute a virtual representation of the real world.
After creating the configuration, you load the reference objects from the asset catalog and set the references as the detectionObjects
for the configuration. Once detected, you’ll get the appropriate callbacks when ARKit adds their anchors to the scene.
In viewDidLoad
change the last line to:
setupObjectDetection()
You just replaced the setup of image detection with the call to set up object detection.
To start the session with this new configuration, replace the contents of viewWillAppear(_:)
with:
super.viewWillAppear(animated)
if let configuration = worldConfiguration {
sceneView.debugOptions = .showFeaturePoints
sceneView.session.run(configuration)
}
This starts the session with the new worldConfiguration
.
You also activate the optional ARSCNDebugOptions.showFeaturePoints
debug option. This places yellow dots on the screen for the feature points ARKit detects. This helps debugging when you get to running the app again. The more dots that show up on the object, the easier the detection will be.
Finding the Objects
As with image detection, when ARKit detects an object, it adds an anchor to the world map and a node to the scene.
Modify renderer(_:didAdd:for:)
by replacing its contents with:
DispatchQueue.main.async { self.instructionLabel.isHidden = true }
if let imageAnchor = anchor as? ARImageAnchor {
handleFoundImage(imageAnchor, node)
} else if let objectAnchor = anchor as? ARObjectAnchor {
handleFoundObject(objectAnchor, node)
}
This keeps the previous handling of the image anchor but adds a check to see if the new anchor is an object anchor. If it’s an object anchor, that means an object was detected! You then hand off the node and anchor to the helper method.
Speaking of which, replace the contents of handleFoundObject(_:_:)
with:
// 1
let name = objectAnchor.referenceObject.name!
print("You found a \(name) object")
// 2
if let facts = DinosaurFact.facts(for: name) {
// 3
let titleNode = createTitleNode(info: facts)
node.addChildNode(titleNode)
// 4
let bullets = facts.facts.map { "• " + $0 }.joined(separator: "\n")
// 5
let factsNode = createInfoNode(facts: bullets)
node.addChildNode(factsNode)
}
This code gathers information about the found object. The user can get extra information about the dinosaur represented by the object with the added text nodes. Taking a look at the code:
- The
referenceObject
‘s name is set in the asset catalog and matches that dinosaur’s name. -
DinosaurFact
is a helper type that describes each of the known dinosaurs. It has a handy list of coolfacts
. - This helper function creates a text node with the dinosaur’s name and adds it to the scene. This text will look as if it’s floating above the object.
- This little string math prepends a bullet to each fact, combining them into a single, line-separated string.
SCNText
nodes can have multiple lines but require a singleString
input. - This helper creates the text node, which will appear next to the object and adds it to the scene.
Displaying Text Nodes
Now, to dive into the SceneKit text nodes.
Add the helper function for creating the text node below handleFoundObject(_:_:)
:
private func createTitleNode(info: DinosaurFact) -> SCNNode {
let title = SCNText(string: info.name, extrusionDepth: 0.6)
let titleNode = SCNNode(geometry: title)
titleNode.scale = SCNVector3(0.005, 0.005, 0.01)
titleNode.position = SCNVector3(info.titlePosition.x, info.titlePosition.y, 0)
return titleNode
}
This creates a text node with the dinosaur’s name. A SCNText
is a geometry that describes the shape of the string. It allows you to create a shape that can be placed in the scene. The default text size is huge compared to the object, so scaling the titleNode
shrinks it to a reasonable size.
The position
specified here aligns the text over the center of the object. Because the size of the object can vary from object to object, it needs to be specified for each individual dinosaur representation. You can adjust the values in DinosaurFacts.swift for your own objects. The dimensions are in meters by default for SceneKit.
Next, add the other helper function for the fun facts:
private func createInfoNode(facts: String) -> SCNNode {
// 1
let textGeometry = SCNText(string: facts, extrusionDepth: 0.7)
let textNode = SCNNode(geometry: textGeometry)
textNode.scale = SCNVector3(0.003, 0.003, 0.01)
textNode.position = SCNVector3(0.02, 0.01, 0)
// 2
let material = SCNMaterial()
material.diffuse.contents = UIColor.blue
textGeometry.materials = [material]
// 3
let billboardConstraints = SCNBillboardConstraint()
textNode.constraints = [billboardConstraints]
return textNode
}
This is similar to the previous helper, but with a few extras:
- First, like the previous helper function, this creates a text geometry with a node and scales it down to a reasonable size.
- This makes the text blue. The blue color is set by creating a new material with its
diffuse
contents set to the blue color. A node’s material helps the scene renderer figure out how the object responds to light. The diffuse property is like the base appearance. Here, it’s set to a blue color, but could instead be an image or a video, as you’ve seen previously. -
SCNBillboardConstraint
is a useful constraint that keeps oriented to the node so that the text is always facing the user. This improves readability; as you move around, you won’t have to move to an awkward angle to see the text.
Build and run the app, then point at one of the scanned objects.
Detection may require several attempts. It helps to move around the object: forward and back, around the sides, etc., to give ARKit the best chance of realizing the shape. Be sure to move slowly and steadily.
Once ARKit detects an object, the app displays the information next to the object. Notice that the title floats above the object. If your objects are taller than a few inches, you’ll have to adjust the titlePosition.y
in DinosaurFacts.swift. This text will orient along the origin that was set during the scan.
In contrast with the title, the informational bullets move along with the camera so that they are always facing you.
Simultaneous Image and Object Tracking
At this point, you’ve replaced image tracking with object tracking. The ARWorldTrackingConfiguration
is a super-set configuration; it supports the same image tracking as ARImageTrackingConfiguration
.
To get image tracking back, add the following lines to the bottom of setupObjectDetection
.
guard let referenceImages = ARReferenceImage.referenceImages(
inGroupNamed: "AR Images", bundle: nil) else {
fatalError("Missing expected asset catalog resources.")
}
worldConfiguration?.detectionImages = referenceImages
This loads the same set of reference images as before, but sets them as the detectionImages
of the world-tracking configuration.
Build and run, again. Now, you’ll see both the animation on the dinosaur posters and the informational text on the objects.
Adding Sound
A cool way to punch up any app is with some positional audio. Time to add some scary dinosaur sounds!
At the top of the file, add a new variable below the configurations:
lazy var audioSource: SCNAudioSource = {
let source = SCNAudioSource(fileNamed: "dinosaur.wav")!
source.loops = true
source.load()
return source
}()
This creates a SCNAudioSource
, which holds sound data for use in SceneKit. This data is loaded from the included sound file.
Next, at the very end of handleFoundObject(_:_:)
, add this one line:
node.addAudioPlayer(SCNAudioPlayer(source: audioSource))
Voilà! That’s it. By default, a SCNAudioPlayer
handles all the details of creating a 3D sound effect from its source.
Build and run, again. Aim the camera at the object. Once it’s recognized, the scary audio starts playing. For the best experience, put on headphones. You should hear the sound modulate between your ears as you walk around the object.
Where to Go From Here?
It’s time to say goodnight to the museum and move on for the day. That doesn’t mean the ARKit fun has to stop.
This app itself is hardly complete. There is a lot more information and more media types that you can display in the scene. And, you can add more exhibits beyond just dinosaurs. You saw some hints for this earlier: switch up configurations when moving between areas and combine with Core Location to automatically determine where the user is standing.
ARKit also allows sharing world maps. This means museum goers could share notes and reviews of individual objects.
There is a lot of great free and premium ARKit content here to find out what else you can do.
And if you would like to learn more about SceneKit, check out the SceneKit Tutorial with Swift or have a look at our book.
If you have any questions or comments, please join the discussion below!
All videos. All books.
One low price.
A Kodeco subscription is the best way to learn and master mobile development — plans start at just $19.99/month! Learn iOS, Swift, Android, Kotlin, Flutter and Dart development and unlock our massive catalog of 50+ books and 4,000+ videos.
Learn more