Video Depth Maps Tutorial for iOS: Getting Started
In this iOS video depth maps tutorial, you’ll harness iOS 13’s video depth maps to apply realtime video filters and create a special effects masterpiece! By Owen L Brown.
Sign up/Sign in
With a free Kodeco account you can download source code, track your progress, bookmark, personalise your learner profile and more!
Create accountAlready a member of Kodeco? Sign in
Sign up/Sign in
With a free Kodeco account you can download source code, track your progress, bookmark, personalise your learner profile and more!
Create accountAlready a member of Kodeco? Sign in
Sign up/Sign in
With a free Kodeco account you can download source code, track your progress, bookmark, personalise your learner profile and more!
Create accountAlready a member of Kodeco? Sign in
Contents
Video Depth Maps Tutorial for iOS: Getting Started
20 mins
Admit it. Ever since you took your first video with the iPhone, you’ve had a burning desire to break into Hollywood. But you’re asking yourself, how can I do it?
Simple! You can use your iOS development skills to enhance your videos, become a special effects genius and take Hollywood by storm.
In this video depth maps tutorial, you’ll learn how to:
- Request depth information for a video feed.
- Manipulate the depth information.
- Combine the video feed with depth data and filters to create an SFX masterpiece.
Since the core of the project deals with depth maps, it’d be nice to know what depth maps are and how the iPhone gets them before you get started.
What are Depth Maps?
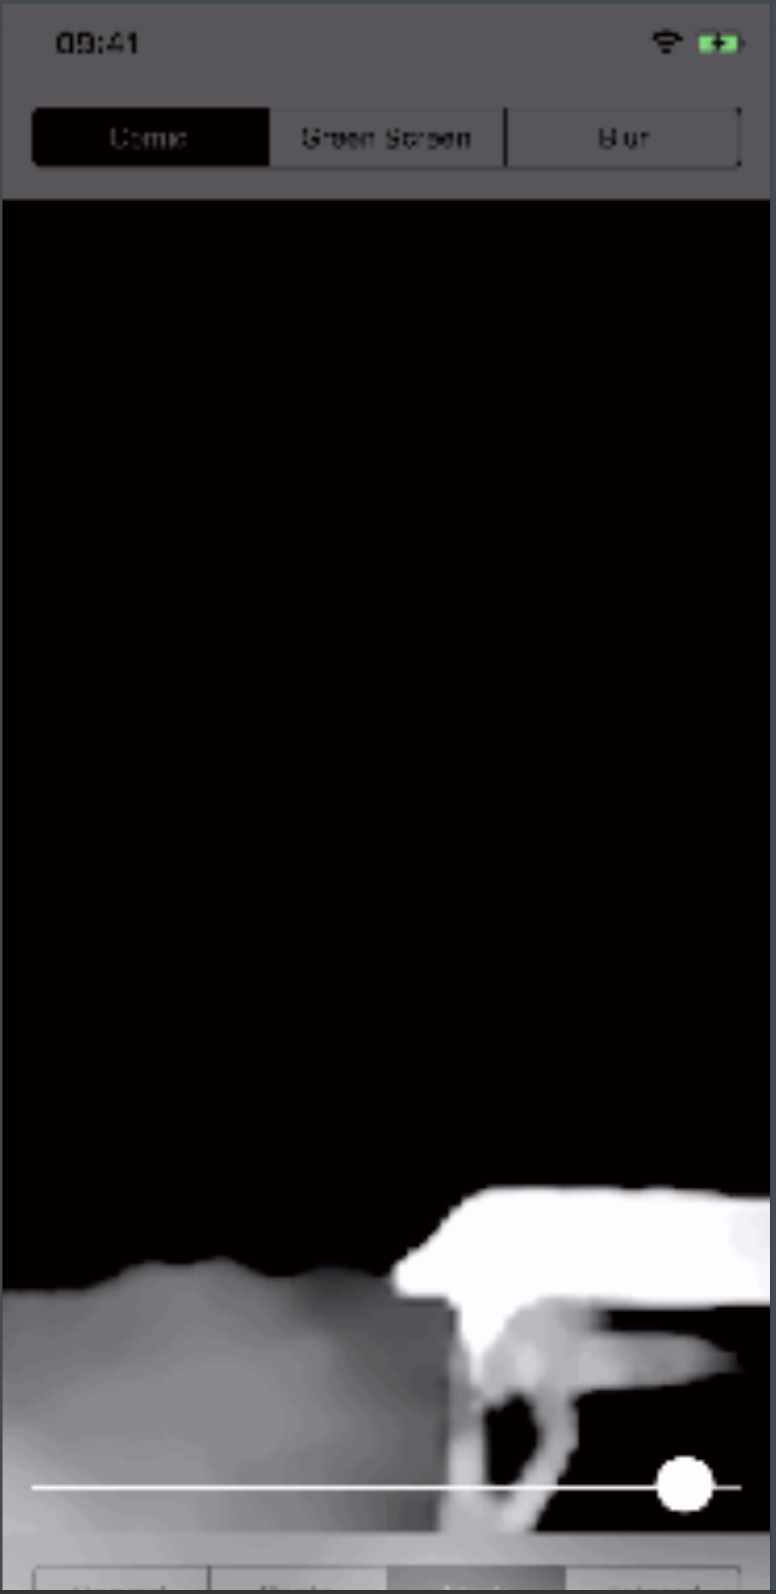
A depth map is distance data of surfaces from the camera’s point of view. This data is tied to a given image or video and, once it’s grabbed, you can do some pretty cool things with it.
For example, the image below displays closer objects in white and far away ones in black.
Using two offset cameras, the iPhone calculates the relative distances of objects. The process is very similar to your eyes working together to determine depth perception.
Filters
Filtering is another concept important to depth data handling. There are many ways to filter data, but for this tutorial you’ll focus on two:
- High-pass: These filters only keep values above a certain threshold.
- Band-pass: These filters only keep values between a minimum and maximum range.
That’s enough theory for now!
OK, it’s time to launch Xcode and get your formal wear ready for the Oscars!
Getting Started
For this video depth maps tutorial, you need Xcode 11 or later. You also need an iPhone with dual cameras on the back because that’s how the iPhone generates depth information. Since you need to run this app on a device, not the simulator, you also need an Apple Developer account.
Once you have everything ready, download and explore the materials for this tutorial by clicking the Download Materials button at the top or bottom of this page.
Open the starter project and select your development team in the Signing & Capabilities section of the Project Settings. Build and run it on your device. You’ll see something like this:
At this point, the app doesn’t do much. That’s where you come in!
Capturing Video Depth Maps Data
Before you can capture depth data for videos you need to add an AVCaptureDepthDataOutput
object to the AVCaptureSession
.
Apple added AVCaptureDepthDataOutput
in iOS 11 specifically to handle depth data, as the name suggests.
Open DepthVideoViewController.swift and add the following lines to the bottom of configureCaptureSession()
:
// 1
let depthOutput = AVCaptureDepthDataOutput()
// 2
depthOutput.setDelegate(self, callbackQueue: dataOutputQueue)
// 3
depthOutput.isFilteringEnabled = true
// 4
session.addOutput(depthOutput)
// 5
let depthConnection = depthOutput.connection(with: .depthData)
// 6
depthConnection?.videoOrientation = .portrait
Here’s the step-by-step breakdown:
- You create a new
AVCaptureDepthDataOutput
object. - Then, you set the current view controller as the delegate for the new object. The
callbackQueue
parameter is the dispatch queue on which to call the delegate methods. For now, ignore the error — you’ll fix it later. - Enable filtering on the depth data to take advantage of Apple’s algorithms to fill in any holes in the data.
- At this point, you’re ready to add the configured
AVCaptureDepthDataOutput
to theAVCaptureSession
. - Finally, get the
AVCaptureConnection
for the depth output in order to… - …ensure the video orientation of the depth data matches the video feed.
Simple, right?
But hang on! Before you build and run the project, you first need to tell the app what to do with this depth data. That’s where the delegate method comes in.
Still in DepthVideoViewController.swift, add the following extension and delegate method at the end of the file:
// MARK: - Capture Depth Data Delegate Methods
extension DepthVideoViewController: AVCaptureDepthDataOutputDelegate {
func depthDataOutput(
_ output: AVCaptureDepthDataOutput,
didOutput depthData: AVDepthData,
timestamp: CMTime,
connection: AVCaptureConnection) {
}
}
This method gets called every time the camera records more depth data. Add the following code to the method:
// 1
guard previewMode != .original else {
return
}
var convertedDepth: AVDepthData
// 2
let depthDataType = kCVPixelFormatType_DisparityFloat32
if depthData.depthDataType != depthDataType {
convertedDepth = depthData.converting(toDepthDataType: depthDataType)
} else {
convertedDepth = depthData
}
// 3
let pixelBuffer = convertedDepth.depthDataMap
// 4
pixelBuffer.clamp()
// 5
let depthMap = CIImage(cvPixelBuffer: pixelBuffer)
// 6
DispatchQueue.main.async {
self.depthMap = depthMap
}
Here’s what’s happening:
- First, optimize this function to create a depth map only if the current preview mode is anything that would use the depth map.
- Next, ensure the depth data is the format you need: 32-bit floating point disparity information. Disparity tells you how much one image is shifted compared to another.
- Save the depth data map from the
AVDepthData
object as aCVPixelBuffer
, an efficient data structure for holding a bunch of pixels. - Using an extension included in the project, clamp the pixels in the pixel buffer to keep them between 0.0 and 1.0.
- Convert the pixel buffer into a
CIImage
. - Finally, store this in a class property for later use.
Phew! You’re probably itching to run this now. But before you do, there’s one small addition you need to make to view the depth map: You need to display it!
Find the AVCaptureVideoDataOutputSampleBufferDelegate
extension and look for the switch
statement in captureOutput(_:didOutput:from:)
. Add the following case:
case (.depth, _, _):
previewImage = depthMap ?? image
previewImage
for each different filter.
Build and run the project. Tap the Depth segment of the segmented control at the bottom.
This is the visual representation of the depth data captured alongside the video data.
Video Resolutions And Frame Rates
There are a couple of things you should know about the depth data you’re capturing. It’s a lot of work for your iPhone to correlate the pixels between the two cameras and calculate the disparity.
To provide you with the best real-time data it can, the iPhone limits the resolutions and frame rates of the depth data it returns.
For instance, the maximum amount of depth data you can receive on an iPhone 7 Plus is 320 x 240 at 24 frames per second. The iPhone X is capable of delivering that data at 30 fps.
AVCaptureDevice
doesn’t let you set the depth frame rate independent of the video frame rate. Depth data must be delivered at the same frame rate or an even fraction of the video frame rate. Otherwise, a situation would arise where you have depth data but no video data, which is strange.
Because of this, you need to:
- Set your video frame rate to ensure the maximum possible depth data frame rate.
- Determine the scale factor between your video data and your depth data. The scale factor is important when you start creating masks and filters.
Time to make your code better!
Again in DepthVideoViewController.swift, add the following to the bottom of configureCaptureSession
:
// 1
let outputRect = CGRect(x: 0, y: 0, width: 1, height: 1)
let videoRect = videoOutput
.outputRectConverted(fromMetadataOutputRect: outputRect)
let depthRect = depthOutput
.outputRectConverted(fromMetadataOutputRect: outputRect)
// 2
scale =
max(videoRect.width, videoRect.height) /
max(depthRect.width, depthRect.height)
// 3
do {
try camera.lockForConfiguration()
// 4
if let format = camera.activeDepthDataFormat,
let range = format.videoSupportedFrameRateRanges.first {
camera.activeVideoMinFrameDuration = range.minFrameDuration
}
// 5
camera.unlockForConfiguration()
} catch {
fatalError(error.localizedDescription)
}
Here’s the breakdown:
- First, calculate a
CGRect
that defines the video and depth output in pixels. The methods map the full metadata output rect to the full resolution of the video and data outputs. - Using the
CGRect
for both video and data output, you calculate the scaling factor between them. You take the maximum of the dimension because the depth data is actually delivered rotated by 90 degrees. - While you’re changing the
AVCaptureDevice
configuration, you need to lock it. That can throw an error. - Then, set the
AVCaptureDevice
‘s minimum frame duration, which is the inverse of the maximum frame rate, to be equal to the supported frame rate of the depth data. - Finally, unlock the configuration you locked in step three.
Build and run the project. Whether or not you see a difference, your code is now more robust and future-proof. :]
What Can You Do With This Depth Data?
Well, much like in Image Depth Maps Tutorial for iOS: Getting Started, you can use this depth data to create a mask. You can use the mask to filter the original video feed.
The mask is a black and white image with values from 0 to 1. To filter the video input, you’ll blend each video frame with a filter CIImage
, according to the mask. The blending happens by multiplying each pixel of the filter image with a mask pixel at the same location. If the masks’ pixel value is 0.0, the resulting pixel isn’t filtered. If it’s 1.0, that pixel is completely filtered.
You may have noticed a slider at the bottom of the screen for the Mask and Filtered segments. This slider controls the depth focus of the mask.
Currently, that slider seems to do nothing. That’s because there’s no visualization of the mask on the screen. You’re going to change that now!
Go back to depthDataOutput(_:didOutput:timestamp:connection:)
in the AVCaptureDepthDataOutputDelegate
extension. Just before DispatchQueue.main.async
, add the following:
if previewMode == .mask || previewMode == .filtered {
switch filter {
default:
mask = depthFilters.createHighPassMask(
for: depthMap,
withFocus: sliderValue,
andScale: scale)
}
}
First, only create a mask if the Mask or the Filtered segments are active. Then, switch on the type of filter selected. You’ll find those at the top of the iPhone screen. For now, create a high pass mask as the default case. You’ll fill out other cases soon.
You still need to hook the mask up to the image view to see it. Go back to the AVCaptureVideoDataOutputSampleBufferDelegate
extension and look for the switch
statement in captureOutput(_:didOutput:from:)
. Add the following case:
case (.mask, _, let mask?):
previewImage = mask
Build and run the project. Tap the Mask segment.
As you drag the slider to the left more of the screen turns white. That’s because you implemented a high pass mask.
Good job! You laid the groundwork for the most exciting part of this tutorial: the filters!
Comic Background Effect
The iOS SDK comes bundled with a bunch of Core Image filters. One that particularly stands out is CIComicEffect
. This filter gives an image a printed comic look.
You’re going to use this filter to turn the background of your video stream into a comic.
Open DepthImageFilters.swift. This class is where all your masks and filters go.
Add the following method to the DepthImageFilters
class:
func comic(image: CIImage, mask: CIImage) -> CIImage {
// 1
let bg = image.applyingFilter("CIComicEffect")
// 2
let filtered = image.applyingFilter("CIBlendWithMask", parameters: [
"inputBackgroundImage": bg,
"inputMaskImage": mask
])
// 3
return filtered
}
To break it down:
- Apply the
CIComicEffect
to the input image. - Then blend the original image with the comic image using the input mask.
- Finally, return the filtered image.
Now, to use the filter, open DepthVideoViewController.swift, find captureOutput(_:didOutput:from:)
and add the following case:
case (.filtered, .comic, let mask?):
previewImage = depthFilters.comic(image: image, mask: mask)
Before you run the code, there’s one more thing you need to do to make adding future filters easier.
Find depthDataOutput(_:didOutput:timestamp:connection:)
and add the following case to the switch filter
statement:
case .comic:
mask = depthFilters.createHighPassMask(
for: depthMap,
withFocus: sliderValue,
andScale: scale)
Here, you create a high pass mask.
This looks exactly the same as the default
case. You’ll remove the default case after you add the other filters, so it’s best to make sure the comic
case is in there now.
Go ahead. I know you’re excited to run this. Build and run the project and tap the Filtered segment.
Fantastic work! Do you feel like a superhero in a comic book?
No Green Screen? No Problem!
That’s good and all, but maybe you don’t want to work on superhero movies. Perhaps you prefer science fiction instead.
No worries. This next filter will have you jumping for joy on the Moon! For that, you’ll need to create a makeshift green-screen effect.
Open DepthImageFilters.swift and add the following method to the class:
func greenScreen(
image: CIImage,
background: CIImage,
mask: CIImage)
-> CIImage {
// 1
let crop = CIVector(
x: 0,
y: 0,
z: image.extent.size.width,
w: image.extent.size.height)
// 2
let croppedBG = background.applyingFilter("CICrop", parameters: [
"inputRectangle": crop
])
// 3
let filtered = image.applyingFilter("CIBlendWithMask", parameters: [
"inputBackgroundImage": croppedBG,
"inputMaskImage": mask
])
// 4
return filtered
}
In this filter:
- Create a 4D
CIVector
to define a cropping boundary equal to your input image. - Then crop the background image to be the same size as the input image. This is important for the next step.
- Next, combine the input and background images by blending them based on the mask parameter.
- Finally, you return the filtered image.
Now you need to hook the mask and filter logic for this back in DepthVideoViewController.swift and you’ll be ready to go.
Find captureOutput(_:didOutput:from:)
in DepthVideoViewController.swift and add the following case to the switch filter
statement:
case (.filtered, .greenScreen, let mask?):
previewImage = depthFilters.greenScreen(
image: image,
background: background,
mask: mask)
Here you filter the input image with the background and the mask using the new function you just wrote.
Next, find depthDataOutput(_:didOutput:timestamp:connection:)
and add the following case to the switch
statement:
case .greenScreen:
mask = depthFilters.createHighPassMask(
for: depthMap,
withFocus: sliderValue,
andScale: scale,
isSharp: true)
This code creates a high pass mask but makes the cutoff sharper, resulting in harder edges.
Build and run the project. Move the slider around and see what objects you can put on the Moon.
Out of this world!
Dream-like Blur Effect
OK, OK! Maybe you don’t like the superhero or science fiction genres. I get it. You’re more of an art film type of person. If so, this next filter is right up your alley.
With this filter, you’re going to blur out anything besides objects at a narrowly defined distance from the camera. This can give a dream-like feeling to your films.
Go back to DepthImageFilters.swift and add a new method to the class:
func blur(image: CIImage, mask: CIImage) -> CIImage {
// 1
let blurRadius: CGFloat = 10
// 2
let crop = CIVector(
x: 0,
y: 0,
z: image.extent.size.width,
w: image.extent.size.height)
// 3
let invertedMask = mask.applyingFilter("CIColorInvert")
// 4
let blurred = image.applyingFilter("CIMaskedVariableBlur", parameters: [
"inputMask": invertedMask,
"inputRadius": blurRadius
])
// 5
let filtered = blurred.applyingFilter("CICrop", parameters: [
"inputRectangle": crop
])
// 6
return filtered
}
This one is a bit more complicated, but here’s what you did:
- First, define a blur radius to use. The bigger the radius, the bigger and slower the blur!
- Once again, create a 4D
CIVector
to define a cropping region. This is because blurring will effectively grow the image at the edges and you just want the original size. - Then, invert the mask because the blur filter you’re using blurs where the mask is white.
- Next, apply the
CIMaskedVariableBlur
filter to the image using the inverted mask and the blur radius as parameters. - Crop the blurred image to maintain the desired size.
- Finally, return the filtered image.
By now, you should know the drill. Open DepthVideoViewController.swift and add a new case to the switch
statement inside captureOutput(_:didOutput:from:)
:
case (.filtered, .blur, let mask?):
previewImage = depthFilters.blur(image: image, mask: mask)
This will create the blur filter when selected in the UI.
Now for the mask.
Replace the default
case with the following case inside the switch
statement in depthDataOutput(_:didOutput:timestamp:connection:)
:
case .blur:
mask = depthFilters.createBandPassMask(
for: depthMap,
withFocus: sliderValue,
andScale: scale)
Here you create a band pass mask for the blur filter to use.
It’s time! Build and run this project. Try adjusting the sliders in the Mask and Filtered segments as well as changing the filters to see what effects you can create.
It’s so dreamy!
Where to Go From Here?
You’ve accomplished so much in this video depth maps tutorial. Give your self a well-deserved pat on the back.
You can download the final project using the Download Materials button at the top or bottom of this tutorial.
With your new knowledge, you can take this project even further. For instance, the app displays the filtered video stream but doesn’t record it. Try adding a button and some logic to save your masterpieces.
You can also add more filters or even create your own filters! Check here for a complete list of CIFilter
configurations that ship with iOS. Also, check out the Core Image video course that will teach you all about Core Image filters.
I hope you enjoyed this video depth maps tutorial. If you have any questions or comments, please join the forum discussion below!
All videos. All books.
One low price.
A Kodeco subscription is the best way to learn and master mobile development — plans start at just $19.99/month! Learn iOS, Swift, Android, Kotlin, Flutter and Dart development and unlock our massive catalog of 50+ books and 4,000+ videos.
Learn more