Catalyst Tutorial: Running iPad apps on macOS
In this Catalyst tutorial, you’ll learn how to take an iPad app and configure it to run on macOS and add Mac-specific features like contextual menus. By Warren Burton.
The dream of write once, run everywhere came closer at WWDC 2019 when Apple released the Catalyst project into developers’ hands. Catalyst allows you to use most of your UIKit and Foundation code to compile an app that runs natively on macOS. What does this mean in reality?
The apps you write using UIKit for iPad targets can be cross-compiled to run on macOS, but there are catches in this statement. Not all frameworks for iOS are available on macOS. For example, ARKit makes no sense for macOS and is not available, and for people who have developed for macOS, there is no access to AppKit.
Your standard iOS containers and collections will work as they did on iOS. Where these objects have an equivalent AppKit version, the compiler swaps them out for the platform native version. For example:
-
UITableView->NSTableView -
UICollectionView->NSCollectionView -
UISplitView->NSSplitView -
SwiftUIcomponents that are in aUIHostingControllerjust work.
Other iOS UI objects that have no macOS equivalent like UINavigationController will render the same as they do on iOS.
This tutorial will cover some more complex cases you’ll need to deal with to make your iOS app a good macOS citizen. Multiple windows support is a broad topic that deserves its own tutorial, so it is out of scope for this session.
To complete this tutorial you’ll need:
- A Mac running macOS 10.15 Catalina.
- Xcode 11.
Getting Started
You can download the tutorial content via the Download Materials button at the top or bottom of the tutorial. You might have seen this project before if you did the Document Based Apps tutorial. The project allows you to add text and color to a background image.
You’ll be working with the Markup folder in the Project navigator. There are no changes needed for MarkupFramework.
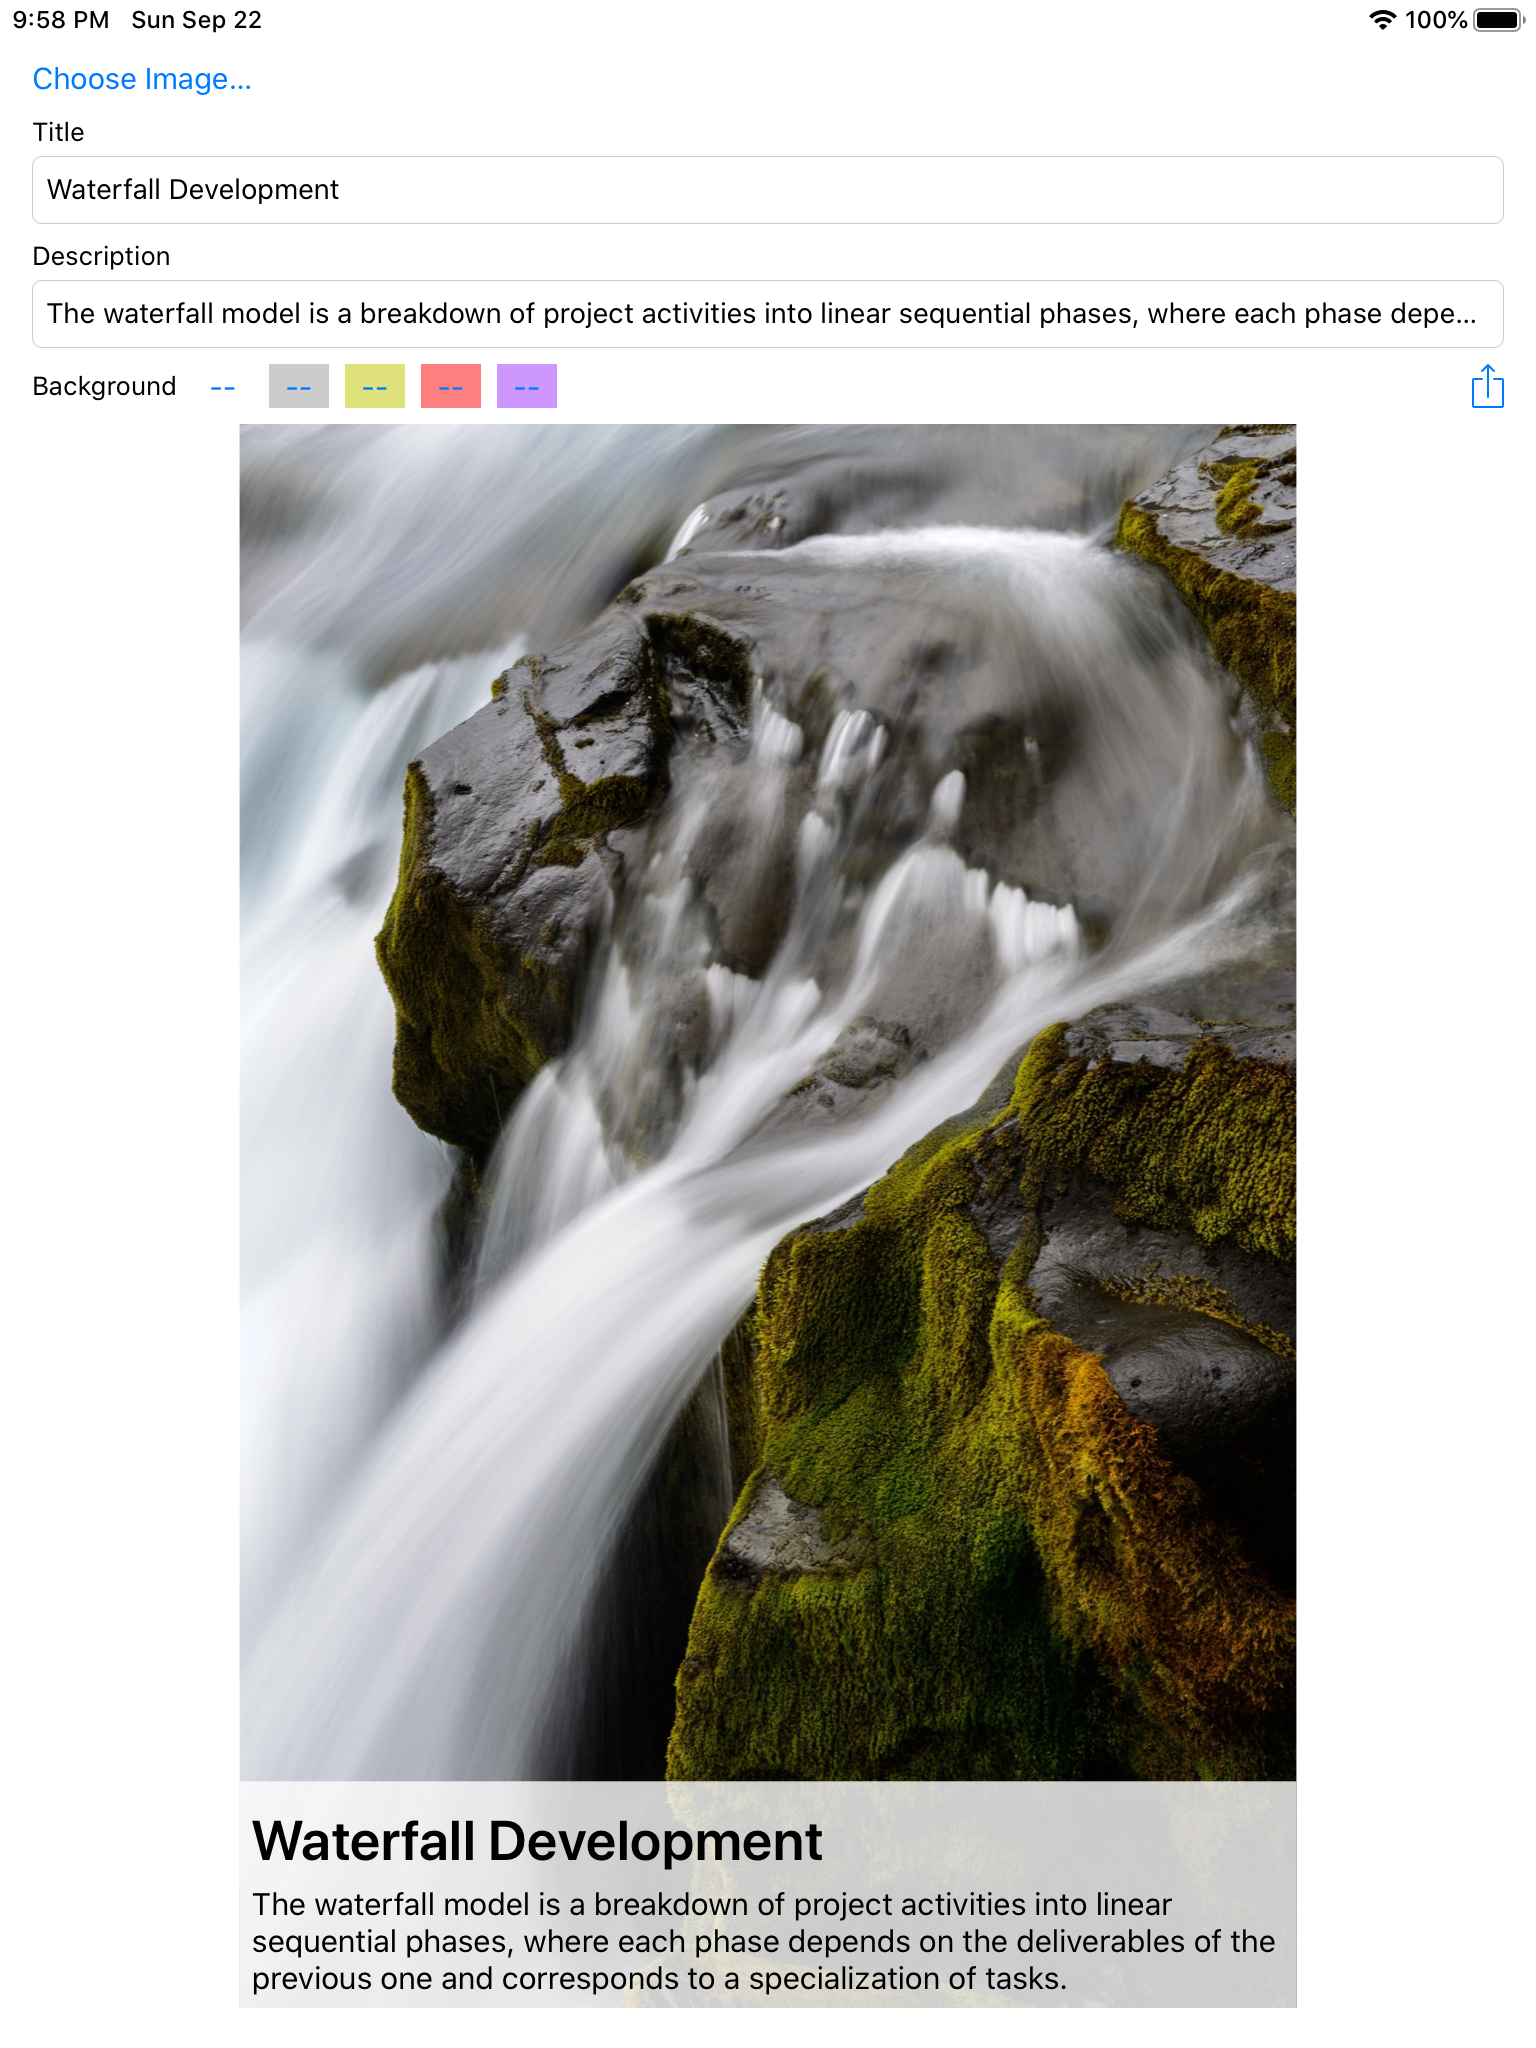
Build and run the project in the Markup-Starter folder using the iOS simulator target iPad Pro (9.7-inch).
![]()
You can create a marked-up image with text and a description.
You now know this is a working iOS project. The next step is to make the app run on macOS.
Enabling Your Build for Mac
In this section, you’ll make some basic project changes to allow Xcode to compile your project for macOS.
1. Select the Markup project in Project navigator and open the General tab:
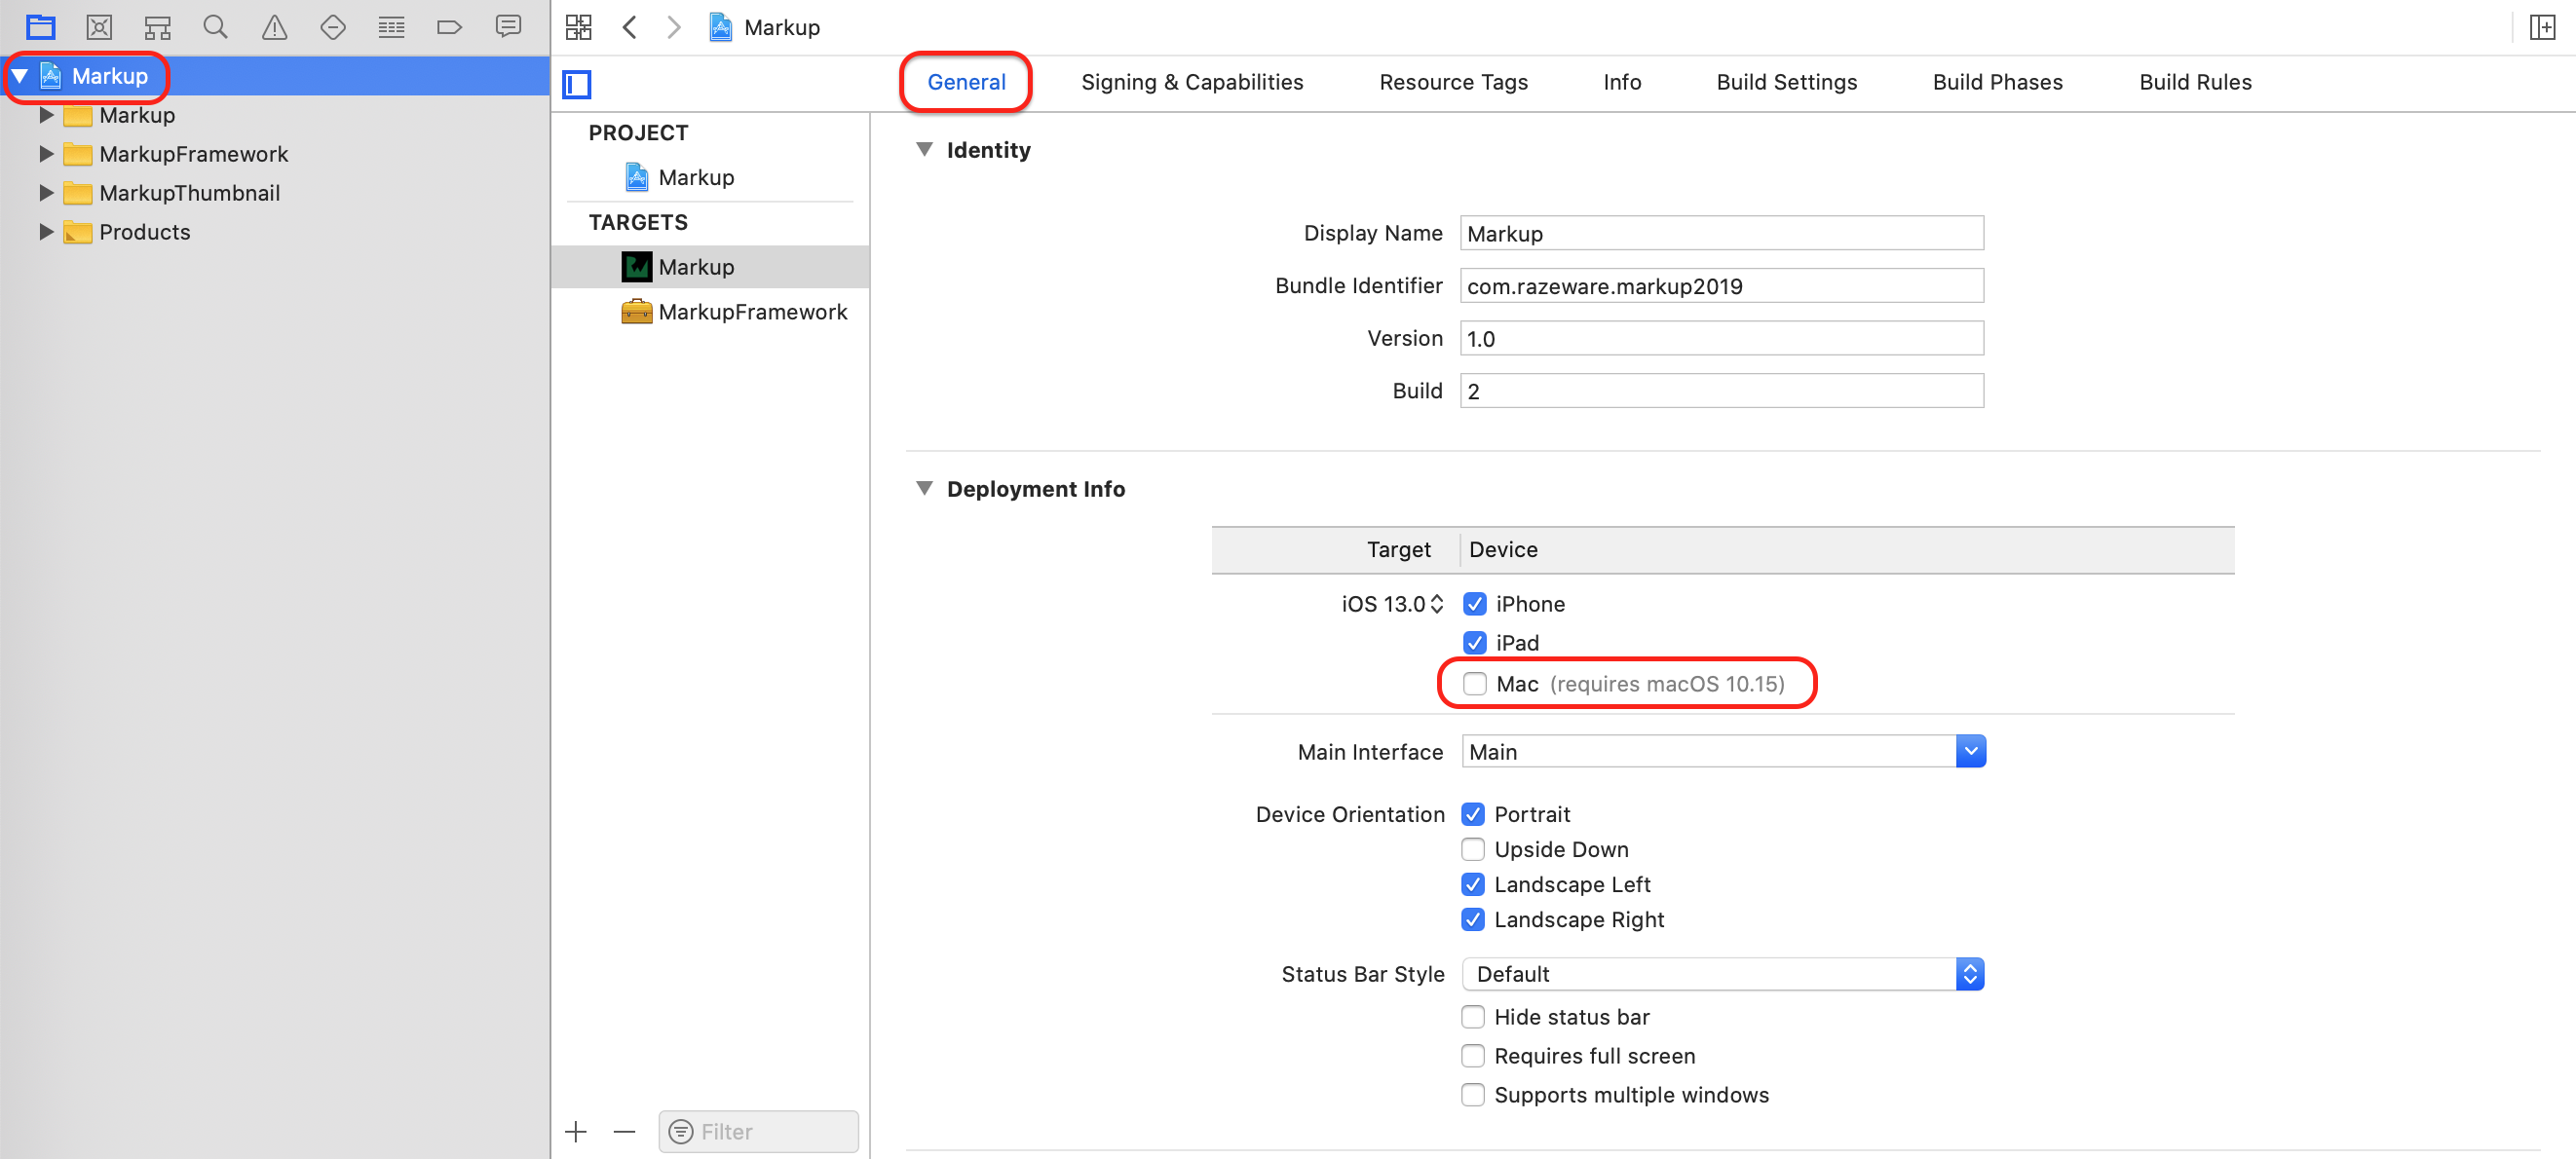
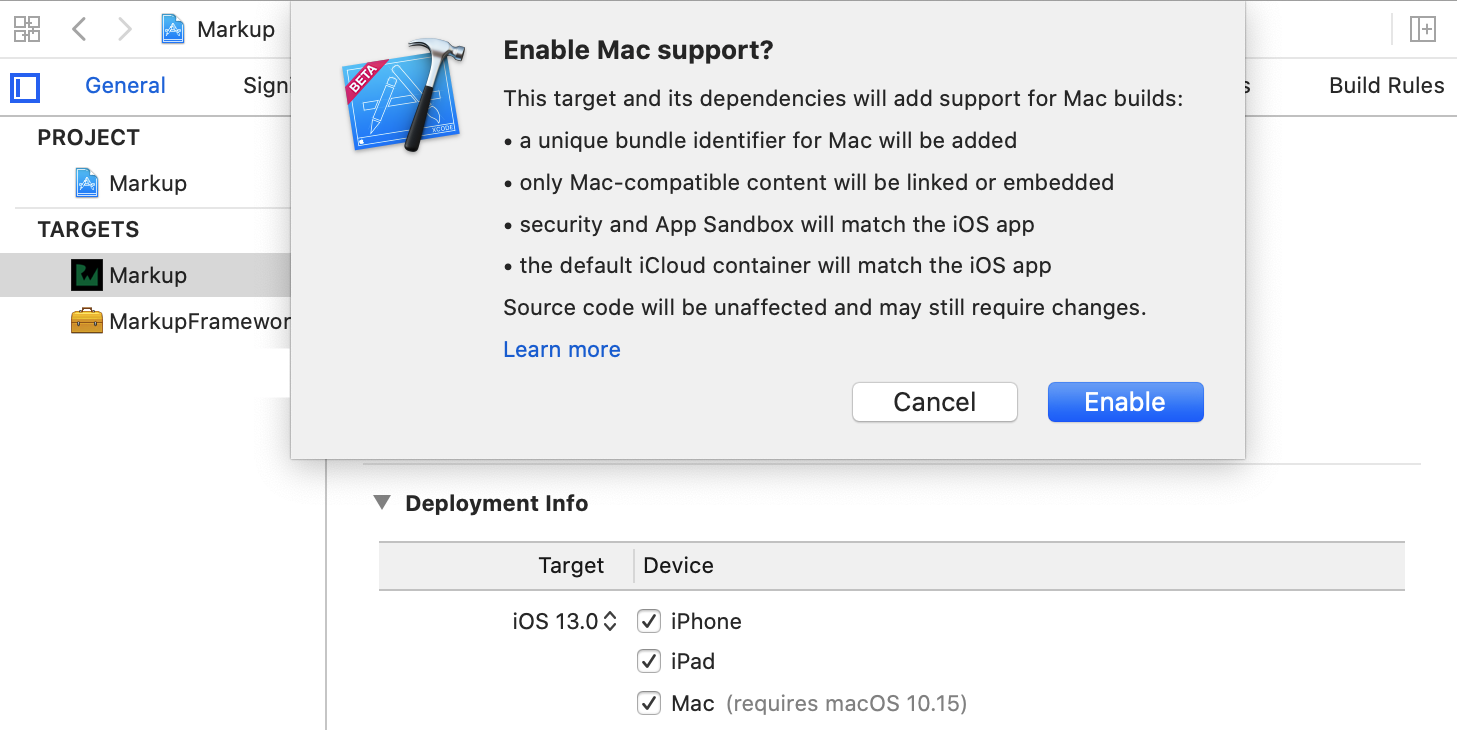
2. Select the Markup target. Tick the box marked Mac in the Deployment Info section. A dialog will appear asking if you want to enable Mac support. Click Enable:
3. Next, you need to make similar settings on the framework. Select the MarkupFramework target and tick the box marked Mac in the Deployment Info section. Click Enable in the dialog:

4. Finally, go back and select the Markup target again. Locate the Frameworks, Libraries, and Embedded Content section. For MarkupFramework.framework, select the option macOS + iOS:

These actions set up the project to compile for macOS. Xcode automatically generates a new bundle ID for the Mac build based on your original iOS bundle ID. For this project you’ll see maccatalyst.com.raywenderlich.markup2019.
It’s possible to assign a bundle ID for Mac manually. You can do this in iTunes Connect, but for this tutorial you’ll stick with the automatically assigned ones.
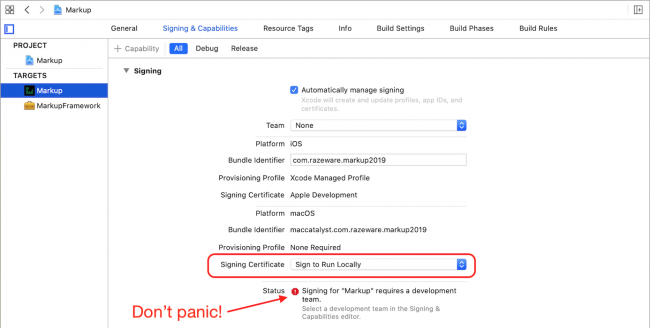
Next, open the Signing & Capabilities tab, and select the Markup target. In the Signing section, ensure that macOS is set to Sign To Run Locally. Don’t worry about the status error. A development team is only required for deployment to other machines:
Select the target to be My Mac.
![]()
Build and run. You’ll see the app icon appear in the dock and a single window will appear with the interface you saw before on the iPad.

Free Functionality
You now have a working Mac app. It doesn’t look very Mac-like at the moment, but you’ll change that soon. First, you’ll look at some of the cross-platform functionality you get for free.
Add a title, description and image to the document, then:
- Resize the window by clicking and dragging the edge of the window interface.
- Locate an image from your Finder or Photos and drag it into to the Markup window. The view adds the image to itself.
- Click and drag the composition render from the Markup window to a new rich text TextEdit document. TextEdit adds the composition image to the document.
You see that most UIKit based features work the same on macOS as they do on iOS.
Compiling Conditionally
There will be code paths that you don’t want to run on macOS or, alternately, on iOS. These conditional paths are not runtime choices. Xcode compiles your code twice: once for iOS and once for macOS. So, there are two binaries.
To make these choices, you can use the following structure:
#if targetEnvironment(macCatalyst)
  //code to run on macOS
#else
  //code to run on iOS
#endif
You’ll see this pattern frequently within the tutorial.
Improving the App for all Platforms
To borrow a phrase from 2019 WWDC session 205, “You make a great Mac app by making a great iPad app.” In this section, you’re going to improve the app for both platforms by adding a contextual menu.
Adding a Contextual Menu
Mac users expect to see contextual menus when they control-click interface items. These menus should contain actions specific to the item you click.
Your next task is to add a contextual menu that will appear when the user control-clicks the editor view. An excellent action to add here is the ability to clear all the content from the editor.
In the project navigator select the Primary Views folder, then add a new file by pressing the key combination Command-N:
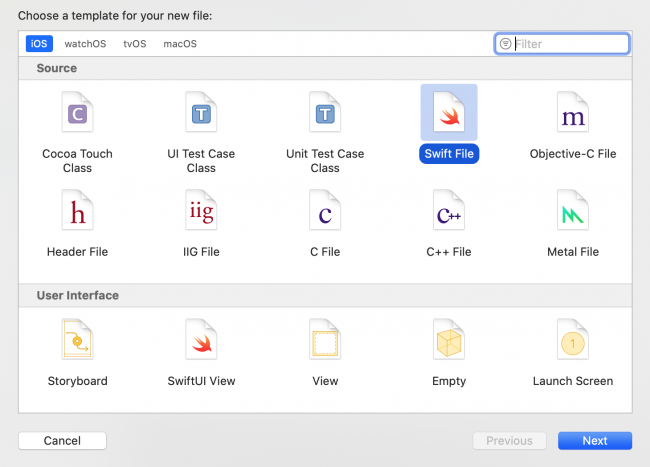
Select iOS ▸ Swift File and click Next.

Name the file MarkupViewController+ContextMenu.swift and make sure Markup target is selected, then click Create.
Replace all the code in the file with this extension:
import UIKit
import MarkupFramework

extension MarkupViewController: UIContextMenuInteractionDelegate {
  //1
  func contextMenuInteraction(
    _ interaction: UIContextMenuInteraction,
    configurationForMenuAtLocation location: CGPoint)
      -> UIContextMenuConfiguration? {
    //2
    let config = UIContextMenuConfiguration(
      identifier: "display" as NSString,
      previewProvider: nil,
      actionProvider: { _ in
        //3
        let identifier = UIAction.Identifier("Clear View")
        let clearAction = UIAction(
          title: "Clear Editor",
          image: UIImage(systemName: "trash"),
          identifier: identifier) { (action) in
            self.cleanDocumentAction(self)
        }

        //4
        let menu = UIMenu(
          title: "",
          image: nil,
          identifier: UIMenu.Identifier("Template"),
          options: .displayInline,
          children: [clearAction])

        return menu
    })
    return config
  }

  //5
  @objc func cleanDocumentAction(_ sender: Any) {
    let template = ContentDescription(template: BottomAlignedView.name)
    currentContent = template
    titleField.text = nil
    descriptionField.text = nil
  }

  //6
  func configureContextInteraction() {
    let interaction = UIContextMenuInteraction(delegate: self)
    templateContainer.addInteraction(interaction)
  }
}
This extension provides a context menu by conforming MarkupViewController to UIContextMenuInteractionDelegate.
- First, implement
UIContextMenuInteractionDelegateby addingcontextMenuInteraction(_:configurationForMenuAtLocation:). - Create an instance of
UIContextMenuConfiguration. - Create a
UIActionfor the Clear Editor action. - Embed that
UIActionin an instance ofUIMenu. - Provide an implementation for
cleanDocumentAction. - Add the
UIContextMenuInteractionto the editor view. You’ll have to call the helper function,configureContextInteraction()when the app launches.
Now open MarkupViewController.swift and add the following to the end of viewDidLoad():
configureContextInteraction()
Build and run. This time around, when you control-click inside the editor, you see a menu with a Clear Editor item. You can use the menu item to return your editor to a blank state:

AppDelegate.application(_:didFinishLaunchingWithOptions:) is optional and, in many apps, deleted as unnecessary. In a Catalyst app, however, it must be present, even if it only returns true. Without it, your context menu will appear but will do nothing, and you’ll waste hours trying to figure out why. So, if you’re converting an existing app and your menus don’t work, make sure this method is present in your app.To see how this code works on iPad, change your target to iPad Pro (9.7-inch), and build and run. Now, long press the editor render view and then release. A context menu will appear, only this time you get a snazzy trash can from SF Symbols icon set too:

Congratulations! You added features to both macOS and iOS with one set of project changes. This is a concrete example of the benefits of the Catalyst framework.