
Leveraging Claude Code
Tired of copying code between AI chat windows and your editor? Claude Code brings AI-powered development directly to your command line and your IDE. This tutorial covers installation, project creation, codebase analysis, and advanced workflows that will transform how you approach coding tasks. By Eric Van de Kerckhove.
Working with Existing Projects
Now that you have a basic understanding of Claude Code, it’s time to take it up a notch. For this section I recommend using VS Code (or VSCodium) as a flexible IDE with easy version control. Feel free to substitute your favorite editor.
To get started, open the project materials folder you unzipped at the start of the tutorial. Look for the todo_project and open it in VS Code.
Analyzing the Codebase
Usually this would be the part where I’d explain the project and its contents, but I’ll let Claude do that to showcase some of its capabilities.
Open a terminal in VS Code by selecting Terminal ▸ New Terminal in the menu. Now run the claude command like you did in the previous section.
In the previous project, Claude was solely using the conversation history as its context. This can work for small projects, but it’s bad practice as the moment you lose connection with Claude or anything else goes wrong, the context is lost forever.
In order for Claude to have a persistent memory, it can make use of a CLAUDE.md files. These are markdown files that Claude will add as context to its conversation. You can use these to store information about your preferred code style, commands, patterns, file paths and so on. There are two places where Claude looks for CLAUDE.md files:
- Your project folder:
./CLAUDE.md. Use this for project-specific memory. - Your home folder:
~/.claude/CLAUDE.md. Used for global memory, this information is shared across all projects.
You can write one yourself and add it to the project folder, but Claude comes with a nifty command to analyze an existing codebase and generate a CLAUDE.md file for you. Pass this command to Claude:
/init
Claude will start looking at all files and piecing together how the project works. It will then generate a CLAUDE.md ask you if it can write it to a file.
Like before, answer yes to write the file. Next, take a look at what Claude has come up with. Every CLAUDE.md file generated with the init command starts with this:
# CLAUDE.md

This file provides guidance to Claude Code (claude.ai/code) when working with code in this repository.
The rest of the file will be the information Claude has gathered from the codebase. Feel free to read through it to know what the small project is about. You can also ask Claude if something is unclear. If Claude did its job, the CLAUDE.md should state that the application a simple todo-list written in Python using the NiceGUI library.
To run the project, run these commands in a new terminal (or ask Claude to do it for you):
pip install -r requirements.txt
python main.py
This will open the application in your browser and show the to-do list.
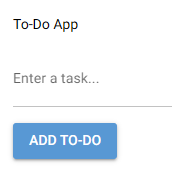
You can add tasks to the list by typing a description and pressing Enter or by clicking the ADD TO-DO button. You can remove tasks by clicking the X button next to each one.
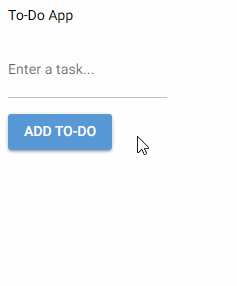
As you can see, there’s not much to write home about. Time for Claude Code to do some magic!
Stop the project by pressing CTRL-C in the terminal and close the browser tab.
Taking Precautions
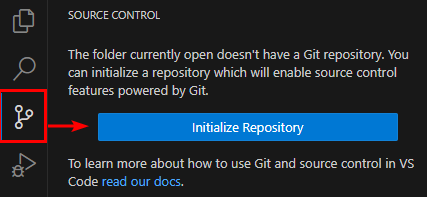
Before proceeding to let Claude extend the application, I recommend that you initialize a Git repository in the project folder. With VS Code, this is as simple as clicking the Source Control button on the left followed by clicking the Initialize Repository button at the top.
Now add “First commit” as a message and click the Commit button.

This will protect the project from being irreversibly changed and will make it easier to revert back to the original state if something goes wrong. This is a good practice, and you should do it for every project you work on. Publishing your code on GitHub is also a good idea, but not necessary.
Getting the Most Out of Claude
Claude Code supports different workflows, but the most versatile one is explore, plan, code, commit. This means:
- Explore: Ask Claude to read parts of the codebase that are relevant, but not to write anything yet.
- Plan: Make Claude write a plan for what to do next. Let it use a file as a scratchpad.
- Code: Ask Claude to write the code for the plan.
- Commit: Let Claude update the README, documentation and changelog. Optionally, let it make a pull request.
To give this a shot, imagine you want these extra features in the application:
- Persistent storage
- Editable tasks
- A nicer looking, modern UI
By following the explore, plan, code, commit workflow, you can let Claude handle this for you in a structured way. On to the first phase!
Explore Phase
By running the /init command in a previous step, Claude has already explored the codebase and written down its findings. Because the codebase is so small, it’s not necessary to delve deeper. For bigger projects, you would ask Claude to read specific files or directories to gather info and write its conclusions to a file.
Next up is the plan phase.
Plan Phase
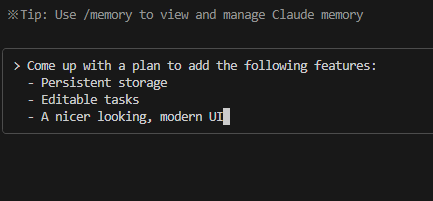
Copy-paste the following prompt to Claude, but don’t hit Enter yet:
Come up with a plan to add the following features:
- Persistent storage
- Editable tasks
- A nicer looking, modern UI
Claude has three modes you can toggle between using SHIFT-Tab: default, auto-accept and plan.
By default, Claude will ask for permission when it wants to run a command or write to a file. In auto-accept mode, Claude will automatically answer yes to these prompts. In plan mode, Claude won’t execute commands, it will only do research and come up with a plan at the end.
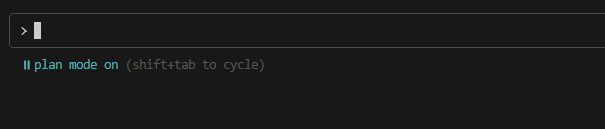
You can see the current mode below your prompt. Press SHIFT-Tab twice to switch to plan mode and then press Enter.
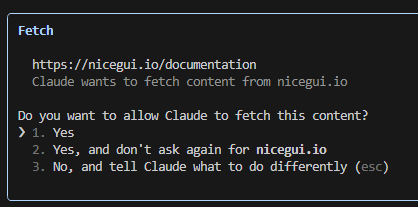
In plan mode, it might still ask for permission to read web content like in the example below. If so, answer yes and then press Enter to let it continue.
This planning process can take a while as Claude gathers information from the web and your codebase. If you want to interrupt Claude at any point, press Escape.
Once it’s done, Claude will suggest a plan for what to do next:
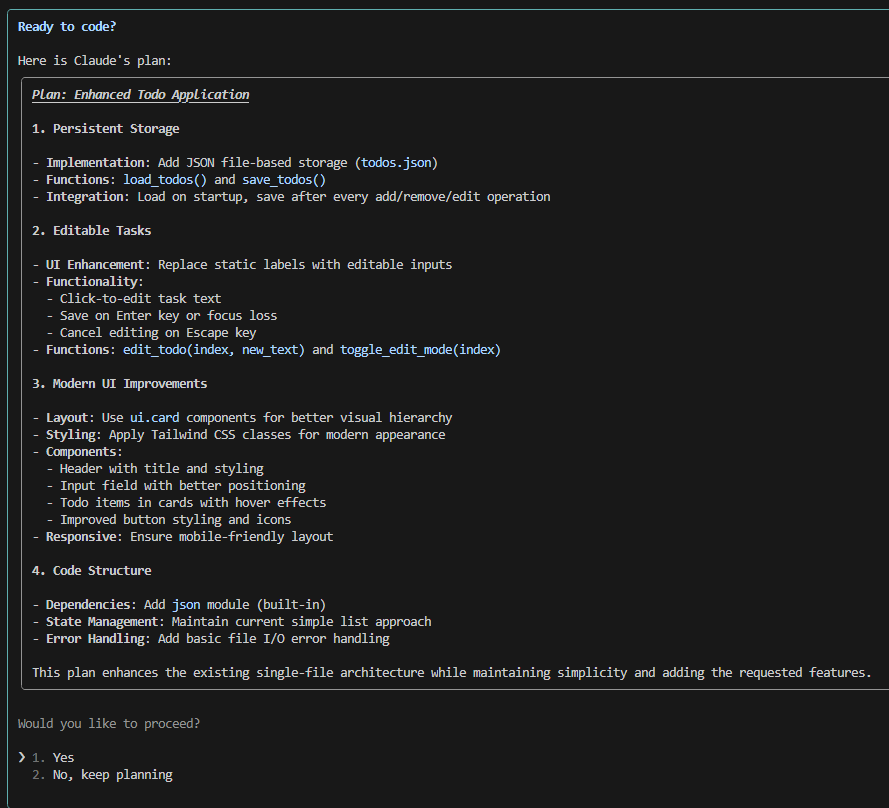
If you say yes here, Claude start coding straight away. If you choose “No, keep planning”, you can send a prompt again. Since you want Claude to have a scratchpad, tell it no. Now you’re back in plan mode, so switch back to default mode by pressing SHIFT-Tab and send the following prompt:
Write your plan to a file named SCRATCHPAD.md and
start executing your plan.
Add updates to the scratchpad as you go.
Making Claude keep track of its progress like this is important so it doesn’t lose focus. It’s also useful for you, as you can check the scratchpad at any time to see what it’s doing.