Documenting Kotlin Code for Android Using KDoc and Dokka
Learn how to use KDoc to document your Kotlin code and generate beautiful-looking documentation pages using Dokka. By Rajdeep Singh.
Defining Block Tags
Block tags provide extra information about the element to which the comment applies.
It must appear at the beginning of a line and start with the @ character. This means you can use @ anywhere else in the comment and it won’t be interpreted as a block tag.
Enough with the theory. Open Prefs.kt in the core module and replace TODO:3 with the following snippet:
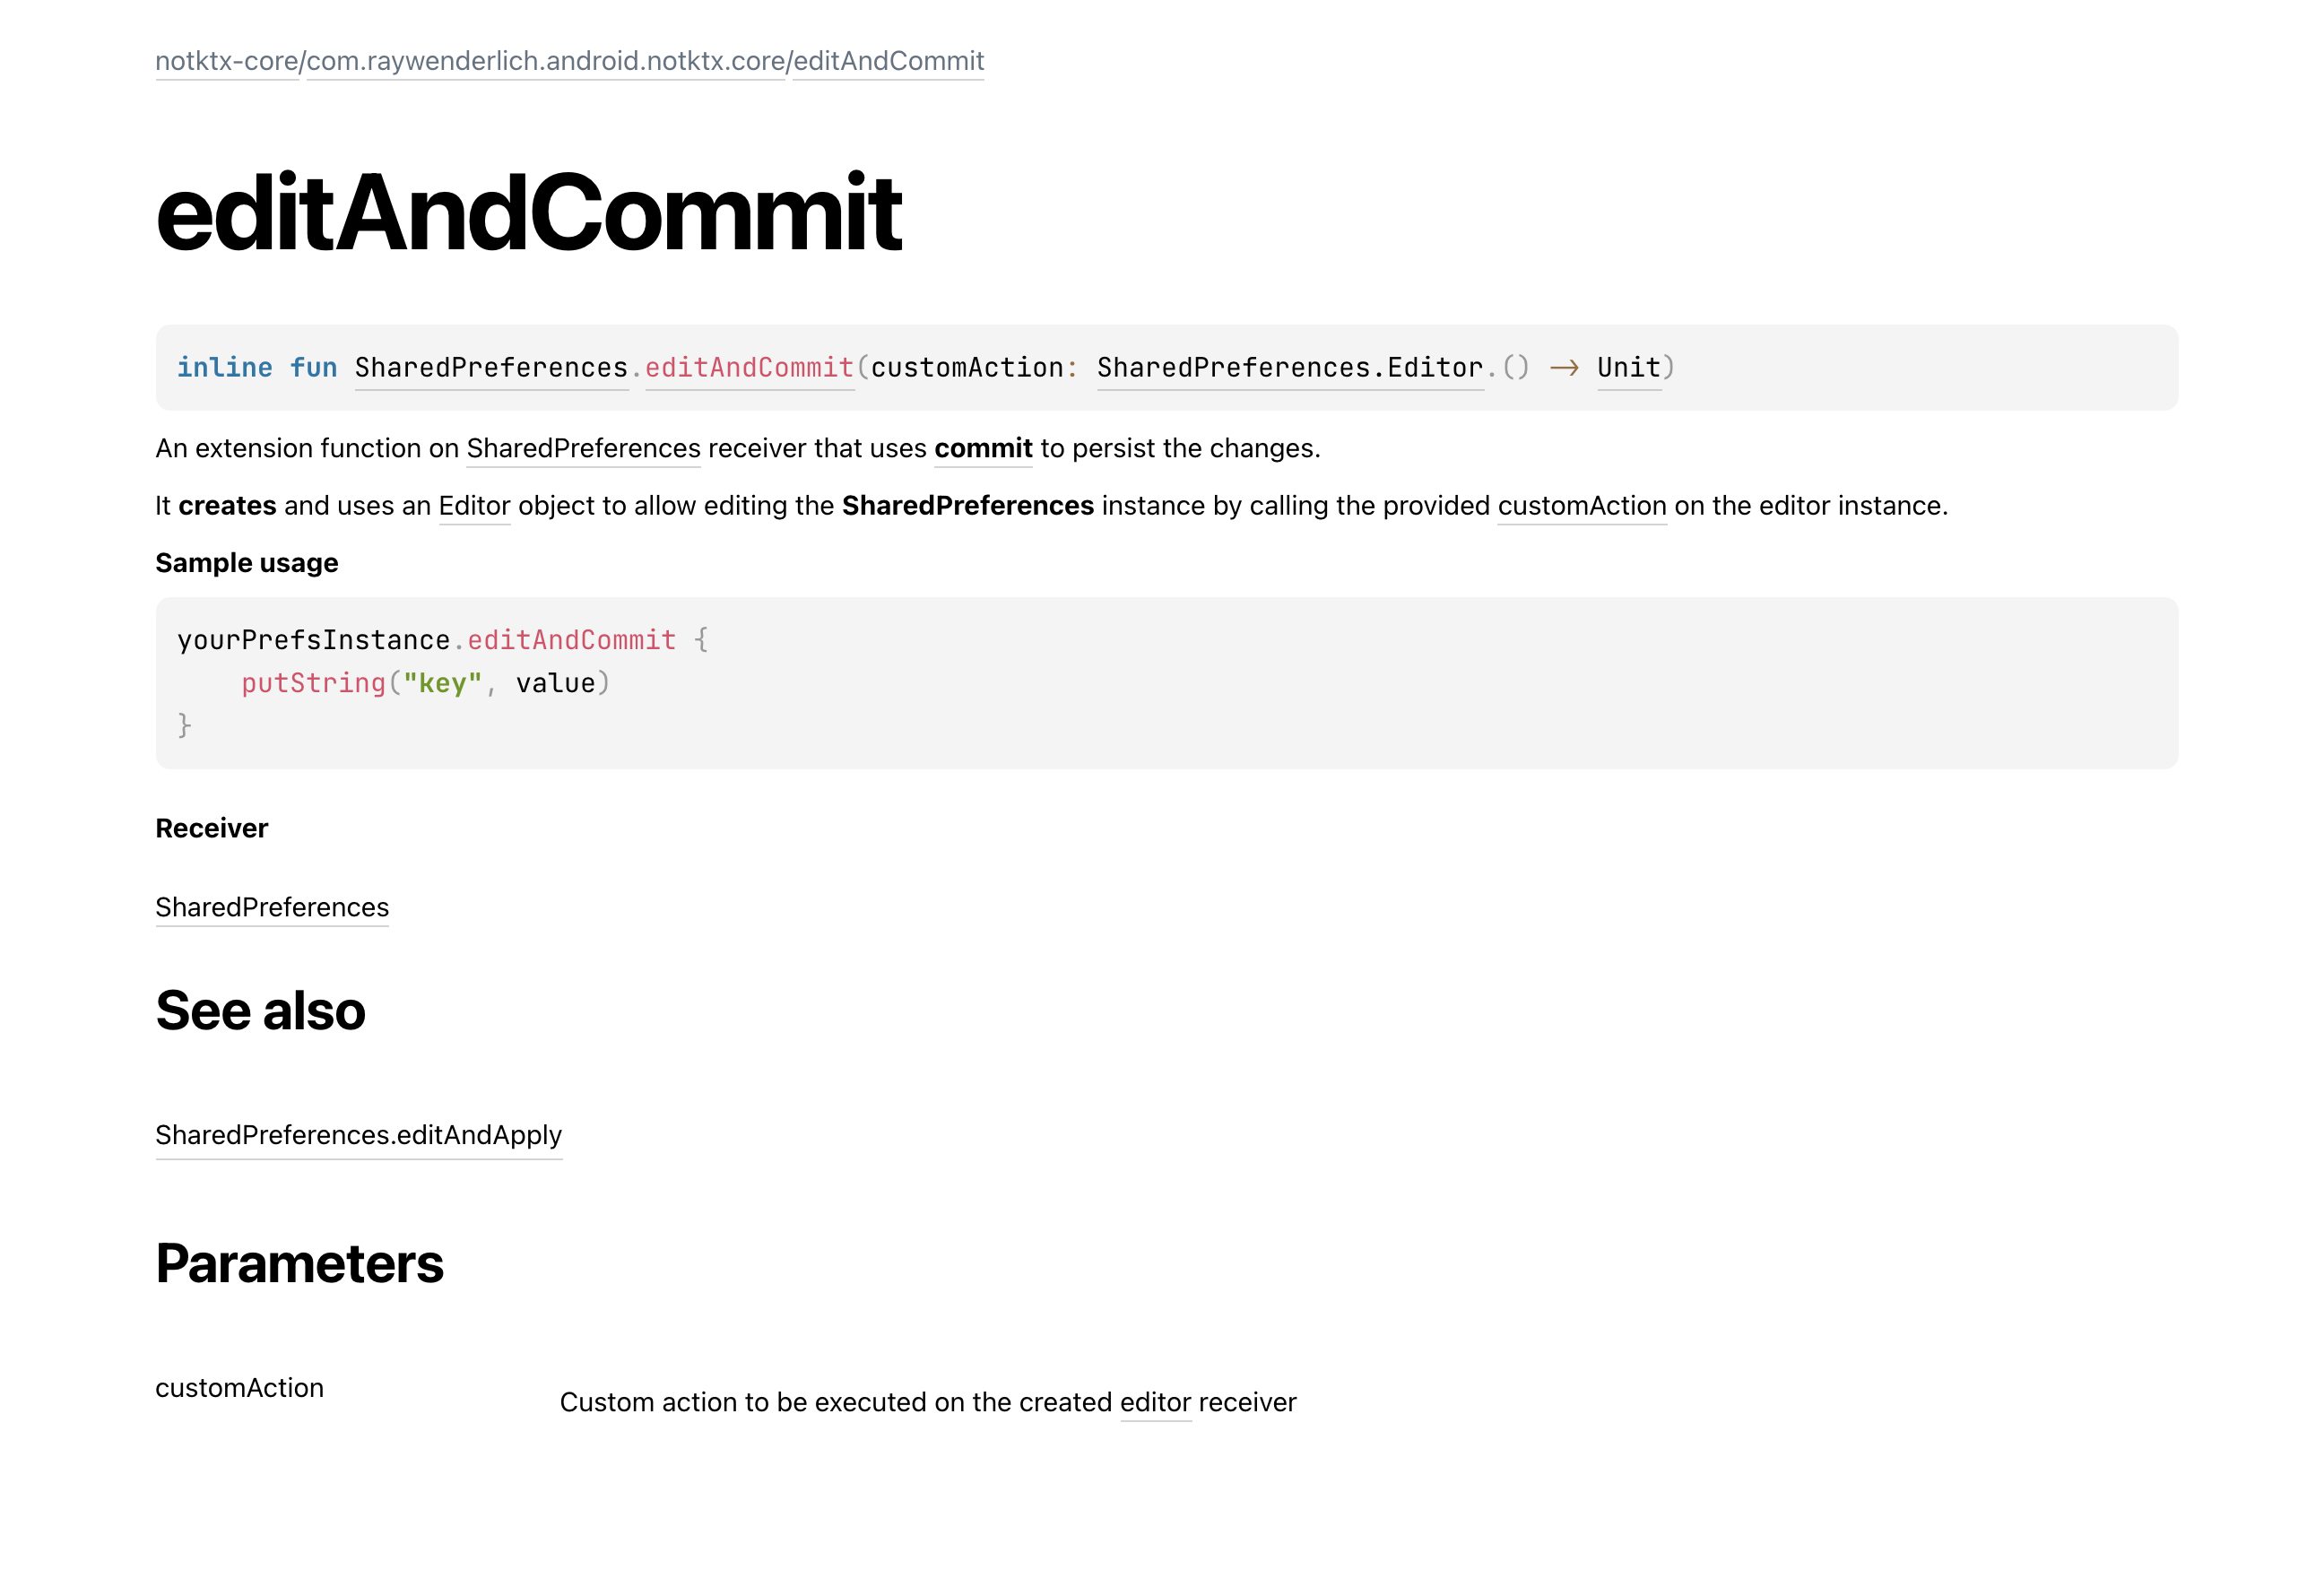
/**
 * An extension function on [SharedPreferences] receiver that uses
 * <b>[commit][SharedPreferences.Editor.commit]</b> to persist the changes.
 *
 * It creates and uses an [Editor][SharedPreferences.Editor] object to allow editing the
 * SharedPreferences instance by calling the provided [customAction] on the editor instance.
 *
 * <b>Sample usage</b>
 *
 * ```
 * yourPrefsInstance.editAndCommit {
 *     putString("key", value)
 * }
 * ```
 *
 * @receiver [SharedPreferences]
 * @param[customAction] Custom action to be executed on the created [editor][SharedPreferences.Editor]
 * receiver
 * @see SharedPreferences.editAndApply
 */
In the above snippet, the first paragraph is the summary description, followed by the detailed description. They get rendered differently when used with Dokka, which you’ll see later.
The block tags used in the above snippet are:
-
@receiver: Documents the receiver of an extension function. -
@param: Documents the properties of a class/method with its name and description. -
@see: Adds a link to the specified class or method.
KDoc also supports HTML tags and inline markup using markdown syntax. The ‹b› tag and [Editor][SharedPreferences.Editor] in the snippet are some of the examples.
This is what Dokka generates:
You can look at all the block tags that KDoc supports here.
Documenting Modules and Packages
KDoc also supports documenting a package or a module using a custom markdown file.
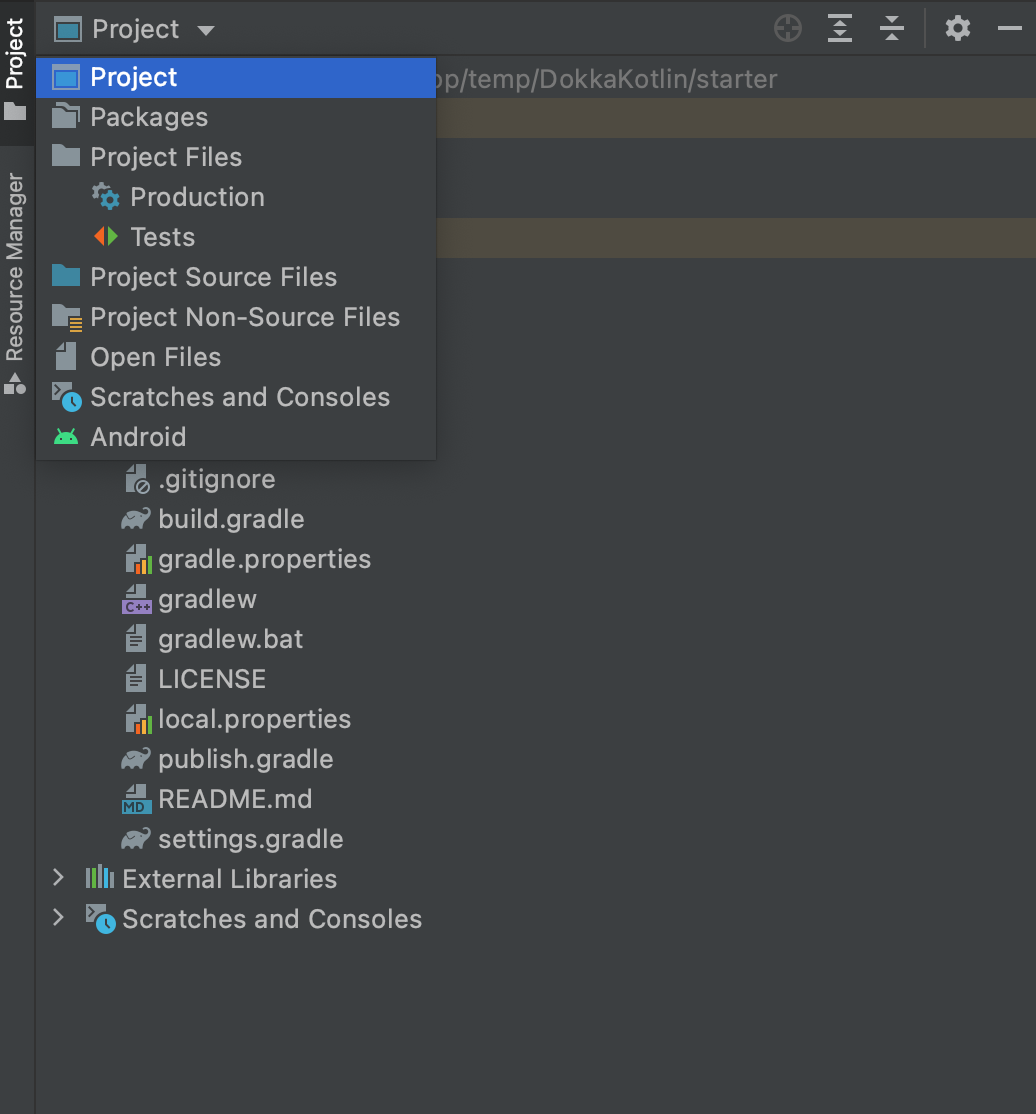
Select the Project view in Android Studio, if it’s not already selected:
Open module.md in the app module. Replace the contents of the file (the TODO:4 line) with the following:
# Module notktx-app

## Description

This adds a custom module-level description for the app module.

# Package com.raywenderlich.android.notktx.sample

This is the only package in the sample app.
It demonstrate usages of `notktx:core` and `notktx:utilities`

## Level 2 heading

Everything is rendered as plain markdown and gets associated with the first level heading
(Module or Package).
KDoc uses first-level headings for module and package names. You can reference the official documentation for more information on this.
This accounts for changes you’ll make later in this article.
This accounts for changes you’ll make later in this article.
This is how the module description will look when rendered by Dokka, which you’ll do next.

Introducing Dokka
Dokka is the documentation engine for Kotlin, performing the same function as the JavaDoc tool. The next few sections will be more hands-on than the previous ones.
Here are some of the key features of Dokka:
- Supports mixed-language Java/Kotlin projects.
- Understands standard JavaDoc comments in Java files and KDoc comments in Kotlin files. You can also use custom options to render Kotlin files as seen from the Java perspective.
- Generates documentation in multiple formats — including standard JavaDoc, HTML and Markdown.
Integrating Dokka
To integrate Dokka in this project, you’ll use gradle. You’ll do a quick Dokka setup in this section and generate a basic version of the documentation in the next.
Open the root-level build.gradle file and replace TODO:5 in the dependencies block with the following:
classpath "org.jetbrains.dokka:dokka-gradle-plugin:1.6.0"
This adds the Dokka gradle plugin to the project’s classpath. Next, apply it to the project and modules. Replace TODO:6 in the same file with following:
apply plugin: "org.jetbrains.dokka"
You can manually add the Dokka plugin to each module or use the subprojects block to dynamically add it. Replace the TODO:7 with the following:
apply plugin: "org.jetbrains.dokka"
Now you’re ready to use Dokka!
One more thing to note is that if you open multiple projects with the same rootProject name, notktx in this case, IntelliJ’s built-in server won’t be able to resolve the page and will give a 404 error.
Make sure you either open the starter project or the final project at this time.
One more thing to note is that if you open multiple projects with the same rootProject name, notktx in this case, IntelliJ’s built-in server won’t be able to resolve the page and will give a 404 error.
Make sure you either open the starter project or the final project at this time.
Generating Documentation
Do a gradle sync for the changes you made in the last section. Then, open the terminal provided in Android Studio and run the following gradle tasks.
./gradlew dokkaHtml dokkaHtmlMultiModule
It can take a few minutes for these two tasks to complete. While they run, have a quick look at what they do:
-
dokkaHtml: Generates HTML documentation for each module that has the Dokka plugin applied. -
dokkaHtmlMultiModule: Generates documentation for the project as a whole by linking all the modules together.
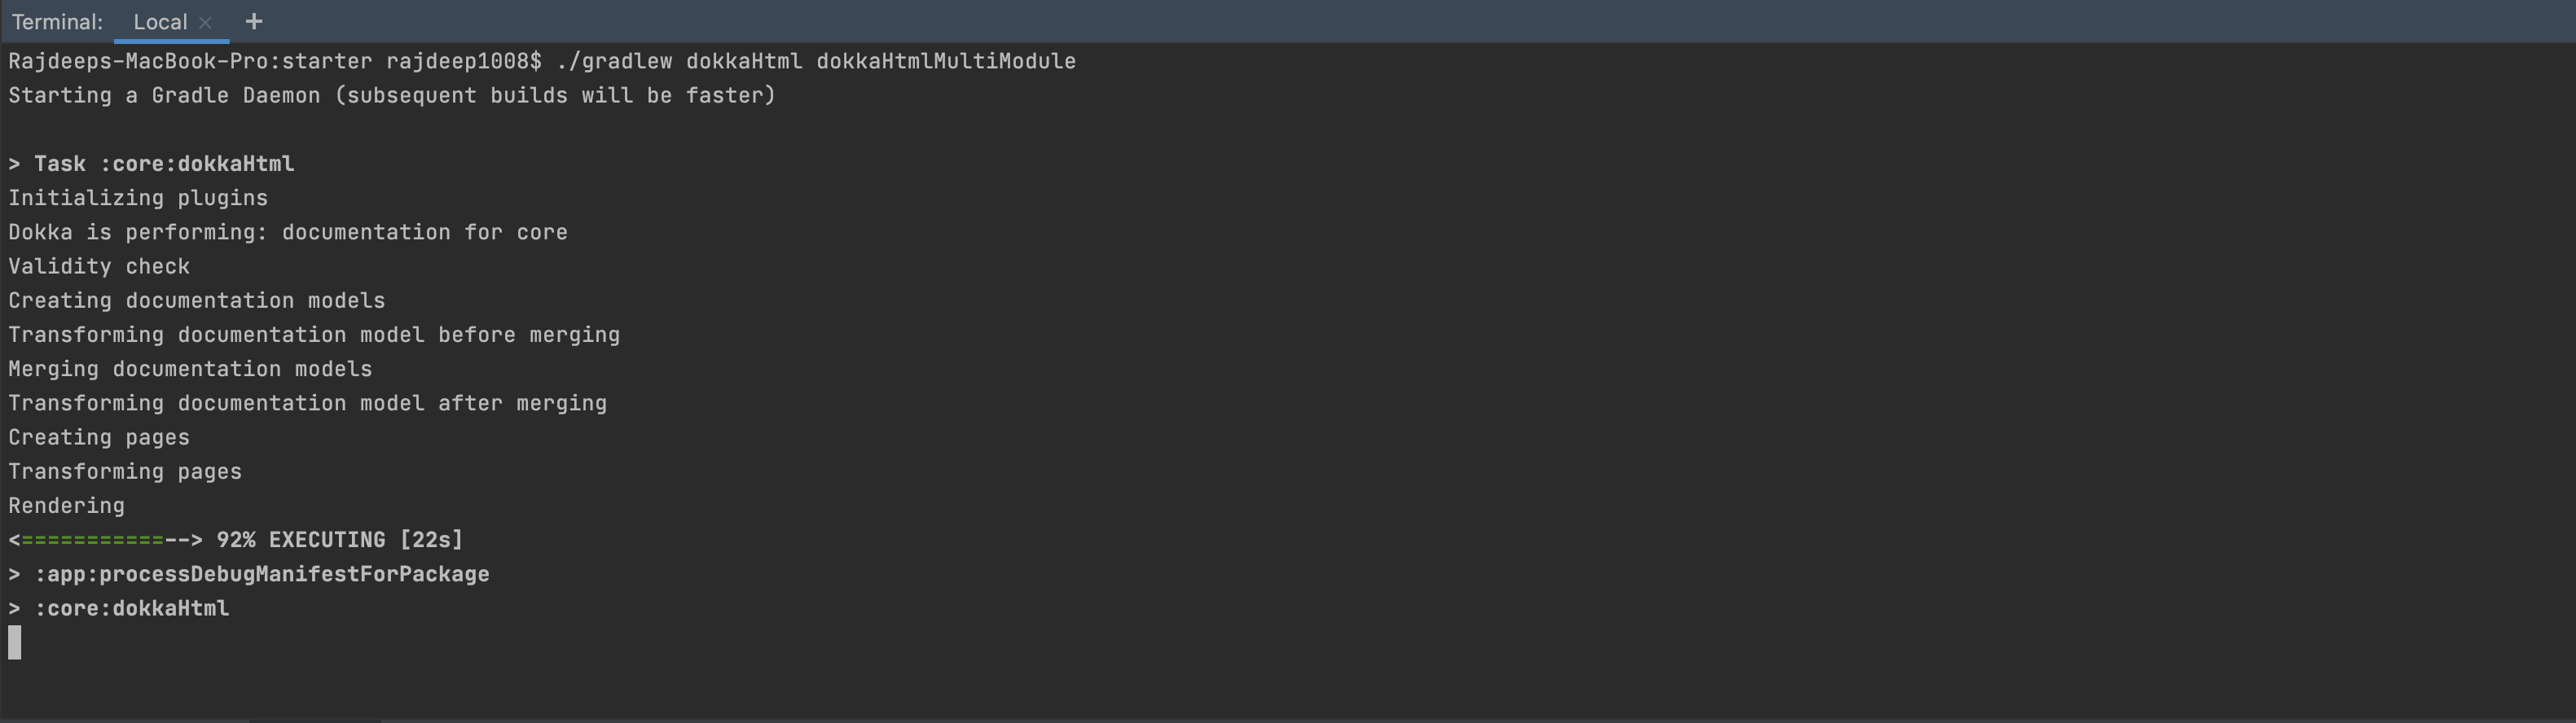
Once the tasks complete, you’ll see build/dokka directories generated in each module and one at the root level.
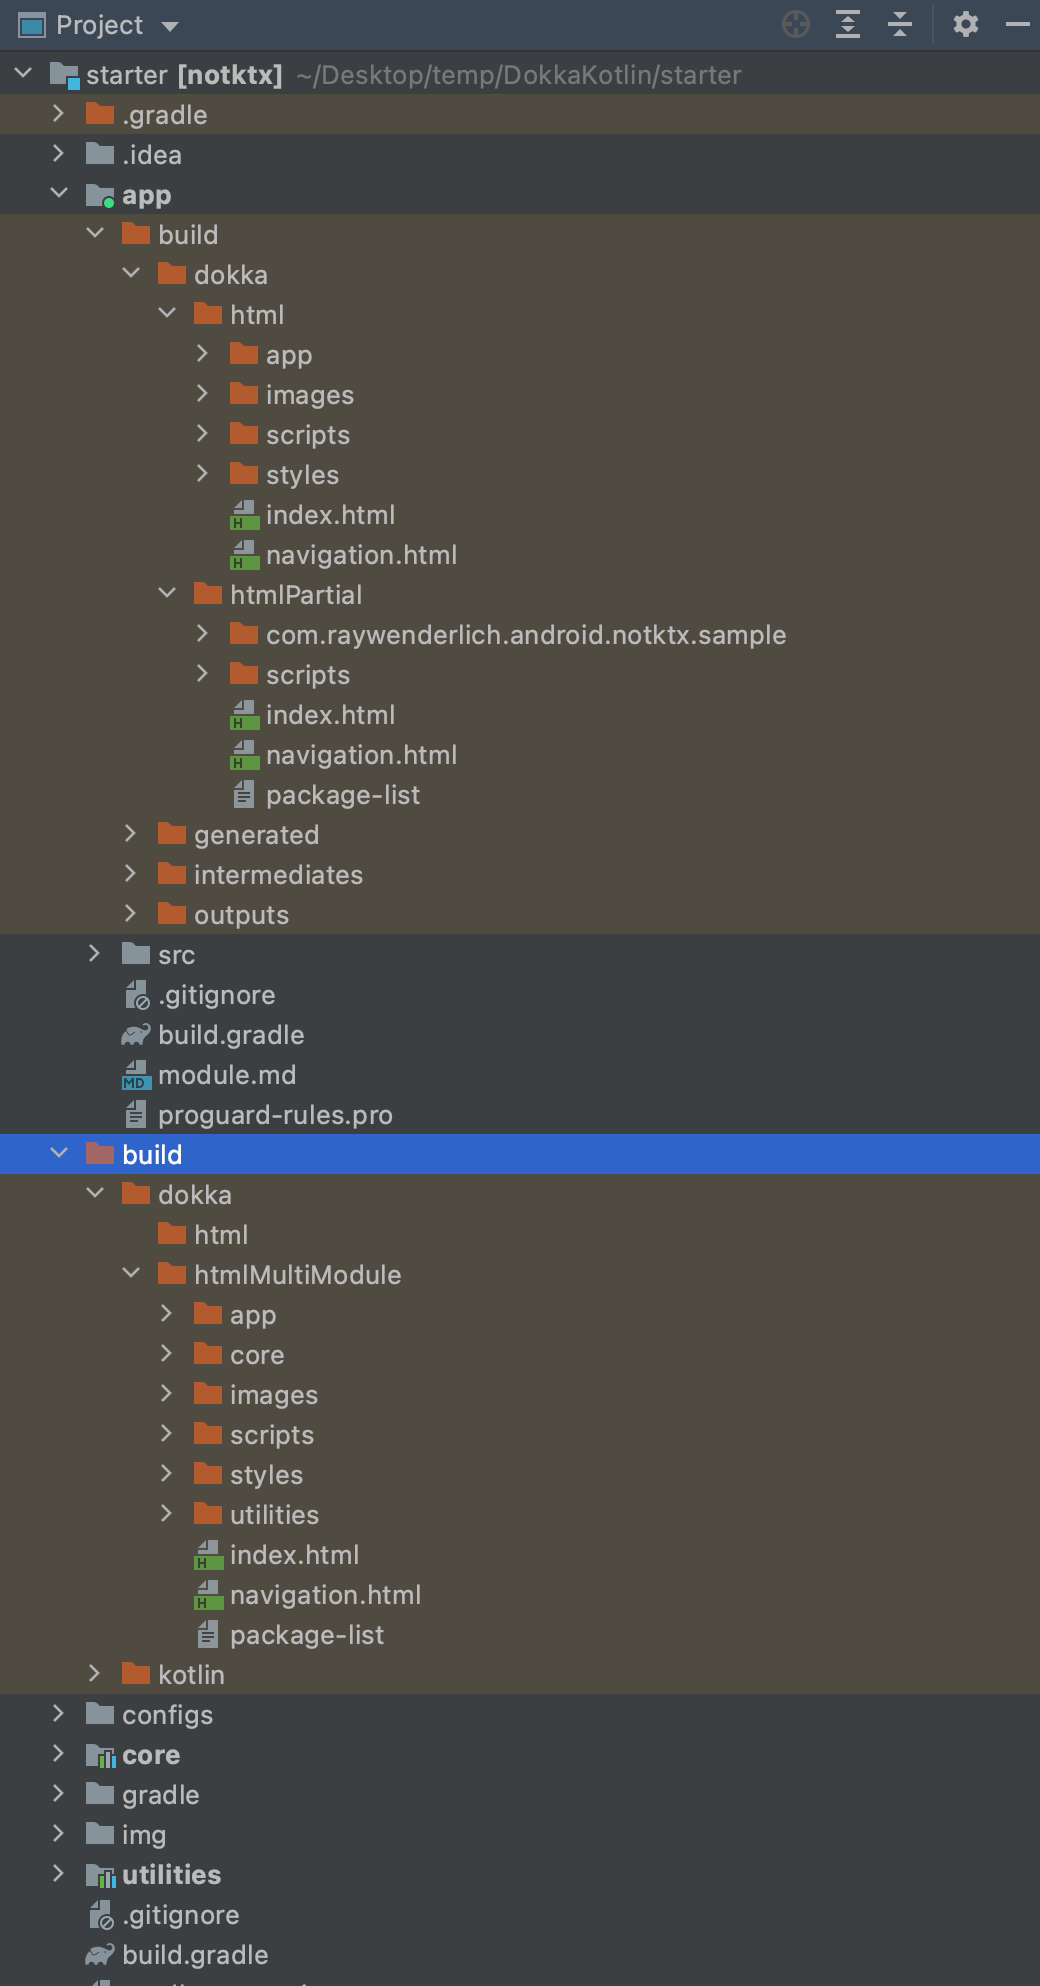
The html directory in each module is generated by dokkaHtml and contains documentation for each standalone module.
The htmlPartial directory in each module is generated by dokkaHtmlMultiModule. It calls the dokkaHtmlPartial gradle task in each module to generate this directory and combines them all in the root-level build/dokka/htmlMultiModule directory.
See all the gradle tasks added by Dokka by clicking on the gradle tab at the top right corner:

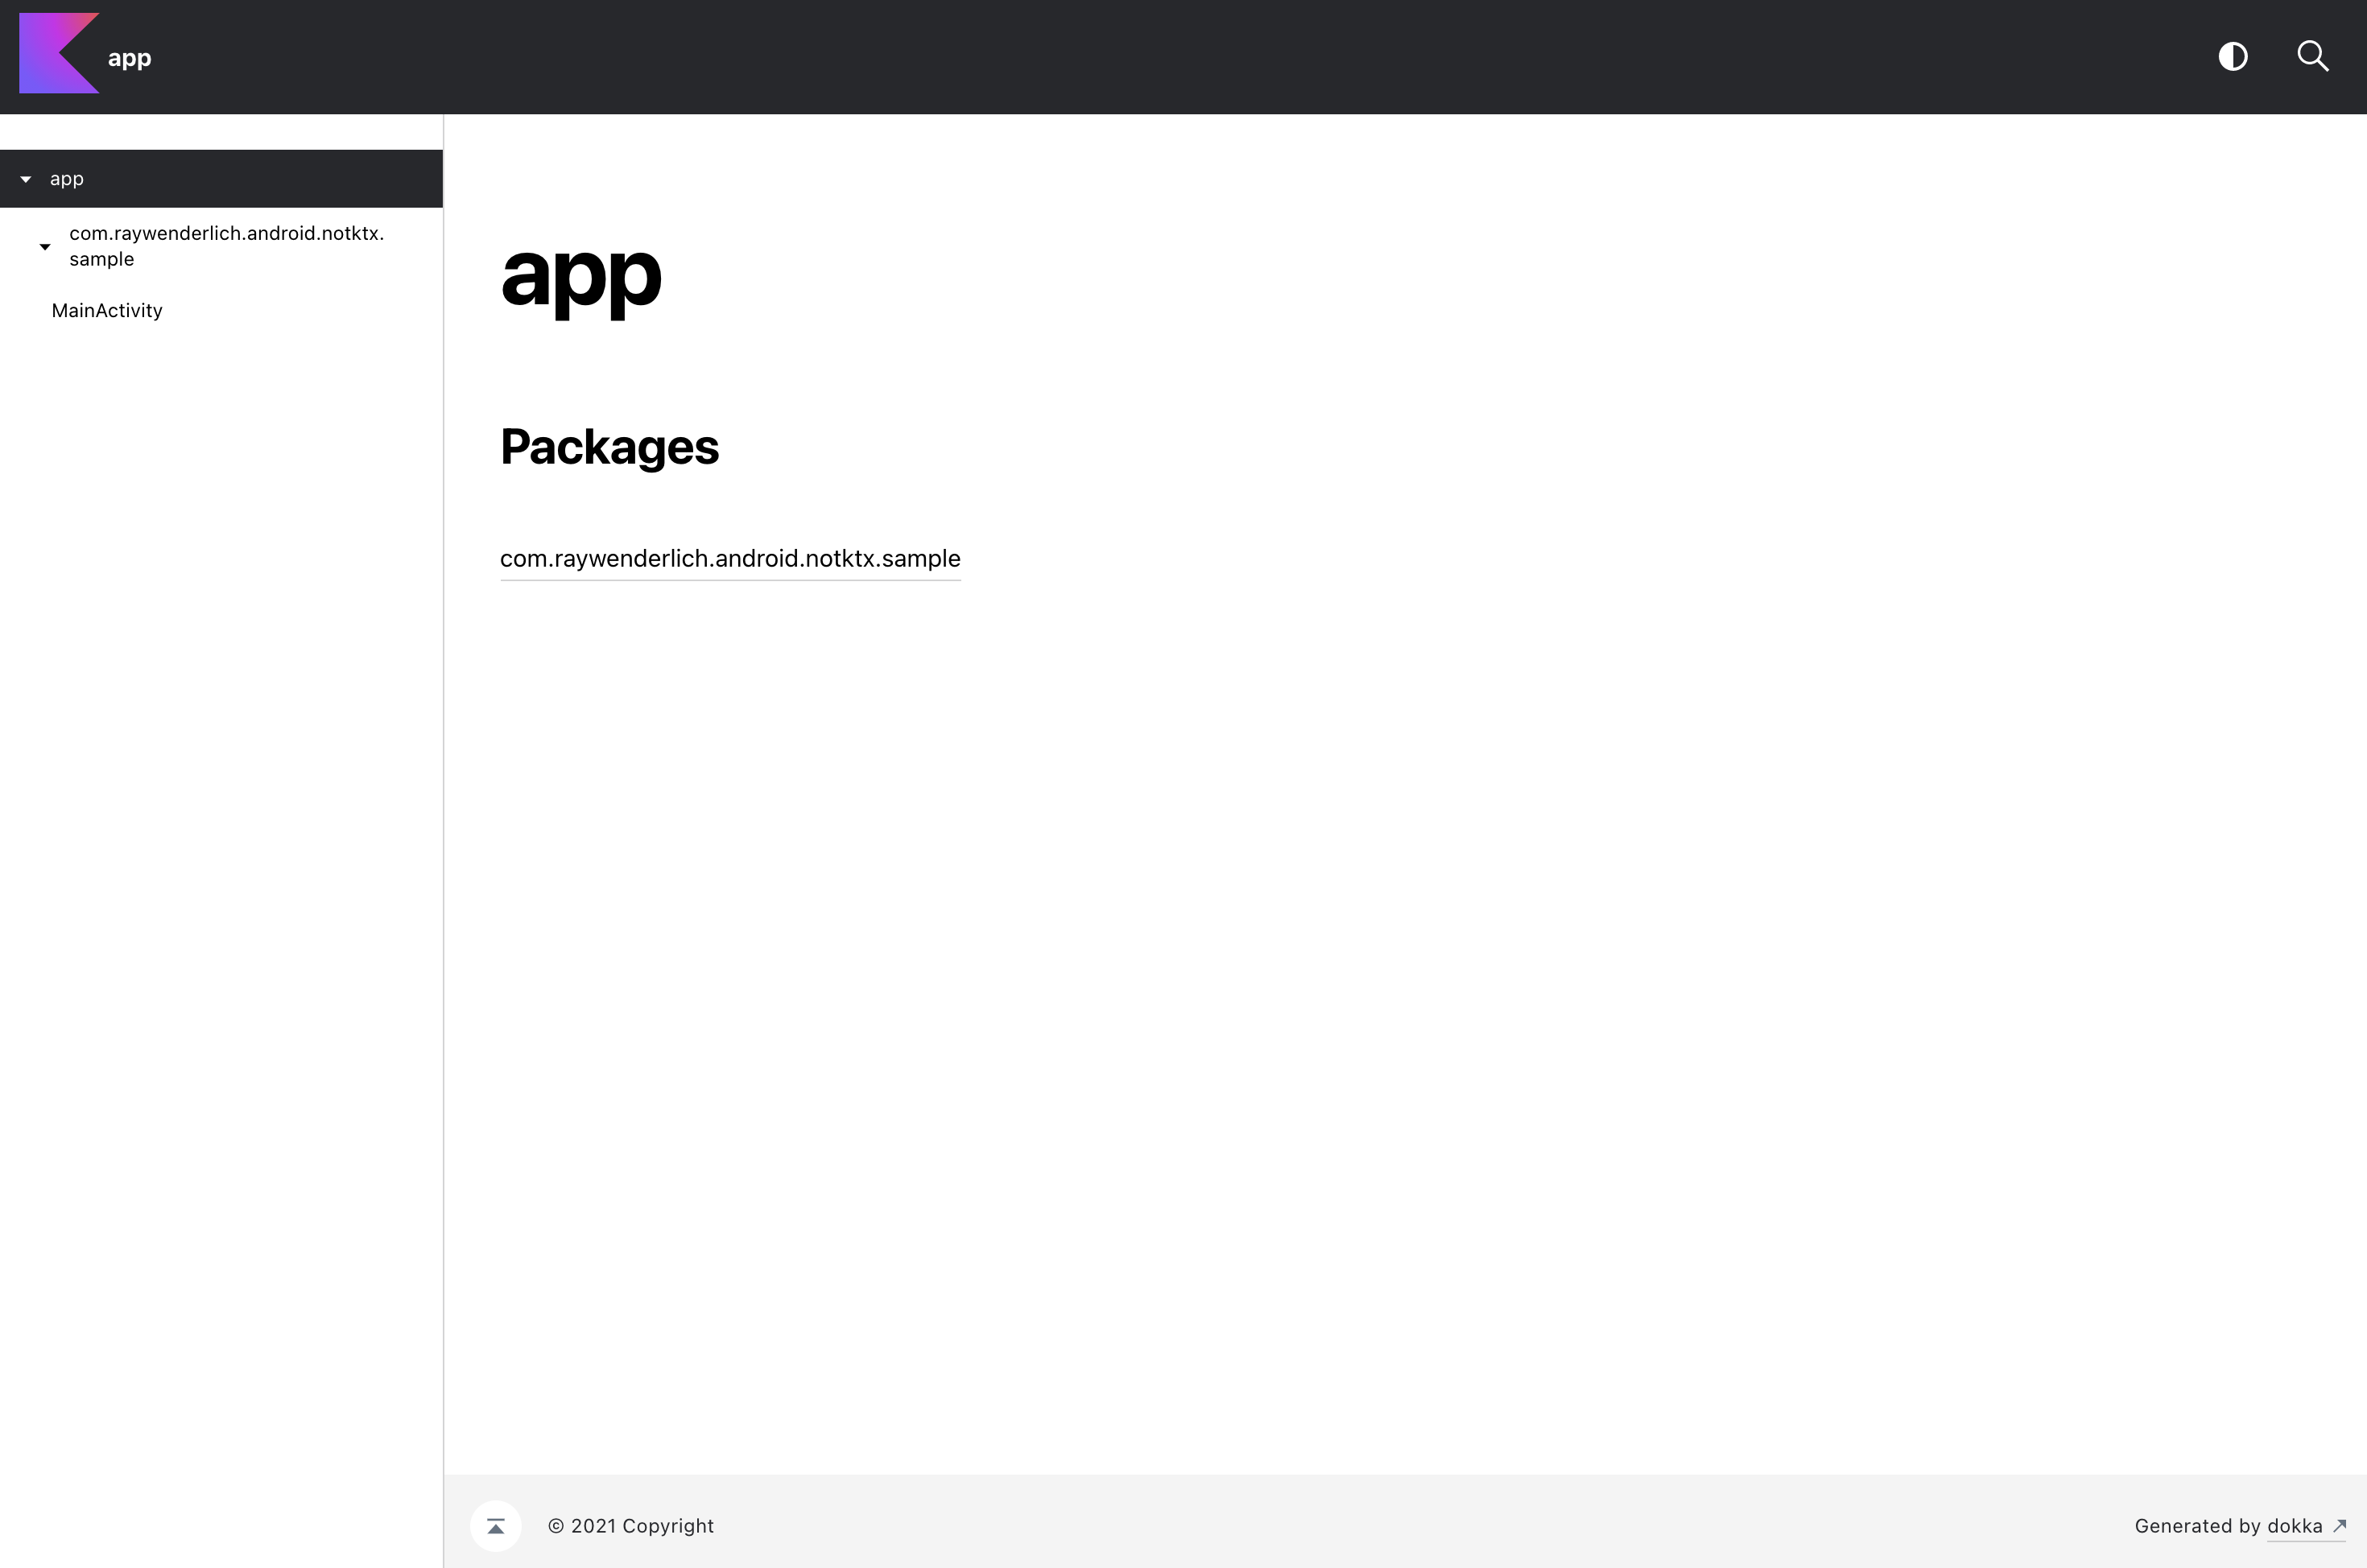
Right-click index.html in build/dokka/html inside the app module and select Open in ▸ Browser ▸ {Whatever browser you want}. This will use IntelliJ’s built-in server to load the file. The generated documentation will look like this:
Do the same for the index.html file in the root-level build/dokka/htmlMultiModule directory, and you’ll see this:

Congratulations! You’ve successfully generated documentation for your project. :]
If you’re facing this issue, don’t worry. You’ll fix this next by setting a custom output directory for the documentation.
If you’re facing this issue, don’t worry. You’ll fix this next by setting a custom output directory for the documentation.
Go ahead and explore the generated documentation pages. The rest of this article will build upon this and show how to customize Dokka to cater to some common use cases.