Developing and Testing Server-Side Swift with Docker and Vapor
Use Docker to develop and test your Vapor apps and learn to use Docker Compose to run different services, which include a database. By Natan Rolnik.
Creating the Testing Dockerfile
Like running the development image, you’ll need two files for executing the tests: the Dockerfile and the Docker Compose file. Start by creating a file named testing.Dockerfile in the root directory and add the following:
# 1
FROM swift:5.5

# 2
WORKDIR /app
# 3
COPY . ./
# 4
CMD ["swift", "test"]
Here’s what you’re telling Docker to do:
- Use the Swift 5.5 image.
- Set the working directory to
/app. - Copy the contents of the current directory — the project directory — to the container.
- Set the default command to
swift test, which is the Swift command for running a package’s tests. You’re doing this because when Docker runs a Dockerfile, it needs either an entry point or a command.
Creating the Testing Docker Compose File
Next, under the same location, create a file named docker-compose-testing.yml. Add the following contents to the file:
# 1
version: '3'

# 2
services:
  til-app-tests:
    # 3
    depends_on:
      - postgres_test
    # 4
    build:
      context: .
      dockerfile: testing.Dockerfile
    # 5
    environment:
      - DATABASE_HOST=postgres_test
      - DATABASE_PORT=5432
      - DATABASE_NAME=vapor_test
  # 6
  postgres_test:
    image: "postgres"
    # 7
    environment:
      - POSTGRES_DB=vapor_test
      - POSTGRES_USER=vapor_username
      - POSTGRES_PASSWORD=vapor_password
This Docker Compose file is similar to the development one. Here’s what it does:
- Sets the Docker Compose version.
- Declares the services you’ll want, starting with the app tests service.
- Sets a dependency on the Postgres service, which you’ll declare a few lines below.
- Uses the
testing.Dockerfileyou just created, which is in the current directory. - Injects the database environment variables into the app tests container. As you did with the development dockerfile, use
postgres_testto allow the app tests to find the database container, and set the port and the database name. - Defines the database container for tests. Here, you use a different name to avoid conflicts with the development Postgres container.
- Sets the database container environment variables using the same name you passed to the
til-app-testsservice.
Because you already configured the environment variables in the previous sections, there’s no need to change the database configuration in the app.
If for some reason you still need to check whether your Vapor app is running under tests, use the following check in your code:
if app.environment == .testing {
  // app is running tests
}
if app.environment == .testing {
  // app is running tests
}
Running Tests with Docker
Once the testing files are ready, you only need to build the images and run the tests.
First, build the images by running:
docker-compose --file docker-compose-testing.yml build
After Docker Compose finishes building the app images, run:
docker-compose --file docker-compose-testing.yml up --abort-on-container-exit
This will start both the til-app-tests and the postgres_test container. The entry point of the testing Dockerfile is swift test. The command exits after the tests finish. This action works differently from running the server, which only exits when the server stops, whether manually or due to a crash. For that reason, it’s better to use --abort-on-container-exit, which makes Docker Compose stop all containers should any container stop.
After tests finish running, you’ll see the test results in the container logs:
Tests passed
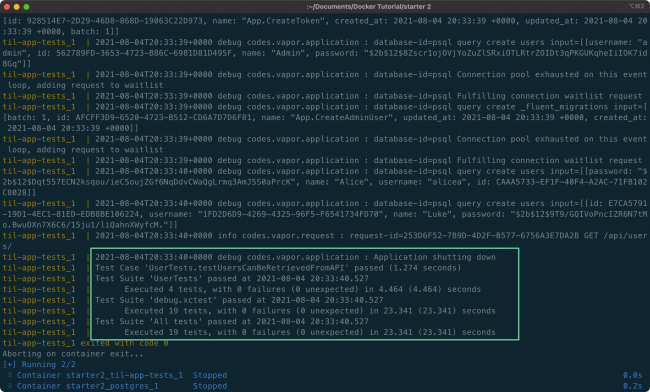
Tests passed
Congrats! You have now a solid development and testing setup ready to build the next iteration of your web app.
Where to Go From Here
You’ve reached the end of this tutorial and learned many Docker and Docker Compose skills.
Download the completed project from this tutorial using the Download Materials button at the top and bottom of this page.
If you want to keep learning more, here are some challenges you could try next:
- Adding another service to your compose files, such as Redis for caching.
- Pushing your Docker images to a registry like Docker Hub or Heroku’s Container Registry.
- Deploying to Heroku or a Linux instance on AWS.
To further widen your knowledge of Docker and Vapor, check out our book, our Getting Started tutorial and our videos.
We hope you enjoyed this tutorial, and if you have any questions or comments, please join the forum discussion below!