Getting Started with Cucumber
Learn to use Cucumber, Gherkin, Hamcrest and Rest Assured to integrate Behavior-Driven Development (BDD) in an application made using Spring Boot and Kotlin. By Prashant Barahi.
Tags
Tags provide a way to organize your features and scenarios. They can refer to a subset of scenarios. With this, you can restrict execution to them or restrict the hooks. You can tag a scenario or feature, using @ followed by the name of the tag.
Uncomment the previously commented @requiresDBClear. Then, navigate to ArticleStepDefs and take a look at requiresDBClear:
@Before("@requiresDBClear")
fun requiresDBClear(scenario: Scenario) {
  println("Clearing table for ${scenario.name}")
  _repository.deleteAll()
}
requiresDBClear() contains a conditional hook that runs before those scenarios that are tagged with @requiresDBClear. You clear the entire table before any of the steps get executed.
Run the tests. Now, you’ll find all the tests are passing.
You can also combine tags using @After("@tag1 and not @tag2") or @After("@tag1 and @tag2").
By default, Cucumber tests are executed using a single thread. A large number of tests can take a lot of time when executed in this manner. Next, you’ll see how you can execute them in parallel.
Running Tests in Parallel
Open build.gradle and provide the following arguments to ConsoleLauncher after the args("--scan-classpath") line:
systemProperty("cucumber.execution.parallel.enabled", true)
systemProperty("cucumber.execution.parallel.config.strategy", "dynamic")

Execute this task using ./gradlew test. Use ./gradlew test | grep \#\# to filter out the logs. You can see the features are executed by multiple threads.
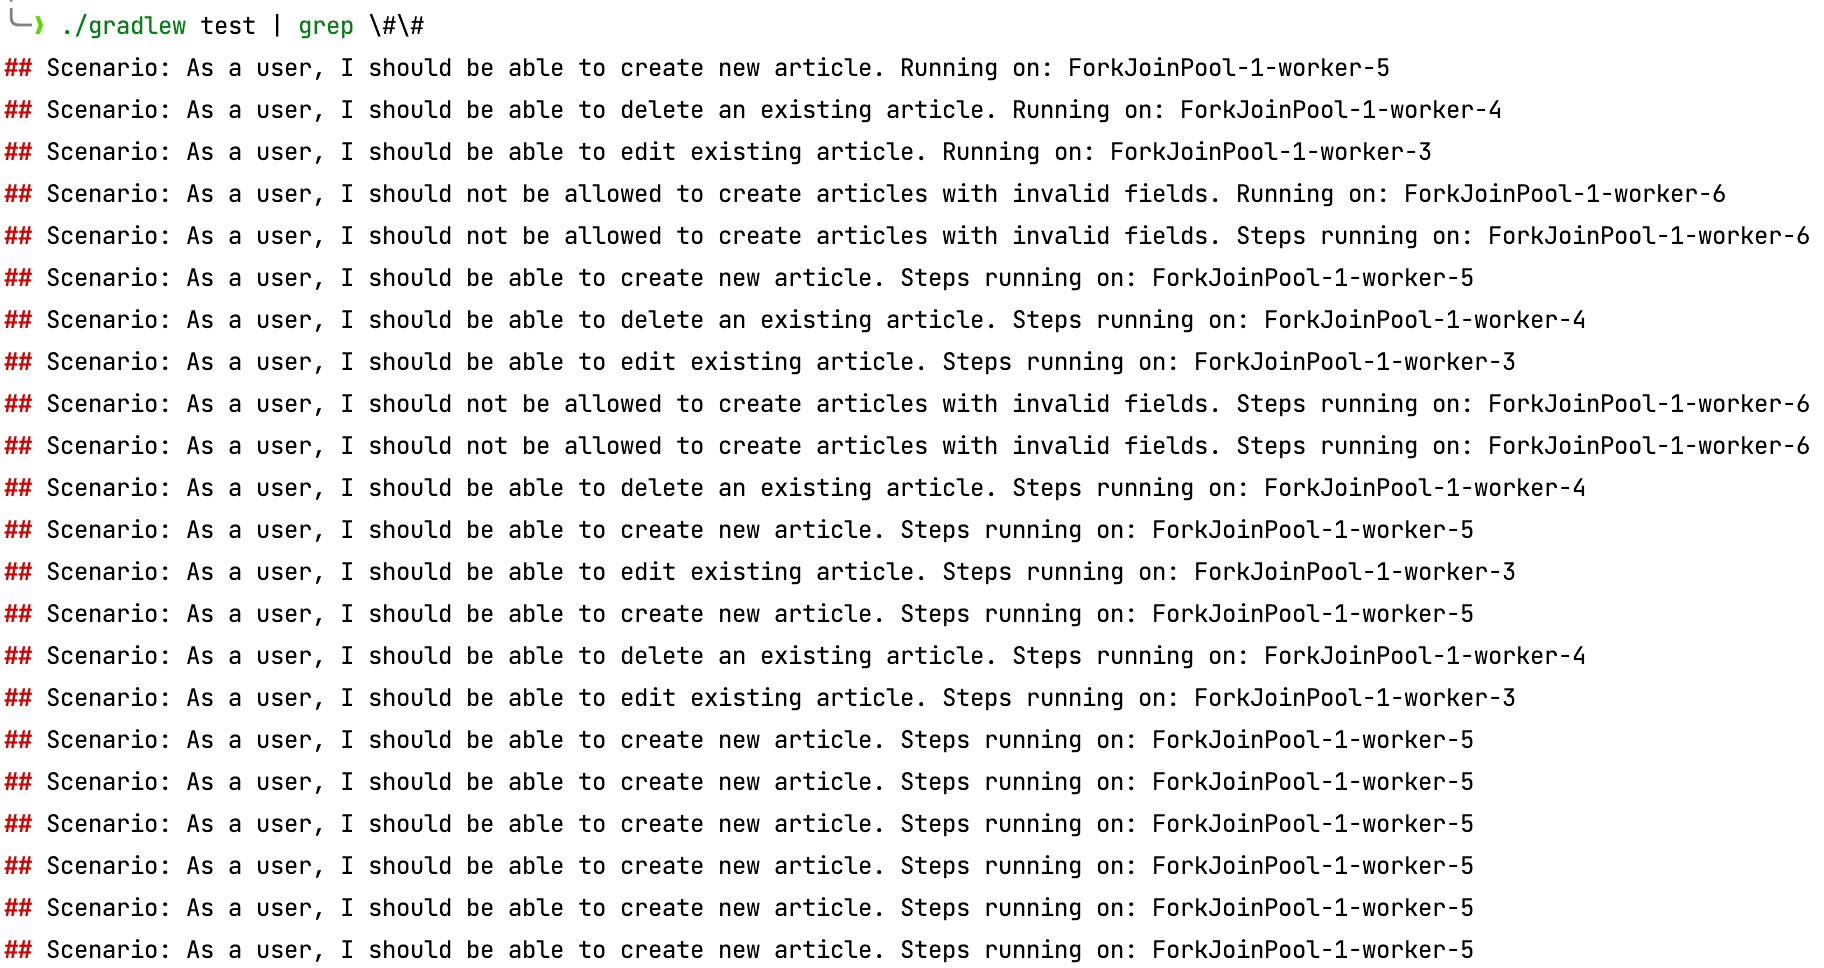
Like before, the success of these tests also depends on the order of execution. If the scenario tagged with @requiresDBClear gets executed in parallel with another scenario where you just created an article and right before the “fetch article by its id” step, then the scenario will fail because the table would already be cleared.
Run the tests in isolation to prevent this. You’ll learn that in the next section.
Running Tests in Isolation
To avoid flaky tests when multiple scenarios manipulate the same resource, you can synchronize the tests on that resource or simply run those tests in isolation.
Create a src/test/resources/junit-platform.properties file and add the following property:
cucumber.execution.exclusive-resources.isolated.read-write=org.junit.platform.engine.support.hierarchical.ExclusiveResource.GLOBAL_KEY
Go to the get-articles.feature file and tag Feature with @isolated.

Now, the get-article.feature feature gets executed in isolation from the other features.
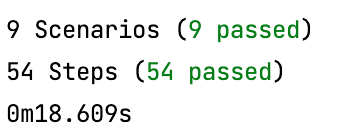
Re-run the tests and you should see all the tests passing.
You can read more about this in the cucumber-unit-platform-engine documentation.
Next, you’ll learn about reporting plugins.
Reporting Plugins
Cucumber provides reporting plugins you can use to generate test reports.
To configure reporting plugins, go to build.gradle and provide the following argument to ConsoleLauncher:
systemProperty(
    "cucumber.plugin",
    "pretty, summary, timeline:build/reports/timeline, html:build/reports/cucumber.html"
)
You provided four plugins in a CSV format, namely pretty, summary, timeline and html.
The summary outputs a summary of the test at the end.
The plugin html generates HTML reports at build/report/cucumber.html.

The timeline plugin generates a report at build/report/timeline that shows how and which thread executed the scenarios, which is great for debugging flaky tests.

Remember the @isolated tag? The report above shows get-article.feature executed separately from the other features.
Where to Go From Here?
Click Download Materials at the top or bottom of the tutorial to download the final project.
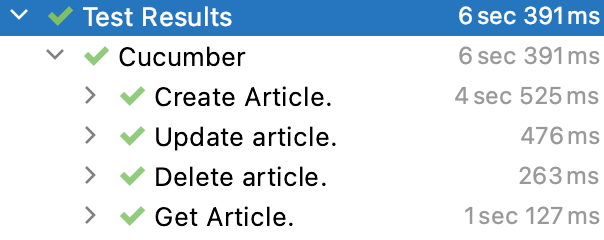
You made it all the way through! You learned how to integrate Cucumber in a Spring Boot application, write and implement step definitions, use multiple threads to execute them in parallel and generate reports using plugins.
Cucumber has well-written documentation on its usage as well as anti-patterns and BDD.
It’s a good practice to automate the verification process and perform it frequently, preferably on every new change. Check out Continuous Integration for Android to get the gist of how to achieve it.
If you have any questions or comments, please join the forum discussion below.