Unity 4.3 2D Tutorial: Getting Started
Learn how to make a cool 2D zombie game using Unity’s new built-in tools in this Unity 4.3 2D Tutorial! By Chris LaPollo.
Slicing Sprite Sheets
You already imported zombie.png into your project, but this file is different from the other ones you imported. Instead of a single zombie image, it contains several, as shown below:

Such a file is usually referred to as a sprite sheet, and you’ll want Unity to create a separate Sprite asset for each of the sheet’s individual images.
Expand zombie in the Project browser. As you can see in the following screenshot, Unity created a single child – a Sprite containing the entire image – which is not what you wanted.
![]()
Fortunately, Unity offers a simple solution you can use to treat this image as a sprite sheet. Select the top-level zombie in the Project browser to open its Import Settings in the Inspector.
Set Sprite Mode to Multiple (see the following image) and click Apply:

Choosing this option caused a new button labeled Sprite Editor to appear. It also removed the Pivot property, because each individual sprite will define its own pivot point elsewhere.
[spoiler title="Not sure about pivot points? Look inside for more info."]A Sprite’s Pivot defines the origin of its local coordinate system. This point, for example, the Sprite’s Center or its Top Left corner, will be placed at the position defined by the GameObject’s Transform; rotations will occur around this point; and scaling will shrink or grow the Sprite from this point.
You can assign a custom point by choosing Custom from the Pivot field combo box. If you do so, you’ll be presented with the following new fields:

The values you supply for X and Y are normalized, so a value of 0.5 is the center. However, you are free to use values that are less than 0 or greater than 1 if you want the origin to lie outside of the sprite’s bounds.
[/spoiler]
Notice in the Project browser (shown in the following image) that the zombie texture asset no longer has any children, as indicated by the lack of a small arrow on its right side:

In this state, the zombie texture is unusable. If you tried to drag it into the Hierarchy, you would get a message indicating it has no Sprites. That’s because you need to tell Unity how you want to slice the sprite sheet.
With zombie selected in the Project browser, click Sprite Editor in the Inspector to open the following window:
![]()
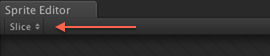
The Sprite Editor lets you define which portions of an image contain its individual sprites. Click the Slice button in the upper left of the window to start defining sprites, as shown below:
Unity can find your sprites automatically, but you can adjust its results. Start with the default settings shown below and click Slice.

Unity uses the transparency in the texture to identify possible sprites and displays a bounding box around each one. In this case, it found the following four sprites:
![]()
In my tests, Unity’s automatic slicing works best when images are laid out with unambiguous empty space between each item. Notice how Unity only finds the smiley face in the following image, but finds three sprites in the image after that:
Unity doesn’t find all the sprites because it cannot create mutually exclusive bounding boxes.
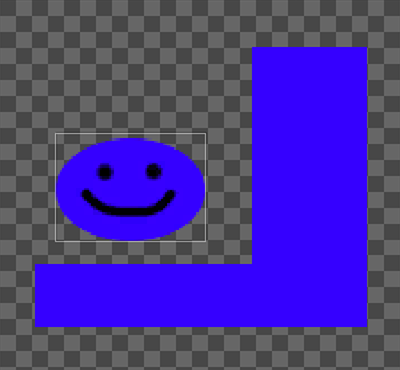
Unity doesn’t find all the sprites because it cannot create mutually exclusive bounding boxes.
Unity finds all three sprites because it can create a bounding box around each one of them.

Unity finds all three sprites because it can create a bounding box around each one of them.
The above images point out that you should arrange the images in your sprite sheets carefully. They also point out exactly why Mike had to draw the game’s sprites.
Click on any of the sprites that Unity identified to edit the details of that sprite, including its name, position, bounds, and pivot point. The following image shows the window with the second sprite selected:
![]()
You can make changes in the window’s fields, and you can adjust the bounds and pivot point directly within the image.
Normally, after you’ve made changes, you would hit Apply or Revert in the upper right of the Sprite Editor to save or discard them, respectively.
However, while the option to tweak Unity’s findings is great, you won’t need to do that here because you aren’t going to use the sprites it found. The images in zombie.png are arranged in four equally sized rectangles, and Unity has a separate option to handle cases like this one.
Click Slice in the upper left of the Sprite Editor to open the slice settings again, but this time, set Type to Grid. The splice settings change to those shown below:
![]()
The Pixel size fields allow you to specify the size of your grid’s cells. X defines the width of each cell; Y defines the height. Unity will use those values to divide the image up equally, starting in the upper left corner of the image.
Set X to 157, and Y to 102, as shown below:
![]()
Click Slice and Unity finds the following four sprites:

You can still select individual cells in the grid and tweak their settings like you could when using Unity’s Automatic slicing option, but that’s unnecessary for these sprites.
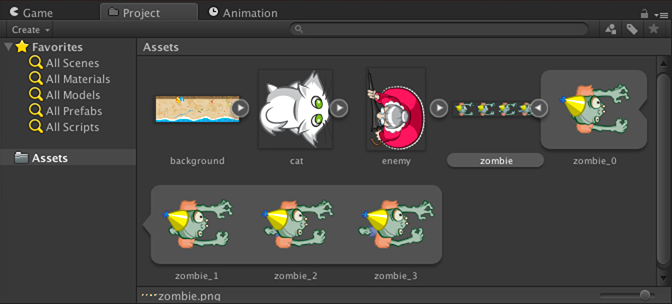
Click Apply in the upper-right of the Sprite Editor to commit your changes. Notice how Unity updates the Project browser so that the top-level zombie texture asset now contains four child Sprites, named zombie_0, zombie_1, and so on, as shown below:
To see another way to add Sprites to your scene, you’ll create the zombie’s GameObject a bit differently. But be aware that this has nothing to do with the fact that the zombie texture is sliced into multiple Sprites – you could still make it the same way you made the enemy or background objects, by simply dragging an asset into the Hierarchy.
Create a new empty GameObject by choosing GameObject\CreateEmpty. Rename the object zombie, and set its Position to (-2, 0, 0), as shown below:

With zombie selected in the Hierarchy, add a Sprite Renderer component by clicking Add Component in the Inspector. In the menu that appears, choose Rendering and then choose Sprite Renderer, as shown below:
![]()
Click the small circle/target icon on the right of the Sprite Renderer‘s Sprite field to open the Select Sprite dialog. The icon is shown below:
![]()
The dialog that appears contains two tabs, Assets and Scene. These show you all the Sprites you have in your project and in the current scene, respectively.
Choose the Assets tab and then click on zombie_0 to assign that Sprite to the renderer, as shown below:
![]()
Inside the Scene view, you now have a zombie relaxing on the beach, with an old lady and her cat buried somewhere below it. Pleasant.

With all the necessary sprites in your scene, it’s time to fix a few problems.