Introduction to Google Maps API for Android with Kotlin
In this Google Maps API Tutorial for Android you will learn how to retrieve the user’s current location, get location updates and search for places. By Joe Howard.
4.1 (17) · 1 Review
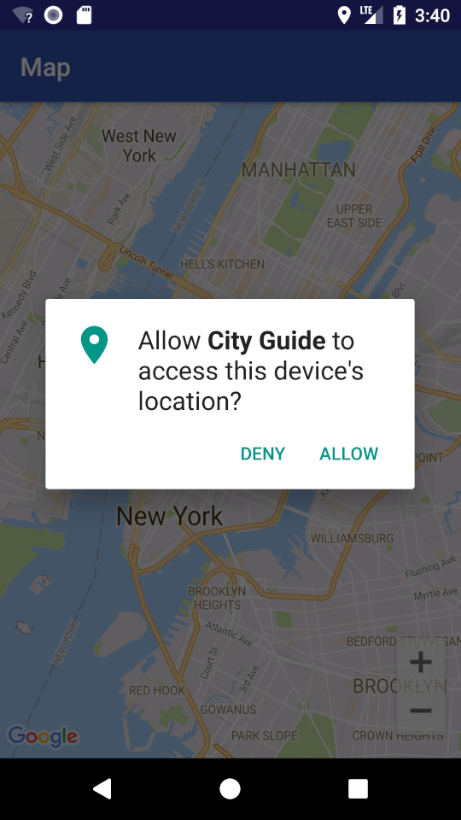
User Permissions
Your app needs the ACCESS_FINE_LOCATION permission for getting the user’s location details; you’ve already included this in AndroidManifest.xml.
Starting with Android 6.0, user permissions are handled a little differently than before. You don’t request permission during the installation of your app; rather, you request them at run time when the permission is actually required.
Permissions are classified into two categories: normal and dangerous categories. Permissions that belong to the dangerous category require run time permission from the user. Permissions that request access to the user’s private information such as the user’s CONTACTS, CALENDAR, LOCATION etc. are categorised as dangerous permissions.
Open MapsActivity.kt and add a companion object with the code to request location permission:
companion object {
  private const val LOCATION_PERMISSION_REQUEST_CODE = 1
}
Create a new method called setUpMap() as follows.
private fun setUpMap() {
  if (ActivityCompat.checkSelfPermission(this,
      android.Manifest.permission.ACCESS_FINE_LOCATION) != PackageManager.PERMISSION_GRANTED) {
    ActivityCompat.requestPermissions(this,
        arrayOf(android.Manifest.permission.ACCESS_FINE_LOCATION), LOCATION_PERMISSION_REQUEST_CODE)
    return
  }
}
The code above checks if the app has been granted the ACCESS_FINE_LOCATION permission. If it hasn’t, then request it from the user.
Add a call to setUpMap() at the end of onMapReady().
Build and run; click “Allow” to grant permission.
Getting Current Location
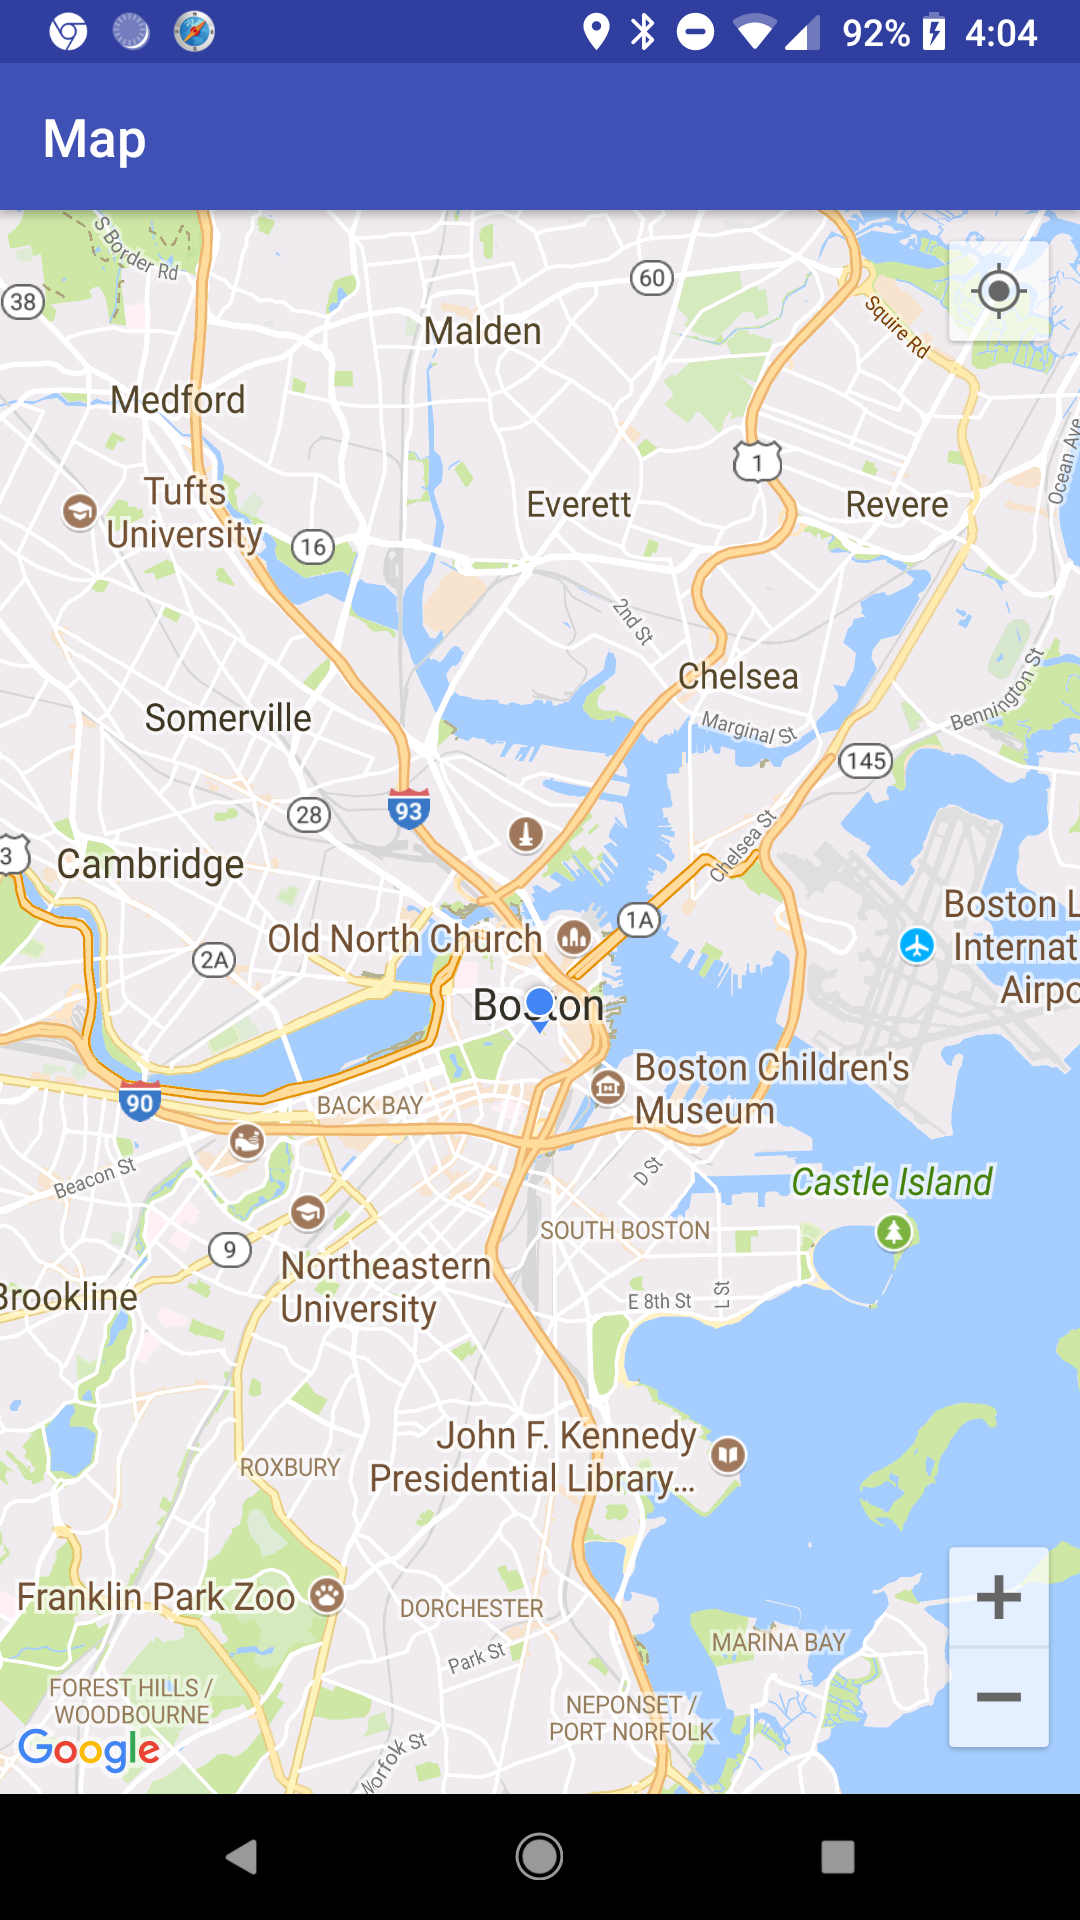
One of the most common uses for location services is finding the user’s current location. You do this by requesting the last known location of the user’s device from the Google Play services location APIs.
In MapsActivity.kt, add the following new property:
private lateinit var lastLocation: Location
Next, remove the code in onMapReady() that put a marker in New York:
override fun onMapReady(googleMap: GoogleMap) {
  map = googleMap

  map.uiSettings.isZoomControlsEnabled = true
  map.setOnMarkerClickListener(this)

  setUpMap()
}
Add the code below to the bottom of setUpMap():
// 1
map.isMyLocationEnabled = true

// 2
fusedLocationClient.lastLocation.addOnSuccessListener(this) { location ->
  // Got last known location. In some rare situations this can be null.
  // 3
  if (location != null) {
    lastLocation = location
    val currentLatLng = LatLng(location.latitude, location.longitude)
    map.animateCamera(CameraUpdateFactory.newLatLngZoom(currentLatLng, 12f))
  }
}
Taking each commented section in turn:
-
isMyLocationEnabled = true enables the
my-locationlayer which draws a light blue dot on the user’s location. It also adds a button to the map that, when tapped, centers the map on the user’s location. - fusedLocationClient.getLastLocation() gives you the most recent location currently available.
- If you were able to retrieve the the most recent location, then move the camera to the user’s current location.
Build and run to view your progress so far. You’ll see a light blue dot on the user’s location:
Emulator Testing
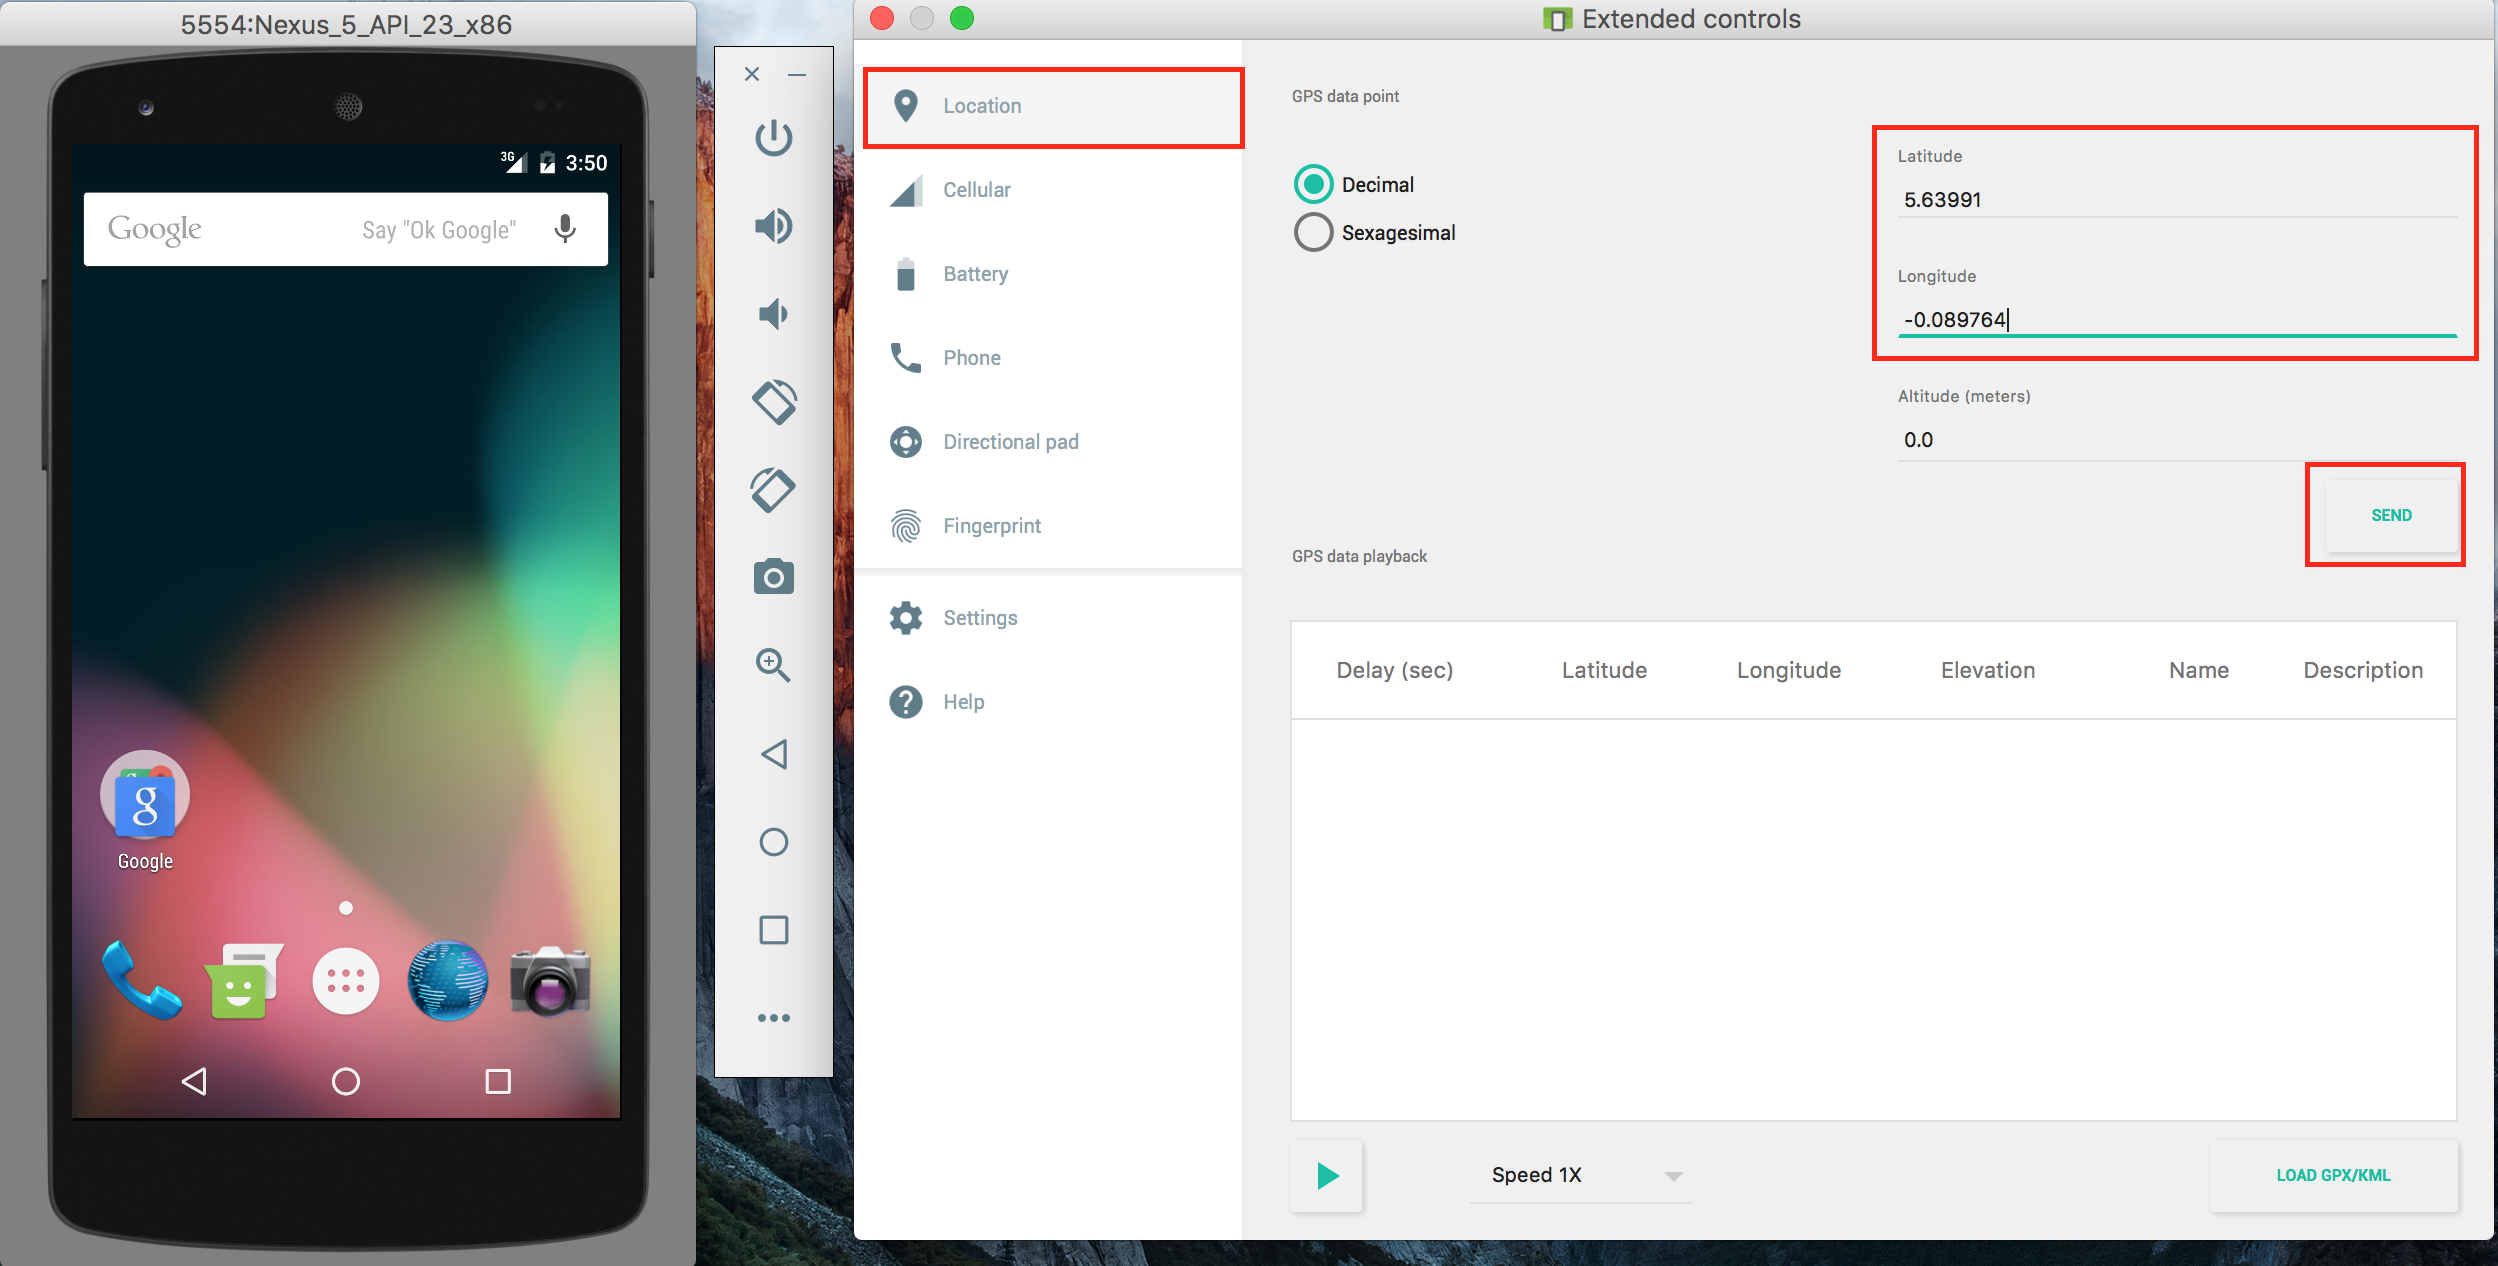
It’s best to use a real Android device to test a map application. If for some reason, you need to test from an emulator, you can do so by mocking location data in the emulator.
One way to do this is by using the emulator’s extended controls. Here’s how you’d do that:

- Start the emulator. On the right hand panel, click the more icon (…) to access the Extended Controls.
- Select the Location item on the left hand side of the Extended Controls dialog.
- Enter the latitude and longitude values in the specified fields and click Send.
Markers
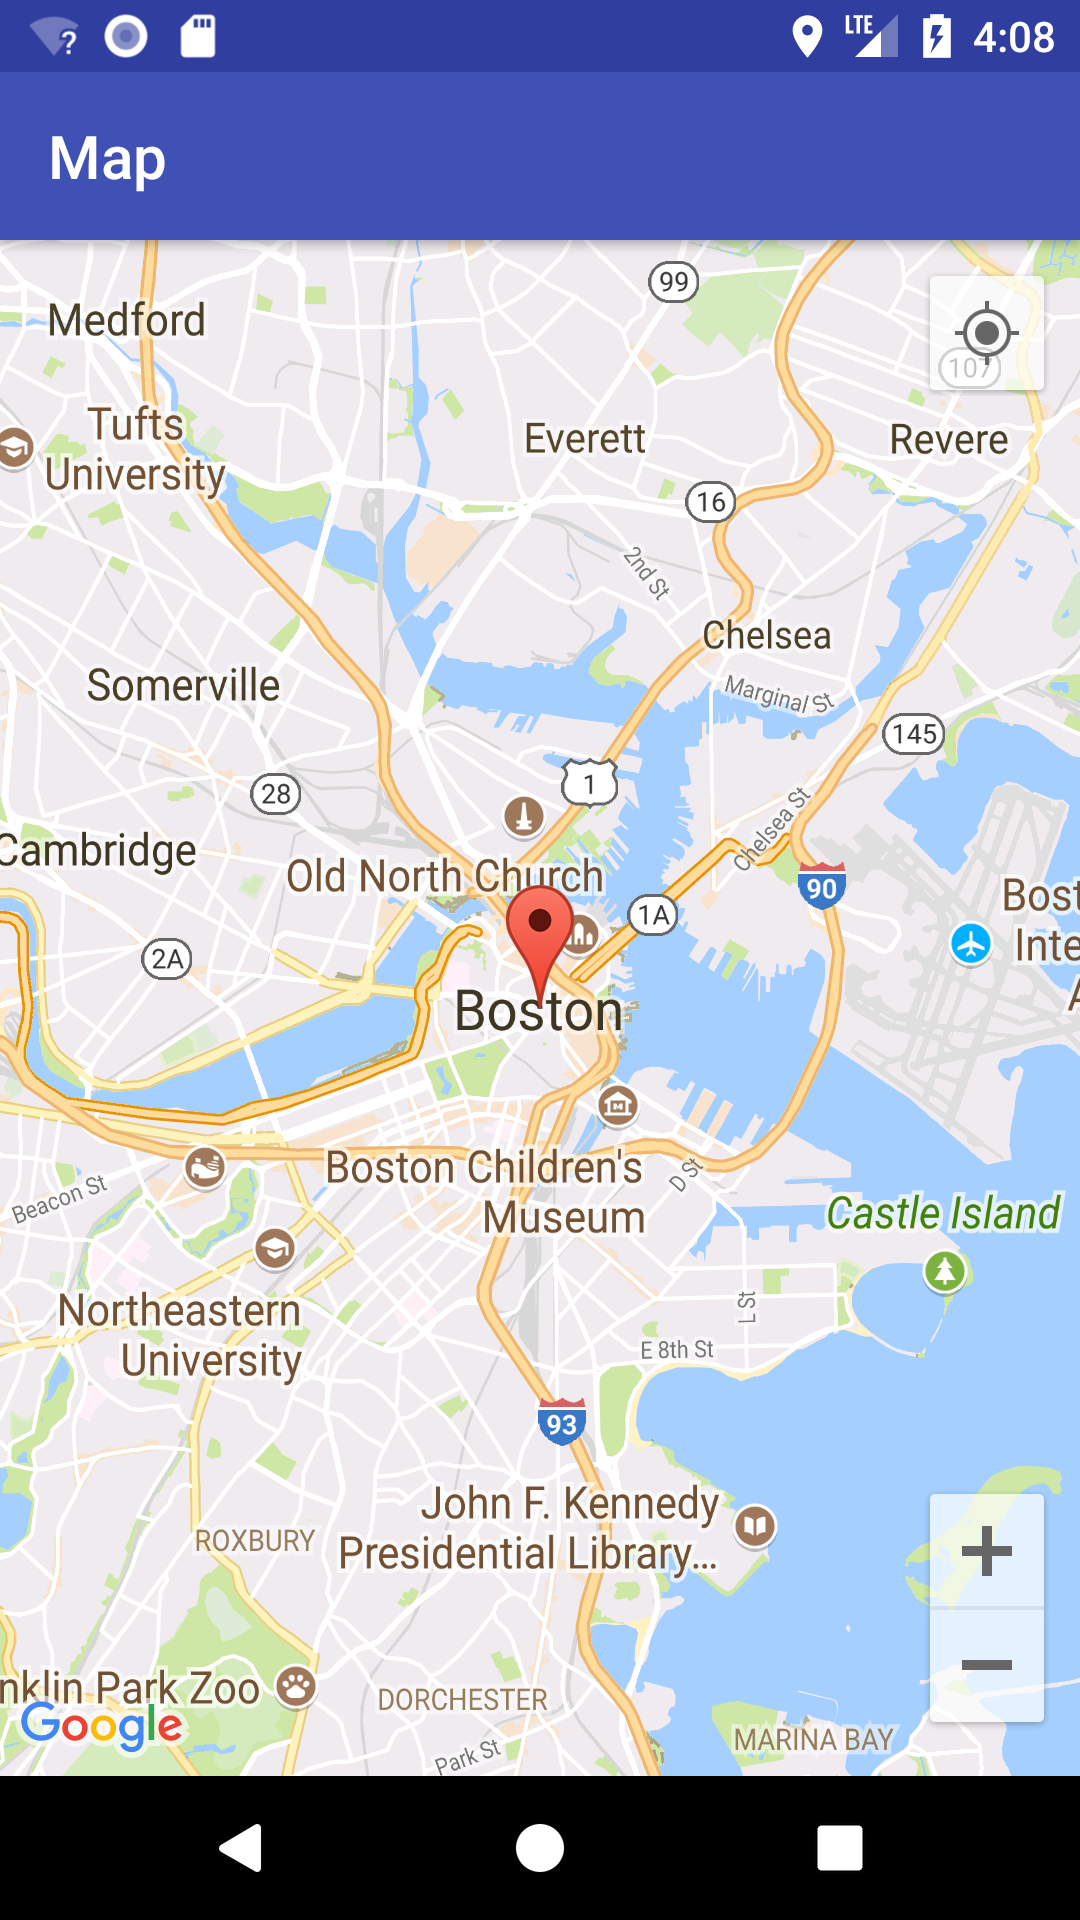
As you may have noticed from the last run, the blue dot on the user’s location is not very prominent. The Android Maps API lets you use a marker object, which is an icon that can be placed at a particular point on the map’s surface.
In MapsActivity.kt add the following code.
private fun placeMarkerOnMap(location: LatLng) {
  // 1
  val markerOptions = MarkerOptions().position(location)
  // 2
  map.addMarker(markerOptions)
}
- Create a MarkerOptions object and sets the user’s current location as the position for the marker
- Add the marker to the map
Now replace the setUpMap() with the following:
private fun setUpMap() {
  if (ActivityCompat.checkSelfPermission(this,
      android.Manifest.permission.ACCESS_FINE_LOCATION) != PackageManager.PERMISSION_GRANTED) {
    ActivityCompat.requestPermissions(this,
        arrayOf(android.Manifest.permission.ACCESS_FINE_LOCATION), LOCATION_PERMISSION_REQUEST_CODE)
    return
  }

  map.isMyLocationEnabled = true

  fusedLocationClient.lastLocation.addOnSuccessListener(this) { location ->
    // Got last known location. In some rare situations this can be null.
    if (location != null) {
      lastLocation = location
      val currentLatLng = LatLng(location.latitude, location.longitude)
      placeMarkerOnMap(currentLatLng)
      map.animateCamera(CameraUpdateFactory.newLatLngZoom(currentLatLng, 12f))
    }
  }
}
The only change you made to setUpMap() here is adding a call to placeMarkerOnMap() to show the marker.
Build and run to view your progress so far. You should see a pin on the user’s location:
Don’t like the default Android pins? You can also create a marker with a custom icon as the pin. Go back to placeMarkerOnMap() and add the following line of code after the MarkerOptions instantiation:
    markerOptions.icon(BitmapDescriptorFactory.fromBitmap(
        BitmapFactory.decodeResource(resources, R.mipmap.ic_user_location)))
Download custom pins named ic_user_location from this link and unzip it. Switch to the Project view in the Project pane and copy all the files to the corresponding mipmap folders of the project as shown below.
Build and run to view your progress so far. The marker on your location should now be using the ic_user_location icon in the project:

What if all you want is the default pin but in a different color? Try to figure this out by yourself, and then check the spoiler below if you need more help:
[spoiler]Add this line of code to placeMarkerOnMap() instead:
markerOptions.icon(BitmapDescriptorFactory.defaultMarker(BitmapDescriptorFactory.HUE_GREEN))
This uses the default marker but in a green color instead of the default red.

[/spoiler]
Changing the Map Type
Depending on the functionality of your app, the normal map view might not be detailed enough for you.
The Android Maps API provides different map types to help you out: MAP_TYPE_NORMAL, MAP_TYPE_SATELLITE, MAP_TYPE_TERRAIN, MAP_TYPE_HYBRID
Add the following inside setUpMap() just below the setMyLocationEnabled() call:
map.mapType = GoogleMap.MAP_TYPE_TERRAIN
GoogleMap.MAP_TYPE_TERRAIN displays a more detailed view of the area, showing changes in elevation:
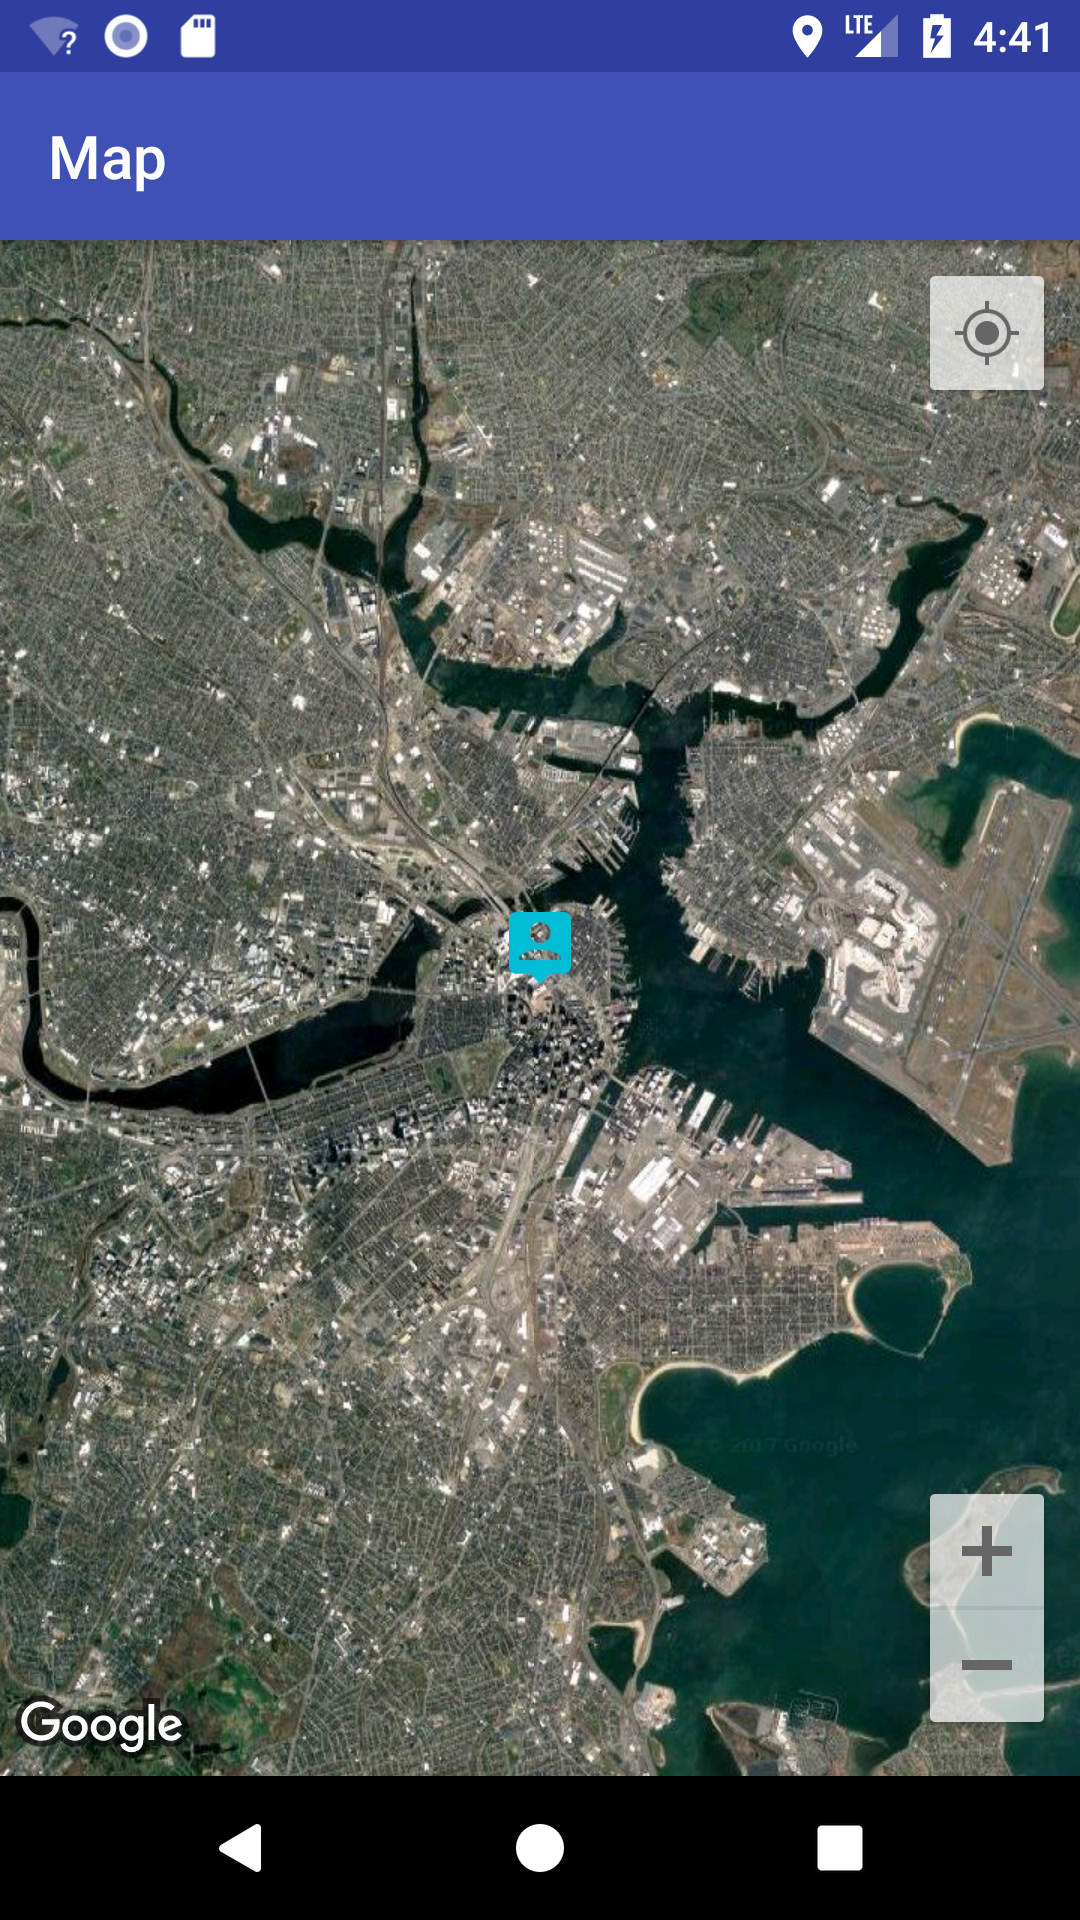
GoogleMap.MAP_TYPE_NORMAL displays a typical road map with labels. This is default type. Here’s what the other types look like:
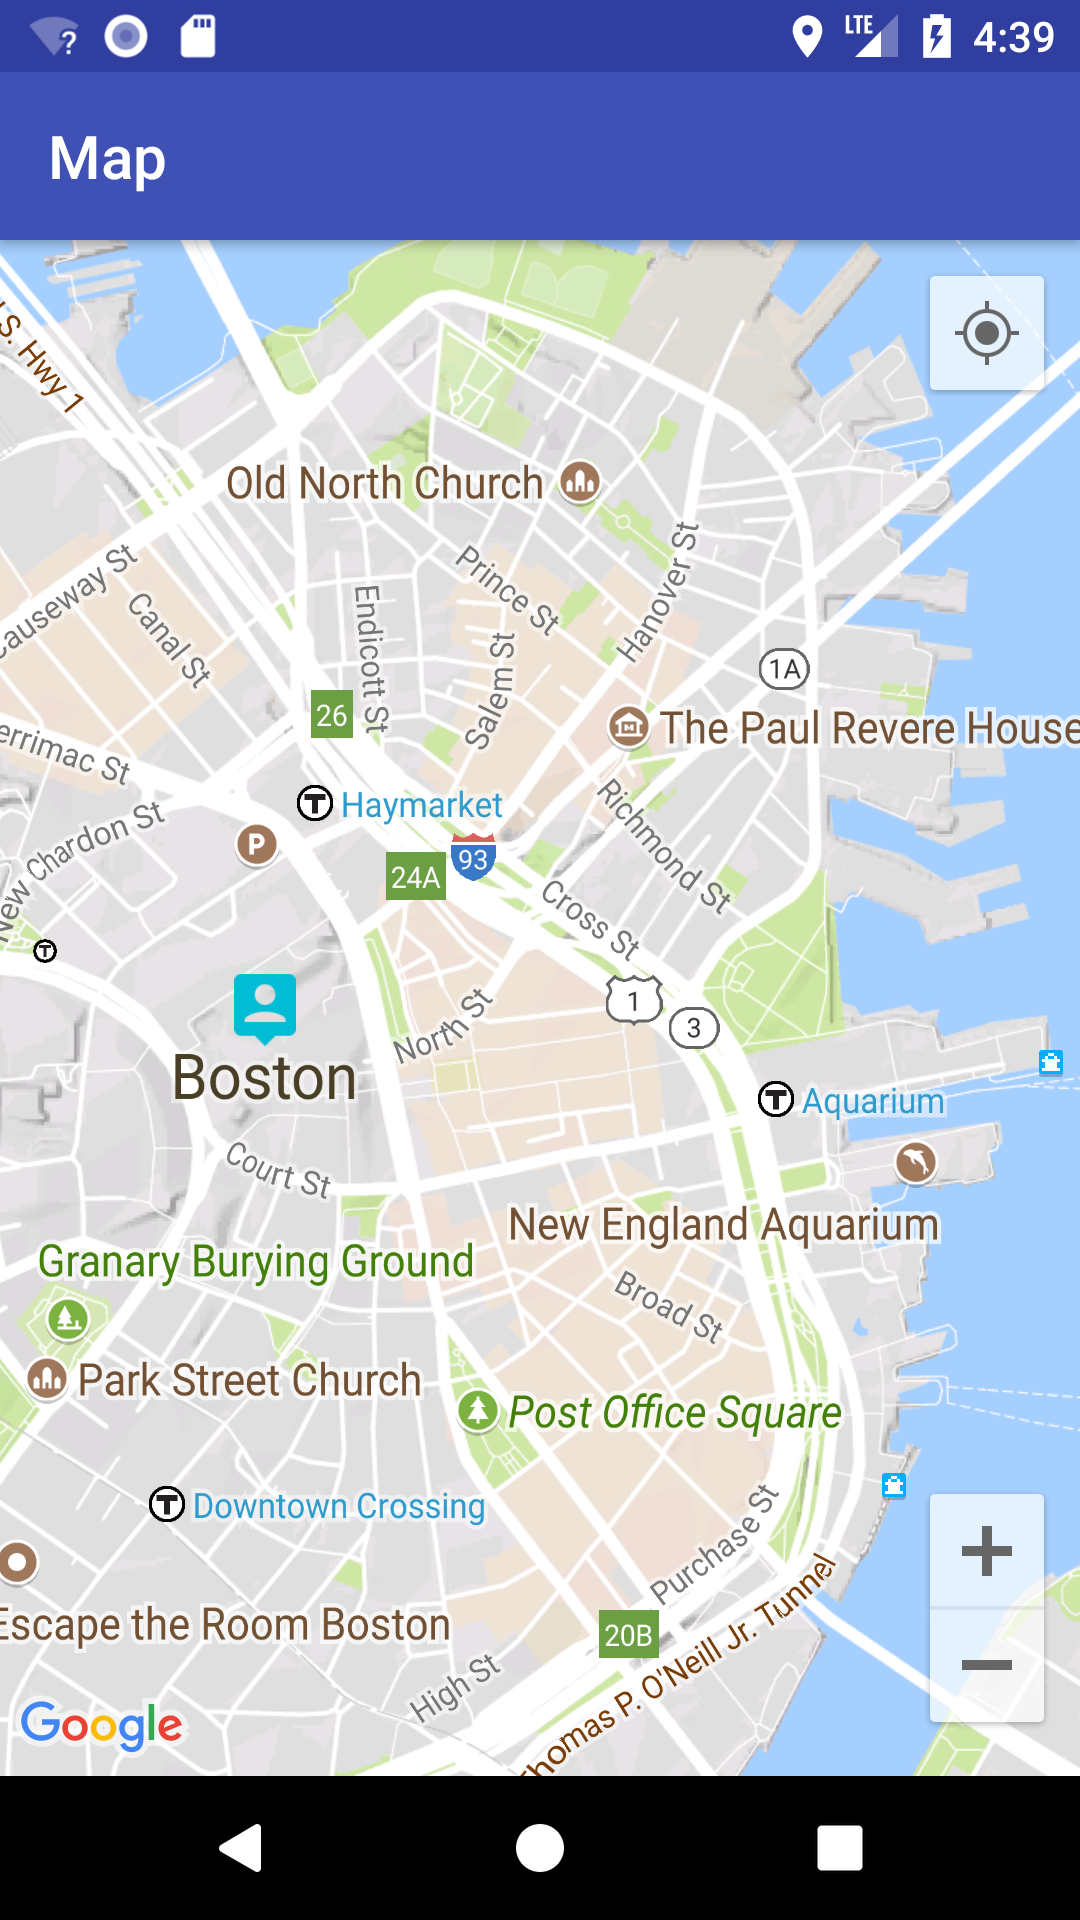
GoogleMap.MAP_TYPE_SATELLITE displays a satellite view of an area with no labels:
GoogleMap.MAP_TYPE_HYBRID displays a combination of the satellite and normal mode:

Implementing Geocoding
Now that you have the user’s location, it would be nice if you could show the address of that location when the user clicks on the marker. Google has a class that does exactly that: Geocoder. This takes the coordinates of a location and returns a readable address and vice versa.
Open MapsActivity. Add the following method:
private fun getAddress(latLng: LatLng): String {
  // 1
  val geocoder = Geocoder(this)
  val addresses: List<Address>?
  val address: Address?
  var addressText = ""

  try {
    // 2
    addresses = geocoder.getFromLocation(latLng.latitude, latLng.longitude, 1)
    // 3
    if (null != addresses && !addresses.isEmpty()) {
      address = addresses[0]
      for (i in 0 until address.maxAddressLineIndex) {
        addressText += if (i == 0) address.getAddressLine(i) else "\n" + address.getAddressLine(i)
      }
    }
  } catch (e: IOException) {
    Log.e("MapsActivity", e.localizedMessage)
  }

  return addressText
}
The import for Address is ambiguous, so specify the following import to resolve the issue:
import android.location.Address
Briefly, here’s what’s going on:
- Creates a Geocoder object to turn a latitude and longitude coordinate into an address and vice versa.
- Asks the geocoder to get the address from the location passed to the method.
- If the response contains any address, then append it to a string and return.
Replace placeMarkerOnMap() with the following.
private fun placeMarkerOnMap(location: LatLng) {
  val markerOptions = MarkerOptions().position(location)

  val titleStr = getAddress(location)  // add these two lines
  markerOptions.title(titleStr)

  map.addMarker(markerOptions)
}
Here you added a call to getAddress() and added this address as the marker title.
Build and run to view your progress so far. Click on the marker to see the address:
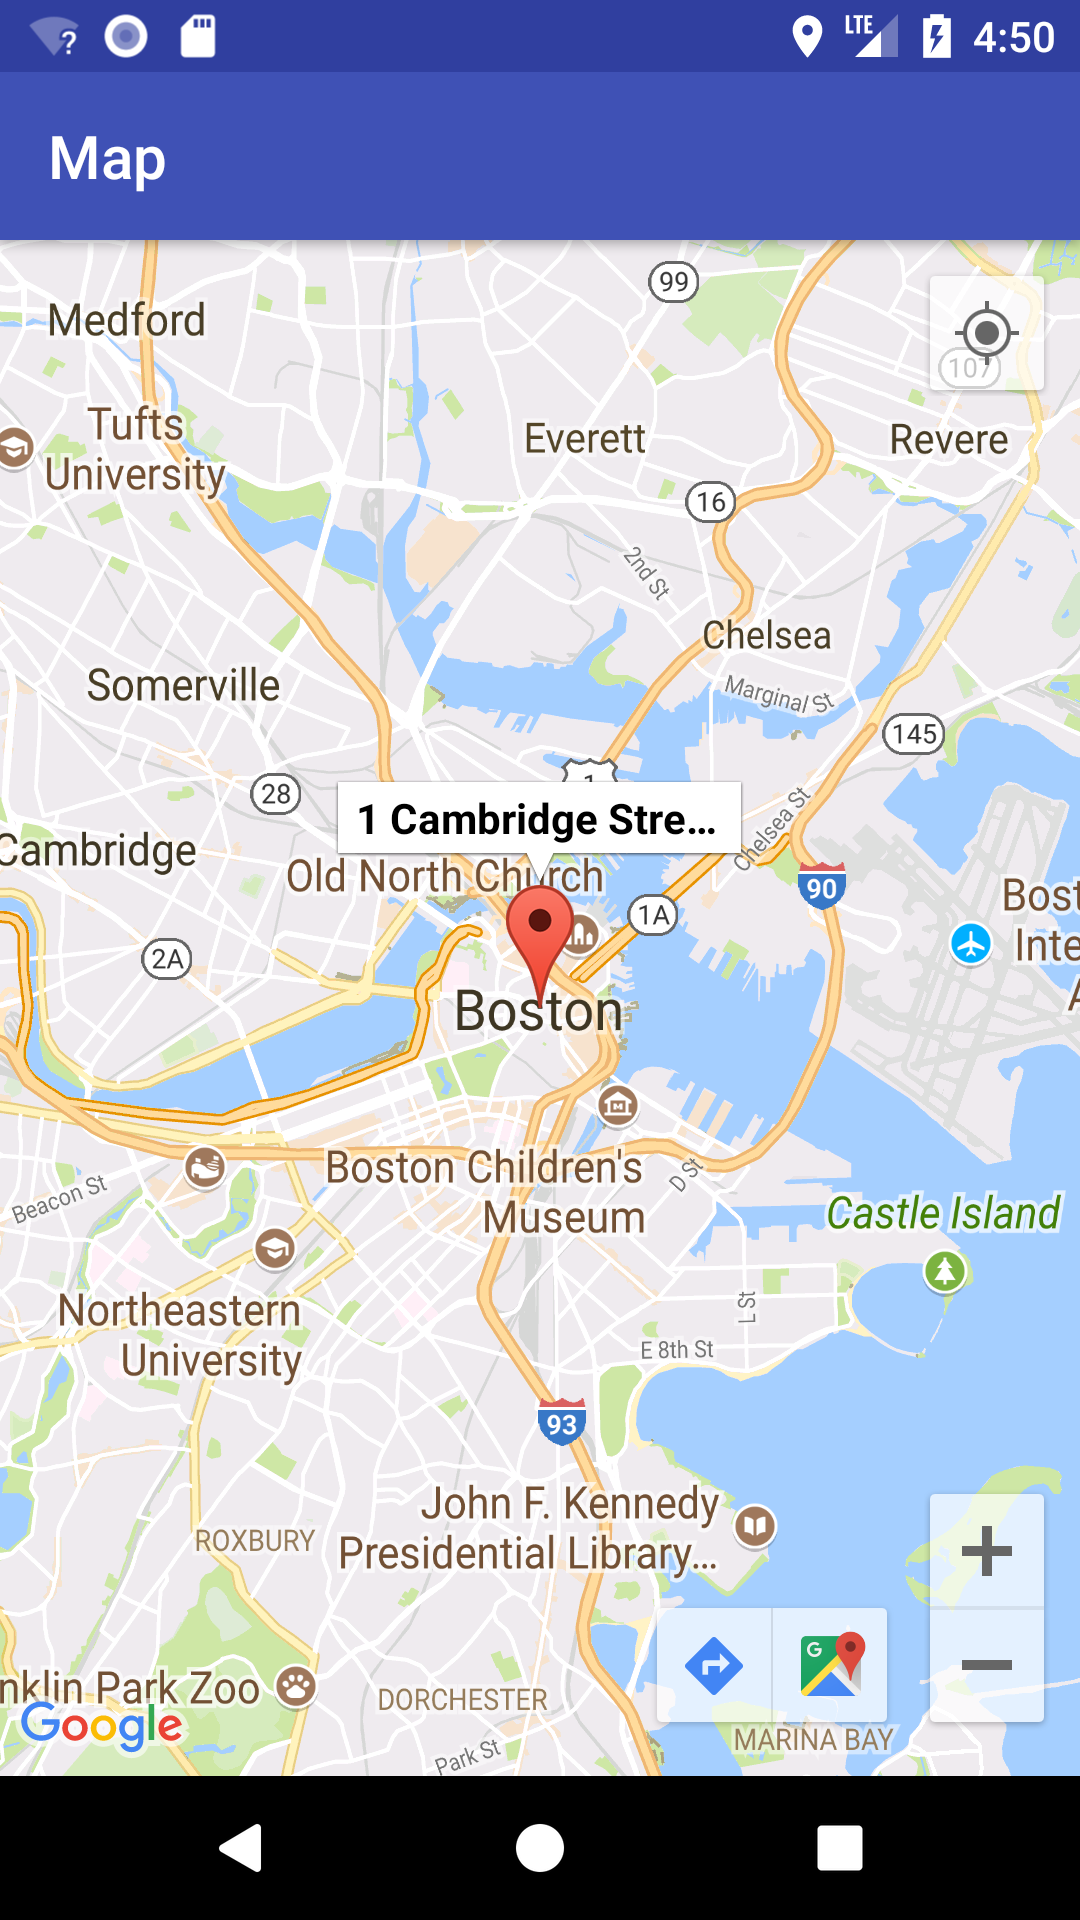
Click anywhere on the map to dismiss the address.
Notice that when you move locations, the blue dot moves with you, but the marker remains at it’s first location. If you’re using a physical device, try moving around to see this. If you are on emulator, change your coordinates to another location in your emulator control.
The marker doesn’t move because your code does not know that the location has changed. The blue dot is controlled by the Google API, not your code. If you want the marker to follow the blue dot always, you need to receive location updates as a call-back in your code.