Scene Kit Tutorial: Getting Started
Learn how to easily create 3D scenes in your iOS apps or games in this Scene Kit tutorial! By Ricardo Rendon Cepeda.
Sign up/Sign in
With a free Kodeco account you can download source code, track your progress, bookmark, personalise your learner profile and more!
Create accountAlready a member of Kodeco? Sign in
Sign up/Sign in
With a free Kodeco account you can download source code, track your progress, bookmark, personalise your learner profile and more!
Create accountAlready a member of Kodeco? Sign in
Contents
Scene Kit Tutorial: Getting Started
30 mins
Note from Ray: This is an abbreviated version of a chapter from iOS 8 by Tutorials released as part of the iOS 8 Feast to give you a sneak peek of what’s inside the book. We hope you enjoy!
In iOS 7, Apple made a huge push in the casual, mobile gaming space by introducing Sprite Kit, an incredible 2D-graphics framework. Developers had plenty to chew on for a whole year, and Sprite Kit gave everyone the capability to make simple iOS games with relative ease.
However, the 3D space continued to be largely inaccessible, requiring expert knowledge of computer graphics (OpenGL ES), or a sizeable wallet (Unity Pro).
Well, not anymore. :]
At WWDC 2012, Apple introduced Scene Kit to Mac OS X developers, and iOS-only devs like myself felt a little jealous that we weren’t invited to the party. Fortunately, it was just a short matter of time before Scene Kit joined the mobile space, and it’s very exciting to have it available to us in iOS 8!
While the focus of Scene Kit is 3D games, the fact of the matter is that it’s a powerful, easy to access, general-purpose 3D-graphics framework that has marvelous potential for non-gaming apps too.
In this Scene Kit tutorial, you’ll learn how to build a simple Scene Kit app by developing a 3D Carbon Visualizer.
3D visualization is a great option for explaining complex concepts – like chemical compounds, in this case – in a fun, playful, and easily digestible format. Words and diagrams are essential, but Scene Kit can definitely elevate your work to a new level!
Scene Kit Quick Start
By providing a built-in project template, Xcode 6 makes it very easy to get started with Scene Kit. Unlike Xcode 5’s OpenGL Game template, the new version of Scene Kit is a great introduction to the framework, and a solid starting point for a new project. In this section, you’ll take a quick look at this template and familiarize yourself with a basic Scene Kit scene.
Open Xcode and create a new project. Choose the iOS/Application/Game template and click Next.
Type in QuickStart for Product Name, select Swift for Language and select SceneKit for Game Technology. Leave everything else as-is, and click Next. Select a directory of your choice and click Create.
There is no need to examine or modify any code right now, just build and run! You’ll see a simple, rotating 3D plane, similar to the following screenshot:
Feel free to explore the scene using the available gestures (pinch, rotate, pan, tap). Also, be sure to take note of the scene statistics at the bottom of the view, defined by the following symbols:
- fps: frames per second
- ◆: draw calls per frame
- Δ: number of polygons
- •: number of vertices
This particular scene, with all the included functionality, is the result of a single file and about 100 lines of code. That’s how powerful Scene Kit is. :]
Close your QuickStart project now, because you’re going to build a new one from scratch!
Getting Started
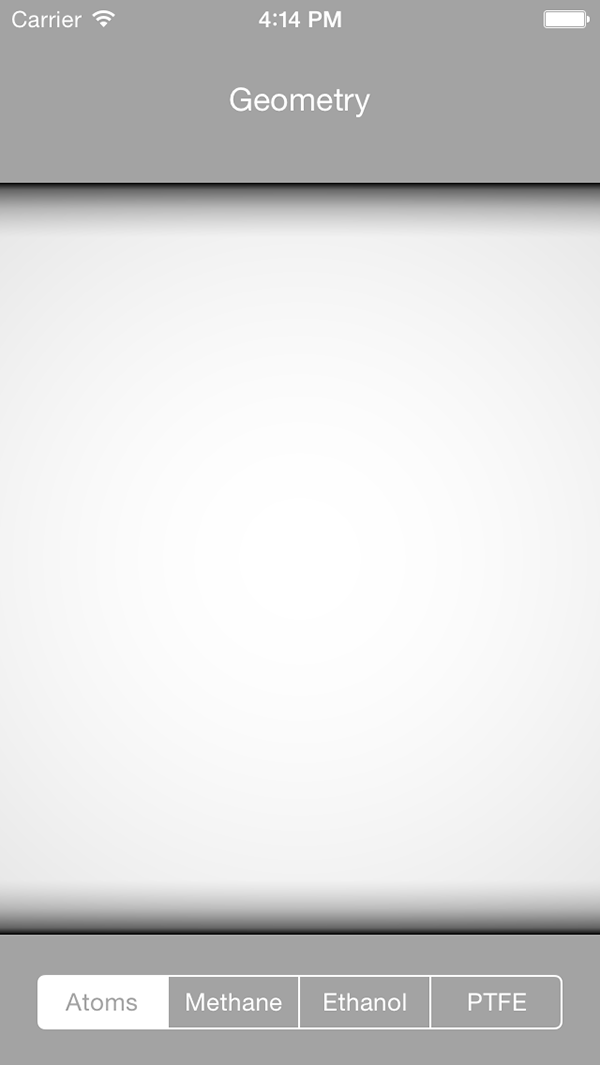
First, download the starter pack for this tutorial, unzip the contents and open the Xcode project titled CarbonVisualizer.xcodeproject. Build and run the project to see this screen:
Simple enough. At this stage, the project is very lightweight and takes care of the bulk of the setup steps for you, without writing any significant Scene Kit code just yet. The project contains all the Swift files you need, which you’ll implement incrementally as you work through this tutorial.
Furthermore, Main.storyboard contains a single view controller with two standard UI components, already linked to ViewController.swift. There’s also a new component, a SceneKit View; open up Main.storyboard so you can learn about it a bit more.
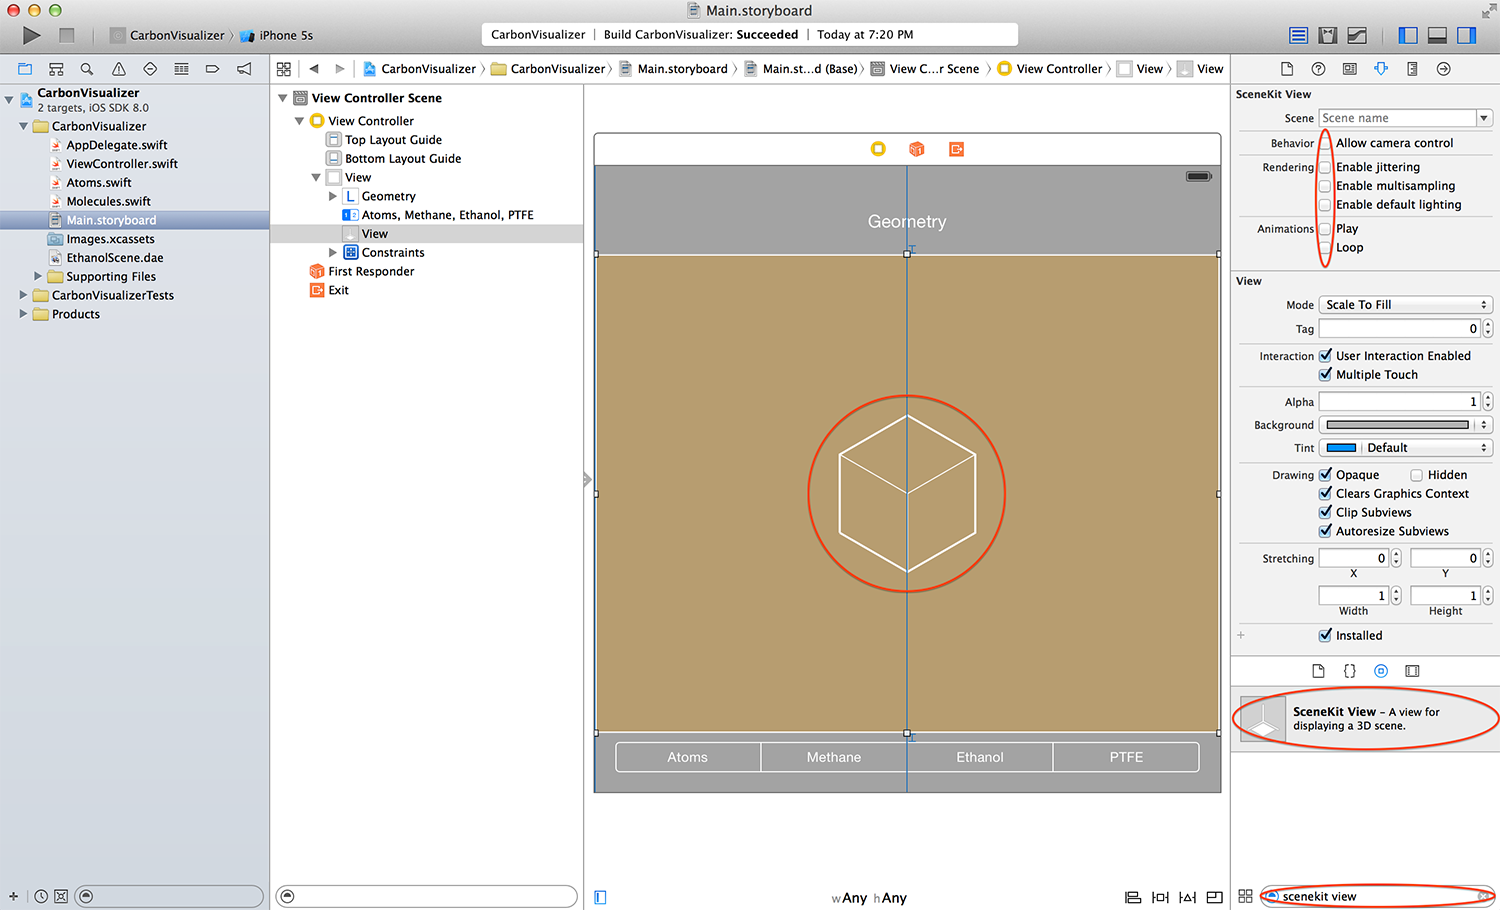
SceneKit View is a great out-of-the-box component available from the Object library of Interface Builder. SceneKit View is built for 3D graphics rendering – much like GLKit View – and allows you and/or your designer to set up many defining attributes of a scene quickly. For now though, you’ll be doing most of the work programmatically so you can switch between different solutions with ease.
Let’s get started with Scene Kit!
Your First Scene
With a SCNView already set up, your first step is to create an actual scene to display; but first, a primer on Scene Kit…
Scene Kit is a node-based framework that allows for uncomplicated construction and rendering of powerful scene graphs. The SCNScene
object you’ll create and manipulate in this tutorial contains a rootNode
property to which you can add several other SCNNode
objects as child nodes, thus forming a tree structure like so:
One major advantage of this system – especially in relation to this tutorial – is that any transformations applied to a node’s geometry also apply to that node’s children. For example, if a 3D Ferrari lunges forward 10ft, then all of its parts, like the seats and tires, move forward 10ft too – simulating real-world physics. Additionally, every component’s relative position to the car remains unchanged and independent e.g. a seat may tilt back without the car tilting back too.
Scene graph systems are very common in 3D graphics applications and you can read more about them here.
Your First Scene
Now it’s time to sit in the director’s chair and create your first scene! After a quick conference with your casting scouts, you’ve decided to cast a box as the lead actor of your pilot show.
You need to set up a quick test scene first to make sure the box looks good, so add the following function to ViewController.swift, just below viewDidAppear(animated:)
:
// MARK: Scene
func sceneSetup() {
// 1
let scene = SCNScene()
// 2
let boxGeometry = SCNBox(width: 10.0, height: 10.0, length: 10.0, chamferRadius: 1.0)
let boxNode = SCNNode(geometry: boxGeometry)
scene.rootNode.addChildNode(boxNode)
// 3
sceneView.scene = scene
}
Here’s what this code snippet does:
- You simply instantiate an empty scene (
SCNScene
), which will soon evolve into a more complex scene graph with lights, camera and geometry. - A box is created by defining a geometry instance (
SCNBox
) and attaching it to a node (SCNNode
), which is then appended to your scene’s root node. - Finally, your scene is attached to your
sceneView
.
Next, add the following line inside viewDidAppear(animated:)
just below the call to super
:
sceneSetup()
Build and run!
If you’re familiar with OpenGL development, you might be very excited about how you can render an object to your screen so few lines of code :]
However, you can’t tell whether your starring actor is a box or a flat square. How about you add some lighting to help here?
Lighting plays a critical role in any 3D scene and defines the “look and feel” of your work, and can be a bit of work to get perfect. Sometimes – like right now – you just need the bare minimum to get a glimpse of what’s going on. Thankfully, SCNView
has a property to accomplish this task by enabling default lighting. Add the following line to your code, just below sceneView.scene = scene
in sceneSetup
:
sceneView.autoenablesDefaultLighting = true
Build and run to see an improved rendering of your scene:
After shining a little light on the subject, it’s easier to infer depth and see a box taking shape on your screen. SCNView
has several powerful built-in features and default lighting is just the touching the surface (pun totally intended).
At the moment, your box is taking up far too much space in your scene, so it would be a good idea to zoom out of the object. The next SCNView
property you’ll enable is a helpful debugging feature that allows you to navigate your scene easily. Add the following line to the bottom of sceneSetup
to enable camera controls:
sceneView.allowsCameraControl = true
Build and run, then use the following gestures to your interact with your scene:
- Pan (one finger) or rotation: rotates the camera around the scene.
- Pan (two fingers): pans the camera across the scene.
- Pinch: zooms in/out of the scene.
If you’re using the iOS Simulator and having trouble making these gestures, please take a look at the iOS Simulator User Guide for more information.
Lights, Camera, Action!
The built-in SCNView
features are very useful, but also rather limited. In order to fully customize and control your scene, you must learn how to create and add multiple nodes to your scene graph, of various different types.
As film directors would say, “Lights, camera, action!” :]
Add the following lines to sceneSetup
, just below let scene = SCNScene()
:
let ambientLightNode = SCNNode()
ambientLightNode.light = SCNLight()
ambientLightNode.light!.type = SCNLightTypeAmbient
ambientLightNode.light!.color = UIColor(white: 0.67, alpha: 1.0)
scene.rootNode.addChildNode(ambientLightNode)
Here, you’re creating a new ambient light node with a 67% white color, then adding it to your scene.
Ambient light is a basic form of lighting that illuminates all objects in a scene evenly, with a constant intensity from all directions, much like cloud-filtered sunlight. It’s a great addition to most scenes when you want a more natural look. Otherwise, objects in shadow would be pure black and that’s not the desired effect in most cases – especially when you build a model-viewer type of app, like the one in this tutorial.
Although ambient light is part of the lighting equation, it’s not very useful on its own because it does little to illuminate surface details. So, add one more light to your scene with the following lines, just after your previous addition:
let omniLightNode = SCNNode()
omniLightNode.light = SCNLight()
omniLightNode.light!.type = SCNLightTypeOmni
omniLightNode.light!.color = UIColor(white: 0.75, alpha: 1.0)
omniLightNode.position = SCNVector3Make(0, 50, 50)
scene.rootNode.addChildNode(omniLightNode)
This new type of light is called an omnidirectional light, or point light. It’s similar to ambient light in that it has constant intensity, but differs because it has a direction. The light’s position relative to other objects in your scene determines its direction. Your box node’s default position is (0, 0, 0), so positioning your new light node at (0, 50, 50) means that it’s above and in front of your box.
Note: Don’t worry too much about units at this point. All units are relative to the scene and defined by your own set of rules. A position of (0, 50, 50) doesn’t mean 50 meters, miles, or light years; it’s simply 50 units. You’ll define a proper unit of measurement shortly.
Now that you’ve set up some lights, delete the following line from sceneSetup
:
sceneView.autoenablesDefaultLighting = true
Build and run! Pinch to zoom out, and you’ll find your box properly illuminated:
Behold your amazing and talented box! For this tutorial, these two sources will do just fine, but be sure to experiment with directional (SCNLightTypeDirectional
) and spot (SCNLightTypeSpot
) lights in future projects.
Next, set up a camera by adding the following lines just below where you setup the lights in sceneSetup
:
let cameraNode = SCNNode()
cameraNode.camera = SCNCamera()
cameraNode.position = SCNVector3Make(0, 0, 25)
scene.rootNode.addChildNode(cameraNode)
Just like the light nodes, a camera node is just as easy – if not easier – to set up. The default projection settings are spot-on for a basic scene, so you don’t have to modify the camera’s field of view, focal range or other properties. The only thing you need to define is its position, conveniently set right in front of your box at (0, 0, 25).
Build and run to “get behind the lens.”
Note: The default projection type of a SCNCamera
is perspective, but you can easily change this to orthographic projection by enabling usesOrthographicProjection
and setting an appropriate orthographicScale
value.
Now, if you navigate your scene with the default camera controls (rotation, specifically), you’ll notice an odd effect: you might expect the box to rotate and the lighting to stay in place but, in fact, it’s actually the camera rotating around the scene. That’s why you see the box from different points of view.
The default camera controls are very powerful, but not customizable. In order to gain total control, you’ll create your own. First, add the following variables to ViewController.swift, just above viewDidLoad
:
// Geometry
var geometryNode: SCNNode = SCNNode()
// Gestures
var currentAngle: Float = 0.0
Dealing with a single box is simple enough, but once you have more complex models with multiple geometry sources, it’ll be much easier to manage them as a single node – hence the addition of geometryNode
. Furthermore, currentAngle
will help modify the y-axis rotation of geometryNode
exclusively, leaving the rest of your scene nodes untouched.
Next up, add the following function below sceneSetup
:
func panGesture(sender: UIPanGestureRecognizer) {
let translation = sender.translationInView(sender.view!)
var newAngle = (Float)(translation.x)*(Float)(M_PI)/180.0
newAngle += currentAngle
geometryNode.transform = SCNMatrix4MakeRotation(newAngle, 0, 1, 0)
if(sender.state == UIGestureRecognizerState.Ended) {
currentAngle = newAngle
}
}
Whenever sceneView
detects a pan gesture, this function will be called, and it transforms the gesture’s x-axis translation to a y-axis rotation on the geometry node (1 pixel = 1 degree).
In this implementation, you modify the transform property of geometryNode
by creating a new rotation matrix, but you could also modify its rotation
property with a rotation vector. A transformation matrix is better because you can easily expand it to include translation and scale.
Next, add the following lines to sceneSetup
, just above sceneView.scene = scene
:
geometryNode = boxNode
let panRecognizer = UIPanGestureRecognizer(target: self, action: "panGesture:")
sceneView.addGestureRecognizer(panRecognizer)
These lines finalize the setup by connecting your new functions and variables. Finally, remove the default camera controls by deleting the following line:
sceneView.allowsCameraControl = true
Build, run, action! Now try rotating your cube with a one-finger pan.
Much better :]
Note: A full 3D transformation engine with gestures is far too complex for this tutorial, but definitely worth a look. Luckily, for you, it’s something we’ve covered on our site before! Check out OpenGL ES Transformations with Gestures for the implementation details.
Atoms
Your box has been a fine star for the scene so far, and did its job in helping you create a pilot app, but now it’s time to kick it to the curb. Since you’re going to build an app with a purpose, you’re going to recast your actors and develop a 3D visualizer starring the common carbon compounds: natural gas, alcohol and Teflon.
These compounds will display as ball-and-stick models (molecules) made of bonded atoms. Atoms are quite complex, but for this tutorial a single sphere will represent each one as it’s an easy way to depict a basic unit of matter. This model is a simple, but useful way to represent molecular structures in chemistry, and you can learn more about it here.
The first atom you’ll create is, of course, carbon. Open up Atoms.swift and add the following class function inside the Atoms
class:
class func carbonAtom() -> SCNGeometry {
// 1
let carbonAtom = SCNSphere(radius: 1.70)
// 2
carbonAtom.firstMaterial!.diffuse.contents = UIColor.darkGrayColor()
// 3
carbonAtom.firstMaterial!.specular.contents = UIColor.whiteColor()
// 4
return carbonAtom
}
Note: If you’re just getting to know Swift, a class function (otherwise, known as type function), is a function that is called directly on a class, rather than on an instance of that class.
In Objective-C, these methods are indicated by the use of plus sign before for the actual method name. For example: + (SCNGeometry *)carbonAtom
;
This is a very compact function, but each line is worth understanding completely:
- As previously mentioned, atoms will be modeled as spheres. 1.70 is the van der Waals radius of carbon, which corresponds to the radius of an atom, in angstroms (10-10m), if it were a perfect sphere. Now that you’ve assigned a unit of measurement to your atom, the rest of your scene will be relative to this unit.
-
firstMaterial
is a property of typeSCNMaterial
, which defines your atom’s material. Think of diffused shading as the intrinsic/base color of a surface. In Scene Kit, you can define this by a color, texture, or other source. For additional information, please refer to How to Export Blender Models to OpenGL ES: Part 2/3 - Specular shading is another material property, which is the reflective color of a surface. For most materials, this is usually pure white.
- All atom models in this tutorial will be declared as type methods, following a factory method pattern. This will be especially useful when creating molecules with many different atoms of the same type, with these methods returning a fully modeled geometry object.
Now that you understand how to create a type method for a carbon atom, the rest of the atoms in this tutorial will be just as easy to model. Add the following code to the Atoms
class:
class func hydrogenAtom() -> SCNGeometry {
let hydrogenAtom = SCNSphere(radius: 1.20)
hydrogenAtom.firstMaterial!.diffuse.contents = UIColor.lightGrayColor()
hydrogenAtom.firstMaterial!.specular.contents = UIColor.whiteColor()
return hydrogenAtom
}
class func oxygenAtom() -> SCNGeometry {
let oxygenAtom = SCNSphere(radius: 1.52)
oxygenAtom.firstMaterial!.diffuse.contents = UIColor.redColor()
oxygenAtom.firstMaterial!.specular.contents = UIColor.whiteColor()
return oxygenAtom
}
class func fluorineAtom() -> SCNGeometry {
let fluorineAtom = SCNSphere(radius: 1.47)
fluorineAtom.firstMaterial!.diffuse.contents = UIColor.yellowColor()
fluorineAtom.firstMaterial!.specular.contents = UIColor.whiteColor()
return fluorineAtom
}
There you have it: hydrogen, oxygen, and fluorine.
All atoms have the same method template and simply differ in sphere radius and diffuse color. In order to display all these atoms together, you’ll add them to a single node. To do so, add the following type method to the Atoms
class, at the bottom of the file (just before the closing brace):
class func allAtoms() -> SCNNode {
let atomsNode = SCNNode()
let carbonNode = SCNNode(geometry: carbonAtom())
carbonNode.position = SCNVector3Make(-6, 0, 0)
atomsNode.addChildNode(carbonNode)
let hydrogenNode = SCNNode(geometry: hydrogenAtom())
hydrogenNode.position = SCNVector3Make(-2, 0, 0)
atomsNode.addChildNode(hydrogenNode)
let oxygenNode = SCNNode(geometry: oxygenAtom())
oxygenNode.position = SCNVector3Make(+2, 0, 0)
atomsNode.addChildNode(oxygenNode)
let fluorineNode = SCNNode(geometry: fluorineAtom())
fluorineNode.position = SCNVector3Make(+6, 0, 0)
atomsNode.addChildNode(fluorineNode)
return atomsNode
}
This is a rather lengthy function, but it’s also easy to digest. It simply creates and returns a new node that contains four children, one for each atom, nicely positioned along the x-axis. To see them in your scene, open up ViewController.swift and add the following lines to viewDidAppear(animated:)
, just below the call to sceneSetup
:
geometryLabel.text = "Atoms\n"
geometryNode = Atoms.allAtoms()
sceneView.scene!.rootNode.addChildNode(geometryNode)
Finally, remove your previous box object by deleting these lines from inside sceneSetup
:
let boxGeometry = SCNBox(width: 10.0, height: 10.0, length: 10.0, chamferRadius: 1.0)
let boxNode = SCNNode(geometry: boxGeometry)
scene.rootNode.addChildNode(boxNode)
geometryNode = boxNode
Build and run (or, as Radioactive Man would say: “Up and atom!”). You should see four nicely rendered atoms:
Awesome job so far! The scene is coming together, and now is a good time to take a quick break if you need to.
Molecules
As you may remember from science class, molecules are groups of two or more atoms held together by chemical bonds. All carbon compounds comprise of molecules of varying complexity. In this section of the tutorial, you’ll build 3D models for various molecules, using your new atoms as building blocks.
You’ll learn about and build each molecule separately, but they’ll all follow a similar pattern. Your first task is to lay the foundation of your molecules, so open up Molecules.swift and add the following lines inside the Molecules
class:
class func methaneMolecule() -> SCNNode {
var methaneMolecule = SCNNode()
return methaneMolecule
}
class func ethanolMolecule() -> SCNNode {
var ethanolMolecule = SCNNode()
return ethanolMolecule
}
class func ptfeMolecule() -> SCNNode {
var ptfeMolecule = SCNNode()
return ptfeMolecule
}
Just like your atoms, you develop your molecules as type methods, which return nodes that you can plug directly into your scene.
Next, open up ViewController.swift and add the following lines inside segmentValueChanged(sender:)
:
// 1
geometryNode.removeFromParentNode()
currentAngle = 0.0
// 2
switch sender.selectedSegmentIndex {
case 0:
geometryLabel.text = "Atoms\n"
geometryNode = Atoms.allAtoms()
case 1:
geometryLabel.text = "Methane\n(Natural Gas)"
geometryNode = Molecules.methaneMolecule()
case 2:
geometryLabel.text = "Ethanol\n(Alcohol)"
geometryNode = Molecules.ethanolMolecule()
case 3:
geometryLabel.text = "Polytetrafluoroethylene\n(Teflon)"
geometryNode = Molecules.ptfeMolecule()
default:
break
}
// 3
sceneView.scene!.rootNode.addChildNode(geometryNode)
Here’s the breakdown for the code:
- Whenever you select a new segment, your scene changes to display a new model. To clean up the previous model, it must be removed from its parent node (i.e. the scene’s root node) and have its rotation angle reset.
- A new model is assigned to
geometryNode
, andgeometryLabel
is updated accordingly with the model’s name. - Finally, the new model is added to the scene.
Build and run! Try selecting different segments, and you’ll notice an empty scene for Methane, Ethanol and PTFE, since you haven’t created the molecules yet. Make sure the label’s text changes for each segment. Also, note that Atoms will always display with its default starting position upon selection.
Methane
Methane is the main component of natural gas. It’s composed of one carbon atom and four hydrogen atoms, with the molecular formula CH4. This molecule is very easy to convert into a 3D model, with carbon in the middle and hydrogen evenly spaced around it, so jump right in!
Open up Molecules.swift and add the following function inside the Molecules
class, at the very end:
class func nodeWithAtom(atom: SCNGeometry, molecule: SCNNode, position: SCNVector3) -> SCNNode {
let node = SCNNode(geometry: atom)
node.position = position
molecule.addChildNode(node)
return node
}
All atoms added to a molecule follow a generic procedure, where they:
- Initialize a new node
- Are given a position
- Are added as a child to the molecule node
The previous function does just that and will be put to use for every atom of a molecule.
Next, replace your methaneMolecule
stub with the following:
class func methaneMolecule() -> SCNNode {
var methaneMolecule = SCNNode()
// 1 Carbon
let carbonNode1 = nodeWithAtom(Atoms.carbonAtom(), molecule: methaneMolecule, position: SCNVector3Make(0, 0, 0))
// 4 Hydrogen
let hydrogenNode1 = nodeWithAtom(Atoms.hydrogenAtom(), molecule: methaneMolecule, position: SCNVector3Make(-4, 0, 0))
let hydrogenNode2 = nodeWithAtom(Atoms.hydrogenAtom(), molecule: methaneMolecule, position: SCNVector3Make(+4, 0, 0))
let hydrogenNode3 = nodeWithAtom(Atoms.hydrogenAtom(), molecule: methaneMolecule, position: SCNVector3Make(0, -4, 0))
let hydrogenNode4 = nodeWithAtom(Atoms.hydrogenAtom(), molecule: methaneMolecule, position: SCNVector3Make(0, +4, 0))
return methaneMolecule
}
It’s a large block of code, but still pretty straightforward. Here, you’re adding one carbon atom at the center of your molecule (0, 0, 0) and four hydrogen atoms around it (think north, east, south, west).
Build and run! Switch to the Methane segment to see the beginnings of your new molecule:
Awesome – now you’re rendering in style!
Where To Go From Here?
Here is the completed project with all of the code and resources for this Beginning Scene Kit tutorial. You can also find its repository on GitHub.
Congratulations, you’ve taken a great first step into Scene Kit and learnt the basics of this new and exciting 3D API!
So far, your atoms are in place but you still have to create bonds between them. You’ve also yet to experiment with COLLADA files and procedural geometry. So, what are you waiting for then?
If you want to learn more, check out iOS 8 by Tutorials. I go a bit further with this example there and show you how to implement the remaining molecules, and Jake Gundersen also has another entire chapter on more advanced Scene Kit techniques.
If you have any questions, comments or suggestions, feel free to join the discussion below!
All videos. All books.
One low price.
A Kodeco subscription is the best way to learn and master mobile development — plans start at just $19.99/month! Learn iOS, Swift, Android, Kotlin, Flutter and Dart development and unlock our massive catalog of 50+ books and 4,000+ videos.
Learn more