Creating a Cross-Platform Multiplayer Game in Unity — Part 1
Learn how to create a cross-platform multiplayer game in Unity in the first of a fourth part tutorial. By Todd Kerpelman.
Introducing Google Play Game Services
Although negotiating network connections between devices behind various firewalls might sound like fun to some, most developers choose to use third-party libraries to handle many of the “complicated but not fun” tasks of initiating multiplayer games. There are lots of choices for third-party frameworks out there, but this tutorial uses Google Play game services for the following reasons:
- It’s free.
- There’s a plug-in available for Unity.
- The plug-in is also free.

Yes, skeptical cereal-eating man, it’s true. Game Center does provide some really good support for real-time multiplayer, but it’s only available for iOS devices. In this day and age, there’s probably a very good chance that even the most hardcore iOS fan has an Android-using friend or two that they’d like to play games with.
One of the advantages of using Unity to make your 2D game is that you can easily export your game to both Android and iOS, and it would be awfully nice if your multiplayer solution followed suit. In the interest of full disclosure, I work for Google and I occasionally play Towerfall with the people who made Google Play game services, so I’m just a teeny bit biased.
Google Play game services includes a number of features for game developers including achievements, leaderboards, saving your game in the cloud, creating quests, and, most importantly for this tutorial, support for turn-based and real-time multiplayer. You won’t implement any of these features right now except for real-time multiplayer. However, once you go through the work to integrate Play services into your game, it’s probably worth checking out some of the other features to see what they can offer you.
Setting Up Google Play Game Services
Okay, I’ll level with you here: there’s a bit of setup required to get things going. But stick with me — once you get through this part, you can go back to writing glorious code!
Registering Your Game
Before you do anything else, you’ll need to register your application with the Google Play Developer Console and get yourself a Client ID. This identifies your app with the service and lets you perform important actions like signing in the user.
Open https://play.google.com/apps/publish/ in your browser. If you don’t have a Google Play developer account, you can set one up at this point:

If you have an account and log in, you will see a screen that either looks like this:
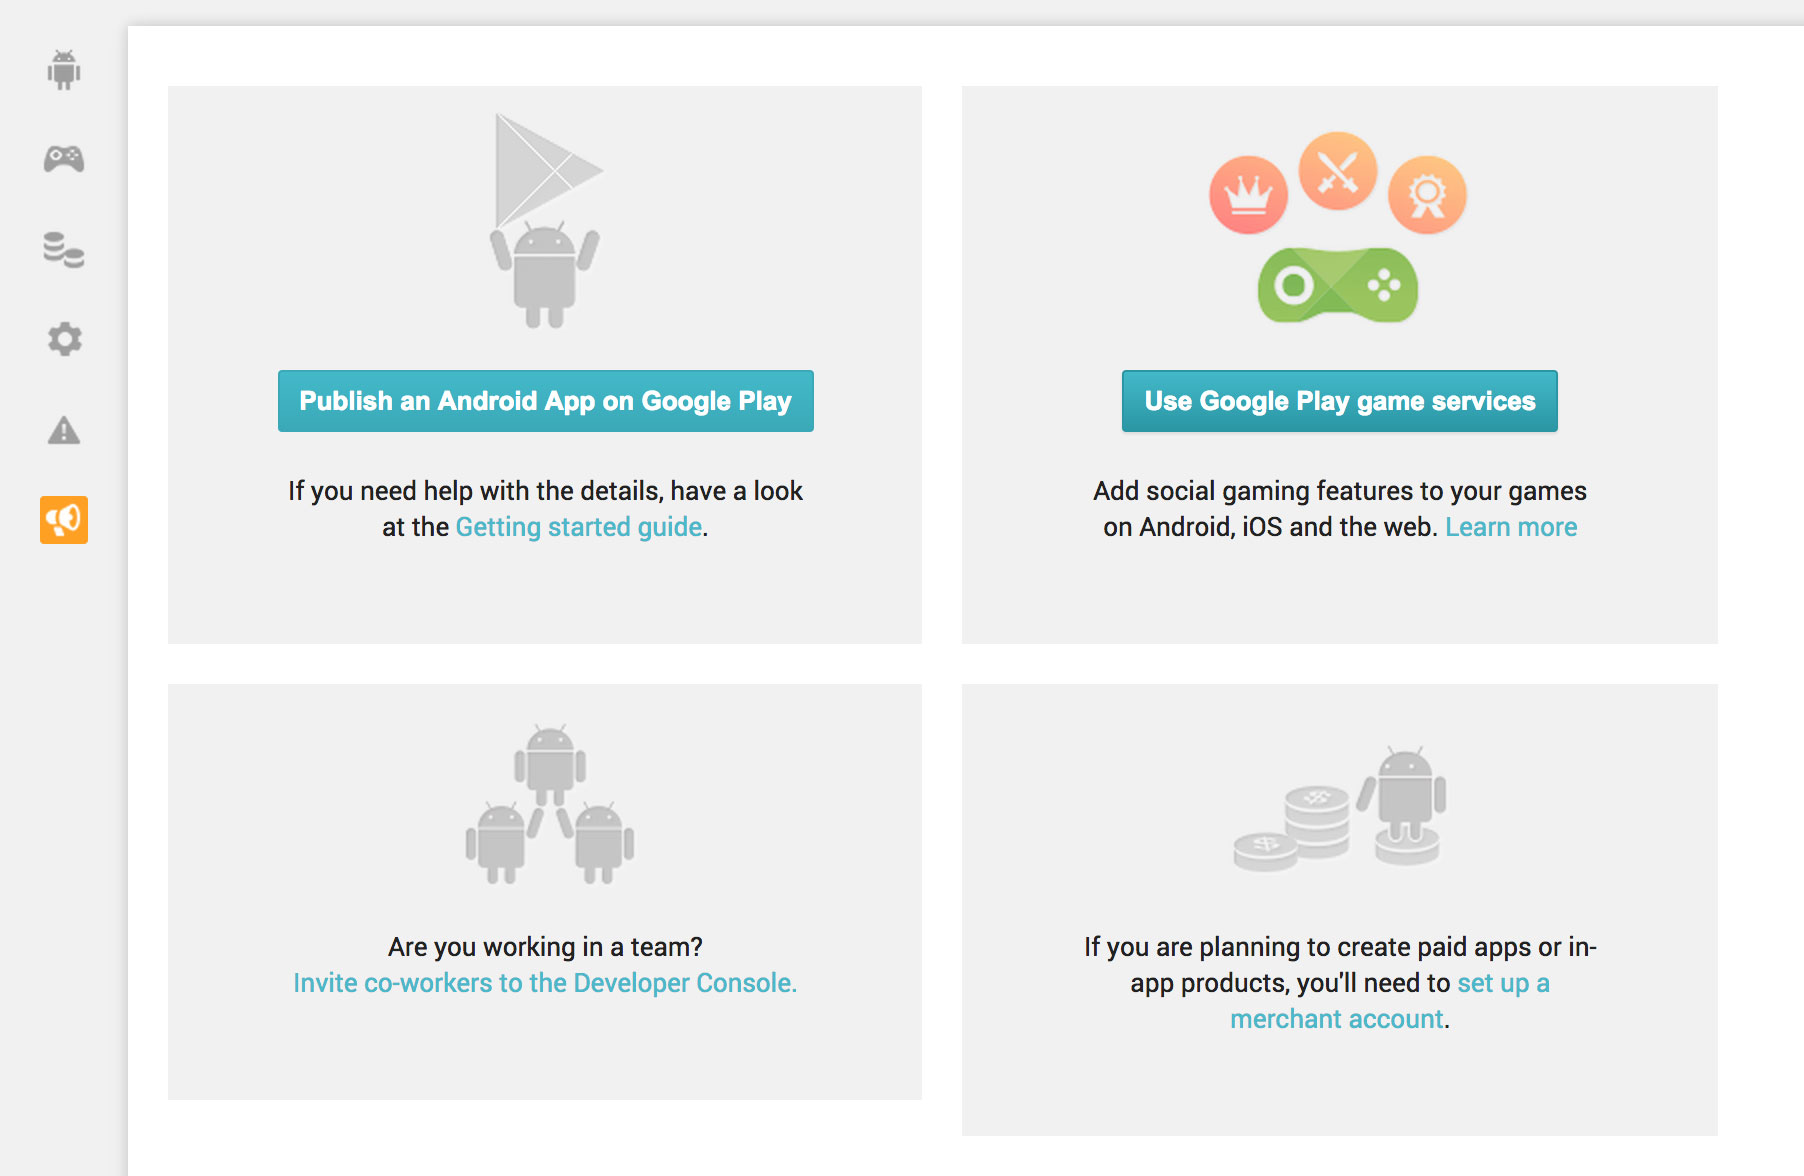
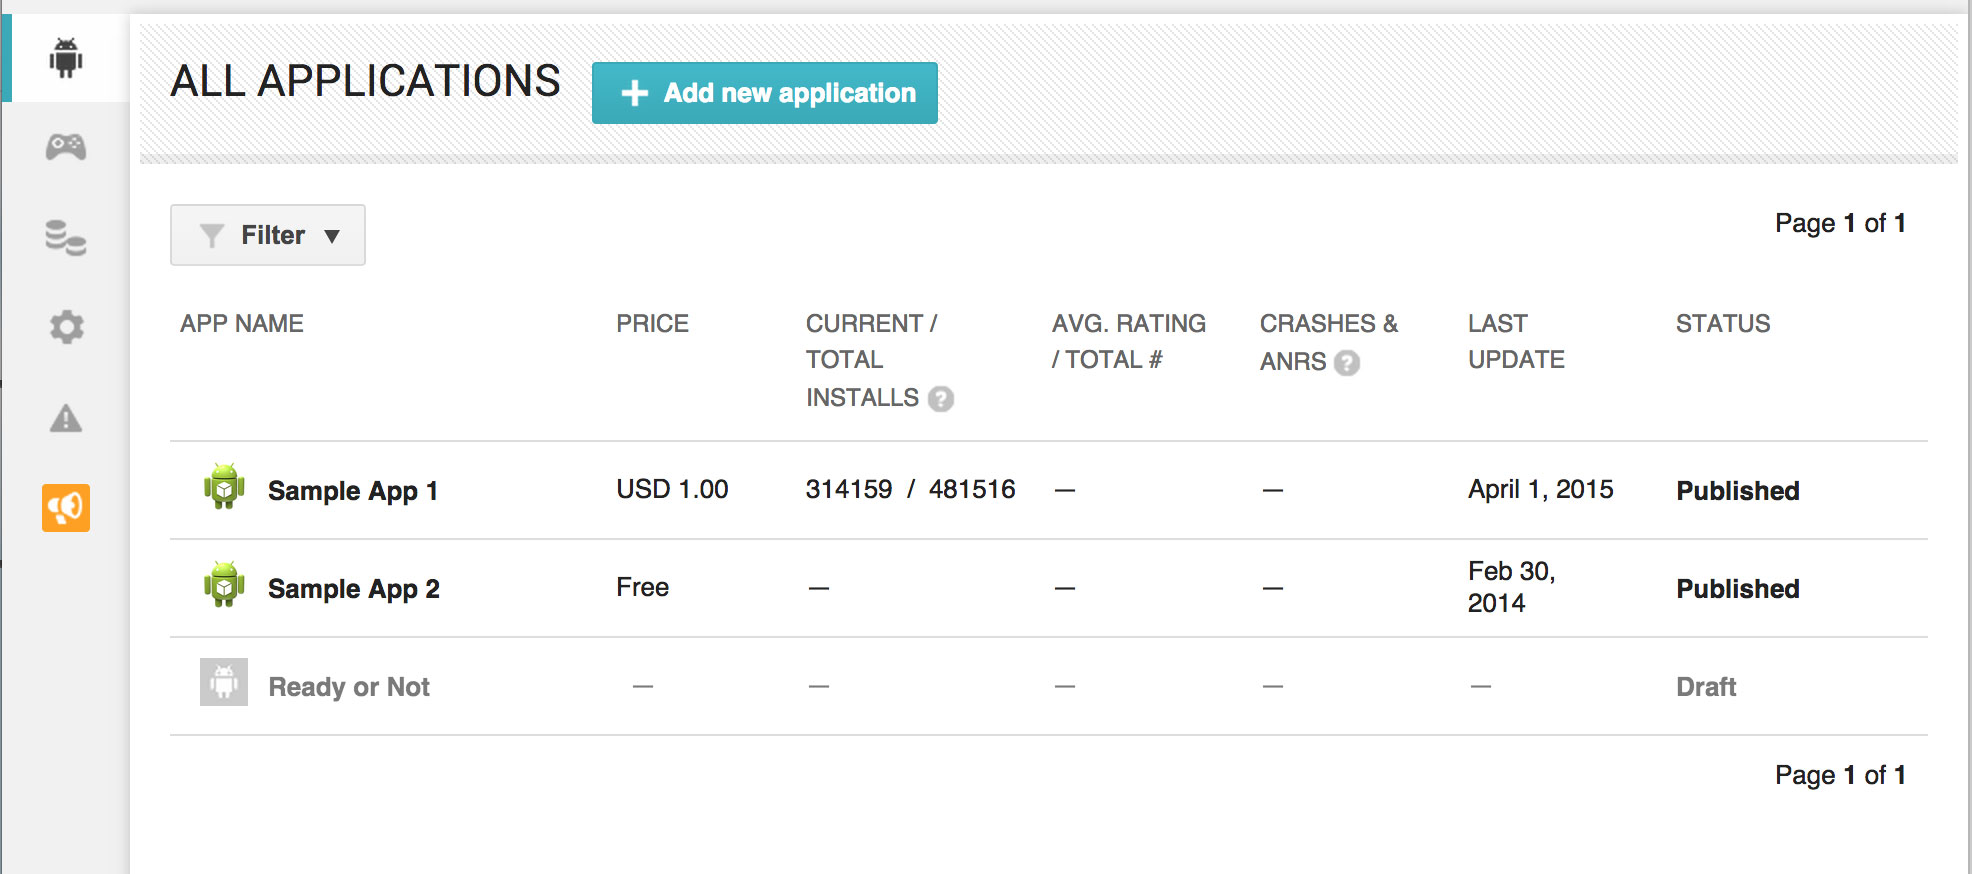
…or one that shows your existing applications:
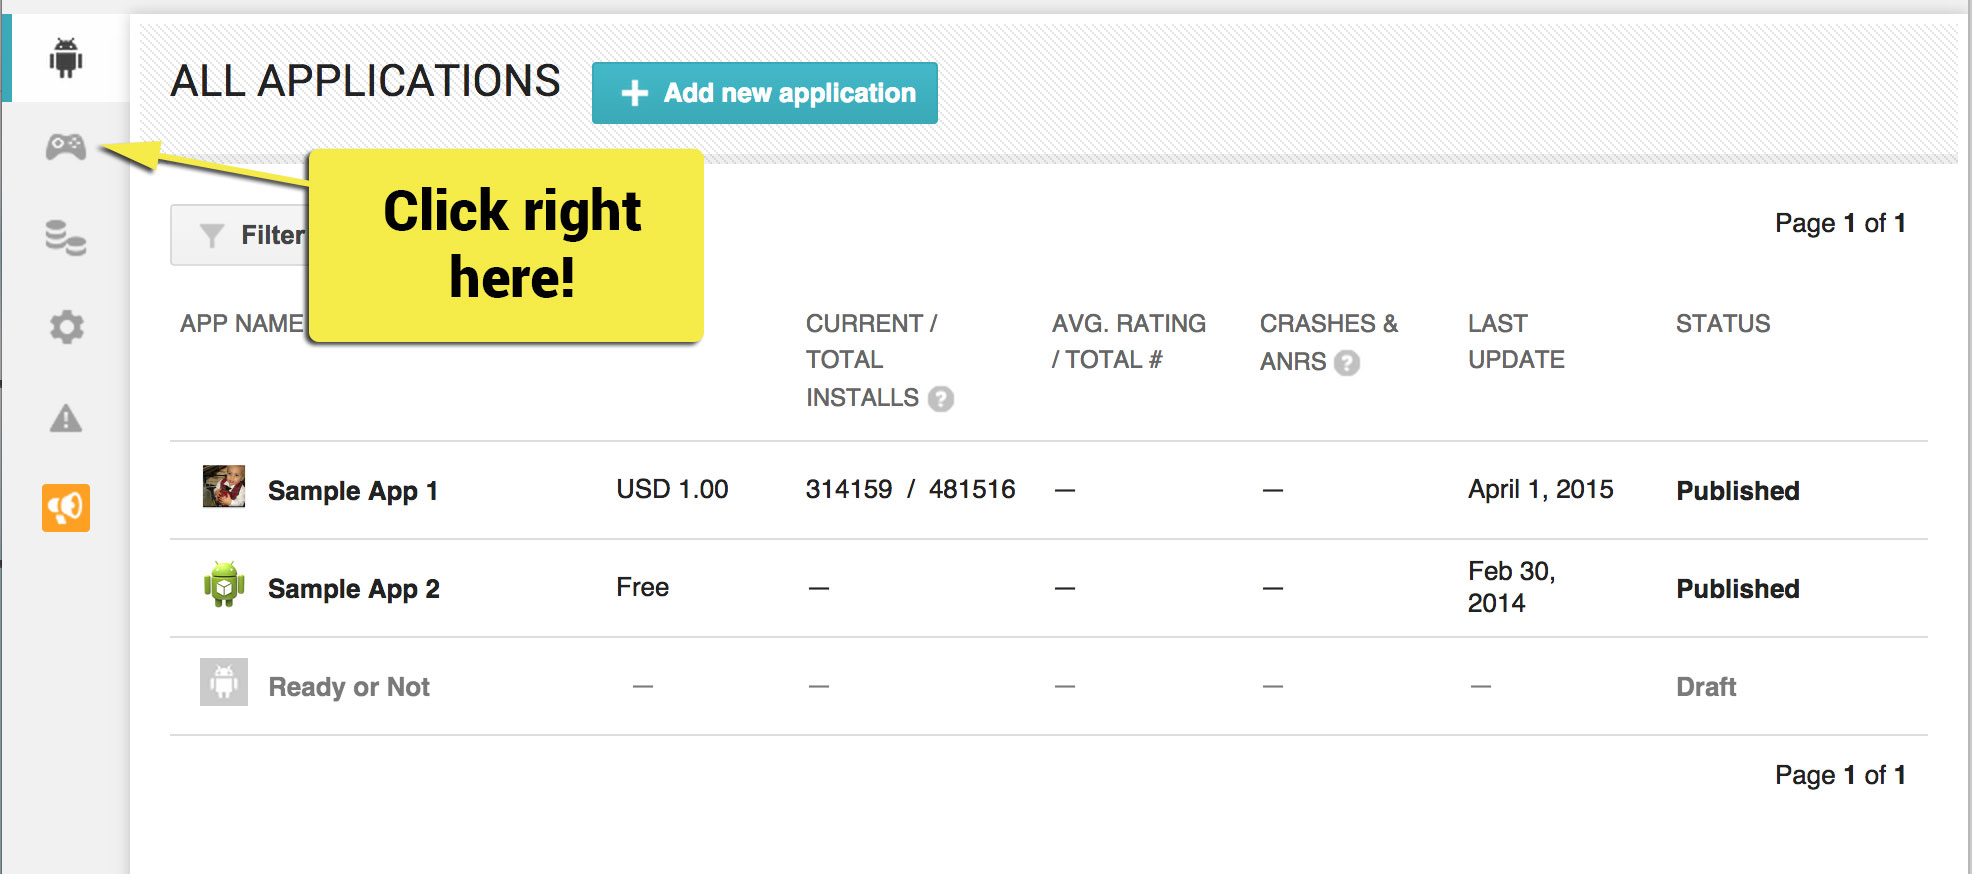
Either way, get started by clicking the little gamepad icon on the left:
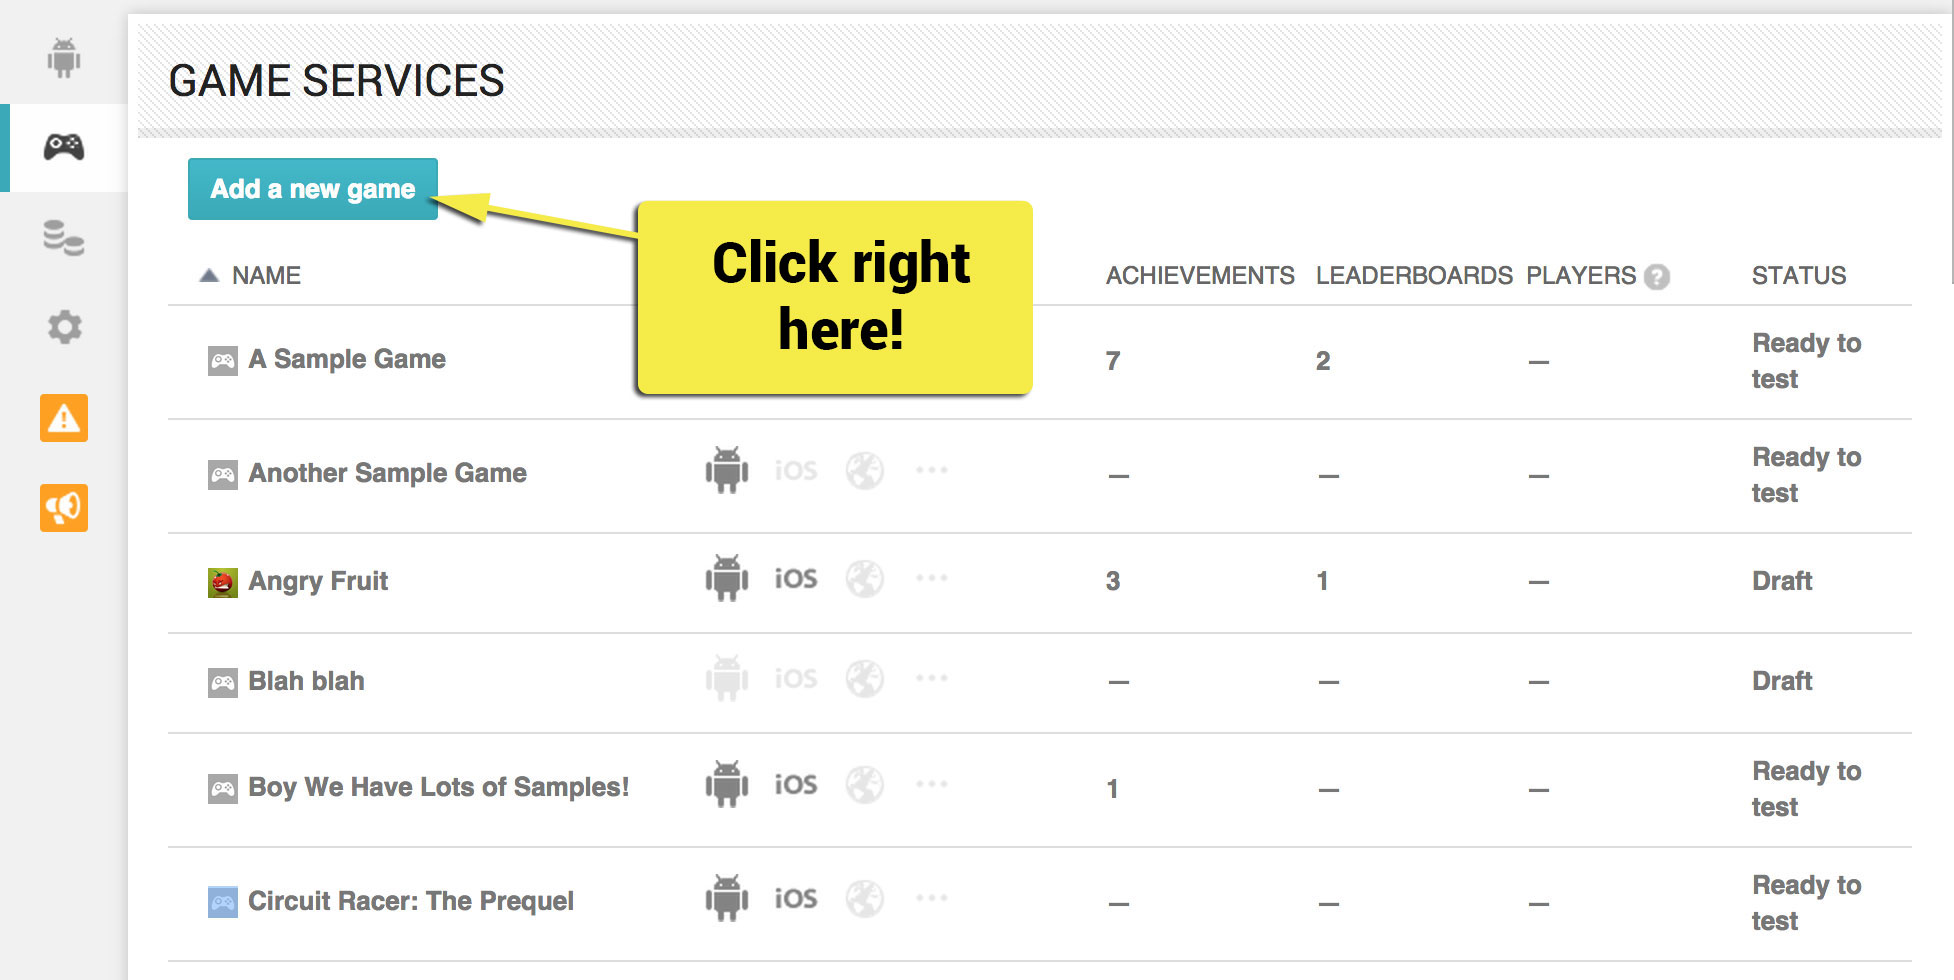
Next, click the Set Up Google Play game services button like so:

If you’ve set up Play game services before, click on the Add a new game button at the top of the screen:
A dialog box will appear with two tabs: the first tab is relevant if you aren’t yet using any Google APIs in your game, and the second is for the case where you’re working with an existing game that already uses Google APIs. You’re definitely in the first situation, so leave the dialog on the first tab.
Name your project appropriately; you can call it whatever you like, as it doesn’t need to be unique. Choose a game category as well; “Racing” is probably a good choice, but hey, it’s a free country. When you’re done, your dialog should look like the following:

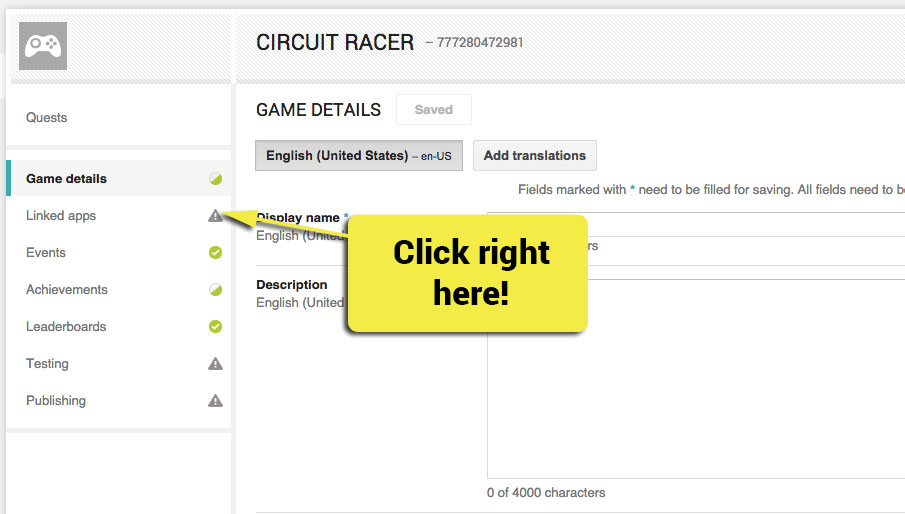
Click Continue, and you’ll find yourself on the Game Details page, where you can add a name, a description and some graphics to your game. This are things you’ll have to handle before you publish your game in real life, but for the purposes of this tutorial you can skip filling out these items for now.
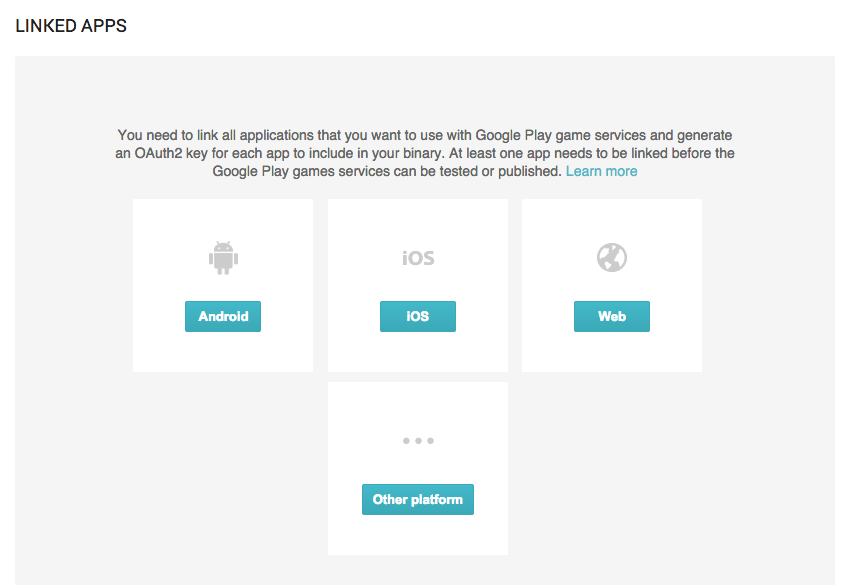
Instead, you’ll set up your Client ID. Click on the Linked Apps tab on the left side as shown below:
Next, select iOS from the given options like so:
In the next page that appears, leave Name set to whatever is prefilled for you and leave both iPad and iPhone set to YES. Next, enter the Bundle ID you assigned to your game back in the Build Settings step.
Leave the iTunes App ID blank; you don’t need this for now. Your page should now look like the following:
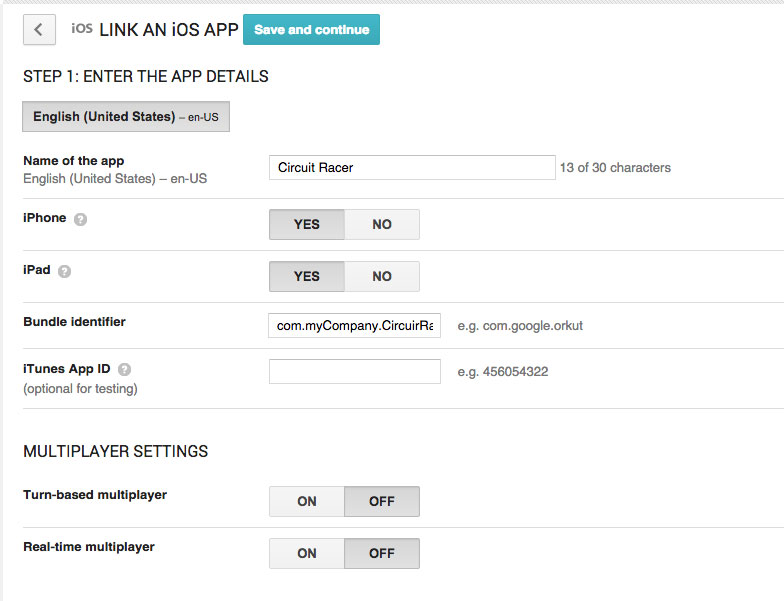
Below that, you have two separate options in the Multiplayer Settings section to enable turn-based and real-time multiplayer support for your game. But which one do you want?
Turn-Based vs. Real-Time: A Quick Primer
Google Play game services, along with many other game frameworks, supports turn-based and real-time games. Here’s a quick introduction to what each of these mean:
A real-time game requires that everybody be present and playing at the same time; it generally applies to games where all players play at once and see each other’s moves as they happen. Examples of this include first-person shooters, multiplayer online battle arenas, and most sports games.
Turn-based games, on the other hand, are generally played by one person at a time, usually while the other players aren’t active and — gasp! — might not even have their phones with them. With these types of games it might take a day or two for players to take their next turn; as a result, this option is most useful for games that are slower, more contemplative, or involve situations where a single player’s turn can take a long time. Words With Friends and Draw Something are prototypical examples of turn-based games.
Pop quiz, hotshot: you’re making a Texas Hold’em poker game. Should this be turn-based, or real-time? Check your answer below.
[spoiler title="Answer"]
While, poker is technically a turn-based game, people are expected to take very quick turns in rapid succession, so instead you’d want this to be a real-time game. Can you imagine a poker game where it took 48 hours for each player to decide whether to bet, raise or fold? It could take a month to get past the first round of betting! Talk about boring! :]
[/spoiler]
In your racing game, you’ll have two players racing against each other on the same playing field, so turn the Real-time multiplayer setting to ON.
Click the Save and continue button at the top of the screen. Next, you’ll see a screen like the one below where you’re asked to authorize your app:

This is where you create your client ID, which is essentially an identifier that identifies your app on Google’s servers. Click the Authorize your app now button.
The first dialog that appears lets you add your company’s name, logo, and home page; these settings determine how your game appears in the various screens that prompt the user to sign in to your application:

For this tutorial, just click Continue.
The next dialog asks for your bundle identifier and App Store ID. It’s been pre-populated with the same information you added previously in Step 1 of the dialog, so you shouldn’t have to do anything here. Simply confirm everything is correct, then click Create client:

Once the page finishes processing, you will see a giant string ending with apps.googleusercontent.com — this is your Client ID:

Copy and paste this string into a text file somewhere, as you’re going to need it later.