How to Make a Game Like Candy Crush Tutorial: OS X Port
Learn how to take an existing iOS Sprite Kit game and level it up to work on OS X too! By Gabriel Hauber.
Getting the game running on OS X
As you might imagine, after all that work, you must be really close to getting the OS X version running. And you’d be right!
Switch the current build target to CookieCrunch Mac and invoke a build. There should only be three errors, all instances of the same problem that you’ll have to deal with now:
Swift Compiler Error ‘SKView’ does not have a member named ‘userInteractionEnabled’
Under iOS, the UIView class declares this property. Unfortunately, NSView doesn’t. But all is not lost: with a custom subclass of SKView it is possible to implement this property yourself.
Checking the documentation for the NSView class, you will find the hitTest function. From the discussion in the documentation:
This method is used primarily by an NSWindow object to determine which view should receive a mouse-down event. You’d rarely need to invoke this method, but you might want to override it to have a view object hide mouse-down events from its subviews.
Ah, that sounds like what you want! If you override this function and return nil when user interaction should be disabled, the view won’t receive any mouse events. This should emulate exactly the userInteractionEnabled behaviour of UIKit.
In the CookieCrunch Mac group, create a new Swift file CCView.swift. Only add it to the OS X target and not iOS. Replace the contents of CCView.swift with the following:
import SpriteKit

@objc(CCView)
class CCView: SKView {

  var userInteractionEnabled: Bool = true

  override func hitTest(aPoint: NSPoint) -> NSView? {
    if userInteractionEnabled {
      return super.hitTest(aPoint)
    }
    return nil
  }
}
That looks pretty easy, doesn’t it? If user interaction is enabled, perform the normal hit testing functionality, otherwise return nil to say “nope! don’t send any mouse down events to me!”.
Note the line @objc(CCView) – this is needed so the compiled nib from Interface Builder can find and load the class. The @objc directive instructs the compiler that the CCView class should be accessible from Objective-C classes as well.
To use this class instead of the standard SKView you need to make changes in two places.
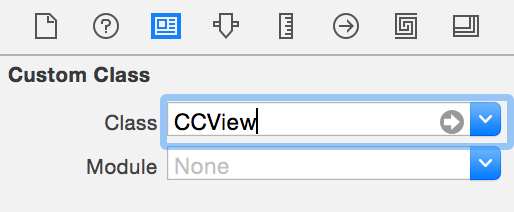
The first is in MainMenu.xib. Select it, then in the document outline, select the SKView object, which is contained inside a parent view:

In the Identity Inspector change SKView to CCView as shown below:
In the CookieCrunch Mac AppDelegate.swift, change the line:
@IBOutlet weak var skView: SKView!
to:
@IBOutlet weak var skView: CCView!
And in GameController.swift file in the shared group, change:
let view: SKView
to:
let view: CCView
And change:
init(skView: SKView) {
to:
init(skView: CCView) {
Now Build the OS X target. The errors you had previously should have gone!
Of course, some new errors have been introduced into the iOS target: it doesn’t yet know about anything called CCView. To fix this is relatively simple.
Open GameViewController.swift and, just below the import statements, add the following line:
typealias CCView = SKView
SKView already has everything you need because it subclasses from UIView, so creating a type alias on iOS is all you need to do.
Now change the line in viewDidLoad():
let skView = view as! SKView
to:
let skView = view as! CCView
Build and run the iOS target to verify that it works again.
Now switch back to the OS X target and build and run. Surprised? All you see is a blank grey window. This is because no instance of the GameController is created in the CookieCrunch Mac AppDelegate!
In the CookieCrunch Mac group, open AppDelegate.swift. Add the following variable to the class:
var gameController: GameController!
This will store a strong reference to the game controller instance so it doesn’t get deallocated while the game is playing. Now, add one simple line to applicationDidFinishLaunching:
gameController = GameController(skView: skView)
Build and run, and voilà! Cookie Crunch running as a native Mac OS X application!

OS X Finishing Touches
While the game runs just fine on OS X, there are a few issues you still have to deal with.
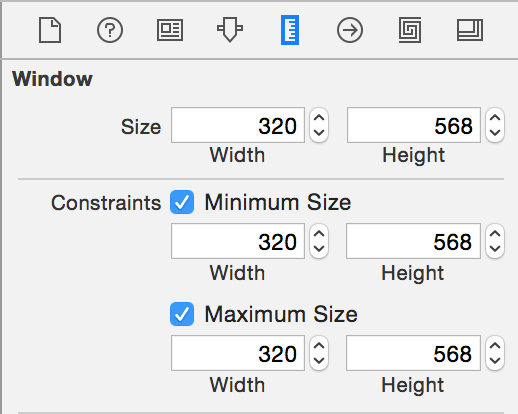
The first thing you’ll notice is that the window is much too big for the game. When you resize it, the game scales but the score labels can be cut off. To fix this, open MainMenu.xib. Select the CookieCrunch Mac window. In the Inspector area on the right, select the Size Inspector:

Since the @2x background image is 320 x 568 points at 1x scale, set the initial window size to match. To prevent resizing, set the minimum and maximum size to the same values:
Build and run. The game is now sized appropriately and does not allow resizing:
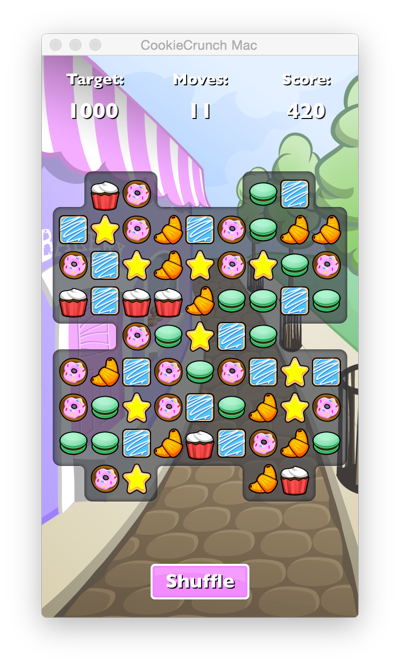
Congratulations! Your OS X conversion of Cookie Crunch is complete!
Where to go from here?
You can grab the completed sample files for this project from here.
If you take a look over the project, you’ll see that the amount of platform-specific code is really quite low. By using Sprite Kit for the UI elements as well as the game itself, you have achieved an extremely high level of code reuse! Although developing a UI for a Sprite Kit game in a storyboard for iOS makes it easy to rapidly prototype the game, when it comes to porting to OS X it makes it very difficult, so you might want to consider going Sprite Kit-only from the start.
If you have any comments or questions, feel free to join the discussion below!