Trigonometry for Game Programming – SpriteKit and Swift Tutorial: Part 2/2
Learn trigonometry for game programming using SpriteKit and Swift. You will learn the theory and then practice using trigonometry by making a space shooter game! By Bill Morefield.
Getting Started
Firing a Missile by Swiping
Calculating Missile Destination
Making a Missile Travel at a Constant Speed
Detecting Collision Between Cannon and Missile
Adding an Orbiting Asteroid Shield for the Cannon
Spinning the Asteroid Around Its Axis
Detecting Collision Between Missile and Orbiter
Game Over, With Trig!
Where to Go from Here?
Learn Trigonometry for Game Programming!
Welcome back to the Trigonometry for Game Programming series!
In the first part of the series, you learned the basics of trigonometry and saw for yourself how useful it can be for making games.
In this second and final part of the series, you will extend your simple space game by adding missiles, an orbiting asteroid shield, and an animated “game over” screen. Along the way, you’ll also learn more about the sine and cosine functions and see some other useful ways to put the power of trig to work in your games.
Use the Download Materials button at the top or bottom of this tutorial to download the starter project.
As of right now, your game has a spaceship and a rotating cannon, each with health bars. While they may be sworn enemies, neither has the ability to damage the other unless the spaceship flies right into the cannon (which works out better for the cannon).

You will now give the player the ability to fire a missile from the spaceship by swiping the screen. The spaceship will launch a missile in the direction of the swipe.
Open GameScene.swift. Add the following properties to GameScene:
You’ll move the missile sprite from the player’s ship in the direction it’s facing. You’ll use the touch location and time to track where and when the user taps on the screen to trigger a missile.
Then, add the following code to the end of didMove(to:):
Note that the missile sprite is hidden initially; you’ll only make it visible when the player fires. To increase the challenge, the player will only be able to have one missile in flight at a time.
To detect the first finger placed on the touchscreen, add the following method to GameScene:
This is pretty simple — whenever a touch is detected, you store the touch location and the time. The actual work happens in touchesEnded(_:with:), which you’ll add next:
The guard statement checks whether the elapsed time between starting and ending the swipe is less than the touchTimeThreshold value of 0.3 seconds. Then, check if the missile is hidden. If not, the player’s one allowed missle is in flight and the touch is ignored.
The next part works out what sort of gesture the user made; was it really a swipe, or just a tap? You should only launch missiles on swipes, not taps. You have done this sort of calculation a couple of times already — subtract two coordinates, then use the Pythagorean Theorem to find the distance between them. If the distance is greater than the touchDistanceThreshold value of 4 points, treat it as an intentional swipe.
There are two ways you could make the missile fly. The first option is to create a playerMissileVelocity vector, based on the angle that you’re aiming the missile. Inside update(_:), you would then add this velocity multiplied by the delta time to the missile sprite’s position each frame, and check if the missile has flown outside of the visible screen area so that it can be reset. This is similar to how you made the spaceship move in part 1 of this tutorial series.
Unlike the spaceship, the missile never changes course; it always flies in a straight line. So you can take a simpler approach and calculate the final destination of the missile in advance upon launch. With that information in hand, you can let SpriteKit animate the missile sprite to its final position for you.
This saves you from having to check whether the missile has left the visible screen. And, this is also an opportunity to do more interesting math!
To begin, replace the TODO comment in touchesEnded(_:with:) with the following code:
Here, you use atan2(_:_:) to convert the swipe vector to an angle, set the sprite’s rotation and position, and make the missile sprite visible.
Now comes the interesting part. You know the starting position of the missile (spaceship’s current position) and you know the angle (derived from the player’s swipe motion). Therefore, you can calculate the destination point of the missile based on these facts.
You already have the direction vector, and you learned in part 1 how to use normalization to set the length of a vector to whatever you need. But what length do you want? Well, that’s the challenging bit. Because you want the missile to stop when it moves outside the screen border, the length it travels depends on the starting position and direction.

The destination point always lies just outside the screen border instead of on the screen border. Hence, the missile will vanish when it completely flies out of sight. This is to make the game more visually appealing. To implement this, add another constant at the top of GameScene.swift:
Finding the destination point is a bit complicated. For example, if you know that the player is shooting downward, you can work out the vertical distance the missile needs to fly. First, calculate the Y componenent by simply finding the sum of the missile starting Y-position and playerMissileRadius. Second, calculate the X component by determining where the missile will intersect that border line.
For missiles that fly off the bottom or top edges of the screen the X component of the destination can be calculated with the following formula:
destination.x = playerPosition.x + ((destination.y – playerPosition.y) / swipe.dy * swipe.dx)
This is similar to the normalization technique from part 1 where you scaled up a vector by first dividing both x and y components by the current length and then multiplying by the desired length. Here, you work out the ratio of the swipe vector’s Y component to the final distance. Then multiply the X component by the same value and add it to the ship’s current X position to get the destination X coordinate.
For missiles that go off the left or right edges, you essentially use the same function, but swap all the X and Y values.
This technique of extending a vector until it hits an edge is known as projection, and it’s very helpful for all sorts of game applications such as detecting if an enemy can see the player by projecting a vector along their line of sight and seeing if it hits a wall or the player.
There’s a snag. If the intersection point is near a corner, it’s not obvious which edge the missile will intersect first:
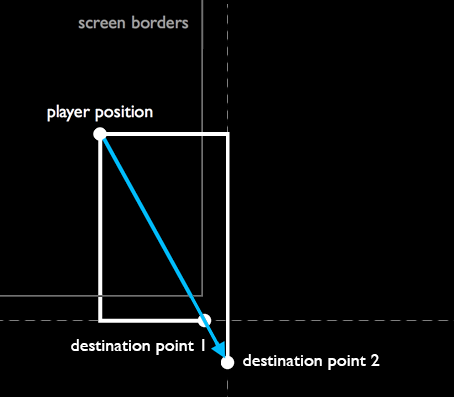
That’s OK. You’ll just calculate both intersection points, then see which is the shorter distance from the player!
Add the following code at the end of touchesEnded(_:with:):
Here, you’re calculating the two candidate destination points for the missile; now you need to work out which is nearer to the player. Add the following code next, right below the code above:
You could have used the Pythagorean theorem here to work out the diagonal distance from the player to each intersection point and chosen the shortest distance, but there's a quicker way. Since the two possible intersection points lie along the same vector, if either the X or Y component is shorter, then the distance as a whole must be shorter. Therefore, there's no need to calculate the diagonal length.
Right below the code you just added, add this last piece of code to touchesEnded(_:with:):
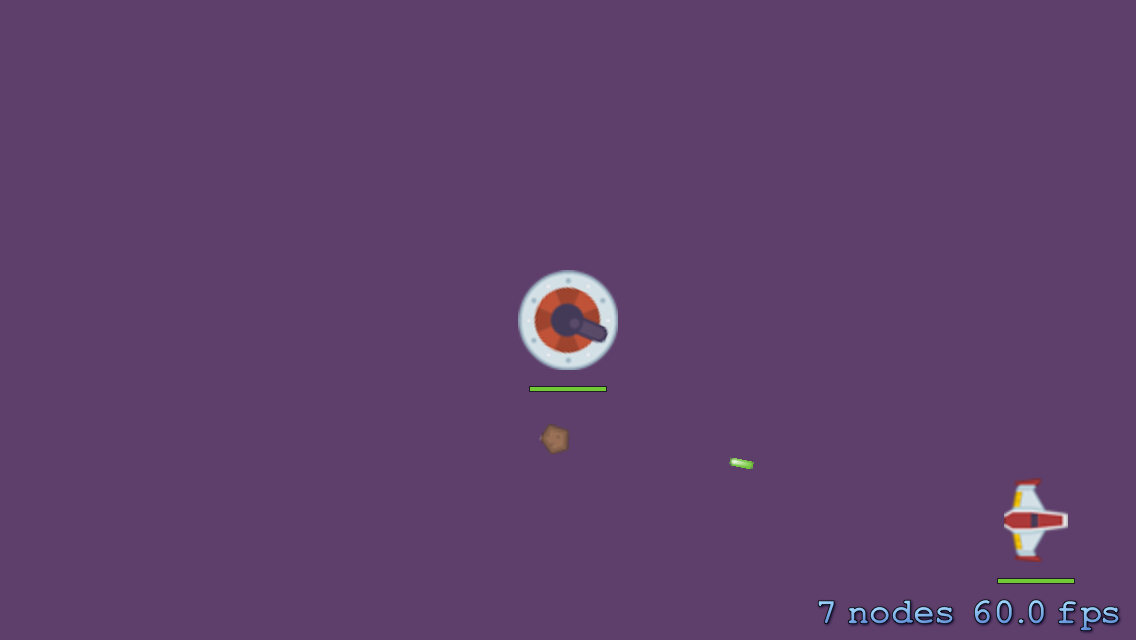
Build and run the app. You can now swipe to shoot bolts of plasma at the turret. Note that you can only fire one missile at a time. You have to wait until the previous missile has disappeared from the screen before firing again.

There's still one problem. The missile appears to travel faster or slower depending on the distance it travels.
That's because the duration of the animation is hard-coded to last 2 seconds. If the missile needs to travel further, it will travel faster in order to cover more distance in the same amount of time. It would be more realistic if the missiles always travel at a consistent speed.
Your good friend Sir Isaac Newton can help out here! As Newton discovered, time = distance / speed. You can use Pythagoras to calculate the distance, so there's just the matter of specifying the speed.
Add another constant to the top of GameScene.swift:
This is the distance that you want the missile to travel each second. Now, replace the last code block you added in touchesEnded(_:with:) with:
Instead of hard-coding the duration, you've derived it from the distance and speed using Newton's formula. Run the app again and you'll see that the missile now always flies at the same speed, no matter how far or close the destination point is.
And that’s how you use trig to fire off a moving missile. It’s a bit involved. At the same time, it’s fire and forget as SpriteKit does all the sprite movement animation work for you.
![]()
Right now, the missile completely ignores the cannon. That’s about to change.
You'll use a simple radius-based method for collision detection like before. You already added playerMissileRadius, so you're all set to detect cannon/missile collisions using the same technique you used for the cannon/ship collision.
Add a new method:
This works pretty much the same as checkShipCannonCollision(). You calculate the distance between the sprites, and consider it a collision if that distance is less than the sum of the radii.
If the collision is detected, first hide the missile sprite and cancel its animations. Then reduce the cannon's hit points, and redraw its health bar.
Add a call to checkMissileCannonCollision() inside the update(_:) method, immediately after the other updates:
Build and run, then try it out. Finally you can inflict some damage on the enemy!

Before moving on, it would be nice if the missile had some sound effects. As with the ship-turret collision before, you can play sounds with a SpriteKit action. Add the following two properties to GameScene:
Now, replace playerMissileSprite.run(missileMoveAction) in touchesEnded(_:with:) with:
Rather than a single action to move the missile, you're setting up a sequence to play the sound then move the missile.
Also add the following line after updateHealthBar(cannonHealthBar, withHealthPoints: cannonHP) in checkMissileCannonCollision():
The missile now shoots out with a ZZAPP sound, and, if your aim is true, hits the turret with a satisfying BOINK!
To make the game more challenging, you will give the enemy a shield. The shield will be a magical asteroid that orbits the cannon and destroys any missiles that come near it.
Add a few more constants to the top of GameScene.swift:
Initialize a sprite node constant and add a new property in GameScene:
Add the following code to the end of didMove(to:):
This adds the orbiterSprite to the GameScene.
Now, add the following method to GameScene:
The asteroid will orbit around the cannon in a circular path. To accomplish this, you need two pieces: the radius that determines how far the asteroid is from the center of the cannon, and the angle that describes how far it has rotated around that center point.
This is what updateOrbiter(_:) does:
You have briefly seen sin() and cos() in action, but it may not have been entirely clear how they worked. You know that both of these functions can be used to calculate the other side lengths of a right triangle, once you have an angle and the hypotenuse.
But aren’t you curious why you can actually do that?
Draw a circle:

The illustration above exactly depicts the situation of the asteroid orbiting around the cannon. The circle describes the path of the asteroid and the origin of the circle is the center of the cannon.
The angle starts at zero degrees but increases all the time until it ends up right back at the beginning. As you can see, it's the radius of the circle that determines how far away from the center the asteroid is placed.
So, given the angle and the radius, you can derive the X- and Y-positions using the cosine and sine, respectively:

Now, take a look at a plot of a sine wave and a cosine wave:

The horizontal axis contains the degrees of a circle, from 0 to 360 or 0 to 2π radians. The vertical axis usually goes from -1 to +1. But if your circle has a radius that is greater than one and it tends to, then the vertical axis really goes from –radius to +radius.
As the angle increases from 0 to 360 degrees, find the angle on the horizontal axis in the plots for the cosine and sine waves. The vertical axis then tells you the x and y values:
Did you also notice that the curves of the sine and cosine are very similar? In fact, the cosine wave is simply the sine wave shifted by 90 degrees.
Call updateOrbiter(_:) at the end of update(_:):
Build and run the app. You should now have an asteroid that perpetually circles the enemy cannon.

You can also make the asteroid spin around its axis. Add the following line to the end of updateOrbiter(_:):
By setting the rotation to orbiterAngle, the asteroid always stays oriented in the same position relative to the cannon, much like the Moon always shows the same side to the Earth.
Let’s give the orbiter a purpose. If the missile comes too close, the asteroid will destroy it before it gets a chance to do any damage to the cannon. Add the following method:
And don't forget to a call to checkMissileOrbiterCollision() at the end of update(_:):
This should look pretty familiar. It's basically the same thing as checkMissileCannonCollision(). When the collision is detected, the missile sprite is removed. This time, you don't play a sound. But as an added visual flourish, you increase the size of the asteroid sprite by two times. Then, you immediately animate the asteroid scaling back down again. This makes it look like the orbiting asteroid “ate” the missile!
Build and run to see your new orbiting shield in action.
There is still more that you can do with sines and cosines. They also come in handy for animations.
A good place to demo such an animation is the game over screen. Add the following constant to the top of GameScene.swift:
And add a few properties to GameScene:
You'll use these properties to keep track of the game state and the nodes to show the "Game Over" information.
Next, add this method to GameScene:
This method checks whether the game is done, and if so, handles the game over animation:
Add a call to checkGameOver(_:) at the bottom of update(_:):
And add a small snippet of logic to the top of touchesEnded(_:with:):
This restarts the game when the user taps on the game over screen.
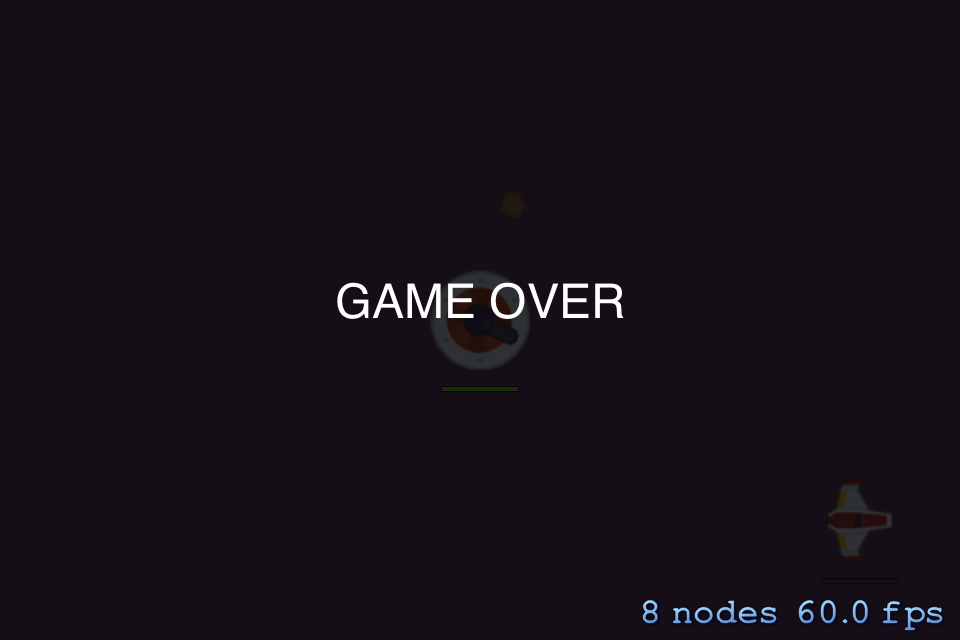
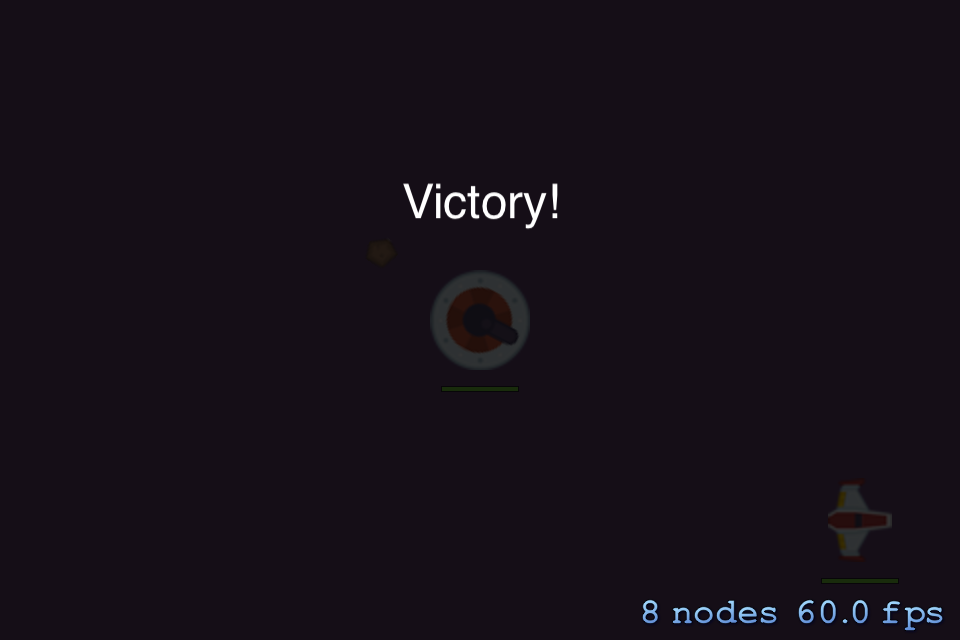
Build and run to try it out. Shoot at the cannon or collide your ship with it until one of you runs out of health. The screen will fade to black and the game over text will appear. The game no longer responds to the accelerometer, but the animations keep going:
This is all fine and dandy, but where are the sine and cosines? As you may have noticed, the fade in animation of the black layer was very linear. It just goes from transparent to opaque at a consistent rate.
You can do better than this — you can use sin() to alter the timing of the fade. This is known as easing and the effect you will apply here is known as an ease out.
Add a new constant at the top of GameScene.swift:
Next, replace the last line of code in checkGameOver(_:) with the following:
The gameOverElapsed keeps track of how much time has passed since the game ended. It takes two seconds to fade in the black layer (darkenDuration). The multiplier determines how much of that duration has passed by. It always has a value between 0.0 and 1.0, regardless of how long darkenDuration really is.
Then you perform the magic trick:
This converts multiplier from a linear interpolation into one that breathes a bit more life into things:

Build and run to see the new “ease out” effect. If you find it hard to see the difference, try it with the “ease out” line commented out or change the duration of the animation. The effect is subtle, but it's there.
Easing is a subtle effect, so let's wrap up with a much more obvious bounce effect — because things that bounce are always more fun!
Add the following code to the end of checkGameOver(_:):
OK, what's happening here? Recall what a cosine looks like:

If you take the absolute value of cos() – using abs() – then the section that would previously go below zero is flipped. The curve already looks like something that bounces, don’t you think?
Because the output of these functions lies between 0.0 and 1.0, you multiply it by 50 to stretch it out to 0-50. The argument to cos() is normally an angle, but you’re giving it the gameOverElapsed time to make the cosine move forward through its curve.
The factor of 3 is just to make it go a bit faster. You can tinker with these values until you have something that you think looks cool.
Build and run to check out the bouncing text:
You've used the shape of the cosine to describe the bouncing motion of the text label. These cosines are useful for all sorts of things!
One last thing you can do is let the bouncing motion lose amplitude over time. You do this by adding a damping factor. Create a new property in GameScene:
The idea here is when the game ends, you'll need to reset this value to 1.0 so the damping takes effect. Over time as the text bounces, the damping will slowly fade off to 0 again.
In checkGameOver(_:), add the following right after you set gameOver to true:
Replace the code underneath // label position with the following:
It’s mostly the same as before. You multiply the y-value by the damping factor. Then, reduce the damping factor slowly from 1.0 back to 0.0, but never less than 0. That’s what the max() prevents. Build and run, then try it out!
Congratulations, you have delved into the depths of sine, cosine and tangent. You have witnessed them in action inside of a game with applicable examples. I hope you've seen how handy trigonometry really is for games!
You can download the final version of the project using the Download Materials button at the top or bottom of this tutorial.
Note that we didn’t talk much about arcsine and arccosine. They are much less useful in practice than arctangent, although a common use for arccosine is to find the angle between two arbitrary vectors — for example, to model the reflection of a light beam in a mirror or to calculate how bright an object should be depending on its angle to a light source.
If you fancy using your new-found skills for more game development, but don't know where to start, then why not try out our book 2D Apple Games by Tutorials. It will certainly kick start your development!
Drop by the forums to share your successes and agonies with trig. And use your new powers wisely!
Credits: The graphics for this game are based on a free sprite set by Kenney Vleugels. The sound effects are based on samples from freesound.org.
- If the angle is 0 degrees, then cos(0) is 1 * radius but sin(0) is 0 * radius. That corresponds exactly to the (x, y) coordinate in the circle: x is equal to the radius, but y is 0.
- If the angle is 45 degrees, then cos(45) is 0.707 * radius and so is sin(45). This means x and y are both the same at this point on the circle. Note: if you’re trying this out on a calculator, then switch it to DEG mode first. You’ll get radically different answers if it’s in RAD mode (no pun intended :]).
- If the angle is 90 degrees, then cos(90) is 0 * radius and sin(90) is 1 * radius. You’re now at the top of the circle where the (x, y) coordinate is (0, radius).
- And so on, and so on. To get a more intuitive feel for how the coordinates in the circle relate to the values of the sine, cosine and even tangent functions, try out this cool interactive circle.
- It increments the angle by
orbiterSpeed, adjusted for the delta time. The angle is then wrapped to the 0 - 360 range usingtruncatingRemainder(dividingBy:). That isn't strictly necessary, assin()andcos()work correctly with angles outside of that range, however if the angles get too large then floating point precision may become a problem. Also, it's easier to visualise angles if they are in this range for debugging purposes. - It calculates the new X- and Y-positions for the orbiter using
sin()andcos(). These take the radius (which forms the hypotenuse of the triangle) and the current angle, then return the adjacent and opposite sides, respectively. More about this in a second. - It sets the new position of the orbiter sprite by adding the X- and Y-positions to the center position of the cannon.
- The game keeps on going until either the player or cannon run out of health points.
- When the game is over, you set
gameOverto true, and disable the accelerometer. - Add a new black color layer on top of everything else. Later in the method, you'll animate the alpha value of this layer so that it appears to fade in.
- Add a new text label and place it on the screen. The text is either “Victory!” if the player won or “Game Over” if the player lost, determined based on the player's health points.
- The above steps only happen once to set up the game over screen – every time after that, you animate
darkenOpacity's alpha from 0 to 0.8 – almost completely opaque, but not quite.
Learn Trigonometry for Game Programming!
run() to do the alpha fade, as it supports various easing modes. Again, the purpose of this tutorial is not to learn SpriteKit; it's to learn the math behind it, including easing!cannonHP to 10 so you can end the game with a single shot.
let playerMissileSprite = SKSpriteNode(imageNamed:"PlayerMissile")

var touchLocation = CGPoint.zero
var touchTime: CFTimeInterval = 0
playerMissileSprite.isHidden = true
addChild(playerMissileSprite)
override func touchesBegan(_ touches: Set<UITouch>, with event: UIEvent?) {
  guard let touch = touches.first else { return }
  let location = touch.location(in: self)
  touchLocation = location
  touchTime = CACurrentMediaTime()
}
override func touchesEnded(_ touches: Set<UITouch>, with event: UIEvent?) {
  let touchTimeThreshold: CFTimeInterval = 0.3
  let touchDistanceThreshold: CGFloat = 4

  guard CACurrentMediaTime() - touchTime < touchTimeThreshold,
    playerMissileSprite.isHidden,
    let touch = touches.first else { return }

  let location = touch.location(in: self)
  let swipe = CGVector(dx: location.x - touchLocation.x, dy: location.y - touchLocation.y)
  let swipeLength = sqrt(swipe.dx * swipe.dx + swipe.dy * swipe.dy)

  guard swipeLength > touchDistanceThreshold else { return }
  // TODO
}
let angle = atan2(swipe.dy, swipe.dx)
playerMissileSprite.zRotation = angle - 90 * degreesToRadians
playerMissileSprite.position = playerSprite.position
playerMissileSprite.isHidden = false
let playerMissileRadius: CGFloat = 20
//calculate vertical intersection point
var destination1 = CGPoint.zero
if swipe.dy > 0 {
  destination1.y = size.height + playerMissileRadius // top of screen
} else {
  destination1.y = -playerMissileRadius // bottom of screen
}
destination1.x = playerSprite.position.x +
  ((destination1.y - playerSprite.position.y) / swipe.dy * swipe.dx)

//calculate horizontal intersection point
var destination2 = CGPoint.zero
if swipe.dx > 0 {
  destination2.x = size.width + playerMissileRadius // right of screen
} else {
  destination2.x = -playerMissileRadius // left of screen
}
destination2.y = playerSprite.position.y +
  ((destination2.x - playerSprite.position.x) / swipe.dx * swipe.dy)
// find out which is nearer
var destination = destination2
if abs(destination1.x) < abs(destination2.x) || abs(destination1.y) < abs(destination2.y) {
  destination = destination1
}
// run the sequence of actions for the firing
let missileMoveAction = SKAction.move(to: destination, duration: 2)
playerMissileSprite.run(missileMoveAction) {
  self.playerMissileSprite.isHidden = true
}
let playerMissileSpeed: CGFloat = 300
// calculate distance
let distance = sqrt(pow(destination.x - playerSprite.position.x, 2) +
  pow(destination.y - playerSprite.position.y, 2))

// run the sequence of actions for the firing
let duration = TimeInterval(distance / playerMissileSpeed)
let missileMoveAction = SKAction.move(to: destination, duration: duration)
playerMissileSprite.run(missileMoveAction) {
   self.playerMissileSprite.isHidden = true
}
func checkMissileCannonCollision() {
  guard !playerMissileSprite.isHidden else { return }
  let deltaX = playerMissileSprite.position.x - turretSprite.position.x
  let deltaY = playerMissileSprite.position.y - turretSprite.position.y

  let distance = sqrt(deltaX * deltaX + deltaY * deltaY)
  if distance <= cannonCollisionRadius + playerMissileRadius {

    playerMissileSprite.isHidden = true
    playerMissileSprite.removeAllActions()

    cannonHP = max(0, cannonHP - 10)
    updateHealthBar(cannonHealthBar, withHealthPoints: cannonHP)
  }
}
checkMissileCannonCollision()
let missileShootSound = SKAction.playSoundFileNamed("Shoot.wav", waitForCompletion: false)
let missileHitSound = SKAction.playSoundFileNamed("Hit.wav", waitForCompletion: false)
playerMissileSprite.run(SKAction.sequence([missileShootSound, missileMoveAction]))
run(missileHitSound)
let orbiterSpeed: CGFloat = 120
let orbiterRadius: CGFloat = 60
let orbiterCollisionRadius: CGFloat = 20
let orbiterSprite = SKSpriteNode(imageNamed:"Asteroid")
var orbiterAngle: CGFloat = 0
addChild(orbiterSprite)
func updateOrbiter(_ dt: CFTimeInterval) {
  // 1
  orbiterAngle = (orbiterAngle + orbiterSpeed * CGFloat(dt)).truncatingRemainder(dividingBy: 360)

  // 2
  let x = cos(orbiterAngle * degreesToRadians) * orbiterRadius
  let y = sin(orbiterAngle * degreesToRadians) * orbiterRadius

  // 3
  orbiterSprite.position = CGPoint(x: cannonSprite.position.x + x, y: cannonSprite.position.y + y)
}
updateOrbiter(deltaTime)
orbiterSprite.zRotation = orbiterAngle * degreesToRadians
func checkMissileOrbiterCollision() {
  guard !playerMissileSprite.isHidden else { return }

  let deltaX = playerMissileSprite.position.x - orbiterSprite.position.x
  let deltaY = playerMissileSprite.position.y - orbiterSprite.position.y

  let distance = sqrt(deltaX * deltaX + deltaY * deltaY)
  guard distance < orbiterCollisionRadius + playerMissileRadius else { return }

  playerMissileSprite.isHidden = true
  playerMissileSprite.removeAllActions()

  orbiterSprite.setScale(2)
  orbiterSprite.run(SKAction.scale(to: 1, duration: 0.5))
}
checkMissileOrbiterCollision()
let darkenOpacity: CGFloat = 0.8
lazy var darkenLayer: SKSpriteNode = {
  let color = UIColor(red: 0, green: 0, blue: 0, alpha: 1)
  let node = SKSpriteNode(color: color, size: size)
  node.alpha = 0
  node.position = CGPoint(x: size.width/2, y: size.height/2)
  return node
}()

lazy var gameOverLabel: SKLabelNode = {
  let node = SKLabelNode(fontNamed: "Helvetica")
  node.fontSize = 24
  node.position = CGPoint(x: size.width/2 + 0.5, y: size.height/2 + 50)
  return node
}()

var gameOver = false
var gameOverElapsed: CFTimeInterval = 0
func checkGameOver(_ dt: CFTimeInterval) {
  // 1
  guard playerHP <= 0 || cannonHP <= 0 else { return }

  if !gameOver {
    // 2
    gameOver = true
    gameOverElapsed = 0
    stopMonitoringAcceleration()

    // 3
    addChild(darkenLayer)

    // 4
    let text = (playerHP == 0) ? "GAME OVER" : "Victory!"
    gameOverLabel.text = text
    addChild(gameOverLabel)
    return
  }

  // 5
  darkenLayer.alpha = min(darkenOpacity, darkenLayer.alpha + CGFloat(dt))
}
checkGameOver(deltaTime)
guard !gameOver else {
  let scene = GameScene(size: size)
  let reveal = SKTransition.flipHorizontal(withDuration: 1)
  view?.presentScene(scene, transition: reveal)
  return
}
let darkenDuration: CFTimeInterval = 2
gameOverElapsed += dt
if gameOverElapsed < darkenDuration {
  var multiplier = CGFloat(gameOverElapsed / darkenDuration)
  multiplier = sin(multiplier * CGFloat.pi / 2) // ease out
  darkenLayer.alpha = darkenOpacity * multiplier
}
multiplier = sin(multiplier * CGFloat.pi / 2) // ease out
// label position
let y = abs(cos(CGFloat(gameOverElapsed) * 3)) * 50
gameOverLabel.position = CGPoint(x: gameOverLabel.position.x, y: size.height/2 + y)
var gameOverDampen: CGFloat = 0
gameOverDampen = 1
let y = abs(cos(CGFloat(gameOverElapsed) * 3)) * 50 * gameOverDampen
gameOverDampen = max(0, gameOverDampen - 0.3 * CGFloat(dt))
gameOverLabel.position = CGPoint(x: gameOverLabel.position.x, y: size.height/2 + y)