Parse Tutorial: Getting Started with Web Backends
Get started with Parse, and learn how to set up your iOS app with a backend that lets you store user accounts, posts, and attachments! By Ron Kliffer.
Sign up/Sign in
With a free Kodeco account you can download source code, track your progress, bookmark, personalise your learner profile and more!
Create accountAlready a member of Kodeco? Sign in
Sign up/Sign in
With a free Kodeco account you can download source code, track your progress, bookmark, personalise your learner profile and more!
Create accountAlready a member of Kodeco? Sign in
Contents
Parse Tutorial: Getting Started with Web Backends
35 mins
Update Note April 12, 2015: This tutorial has been updated to use Swift, iOS 8.3, Xcode 6.3, and the latest Parse SDK version (1.7.1 at the time of writing this tutorial).
Having a backend component to your app adds a whole new world of features, from data synchronization to social sharing features to cloud storage. While you might be an expert iOS developer, what can you do about the server side to support your app?
In this Parse tutorial, you will build an app using the Parse backend service. You’ll work on a photo sharing app, complete with user logins, photo uploads, and a photo wall. To keep the focus on Parse, you’ll begin with a starter project that has the user interface pre-created, but no capability to upload or download any images. You will add the Parse service piece by piece until you have a functioning app.
Ready to build an app with a web backend, the easy way? Great! Then let’s get started with Parse! :]
Getting Started
Before starting the development of your app, the first step is to create an app in the Parse backend. Every developer and every app requires a unique identifier — otherwise, your data and users could get confused with those belonging to someone else.
Visit Parse.com, click on “Get started for free,” and then sign up to create a new account.
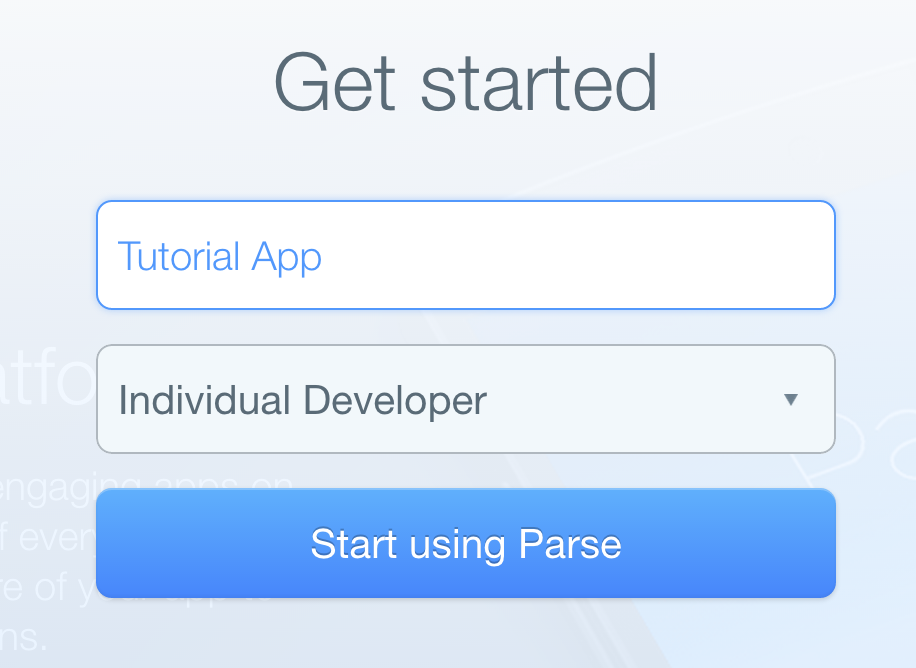
After you create the account, Parse will ask you to create your first app. You must regeister seperately every app you use with the backend. In this case, call it “Tutorial App”; hundreds of apps may exist on Parse with identical names, but only one instance of that app can belong to you.
After you create your app, you will see a Welcome Screen where you have several options to help you start out with some of Parse’s features. These basically let you download template projects to start with, but you won’t need that in this tutorial. On the top of the screen there are some options in a series of buttons, as shown in the following screenshot:
Here’s a guide to the options available at the top of the screen:
- Core: This is where you can see all your backend’s previously uploaded data. You can also see the users, and you can manually manipulate the data.
- Analytics: Here you can find statistical information about your app such as its traffic, the push notifications sent, and number of API calls made. You can also add your custom events using Parse Analytics.
- Push: Use this section to send push notifications to any group (possibly all) of your users.
- Settings: This is where you find all API keys. In addition, here you can change the settings of your app, manage its security, and export your data.
- Docs: This is where you can go for tutorials, sample projects, API documentation, and learn anything you need to extend your Parse supported apps.
The Parse Sample Application
In order to concentrate on backend services, this tutorial contains a starter project. Just download it, and add the Parse calls as you go through the tutorial.
Open up the project in Xcode and build and run! The first thing you will see is a login screen. However, although the buttons appear to do something, it’s a bit of an illusion. There is no back end yet to handle this, or the other parts of your app! You’ll create these functions shortly.
Before you proceed any further, have a look at the structure and flow of the app by opening Main.storyboard:
The project consists of four main views:
- Log In: A Login screen with user and password text fields. There’s a “Sign Up” button to go to the Sign Up view to create a new user.
- Sign Up: In this view, the user introduces the username and password to create a new account with the backend service.
- Wall: This is the main screen of the app. Here the user can see all of the other users uploaded images, the creation date and the comment associated with them.
- Upload: In this view, a user can upload their own images to the wall and (optionally) add a comment.
Each view has its own UIViewController
in the storyboard, but you’ll notice that the Wall view has two representations. That’s because you’re going to see two ways to implement this view with Parse.
Preparing Parse Posthaste
The first step — quite naturally — is to configure your project to work with Parse!
Download the Parse iOS SDK from here:
https://parse.com/downloads/ios/parse-library/latest
After downloading it, unzip it and drag the three frameworks below to the frameworks folder of your project. When prompted, check “Copy items…” and “Create groups…”. The default action is to add these frameworks to the target “ParseTutorial”, which is what you want.
- Parse.framework: This is the main framework with all of Parse’s backend functionalities.
- Bolts.framework: This framework is a collection of low-level libraries used for making various tasks easier and quicker.
- ParseUI.framework: This frameworks includes some very handy UI elements that interact directly with Parse objects. You’ll use this framework to build your images wall.
Note: When adding Parse to your existing apps, you’ll also need to add some of Parse’s framework dependencies such as CoreGraphics
and SystemConfiguration
. The starter project has these set up for you already, but you can see the full set of instructions on the Parse Quick Start Guide.
The Parse SDK is written in Objective-C, while you’ll write the app itself in Swift. To use Parse’s Obj-C SDK code in your Swift application, you need an Objective-C Bridging Header file.
The easiest way to create a bridging header file is to add an arbitrary Objective-C file to your project and let Xcode create the bridging header for you.
Go to File\New\File… and select the iOS\Source\Objective-C file template. Name the file whatever you like — you’ll delete this file in a moment — then save it. When you save the file, Xcode offers to create an Objective-C bridging header file for you like so:
Click Yes and Xcode will create the bridging header file and add it to your project. Delete the original Objective-C file as you no longer need it.
Open the newly created ParseTutorial-Bridging-Header.h and add the following lines of code to the bottom of the file:
#import <Parse/Parse.h>
#import <ParseUI/ParseUI.h>
#import <Bolts/Bolts.h>
This will make these three frameworks available to your swift code.
Next, you’ll need the API keys for the tutorial app you created on the Parse web site. Go to your app’s Settings on the Parse Dashboard (1), select Keys (02) from the left pane menu, and make a note of the application ID and Client Key (03):
Next, open AppDelegate.swift and locate application(_:didFinishLaunchingWithOptions:)
. Add the following code at the beginning of the method:
Parse.setApplicationId("--AppID Goes Here--", clientKey: "--ClientKey Goes Here--")
You should put your actual IDs inside the two strings, of course. :]
Build and run! Check that everything compiles and runs without error. If so, then it means that your app registered and connected properly with the Parse backend. You are ready to work with the service!
The next logical step is to create some sample objects! :]
Creating Some Sample Objects
Every object you upload to Parse becomes an entry in the database scheme that you defined for your app. Think of these objects as being somewhat like dictionaries – you store data in them identified by key, then you can retrieve your data with those same keys later on.
In this example, you’ll upload an object called “Player”, with “Name” and “Score” as fields. So in your database, you will have a table called “Player” with all the objects uploaded with that name. You’ll see this with the example calls below.
Open AppDelegate.swift, and add the lines below to application(_:didFinishLaunchingWithOptions:)
just above return true
:
let player = PFObject(className: "Player")
player.setObject("John", forKey: "Name")
player.setObject(1230, forKey: "Score")
player.saveInBackgroundWithBlock { (succeeded, error) -> Void in
if succeeded {
println("Object Uploaded")
} else {
println("Error: \(error) \(error.userInfo!)")
}
}
As you can see here, you are using asynchronous mode to upload the object, and you are checking the result in a closure.
PFObject
is a base class providing basic object manipulation methods. The best part is you don’t need to create a table in the Parse web interface itself – it will automatically create a schema for you based on what you upload.
Build and run! If you put your API keys into the code properly, and your app properly registered with the Parse service, then everything should run without issue, and you will see the message “Object Uploaded” appear in the console. If something went wrong, then you’ll see an error message instead.
But where did your object go? Is it just out there floating in cyberspace?
To check that you saved your object correctly, go to your Parse dashboard, click on Core, where you should see the object, as below:
Congratulations, you’ve successfully communicated with the back end! :]
Note: If you did see an error message such as “The network connection was lost,” and you’re running on the iOS simulator, try restarting the simulator – useful advice for when other network errors occur as well :]
Also, if you get the “Object Uploaded” message, but you don’t see any data in the Parse dashboard, try reloading the dashboard page and/or click the refresh button in the upper right of the dashboard.
Before continuing to the next section create two more records. Leave the name as “John,” but change the score to 810, and run the app. Now you have two records with name “John” but differing scores. Now change the name to “Sally” and the score 2400 and run the app to create a third record.
Retrieving Objects
Now, it’s time to retrieve the objects. For this purpose, Parse has the class PFQuery
– unsurprisingly, it performs queries, as noted in the PFQuery documentation.
You will code a query for all the objects with a score greater than 1000 where “Name” is equal to “John”. Comment out (or delete) the previous code or you will be uploading a new object every time. In its place, put the following code:
// 1
let query = PFQuery(className: "Player")
// 2
query.whereKey("Name", equalTo: "John")
query.whereKey("Score", greaterThan: 1000)
// 3
query.findObjectsInBackgroundWithBlock { (objects, error) -> Void in
if error == nil {
println("Successfully retrieved: \(objects)")
} else {
println("Error: \(error) \(error.userInfo!)")
}
}
- Here you create the query object, the name will be the name of the table where you want to look.
- You are only going to get those objects where the name is “John” and where the score is bigger than 1000.
- Send the query, and print the result in a closure.
Build and run your app. Once again, the operation is asynchronous and does not stop your UI from appearing quickly — this is key to keeping your users happy. :] In the console, you should see all of the objects that match the query, as shown in the screenshot below:
After this brief exploration of basic storage and query operations, you can continue working in the real project.
Comment out (or delete) these lines from application(_:didFinishLaunchingWithOptions:)
before continuing.
User Registration
The first step that your users will encounter in your app is to register as a user.
Open the file RegisterViewController.swift; right now the view doesn’t do anything apart from being opened and closed. Your mission is to implement the functionality for user registration when the user taps the “Sign Up” button.
Locate the action method signUpPressed(_:):
and replace it with the following code:
@IBAction func signUpPressed(sender: AnyObject) {
//1
let user = PFUser()
//2
user.username = userTextField.text
user.password = passwordTextField.text
//3
user.signUpInBackgroundWithBlock { succeeded, error in
if (succeeded) {
//The registration was successful, go to the wall
self.performSegueWithIdentifier(self.scrollViewWallSegue, sender: nil)
} else if let error = error {
//Something bad has occurred
self.showErrorView(error)
}
}
}
In the code above, the steps followed for creating a user are:
- Create a new
PFUser
object nameduser
. You will use this object for both the login and register processes. It stores your authenticated user, so you can access the data for this user any time you want.
You can find the PFUser class documentation here. - Assign the username and password to
user
from the text fields in the view. - Call the method that registers the user in the background, and checks the response in a closure. There are two possible responses here: either the response is okay and you logged in your newly created user, or there was an error. In the first case, move on to the wall view, and otherwise show the user a description of the error.
Build and run the app to check for errors. To check the user registration process, run the app, and at the Log In screen, press the Sign Up button. You should see the following:
Enter the name and password of the new user, and press the Sign Up button. If all goes well the app will move to the wall view.
Great! But you still need to verify that the code actually saved the new user in your schema! You can check that you successfully created your new user by looking in the User section of Parse’s Core data browser for the backend project, as shown below:
Congratulations! You created your first user! Now it’s time to let that user log in and get busy with the backend! :]
Logging In
Open the LoginViewController.swift class, and take a look at the method below:
@IBAction func logInPressed(sender: AnyObject) {
//If user logged succesful:
performSegueWithIdentifier(scrollViewWallSegue, sender: nil)
}
As you can see, this part is very similar to the registration process! You are going to use PFUser
again, but this time you’ll be using it to log in. Replace the stubbed-out content of the above method with this code:
@IBAction func logInPressed(sender: AnyObject) {
PFUser.logInWithUsernameInBackground(userTextField.text, password: passwordTextField.text) { user, error in
if user != nil {
self.performSegueWithIdentifier(self.scrollViewWallSegue, sender: nil)
} else if let error = error {
self.showErrorView(error)
}
}
}
As you can see, the process is quite simple and very similar to the registration process. Rather than just perform the segue, you first check that the username and password match what’s in the data store.
Build and run the app and you’ll see the login view below:
Try to log in with the same user you created in the previous section. If all goes well, your app will move to the wall view. As a sanity check, try logging in with a bad username or password to see the error message.
Posting to the Wall
Both previous actions (register and log in) will move the app to the Wall View. In this view, you are going to see the pictures that all the users of your backend service uploaded, with their comments attached.
But before you can see anything, you’ll have to upload something! :]
Parse makes it easy to upload files. Open UploadImageViewController.swift, which is where you’ll do the work to upload files.
A logged-in user can tap the “Upload” button on the Wall view to take them to the upload screen shown below.
From here, the user can enter an optional comment and tap “Select Picture” to select something from the library to upload using the standard image picker.
All this is already implemented in the starter app – now it’s time to add the code that completes the implementation of sendPressed(_:)
. This is the action – linked to the “Send” button on the Navigation Toolbar – that sends your picture and comment to the server.
The process consists of two parts. First, upload the image using a PFFile object; second, attach it to a PFObject
, and upload it to the server.
As you saw earlier in the tutorial, you can add and retrieve various fields to a PFObject
using setKey
and objectForKey
. But if you have a specific type of object you use in your app, say like a wall post, wouldn’t it be nice to give it it’s own subclass with relevant properties? You will next see how you can make that happen.
Custom Parse Objects
Open the WallPost.swift file from the Model group in the project navigator. Right now, you’ll see a simple NSObject
subclass with an empty implementation. The first thing you’ll need to do is make it a PFObject
subclass as follows:
class WallPost: PFObject {
}
You also want WallPost
to conform to the PFSubclassing
protocol.
The PFSubclassing protocol declares a few required methods for subclassing a PFObject
. The PFObject+Subclass.h Obj-C category implements these methods, and you can override them.
You will do this by adding the extension shown below right after the WallPost
class. This extension contains two required protocol methods.
extension WallPost: PFSubclassing {
// Table view delegate methods here
//1
class func parseClassName() -> String {
return "WallPost"
}
//2
override class func initialize() {
var onceToken: dispatch_once_t = 0
dispatch_once(&onceToken) {
self.registerSubclass()
}
}
}
- Set the name of the class as seen in the backend database.
- Let Parse know that you intend to use this subclass for all objects with class type
WallPost
. You want to do this only once, so you’re usingdispatch_once_t
to make sure of that.
Next, add three properties to the WallPost
class, as follows:
@NSManaged var image: PFFile
@NSManaged var user: PFUser
@NSManaged var comment: String?
Here you’re adding a PFFile
property to hold the posted image, a PFUser
property to hold the user who uploaded the image, and an optional String
property for the post comment.
You’re using @NSManaged
here because deep down, PFObject
properties are just a set of key-value parameters. This way, when you set the value of each property, it will automatically be written as a key-value pair.
Another thing you want to do is define the PFQuery
object that this subclass returns when calling query()
. Add the following to the WallPost
class in WallPost.swift:
override class func query() -> PFQuery? {
//1
let query = PFQuery(className: WallPost.parseClassName())
//2
query.includeKey("user")
//3
query.orderByDescending("createdAt")
return query
}
Here’s what’s going on in this method:
- Create a
PFQuery
object for theWallPost
class. - Request that this query will return the full user details. Without this line of code, the query will just return the object reference of the user without its details.
- Sort the results by their creation date.
The last thing to do in WallPost.swift, before moving on, is writing an initializer. Add the following to the WallPost
class:
init(image: PFFile, user: PFUser, comment: String?) {
super.init()
self.image = image
self.user = user
self.comment = comment
}
override init() {
super.init()
}
This is a simple initializer to create a WallPost
object – either with starter values or without.
Now that you have the WallPost
class done, you’ll go back to uploading the images to the Parse server.
Open UploadImageViewController.swift, and right before the end of sendPressed(_:)
add the following code:
//Upload a new picture
//1
let file = PFFile(name: "image", data: pictureData)
file.saveInBackgroundWithBlock({ (succeeded, error) -> Void in
if succeeded {
//2
self.saveWallPost(file)
} else if let error = error {
//3
self.showErrorView(error)
}
}, progressBlock: { percent in
//4
println("Uploaded: \(percent)%")
})
Here’s what’s going on here:
- Create the
PFFile
object with the data of the image, and save it in the background. - If successful, save the
PostWall
object with the file you just successfully uploaded. - If not, inform the user.
- When saving a file, Parse let’s you track the progress with this progress block (closure in swift). Here you just write the progress to the console.
Next up is saveWallPost(_:)
; add the following to the WallPost
class:
func saveWallPost(file: PFFile)
{
//1
let wallPost = WallPost(image: file, user: PFUser.currentUser()!, comment: self.commentTextField.text)
//2
wallPost.saveInBackgroundWithBlock{ succeeded, error in
if succeeded {
//3
self.navigationController?.popViewControllerAnimated(true)
} else {
//4
if let errorMessage = error?.userInfo?["error"] as? String {
self.showErrorView(error!)
}
}
}
}
This method does the following steps:
- Create the
WallPost
object with the uploaded image, the current logged in user, and the comment. - Save to
WallPost
in the background. - If successful, go back to the wall.
- If not, inform the user.
Build and run your app. Log in with the user you created previously, and go to the upload screen via the top right button in the Wall Screen. Press “Select Picture” to select a picture from your gallery. When it’s selected, write a comment if you like, and press the “Send” button.
You can follow the percentage of the upload in the console – the progress block of the upload operation updates with the percentage complete status of the upload. Here, it’s shown in the debug console, but your finished app would more correctly show a progress bar to the user.
Now go to the Core Data Browser and view the object in your new table called WallPost. Hooray! But wait — you can’t see it in the app yet!
Now’s a perfect time to implement the picture retrieval process! :]
Showing Pictures on the Wall
Open WallPicturesViewController.swift. This view will show all of your users uploaded pictures.
When the view loads, it calls getWallImages()
to retrieve all the objects. As you can see, it’s empty now.
Before you can make that work, you’ll need to add some code to place the images on the wall once you’ve retrieved them. To that end, add loadWallViews(_:)
as follows:
func loadWallViews(objects: [WallPost]) {
cleanWall()
var originY: CGFloat = 0
for wallPost in objects {
//1
let wallView = UIView(frame: CGRect(x: 0, y: originY,
width: self.wallScroll.frame.size.width, height: 270))
//2
wallPost.image.getDataInBackgroundWithBlock { data, error in
if let data = data, image = UIImage(data: data) {
//3
//Add the image
let imageView = UIImageView(image: image)
imageView.frame = CGRect(x: 10, y: 10, width: wallView.frame.size.width - 20, height: 200)
imageView.contentMode = UIViewContentMode.ScaleAspectFit
wallView.addSubview(imageView)
//4
//Add the info label (User and creation date)
let creationDate = wallPost.createdAt
let dateFormatter = NSDateFormatter()
dateFormatter.dateFormat = "HH:mm dd/MM yyyy"
let infoLabel = UILabel(frame: CGRect(x: 10, y: 220, width: 0, height: 0))
let dateString = dateFormatter.stringFromDate(creationDate!)
if let username = wallPost.user.username {
infoLabel.text = "Uploaded by: \(username), \(dateString)"
} else {
infoLabel.text = "Uploaded by anonymous: , \(dateString)"
}
infoLabel.text = "Uploaded by: \(wallPost.user.username), \(dateString)"
infoLabel.font = UIFont(name: "HelveticaNeue", size: 12)
infoLabel.textColor = UIColor.whiteColor()
infoLabel.backgroundColor = UIColor.clearColor()
infoLabel.sizeToFit()
wallView.addSubview(infoLabel)
//5
//Add the comment label (User and creation date)
let commentLabel = UILabel(frame: CGRect(x: 10, y: CGRectGetMaxY(infoLabel.frame)+5, width:0, height: 0))
commentLabel.text = wallPost.comment
commentLabel.font = UIFont(name: "HelveticaNeue", size: 16)
commentLabel.textColor = UIColor.whiteColor()
commentLabel.backgroundColor = UIColor.clearColor()
commentLabel.sizeToFit()
wallView.addSubview(commentLabel)
}
}
//6
wallScroll.addSubview(wallView)
originY += 270
}
//7
wallScroll.contentSize.height = CGFloat(originY)
}
The first step is to clean the scroll view of any other UIView
objects that may be there, for example, if you reload the screen. Then you use fast enumeration to go through the whole array of objects. For every object in the array:
- Create a view to display the image and post details.
- Download the image data.
- Add the image view to the wall view
- Get the user that uploaded the image, and put it in a label with the creation date.
- Add a label with the comment.
- Add it to the scroll view and increment the next post’s position.
- Set the ScrollView’s content size.
Now, replace the content of getWallImages()
with the following code:
func getWallImages() {
//1
let query = WallPost.query()!
query.findObjectsInBackgroundWithBlock { objects, error in
if error == nil {
//2
if let objects = objects as? [WallPost] {
self.loadWallViews(objects)
}
} else if let error = error {
//3
self.showErrorView(error)
}
}
}
Here’s what this code is doing:
- Create a simple query to retrieve
WallPost
objects, and sorts the query by creation date as we defined earlier in WallPost.swift. - Find the object that matches the query. In this case, show all the objects of the type
WallPost
. If everything went fine, load the posts to the wall. - If there was an error, then inform the user.
Build and run! You should see the image and the comment you previously uploaded. Take some time now to play with the app, uploading some more images and comments, and seeing them appear on your wall!
Feels good, doesn’t it? :]
ParseUI
As noted earlier there is another way to present the saved images. That’s the approach you will implement next.
In the previous section you presented the images in a simple UIScrollView
, and calculated their sizes yourself. You may have thought that this job would be better done with a UITableView
. Well, the smart people at Parse thought the same thing, so they wrote ParseUI.framework and filled it with some very handy objects to display Parse specific UI.
You’re going to focus on these three:
-
PFQueryTableViewController: This
UITableViewController
subclass makes is as simple as it can be to execute aPFQuery
and display the result in a table. -
PFTableViewCell: A
UITableViewCell
subclass to go along with thePFQueryTableViewController
object. -
PFImageView: This
UIImageView
subclass manages downloading and displaying images stored on Parse’s server.
Now, open WallPicturesTableViewController.swift and change its superclass from UITableViewController
to PFQueryTableViewController
.
Similarly, modify WallPostTableViewCell to make it a subclass of PFTableViewCell
instead of UITableViewCell
. In addition change the postImage
property to be of type PFImageView
instead of UIImageView
.
Before you add code, you need to make some changes to your storyboard. Open Main.storyboard and locate the WallTableView scene:
Open the Attributes Inspector and you’ll see you have an option to set parameters that are specific to PFQueryTableViewController
:
These parameters let you choose the object type to fetch and show in the table, and also let you define the the table’s behavior by adding pull to refresh, pagination, and a loading view. When using a simple UITableView
to present the results, you could even set the PFObject
keys you want shown in the table, without needing to fill it in code. Under Parse Class enter WallPost.
Now go back to WallPicturesTableViewController.swift and add the following methods:
override func viewWillAppear(animated: Bool) {
loadObjects()
}
override func queryForTable() -> PFQuery {
let query = WallPost.query()
return query!
}
Every time the view appears, you want to reload the query and the table view. To specify which query to run, you override queryForTable()
to return a query for a WallPost
.
Finally, add the following table view delegate method to the class:
override func tableView(tableView: UITableView, cellForRowAtIndexPath indexPath: NSIndexPath, object: PFObject!) -> PFTableViewCell? {
// 1
let cell = tableView.dequeueReusableCellWithIdentifier("WallPostCell", forIndexPath: indexPath) as! WallPostTableViewCell
// 2
let wallPost = object as! WallPost
// 3
cell.postImage.file = wallPost.image
cell.postImage.loadInBackground(nil) { percent in
cell.progressView.progress = Float(percent)*0.01
println("\(percent)%")
}
// 4
let creationDate = wallPost.createdAt
let dateFormatter = NSDateFormatter()
dateFormatter.dateFormat = "HH:mm dd/MM yyyy"
let dateString = dateFormatter.stringFromDate(creationDate!)
if let username = wallPost.user.username {
cell.createdByLabel.text = "Uploaded by: \(username), \(dateString)"
} else {
cell.createdByLabel.text = "Uploaded by anonymous: , \(dateString)"
}
cell.createdByLabel.text = "Uploaded by: \(wallPost.user.username), \(dateString)"
cell.commentLabel.text = wallPost.comment
return cell
}
This method replaces the UITableView
data source method tableView(_:cellForRowAtIndexPath:)
with a more suitable form. You get the returned PFObject
as a parameter, without the need search it in a results array using and index path.
Let’s go over what this code does:
- Dequeue a cell from the table view, and cast it to a WallPostTableViewCell.
- Cast the given
PFObject
to a WallPost object - Download the post image using
PFImageView
‘sloadInBackground
method. In the completion closure you track the download’s progress. Here you fill aUIProgressBar
as the image downloads. - Add the creation date, the user’s name and the comment to the cell.
Before you can run this code, there’s one last thing you need to do. Go to LoginViewController.swift, and inside logInPressed(_:)
replace the segues name from scrollViewWallSegue
to tableViewWallSegue
. Do the same in RegisterViewController.swift.
Build and run you code, and you’ll see the wall posts presented in a table view with a nice progress bar filling up as the images are downloading.
Staying Logged In and Logging Out
YYou probably noticed that every time the app launches, the user needs to log in again. Also, the “Log Out” button just takes you back to main screen and it doesn’t actually log you out.
In this final part of the tutorial you’ll create code to keep the user logged in between app launches, and also provide an option to actually log out of the server.
First, go to LoginViewController.swift and add the following to viewDidLoad()
:
//Check if user exists and logged in
if let user = PFUser.currentUser() {
if user.isAuthenticated() {
self.performSegueWithIdentifier(scrollViewWallSegue, sender: nil)
}
}
When a user logs in to your app, Parse will save the user and their state between app launches. Here you check, using optional binding, if the user exists. If so, you check if the user is authenticated, and if so, then navigate to the posts wall.
To let a user log out, go to WallPicturesTableViewController.swift and find logOutPressed(_:)
. Replace it with the following:
@IBAction func logOutPressed(sender: AnyObject) {
PFUser.logOut()
navigationController?.popToRootViewControllerAnimated(true)
}
Here you simply log out the user and navigate back to the initial login screen. Do the same in WallPicturesViewController.swift.
Build and run, and you’re done! :]
Where To Go From Here?
Here is the complete example project you developed in the above tutorial.
You’ve seen how easy it is to upload and download objects based on a PFObject
subclass, and how to work with PFUser
s in Parse!
There is so much more you can do with Parse. Parse also lets you send push notifications to your users directly from within your app, add various social features that are already embedded in the framework, and add analytics so you track your users’ every move.
Parse also offers more advanced features like writing cloud code and schedule recurring jobs for the backend.
As you go along with writing your Parse apps, and get more familiar with it, I highly recommend you explore more of these features.
At this point, you’re likely inspired to add some backend functionality to a project that could benefit from it; or perhaps a cloud app you thought was going to be too hard is now within reach! :]
I hope to see some apps made from you with Parse in the future. If you have any questions or comments, please join the forum discussion below! :]
All videos. All books.
One low price.
A Kodeco subscription is the best way to learn and master mobile development — plans start at just $19.99/month! Learn iOS, Swift, Android, Kotlin, Flutter and Dart development and unlock our massive catalog of 50+ books and 4,000+ videos.
Learn more