How to Install iOS 9 and watchOS 2
This tutorial will guide you through the process of installing the iOS 9 beta and watchOS 2 beta on your devices, as well as highlighting the common issues. By Kelvin Lau.
Sign up/Sign in
With a free Kodeco account you can download source code, track your progress, bookmark, personalise your learner profile and more!
Create accountAlready a member of Kodeco? Sign in
Sign up/Sign in
With a free Kodeco account you can download source code, track your progress, bookmark, personalise your learner profile and more!
Create accountAlready a member of Kodeco? Sign in
Contents
How to Install iOS 9 and watchOS 2
15 mins
- Getting Started
- Updating iTunes for iOS 9
- Installing Xcode 7 Beta for watchOS 2
- Registering Your Device on Your Developer Account
- Getting the UDID From Your Device
- Using iTunes to Get Your iOS Device’s UUID
- Using Xcode to Get Your Device’s UUID
- Backing up your Data
- Backing up Data Using iTunes
- Installing iOS 9 Beta
- Installing watchOS 2 Beta
- Where to Go From Here?

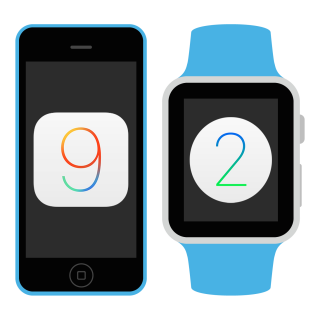
Apple unveiled iOS 9 and watchOS 2
Being a developer has its privileges — one of them being immediate access to iOS 9 and watchOS 2, both of which were announced at WWDC 2015!
iOS 9 has a stack of new features, such as Multitasking for iPad, new built-in apps, improvements to existing apps, performance optimizations and a host of other clever features.
watchOS 2 also has a list of new and improved features, including customized complications for app specific information, native watch apps and a lot more!
If upgrading to iOS9 or watchOS 2 while they’re in beta worries you, don’t worry; we’ve prepared this guide to help you upgrade your devices as painlessly as possible!
Getting Started
- App crashes
- Device instability
- Dramatically reduced battery life, especially on iOS devices
iOS 9 beta works on iPhone 4s or later, iPod touch 5th gen, and iPad 2 or later. If you have one of these devices, and you’re a registered developer, then you’re eligible to install the betas from Apple.
Before you start, you’ll need to confirm that you have the proper software to support the installation of iOS 9 or watchOS 2:
- To install iOS 9 Beta, you’ll need the latest version of iTunes. At the time of writing, the latest iTunes is 12.1.2.
- To install watchOS 2 you’ll need the latest beta version of Xcode 7. At the time of writing, the latest Xcode 7 beta version is 7.0 (7A120f)
The two sections below show you how to update to the latest versions of iTunes and Xcode 7.
Updating iTunes for iOS 9
Updating iTunes is relatively straightforward.
First, open iTunes, then select iTunes\Check for Updates from the menu bar:
Follow the prompts provided on the screen to install the most recent version of iTunes.
Installing Xcode 7 Beta for watchOS 2
Downloading the beta version of Xcode 7 is also relatively straightforward.
Download the Xcode 7 beta here, and follow the installer prompts to get Xcode 7 installed. For clarification, Xcode 7 beta is a standalone app that can be installed side-by-side with Xcode 6. Just bear in mind that the installation process will set Xcode 7 as the default, meaning if you double-click an Xcode project file to open it, it’ll open in Xcode 7 rather than Xcode 6, even if you have both installed.
Registering Your Device on Your Developer Account
Before you can install either iOS 9 Beta or watchOS 2 Beta, you’ll need to register your device on your developer account.
Note: If you’ve previously used your device for development purposes, Xcode may have already registered the device for you. However, it’s a good idea to follow the steps below just to ensure that the upgrade goes smoothly.
Getting the UDID From Your Device
You’ll need your UDID (Unique Device Identifier) to register your device. But how can you find this for your iOS or watchOS device?
For an iOS device, you can get the UDID from the device in one of two ways: the first way is to use iTunes, and the second way is to use Xcode.
For an Apple Watch, the only way to get the UDID from the device is to use Xcode.
Using iTunes to Get Your iOS Device’s UUID
First, connect your iOS device to your Mac and launch iTunes.
Next, select your device by clicking the small device icon just below the playback controls, and then click Summary in the list on the left:
Once on the Summary tab, click the Serial Number label to reveal the identifier field and the 40-character UDID string.
Control-click the UDID label and choose Copy to copy the identifier to the clipboard:
Using Xcode to Get Your Device’s UUID
First, connect your iOS device to your Mac and launch Xcode.
Next, open Devices from the Window menu and select your device from the list on the left-hand side:
Obtain the UDID identifier from your device’s page by highlighting the field and copying the identifier:
Now that you have your UDID identifier, you’re ready to register it on your developer account!
Head over to Certificates, Identifiers, & Profiles and select Devices:
You’re now on the iOS devices page. Click the ‘+’ button to add a device:
Give your device a Name, enter (or paste in) the UDID you copied from the earlier step, and click Continue to register your device:
If you’ve used your device for development before, you may get a message stating that you’ve already registered that device on the account. No harm done — at least now you’re certain that the device is registered! Otherwise, go through the prompts and you’ll be greeted with a confirmation screen stating you successfully registered your device.
You’re done registering your device — now on to the all-important backing-up of your data!
Backing up your Data
Before you proceed with ANY OS installation or upgrade, it’s a good idea to back up your data. If you’re one of those wild ones who lives life on the edge without backups, or if you want to start your iOS 9 beta adventures with a clean slate, you can skip this step and proceed on to installation.
Note: If your device is an iPhone and you have an Apple Watch paired to it, the upgrade process will unpair your Apple Watch from your iPhone and will reset it to factory settings during the installation process. When you back up your iPhone, you also back up your watch’s data.
Once you’ve installed iOS 9 beta, you can pair your watch and your iPhone again and restore the Apple Watch data from the backup.
Backing up Data Using iTunes
Backing up your data using iTunes is quite straightforward.
First, connect your iOS device to your Mac and open iTunes.
As you did before, select your device and open the Summary tab. Select Back Up Now in the second section:
iTunes will then happily back up your data and let you know when it’s done.
Now that you’ve backed up your iOS device, you’re ready to install iOS 9 beta!
Installing iOS 9 Beta
You can find the latest version of the iOS 9 beta here. Simply download the version corresponding to your device by selecting it from the drop down box:
Ensure your device is plugged in to your Mac and that iTunes is open. Before you can install iOS 9 Beta, you’ll have to disable Find My Phone, since iTunes will display an error if you attempt to upgrade your device with this enabled.
To disable Find My Phone, simply navigate to Settings\iCloud\Find My iPhone (or Find My iPad or Find My iPod touch, depending on your device), and turn Find My iPhone off.
It’s finally time to take the big step of upgrading your iOS device!
From the Summary tab, find the section that shows your current iOS version:
Hold down the Option key and click Restore iPhone. In the window that appears, browse to the iOS 9 beta file you downloaded:
Click Open and the update will begin. Your iOS device is now being updated to the iOS 9 beta in a clean state. Make sure your device is connected to your Mac during the installation and until you successfully restore your device’s data from a backup (if you have one).
When your device finally boots up after the installation process, you’ll be greeted by the on boarding experience much like what you’d expect from a completely new iOS device. There, you’ll have the option to restore your data from a previous backup. Make sure your device is still connected to your Mac so you can restore your device data from iTunes.
At this point, you now have iOS 9 Beta installed on your device! To confirm this, navigate to Settings\General\About on your device and check the Version – you should see 9.0, followed by the build number in curly braces.
Installing watchOS 2 Beta
First, connect your watch to the charger; to upgrade to watchOS 2, your watch must have more than 50 percent charge, and remain connected to the charger during installation. As well, make sure your iPhone is connected to WiFi at all times during the installation.
Now, you’ll need to set up your watch’s configuration settings appropriately.
Open Safari on your iPhone and navigate to https://developer.apple.com/watchos/pre-release/. You should see the “Start Developing for watchOS 2” screen on your iPhone:
Tap the blue Download button, and you’ll be taken to the download links:
Tap Download watchOS 2 beta Configuration Profile, which will take you to the developer login screen. Log in using the developer account you registered your watch under.
Once you’ve logged in, you’ll see an alert prompting you to select which device you’d like to install the profile on:
Select Apple Watch, then tap Install on the Install Profile screen:
Tap through the confirmation screens and your Apple Watch will restart. This step doesn’t install watchOS 2; instead, it’s just a preliminary step required to gain access to the beta update.
Now that the configuration file has been loaded on your Apple Watch, you can access the watchOS 2 update from your Apple Watch app; this is where you’ll start the update process.
Open up the Apple Watch app on your iPhone and navigate to General\Software Update. You’ll be greeted with the following:
Select Download and Install; tap through the resultant confirmation screens and your watch will begin the installation of watchOS 2 beta. Enter any iPhone or Apple Watch passcodes as you’re prompted for them.
Make sure your Apple Watch remains connected to the charger while watchOS 2 is being installed. Once the update is complete, your Apple Watch will restart.
Confirm that you’ve successfully updated your Apple Watch software to watchOS 2 beta by going to Settings\General\About and checking the Version – you should see 2.0, followed by the build number in curly braces.
Where to Go From Here?
In this tutorial, you’ve learned how to update your iOS devices and Apple Watch to the newest beta versions, iOS 9 and watchOS 2. At the time of this writing, Apple has only released the first version of the beta, but it’s quite certain there will be more versions released in the coming weeks.
You’re now ready to take advantage of all the cool new features that the new operating systems have to offer! Be sure to check out our new posts on all the great new SDK features released with iOS 9 and watchOS 2:
I hope you enjoyed this tutorial, and if you have any questions or comments, please post them in the comments below!
All videos. All books.
One low price.
A Kodeco subscription is the best way to learn and master mobile development — plans start at just $19.99/month! Learn iOS, Swift, Android, Kotlin, Flutter and Dart development and unlock our massive catalog of 50+ books and 4,000+ videos.
Learn more