How to Make a VR Game With Unity and Google Cardboard
Google Cardboard is a new API for creating virtual reality games with a DIY headset. In this tutorial, you’ll use it to kill blobs with throwing stars! By Todd Kerpelman.
Getting Started with The Google VR SDK
The first thing you need to do is download the SDK. Head on over to the Google VR Downloads page, click on the “Agree” button if you see one, and download the SDK. You can do this either by cloning the repo (if you’re into git), or clicking the “download the repo directly” link (if you’re not).
Next, import it into your project. From Unity’s menu, select Assets\Import Package\Custom Package… and then select the GoogleVRForUnity.unitypackage from within the repo you just downloaded.
Make sure everything is selected, uncheck the DemoScenes folder, and then click the Import button.

Hack it Like It’s Hot
To get your game working as a VR experience, you need to perform a few quick ‘n dirty hacks.
From the GoogleVR\Prefabs folder in the Project Browser, drag the GvrMain Prefab into your scene. In the inspector, give it almost the same Position as your ninja main character — (-5.53, 1.13, 0.122) — and a Y Rotation of 90.

You’ll notice it’s a little bit higher than the ninja’s center to represent the fact that you’re looking through his eyes.
Next, select the Main Camera in the hierarchy and uncheck it in the inspector to disable it. Do the same thing for the raccoon-ninja object.
Now, run your game in the Unity editor again. You should see something resembling a 3D scene! And if you hold down the option key while moving your mouse around, your camera will move as if you were turning your head.

Running Your Scene on an iOS Device

It’s great to be able to run your game in the Unity editor, but last time I checked, there was no way to fit a computer monitor inside a VR headset without some serious pain, hence why you’re also working on an iPhone.
- Select File\Build Settings — iOS should already be selected as your default platform.
- Click Player Settings and switch to the inspector
- Under Resolution and Presentation, change the Default Orientation to Landscape Left.
- In Other Settings, change your Bundle Identifier to be something appropriate for your organization. (Like
com.<your_company>.NinjaAttackVR) - Change your Target Device to iPhone Only

Attach your iPhone to your computer, select Build and Run and give your export folder a name; it can be anything you’d like.
Unity will export your project, and then it should automatically open up in Xcode. If it doesn’t, start up Xcode and manually open the generated project. Run it, and try it out on your phone!
The first time you run your game, it takes you through a setup process where you can scan a QR code on your Cardboard unit. This lets the Google VR SDK make a few minor graphical adjustments based on how far apart your lenses are, their distance from the phone, and so on.

Note: If the setup process displays the error message Problem in parsing the URL after you scanned the QR code of your Cardboard unit, you’ll have to modify the info.plist of your Xcode project as described here, in the Apple developer forums.
Note: If the setup process displays the error message Problem in parsing the URL after you scanned the QR code of your Cardboard unit, you’ll have to modify the info.plist of your Xcode project as described here, in the Apple developer forums.
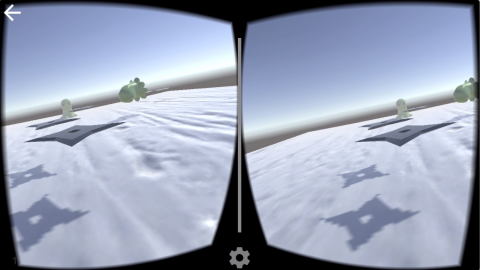
Now go ahead and insert your phone into your Cardboard unit. Turn your head to adjust the camera’s view, and enjoy some fairly convincing 3D graphics.
Make it a Game Again!
Being able to view your game world is great and all, but you need to bring the gameplay back. Specifically, you want to be able to shoot ninja stars in the direction you’re facing. That’s the first piece of gameplay you’ll work with.
For UI, Cardboard supports a single button. It might seem limiting, but if you combine it with the motion tracking you get from moving your head, it allows for interactions that are more complex.
In Ninja Attack, you detect if your user is in VR mode with the GvrViewer.Instance.VRModeEnabled property. You’ll check if the button is pressed with the GvrViewer.Instance.Triggered property. If both of those come out to be true, you launch a ninja star in the direction the user is looking.
Open up your NinjaStarLauncher.cs script. You can find it attached to the GameLogic GameObject in the inspector.
Create a new private variable:
private Vector3 _vrShooterOffset;
Initialize it in your Start() method:
_vrShooterOffset = new Vector3(0.0f, -0.4f, 1.0f);
Replace Update() with the following:
void Update () {
  //1
  if (GvrViewer.Instance.VRModeEnabled && GvrViewer.Instance.Triggered && !_gameController.isGameOver) {
    GameObject vrLauncher = GvrViewer.Instance.GetComponentInChildren<GvrHead>().gameObject;
    // 2
    LaunchNinjaStarFrom(vrLauncher, _vrShooterOffset);
  } else if (!GvrViewer.Instance.VRModeEnabled && Input.GetButtonDown("Fire1") &&
    !_gameController.isGameOver) {
    // This is the same code as before
    Vector3 mouseLoc = Input.mousePosition;
    Vector3 worldMouseLoc = Camera.main.ScreenToWorldPoint(mouseLoc);
    worldMouseLoc.y = ninja.transform.position.y;
    ninja.transform.LookAt(worldMouseLoc);
    LaunchNinjaStarFrom(ninja, _shooterOffset);
  }
}
That will get things working. Here’s a look at what Update() does:
- You first check if the game is in VR mode and if the user has pressed the button by examining the properties on the
GvrViewer.Instancesingleton object. - After that, you call
LaunchNinjaStarFrom()to instantiate a ninja star. You pass in two parameters:- The first is the head GameObject. The Google VR library moves it around for you, so it should already be pointed in the right direction.
- The second is a slight offset, so the method instantiates a ninja star slightly in front of and below the head GameObject, which looks a little more natural — otherwise it would look like you’re shooting ninja stars out of your eyes. Cool, but weird.
- The first is the head GameObject. The Google VR library moves it around for you, so it should already be pointed in the right direction.
- The second is a slight offset, so the method instantiates a ninja star slightly in front of and below the head GameObject, which looks a little more natural — otherwise it would look like you’re shooting ninja stars out of your eyes. Cool, but weird.
Since your Ninja Star GameObject is already designed to fly out from where it’s created, it will fire in the correct direction.
Give it another try! At this point, you can turn your head around and shoot bad guys. The win or lose logic still applies.
Take that, blobbies!
Take that, blobbies!