Realm Tutorial: Getting Started
Learn how to use Realm, a popular cross-platform mobile database that is an alternative to Core Data. By Bradley Johnson.
Sign up/Sign in
With a free Kodeco account you can download source code, track your progress, bookmark, personalise your learner profile and more!
Create accountAlready a member of Kodeco? Sign in
Sign up/Sign in
With a free Kodeco account you can download source code, track your progress, bookmark, personalise your learner profile and more!
Create accountAlready a member of Kodeco? Sign in
Contents
Update note: This tutorial was updated for iOS 9 and Swift 2.2 by Bradley Johnson. Original tutorial was by team member Bill Kastanakis.
Realm is a cross-platform mobile database solution designed specifically for mobile applications.
It’s fast, lightweight, and extremely simple to integrate in your project. Most common functions such as querying the database consist of a single line of code!
Unlike wrappers around Core Data such as MagicalRecord, Realm does not rely on Core Data or even a SQLite backend. The Realm developers claim that their proprietary data storage solution is even faster than SQLite and Core Data.
Here’s some example Core Data code to fetch a set of records with a predicate and then sort the results:
let fetchRequest = NSFetchRequest(entityName: "Specimen")
let predicate = NSPredicate(format: "name BEGINSWITH [c]%@", searchString)
fetchRequest.predicate = predicate
let sortDescriptor = NSSortDescriptor(key: "name", ascending: true)
fetchRequest.sortDescriptors = [sortDescriptor]
do {
let results = try managedObjectContext?.executeFetchRequest(fetchRequest)
} catch { ... }
What takes quite a few lines with Core Data can be achieved with far fewer lines in Realm:
let predicate = NSPredicate(format: "name BEGINSWITH [c]%@", searchString);
do {
let specimens = try Realm().objects(Specimen).filter(predicate).sorted("name", ascending: true)
} catch { ... }
Working with Realm results in more concise code — which makes it easier to write and read your code.
This Realm tutorial will introduce you to the basic features of Realm on iOS. You’ll learn how to link in the Realm framework, create models, perform queries, and update records.
Getting Started
Here’s the scenario: you’ve accepted a position as an intern in the National Park Service and your job is to document the species found in the biggest national parks in the United States. You need an assistant to keep notes and document your findings, but the agency doesn’t have an assistant to spare, nor the budget to hire a new one. Instead, you’ll create a virtual assistant for yourself — an app named “Agents Partner”.
Download the starter project for this tutorial here: AgentsPartner_Starter
Open the starter project in Xcode. MapKit is already set up in your project. Right now your app only contains instances of UITableView
and MKMapView
to provide the map functionality.
The starter project is missing Realm, so it’s time to add it.
One great way to install Realm is with CocoaPods. CocoaPods is a dependency manager for Swift and Objective-C Cocoa projects, and it has thousands of libraries you can download and use in your own projects.
Create a file called ‘Podfile’ in the root directory of the starter project (To do this in command line simply use the command touch Podfile
). Copy the following chunk of text and paste it into your Podfile:
platform :ios, ‘9.0’
use_frameworks!
target ‘Agents Partner’ do
pod 'RealmSwift', '~> 0.98'
end
Save and close your Podfile. Back in the command line, in the root directory of your project (the same location your Podfile is in), run the command pod install
. This tells CocoaPods to scan through your Podfile and install any pods you have listed in your Podfile. Pretty neat! It may take several minutes for Realm to install, keep an eye on your terminal and once it’s complete you will see a line near the bottom that begins with Pod installation complete!
.
Open the root directory of the starter project in finder, and you will now see some folders that CocoaPods placed there, in addition to Agents Partner.xcworkspace. If you currently have your Agents Partner starter project open in Xcode, close it now, and then double click to open the .xcworkspace file. This is now the file you will open when you want to work on this project. If you open the regular project file by mistake, Xcode won’t properly be able to find any of the dependencies you installed with CocoaPods, so you must use the .xcworkspace file instead. Expand the Agents Partner project in the Project navigator, and then the group/folder also named Agents Partner to reveal the files you will be working with.
Thats it! Build and run the project to ensure everything compiles. If not, re-check the steps above carefully. You should see a basic screen like so:
Introducing Realm Browser
Realm also provides a nice utility that you’ll want to install from the App Store to make your life a little easier.
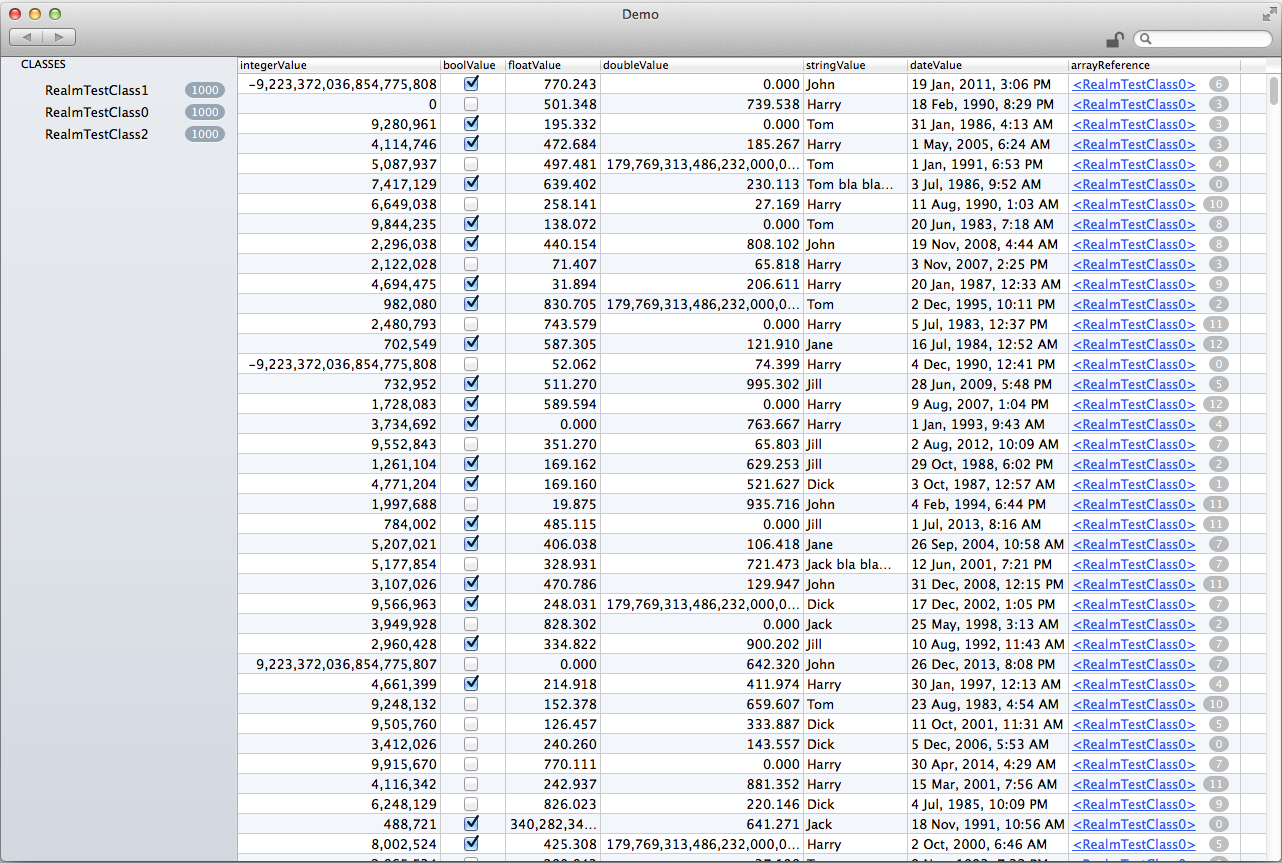
The Realm Browser lets you read and edit Realm databases. It’s really useful while developing as the Realm database format is proprietary and not easily human-readable. Download it here.
Concepts and Major Classes
In order to better understand what Realm does, here’s an overview of the Realm classes and concepts you’ll use in this tutorial:
Realm: Realm instances are the heart of the framework; it’s your access point to the underlying database, similar to a Core Data managed object context. You will create instances using the Realm()
initializer.
Object: This is your Realm model. The act of creating a model defines the schema of the database; to create a model you simply subclass Object
and define the fields you want to persist as properties.
Relationships: You create one-to-many relationships between objects by simply declaring a property of the type of the Object
you want to refer to. You can create many-to-one and many-to-many relationships via a property of type List
, which leads you to…
Write Transactions: Any operations in the database such as creating, editing, or deleting objects must be performed within writes which are done by calling write(_:)
on Realm
instances.
Queries: To retrieve objects from the database you’ll need to use queries. The simplest form of a query is calling objects()
on a Realm
instance, passing in the class of the Object
you are looking for. If your data retrieval needs are more complex you can make use of predicates, chain your queries, and order your results as well.
Results: Results is an auto updating container type that you get back from object queries. They have a lot of similarities with regular Arrays
, including the subscript syntax for grabbing an item at an index.
Now that you’ve had an introduction to Realm, it’s time to get your feet wet and build the rest of the project for this tutorial.
Creating Your First Model
Open Specimen.swift from the Models group and add the following implementation:
import Foundation
import RealmSwift
class Specimen: Object {
dynamic var name = ""
dynamic var specimenDescription = ""
dynamic var latitude = 0.0
dynamic var longitude = 0.0
dynamic var created = NSDate()
}
The code above adds a few properties: name
and specimenDescription
store the specimen’s name and description respectively. Specific datatypes in Realm, such as strings, must be initialized with a value. In this case you initialize them with an empty string.
latitude
and longitude
store the coordinates for the specimen. Here you set the type to Double
and initialize them with 0.0
.
Finally, created
stores the creation date of the specimen. NSDate()
returns the current date, so you can initialize the property with that value.
Now that you’ve created your first model in Realm, how about using what you’ve learned in a small challenge?
Specimens will be separated into different categories. The challenge is to create a Category
model by yourself; name the file Category.swift and give your new model a single String
property name
.
If you want to check your work, the solution is below:
[spoiler title=”Category object”]
Once you’ve created a new Swift file Category.swift, its contents should look like this:
import Foundation
import RealmSwift
class Category : Object {
dynamic var name = ""
}
[/spoiler]
You now have a Category
model which you need to relate to the Specimen
model somehow.
Recall the note above that stated you could create relationships between models by simply declaring a property with the appropriate model to be linked.
Open Specimen.swift and add the following declaration below the other properties:
dynamic var category: Category!
This sets up a one-to-many relationship between Specimen
and Category
. This means each Specimen
can belong to only one Category
, but each Category
may have many Specimen
s.
You have your basic data models in place — it’s time to add some records to your database!
Adding Records
When the user adds a new specimen, they’ll have a chance to enter the specimen name and select a category. Open CategoriesTableViewController.swift. This view controller will present the list of categories in a table view so the user can select one.
Before you start writing code to integrate Realm into this view controller, you must first import the RealmSwift framework in this source file. Add the following line to the top of the file, just below import UIKit
:
import RealmSwift
You’ll need to populate this table view with some default categories. You can store these Category
instances in an instance of Results
.
CategoriesTableViewController
has a categories
array as a placeholder for now. Find the following code at the top of the class definition:
var categories = []
and replace it with the following lines:
let realm = try! Realm()
lazy var categories: Results<Category> = { self.realm.objects(Category) }()
When you you need to fetch objects, you always need to define which models you want. In the code above you first create a Realm
instance, and then populate categories
by calling objects(_:)
on it, passing in the class name of the model type you want.
try!
when calling Realm methods that throw an error. In your own code, you should really be using try
and do
/ catch
to catch errors and handle them appropriately.You’ll want to give your user some default categories to choose from the first time the app runs.
Add the following helper method to the class definition, below preferredStatusBarStyle
:
func populateDefaultCategories() {
if categories.count == 0 { // 1
try! realm.write() { // 2
let defaultCategories = ["Birds", "Mammals", "Flora", "Reptiles", "Arachnids" ] // 3
for category in defaultCategories { // 4
let newCategory = Category()
newCategory.name = category
self.realm.add(newCategory)
}
}
categories = realm.objects(Category) // 5
}
}
Taking each numbered line in turn:
- If
count
here is equal to 0 this means the database has noCategory
records, which is the case the first time you run the app. - This starts a transaction on
realm
— you’re now ready to add some records to the database. - Here you create the list of default category names and then iterate through them.
- For each category name, you create a new instance of
Category
, populatename
and add the object to the realm. - Finally, you fetch all of the categories you just created and store them in
categories
.
Add the following line to the end of viewDidLoad()
:
populateDefaultCategories()
This calls the helper method to populate your test categories when the view loads.
Now that you have some data, you’ll need to update the table view data source methods to show the categories. Find tableView(_:cellForRowAtIndexPath:)
and replace the method with the following implementation:
override func tableView(tableView: UITableView, cellForRowAtIndexPath indexPath: NSIndexPath) -> UITableViewCell {
let cell = tableView.dequeueReusableCellWithIdentifier("CategoryCell", forIndexPath: indexPath)
let category = categories[indexPath.row]
cell.textLabel?.text = category.name
return cell
}
This implementation retrieves a category from categories
based on the index path and then sets the cell’s text label to show the category’s name
.
Next, add this property below the other properties you just added to CategoriesTableViewController
:
var selectedCategory: Category!
You’ll use this property to store the currently selected Category
.
Find tableView(_:willSelectRowAtIndexPath:)
and replace the entire method with the following:
override func tableView(tableView: UITableView, willSelectRowAtIndexPath indexPath: NSIndexPath) -> NSIndexPath {
selectedCategory = categories[indexPath.row]
return indexPath
}
This will now store the user’s selection in the property you declared above.
Build and run your app.
Zoom and pan the map to somewhere interesting and create a new annotation by tapping on the + button in the top-right. Tap on the map pin to select it, and then tap on the annotation data to edit the details. Then tap the Category text field to see the list of categories as shown below:
You can select a category, but that will only save it to the property and not anywhere else in the database. It’s all well and good to see the categories show up in the app, but it’s always reassuring to actually see the records in the database. You can do this via the Realm Browser.
Working With the Realm Browser
One thing you don’t know at this point is where your Realm database lives. There’s a nice trick you can use to find it.
Open MapViewController.swift and import the RealmSwift framework. Add the following line to the top of the file, just below the existing import
statements at the top of the file:
import RealmSwift
Now add the following line to viewDidLoad()
just after the call to super.viewDidLoad()
:
print(Realm.Configuration.defaultConfiguration.path!)
This line simply prints the database location to the debug console. It’s a short step to then browse the database using the Realm Browser.
Build and run your app; you’ll see that it reports the location of the database in the Xcode console.
The easiest way to go to the database location is to open Finder, press Cmd-Shift-G and paste in the path your app reported.
Once you open the folder in Finder, you might see one or two files. One of them will be default.realm, which is your database file. The second file, which may or may not be present, is default.realm.lock which prevents modification from other apps while the database is in use.
If you haven’t yet downloaded Realm Browser, download it now from the Mac App Store. Double-click default.realm to open it with Realm Browser:
Once the database is open in Realm Browser, you’ll see Category with a 5 next to it. This means that this class contains five records. Click a class to inspect the individual fields contained within.
Adding Categories
Now you can implement the logic to set the category
of a Specimen
.
Open AddNewEntryController.swift and import the RealmSwift framework. Once again, import Realm at the top of the file, just below the existing import statements:
import RealmSwift
Now add the following property to the class:
var selectedCategory: Category!
You’ll use this to store the selected Category
.
Next, find unwindFromCategories()
and add the following implementation:
if segue.identifier == "CategorySelectedSegue" {
let categoriesController = segue.sourceViewController as! CategoriesTableViewController
selectedCategory = categoriesController.selectedCategory
categoryTextField.text = selectedCategory.name
}
unwindFromCategories()
is called when the user selects a category from CategoriesTableViewController
, which you set up in the previous step. Here, you retrieve the selected category, store it locally in selectedCategory
, and then fill in the text field with the category’s name.
Now that you have your categories taken care of, you can create your first Specimen
!
Still in AddNewEntryController.swift, add one more property to the class:
var specimen: Specimen!
This property will store the new specimen object.
Next, add the helper method below to the class:
func addNewSpecimen() {
let realm = try! Realm() // 1
try! realm.write { // 2
let newSpecimen = Specimen() // 3
newSpecimen.name = self.nameTextField.text! // 4
newSpecimen.category = self.selectedCategory
newSpecimen.specimenDescription = self.descriptionTextField.text
newSpecimen.latitude = self.selectedAnnotation.coordinate.latitude
newSpecimen.longitude = self.selectedAnnotation.coordinate.longitude
realm.add(newSpecimen) // 5
self.specimen = newSpecimen // 6
}
}
Here’s what the code above does:
- You first get a
Realm
instance, as before. - Here you start the write transaction to add your new
Specimen
. - Next, you create a new
Specimen
instance. - Then you assign the
Specimen
values. The values come from the text input fields in the user interface, the selected categories, and the coordinates from the map annotation. - Then you add the new
Specimen
to the realm. - Finally, you assign the new
Specimen
to yourspecimen
property.
You’ll need some sort of validator to make sure all the fields are populated correctly in your Specimen
. validateFields()
in AddNewEntryController
exists to do just this: check for a specimen name and description. Since you’ve just added the ability to assign a category to a specimen, you’ll need to check for that field too.
Still in AddNewEntryController.swift, find the line in validateFields()
that looks like this:
if nameTextField.text!.isEmpty || descriptionTextField.text!.isEmpty {
Change that line to this:
if nameTextField.text!.isEmpty || descriptionTextField.text!.isEmpty || selectedCategory == nil {
This verifies that all fields have been filled in and that you’ve selected a category as well.
Next, add the following method to the class:
override func shouldPerformSegueWithIdentifier(identifier: String?, sender: AnyObject?) -> Bool {
if validateFields() {
addNewSpecimen()
return true
} else {
return false
}
}
In the above code you call the method to validate the fields; only if everything is filled in do you add the new specimen.
Build and run your app; tap the + button to create a new Specimen
. Fill in the name and description, select a Category
, and tap Confirm to add your Specimen
to the database.
The view controller dismisses — but nothing appears to happen. What’s the deal?
Ah — you’ve posted the record to your realm, but you haven’t yet populated the map with your newly discovered specimen!
Retrieving Records
Now that you’ve added a specimen to the database, you want it to show up on the map.
First, take another look at the updated database in the Realm Browser:
You’ll see your one lonely specimen, with all fields filled along with the latitude and longitude from the MKAnnotation
. You’ll also see the link to your specimen’s category — that means your one-to-many Category
relationship is working as expected. Click the Category
in your Specimen
record to view the Category
record itself.
Now you need to populate the map in the app.
Open SpecimenAnnotation.swift and add a property to the class:
var specimen: Specimen?
This will hold the Specimen
for the annotation.
Next, replace the initializer with the following:
init(coordinate: CLLocationCoordinate2D, title: String, subtitle: String, specimen: Specimen? = nil) {
self.coordinate = coordinate
self.title = title
self.subtitle = subtitle
self.specimen = specimen
}
The change here is to add an option to pass in a Specimen
. The specimen will have a default value of nil which means you can omit that argument if you like. That means the rest of the app can continue to call the initializer with just the first three arguments as usual if there’s no specimen.
Now open MapViewController.swift add a new property to the class:
var specimens = try! Realm().objects(Specimen)
Since you want to store a collection of specimens in this property, you simply ask a Realm
instance for all objects of type Specimen
.
Now you’ll need some sort of mechanism to populate the map. Still in MapViewController.swift, add the following method to the class:
func populateMap() {
mapView.removeAnnotations(mapView.annotations) // 1
specimens = try! Realm().objects(Specimen) // 2
// Create annotations for each one
for specimen in specimens { // 3
let coord = CLLocationCoordinate2D(latitude: specimen.latitude, longitude: specimen.longitude);
let specimenAnnotation = SpecimenAnnotation(coordinate: coord,
title: specimen.name,
subtitle: specimen.category.name,
specimen: specimen)
mapView.addAnnotation(specimenAnnotation) // 4
}
}
Taking each numbered comment in turn:
- First, you clear out all the existing annotations on the map to start fresh.
- Next, you refresh your
specimens
property. - You then loop through
specimens
and create aSpecimenAnnotation
with the coordinates of the specimen, as well as itsname
andcategory
. - Finally, you add each
specimenAnnotation
to theMKMapView
.
Now you need to call this method from somewhere. Find viewDidLoad()
and add this line to the end of its implementation:
populateMap()
That will ensure the map will be populated with the specimens whenever the map view controller loads.
Finally you just need to modify your annotation to include the specimen name and category. Find unwindFromAddNewEntry(_:)
and replace the method with the following implementation:
@IBAction func unwindFromAddNewEntry(segue: UIStoryboardSegue) {
let addNewEntryController = segue.sourceViewController as! AddNewEntryController
let addedSpecimen = addNewEntryController.specimen
let addedSpecimenCoordinate = CLLocationCoordinate2D(latitude: addedSpecimen.latitude, longitude: addedSpecimen.longitude)
if let lastAnnotation = lastAnnotation {
mapView.removeAnnotation(lastAnnotation)
} else {
for annotation in mapView.annotations {
if let currentAnnotation = annotation as? SpecimenAnnotation {
if currentAnnotation.coordinate.latitude == addedSpecimenCoordinate.latitude && currentAnnotation.coordinate.longitude == addedSpecimenCoordinate.longitude {
mapView.removeAnnotation(currentAnnotation)
break
}
}
}
}
let annotation = SpecimenAnnotation(coordinate: addedSpecimenCoordinate, title: addedSpecimen.name, subtitle: addedSpecimen.category.name, specimen: addedSpecimen)
mapView.addAnnotation(annotation)
lastAnnotation = nil;
}
This method is called once you’ve returned from AddNewEntryController
and there’s a new specimen to add to the map. When you add a new specimen to the map, it gets the generic annotation icon; now that you have a category, you want to change that icon to the category-specific icon. Here you simply remove the last annotation added to the map (the generic-looking one) and replace it with an annotation that shows the name and category of the specimen.
Build and run your app; create some new specimens of different categories and see how the map updates:
A Different View
You might have noticed the Log button in the top-left of the map view. In addition to the map, the app also has a text-based table view listing of all annotations called the Log View. You will now populate this table view with some data.
Open LogViewController.swift and import RealmSwift
again below the other import
statements:
import RealmSwift
Then replace the specimens
property with the following:
var specimens = try! Realm().objects(Specimen).sorted("name", ascending: true)
In the code above, you replace the placeholder array with a Results
which will hold Specimen
s just as you did in MapViewController
. They will be sorted by name
.
Next, replace tableView(_:cellForRowAtIndexPath:)
with the following implementation:
override func tableView(tableView: UITableView, cellForRowAtIndexPath indexPath: NSIndexPath) -> UITableViewCell {
let cell = self.tableView.dequeueReusableCellWithIdentifier("LogCell") as! LogCell
let specimen = specimens[indexPath.row]
cell.titleLabel.text = specimen.name
cell.subtitleLabel.text = specimen.category.name
switch specimen.category.name {
case "Uncategorized":
cell.iconImageView.image = UIImage(named: "IconUncategorized")
case "Reptiles":
cell.iconImageView.image = UIImage(named: "IconReptile")
case "Flora":
cell.iconImageView.image = UIImage(named: "IconFlora")
case "Birds":
cell.iconImageView.image = UIImage(named: "IconBird")
case "Arachnid":
cell.iconImageView.image = UIImage(named: "IconArachnid")
case "Mammals":
cell.iconImageView.image = UIImage(named: "IconMammal")
default:
cell.iconImageView.image = UIImage(named: "IconUncategorized")
}
return cell
}
This method will now populate the cell with the specimen’s name and category..
Build and run your app. Tap Log and you’ll see all of your entered specimens in the table view like so:
Fetching With Predicates
You really want your app to rock, so you’ll need a handy search feature. Your starter project contains an instance of UISearchController
— you’ll just need to add a few modifications specific to your app in order to make it work with Realm.
In LogViewController.swift, replace the searchResults
property with the following:
var searchResults = try! Realm().objects(Specimen)
Now add the method below to the class:
func filterResultsWithSearchString(searchString: String) {
let predicate = NSPredicate(format: "name BEGINSWITH [c]%@", searchString) // 1
let scopeIndex = searchController.searchBar.selectedScopeButtonIndex // 2
let realm = try! Realm()
switch scopeIndex {
case 0:
searchResults = realm.objects(Specimen).filter(predicate).sorted("name", ascending: true) // 3
case 1:
searchResults = realm.objects(Specimen).filter(predicate).sorted("created", ascending: true) // 4
default:
searchResults = realm.objects(Specimen).filter(predicate) // 5
}
}
Here’s what the above function does:
- First you create a predicate which searches for
name
s that start withsearchString
. The[c]
that followsBEGINSWITH
indicates a case insensitive search. - You then grab a reference to the currently selected scope index from the search bar
- If the first segmented button is selected, sort the results by name ascending.
- If the second button is selected, sort the results by created date ascending.
- If none of the buttons are selected, don’t sort the results — just take them in the order they’re returned from the database.
Now you need to actually perform the filtering when the user interacts with the search field. In updateSearchResultsForSearchController(_:)
add the following two lines at the beginning of the method:
let searchString = searchController.searchBar.text!
filterResultsWithSearchString(searchString)
Since the search results table view calls the same data source methods, you’ll need a small change to tableView(_:cellForRowAtIndexPath:)
to handle both the main log table view and the search results. In that method, find the line that assigns to specimen
:
let specimen = specimens[indexPath.row]
Delete that one line and replace it with the following:
let specimen = searchController.active ? searchResults[indexPath.row] : specimens[indexPath.row]
The above code checks whether the searchController
is active; if so, it retrieves the specimen from searchResults
; if not, then it retrieves the specimen from specimens
instead.
Finally you’ll need to add a function to sort the returned results when the user taps a button in the scope bar.
Replace the empty scopeChanged(_:)
with the code below:
@IBAction func scopeChanged(sender: AnyObject) {
let scopeBar = sender as! UISegmentedControl
let realm = try! Realm()
switch scopeBar.selectedSegmentIndex {
case 0:
specimens = realm.objects(Specimen).sorted("name", ascending: true)
case 1:
specimens = realm.objects(Specimen).sorted("created", ascending: true)
default:
specimens = realm.objects(Specimen).sorted("name", ascending: true)
}
tableView.reloadData()
}
In the code above you check which scope button is pressed — A-Z, or Date Added — and call arraySortedByProperty(_:ascending:)
accordingly. By default, the list will sort by name
.
Build and run your app; try a few different searches and see what you get for results!
Updating Records
You’ve covered the addition of records, but what about when you want to update them?
If you tap in a cell in LogViewController
you will segue to the AddNewEntryViewController
but with the fields empty. Of course the first step to letting the user edit the fields is to show the existing data!
Open AddNewEntryViewController.swift and add the following helper method to the class:
func fillTextFields() {
nameTextField.text = specimen.name
categoryTextField.text = specimen.category.name
descriptionTextField.text = specimen.specimenDescription
selectedCategory = specimen.category
}
This method will fill in the user interface with the specimen data. Remember, AddNewEntryViewController
has up to this point only been used for new specimens, so those fields have always started out empty.
Next, add the following lines to the end of viewDidLoad()
:
if let specimen = specimen {
title = "Edit \(specimen.name)"
fillTextFields()
} else {
title = "Add New Specimen"
}
The above code sets the navigation bar title to say whether the user is adding a new specimen or updating an existing one. If it’s an existing specimen, you also call your helper method to fill in the fields.
Now you’ll need a method to update the specimen record with the user’s changes. Add the following method to the class:
func updateSpecimen() {
let realm = try! Realm()
try! realm.write {
self.specimen.name = self.nameTextField.text!
self.specimen.category = self.selectedCategory
self.specimen.specimenDescription = self.descriptionTextField.text
}
}
As usual, the method begins with getting a Realm
instance and then the rest is wrapped inside a write()
transaction. Inside the transaction, you simply update the three data fields.
Six lines of code to update the Specimen
record is all it takes! :]
Now you need to call the above method when the user taps Confirm. Find shouldPerformSegueWithIdentifier(_:sender:)
and replace it with the following:
override func shouldPerformSegueWithIdentifier(identifier: String?, sender: AnyObject?) -> Bool {
if validateFields() {
if specimen != nil {
updateSpecimen()
} else {
addNewSpecimen()
}
return true
} else {
return false
}
}
This will call your helper method to update the data when appropriate.
Now open LogViewController.swift and add the following implementation for prepareForSegue(_:sender:)
:
override func prepareForSegue(segue: UIStoryboardSegue, sender: AnyObject!) {
if (segue.identifier == "Edit") {
let controller = segue.destinationViewController as! AddNewEntryController
var selectedSpecimen: Specimen!
let indexPath = tableView.indexPathForSelectedRow
if searchController.active {
let searchResultsController = searchController.searchResultsController as! UITableViewController
let indexPathSearch = searchResultsController.tableView.indexPathForSelectedRow
selectedSpecimen = searchResults[indexPathSearch!.row]
} else {
selectedSpecimen = specimens[indexPath!.row]
}
controller.specimen = selectedSpecimen
}
}
You need to pass the selected specimen to the AddNewEntryController
instance. The complication with the if / else
is because getting the selected specimen is slightly different depending on whether the user is looking at search results or not.
Build and run your app; open the Log view and tap on an existing Specimen
. You should see the details with all the fields filled in, ready for editing.
Where to Go From Here?
You can download the finished project here.
In this Realm tutorial you’ve learned how to create, update, delete and fetch records from a Realm database, how to use predicates, and sort the results by their properties.
There are many other features of Realm that weren’t touched on in this tutorial, like migrations and concurrency. You can learn about those topics and much more in the official documentation, which are very good.
If you have any comments or questions on this tutorial or Realm in general, please join the discussion below!